How to create a self-hosted Airbyte environment in the Azure Cloud
In this quick guide, I will show you how to set up an Airbyte environment in a virtual machine in Azure.
Airbyte is a data integration platform that helps to collect data from various sources and transfer it to data warehouses, data lakes and similar destinations. Airbyte can be operated as an open source version or as a SaaS solution from the provider with a corresponding pricing model.
This platform focuses in particular on the steps of extracting and loading data (Extract and Load) from various sources. With over 300 predefined connectors, Airbyte enables the seamless transfer of data from applications, APIs and databases to the desired storage locations. Data loading and synchronization tasks are easily configured via a web-based interface. Airbyte also uses container-based technologies, with each connection type having its own container.
More information can be found on the official website or the Github repo.
With Airbyte Self-Managed Community (the open source version), you can use one of the following options for your infrastructure:
- Local Deployment
- AWS
- Azure VM Cloud Shell
- Digital Ocean Droplet
- GCP
- Kubernetes
- OCI VM
- Restack
- Plural
- AWS ECS
In this article, I will show you how to set up a VM in the Azure Cloud. If you don’t have much experience with the Azure Cloud yet, I recommend the following article, which I wrote: First steps with the Azure Cloud.
Disclaimer: It goes without saying that if this setup is used professionally, additional measures must be taken to harden the system. These are not discussed here and are the responsibility of the person carrying out the setup.
Contents
Creating the virtual machine
As a first step, I create a resource group for Airbyte.
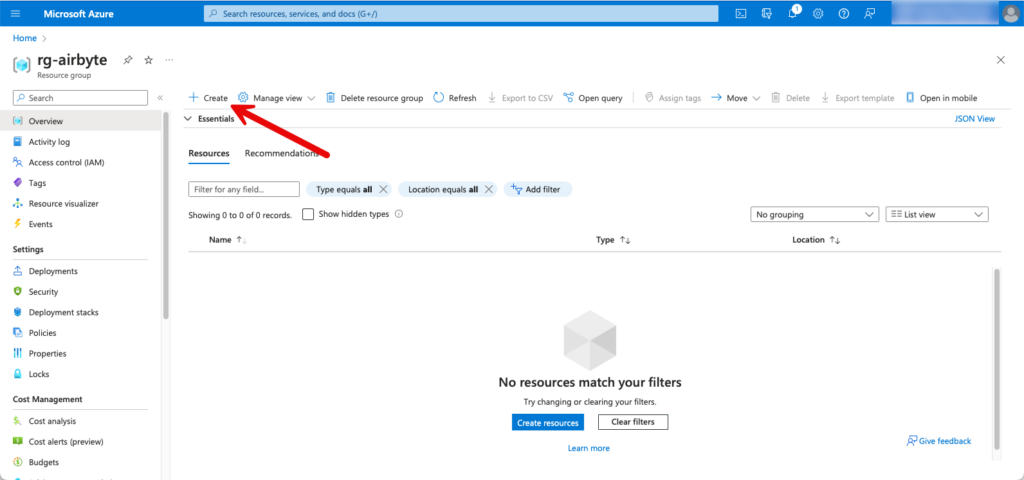
Within the resource group, I click on “Create” to deploy a new resource. I search for “virtual machine” and select the corresponding resource.

The subsequent configuration is as follows:

I select the “SSH public key” method for authentication for the admin account.

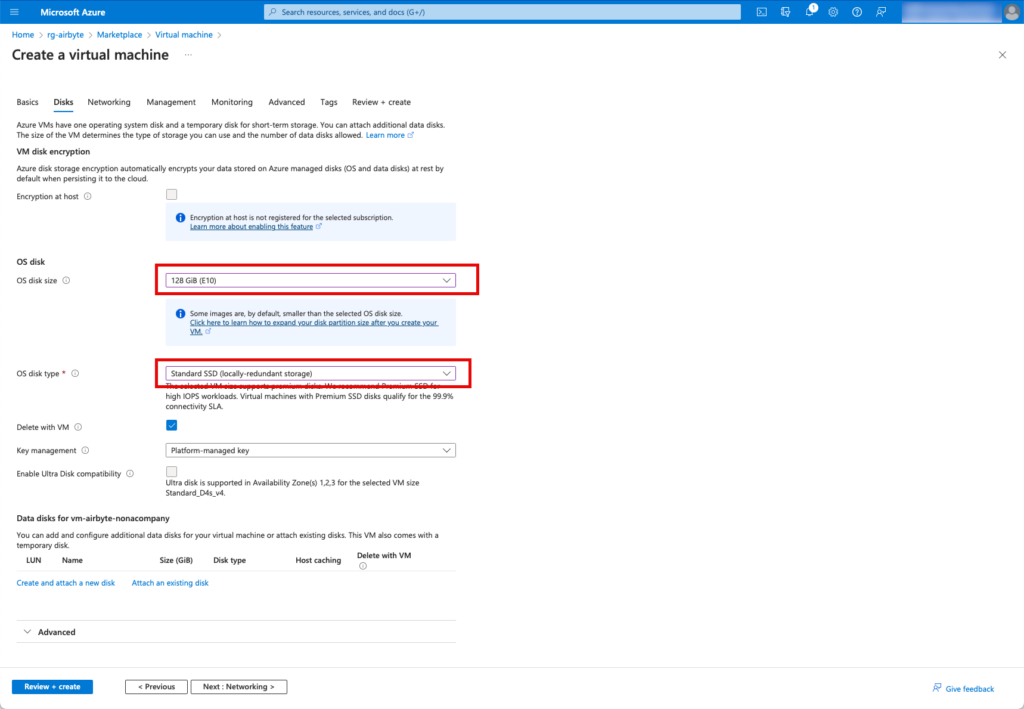
Airbyte writes log files and needs the corresponding space on the SSD. The default 64 GB could be a bit tight, so I choose 128 GB. I don’t need a premium SSD, so I switch to a standard SSD.
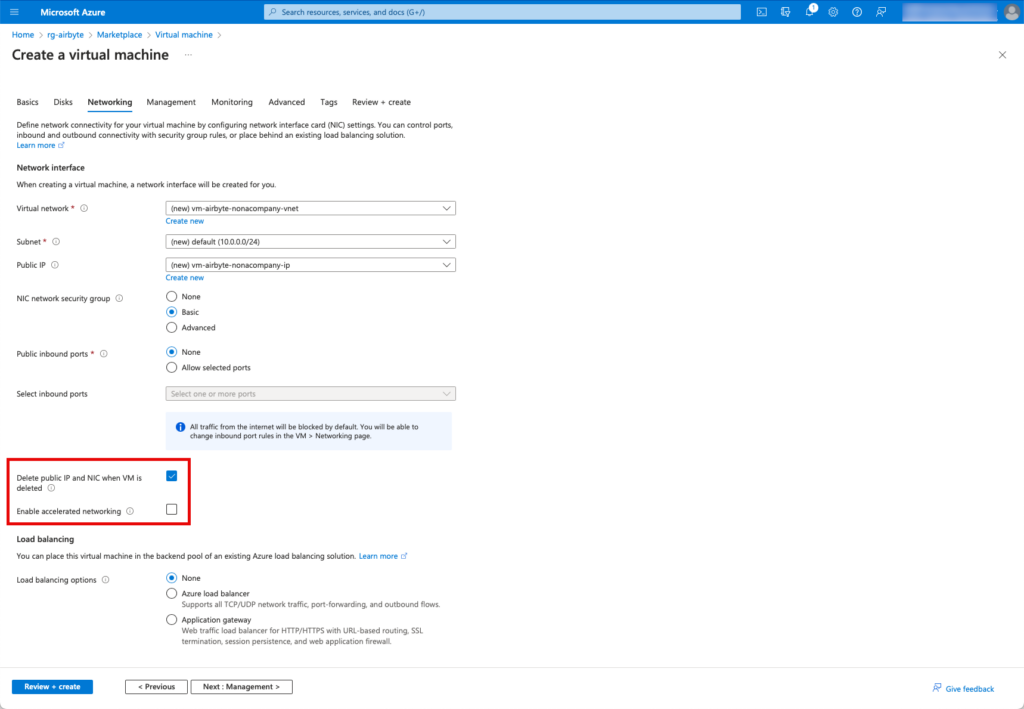
I check the “Delete Public IP…” box, as well as the other tabs. It makes sense that all associated components are also deleted when a VM is deleted. Otherwise, many resources remain in the account when the VM is deleted again.
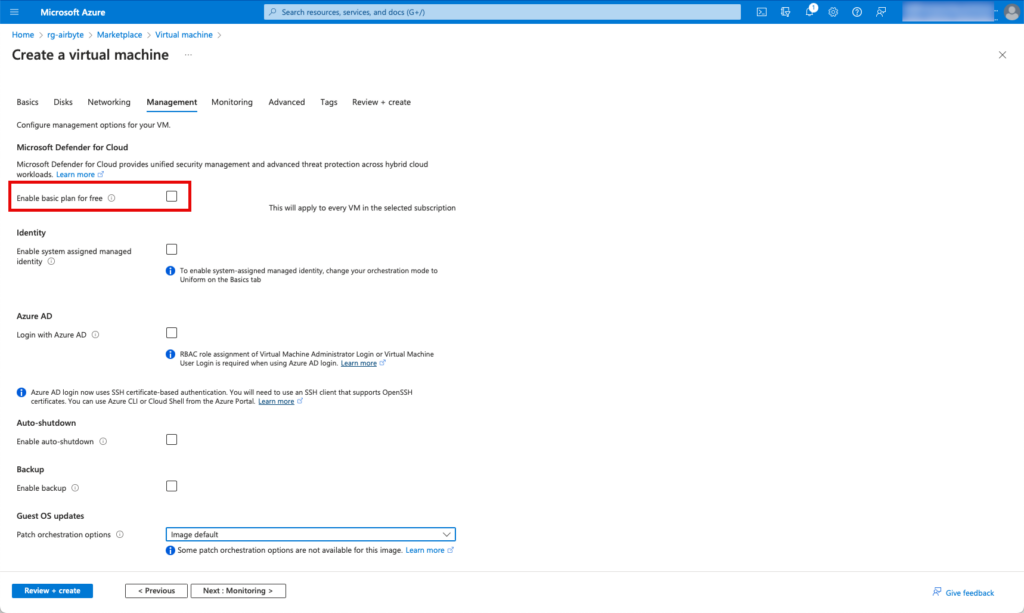
I deactivate the “Microsoft Defender for Cloud” option. As already mentioned, this is a simple prototype. For professional use, I would activate this option, among others.
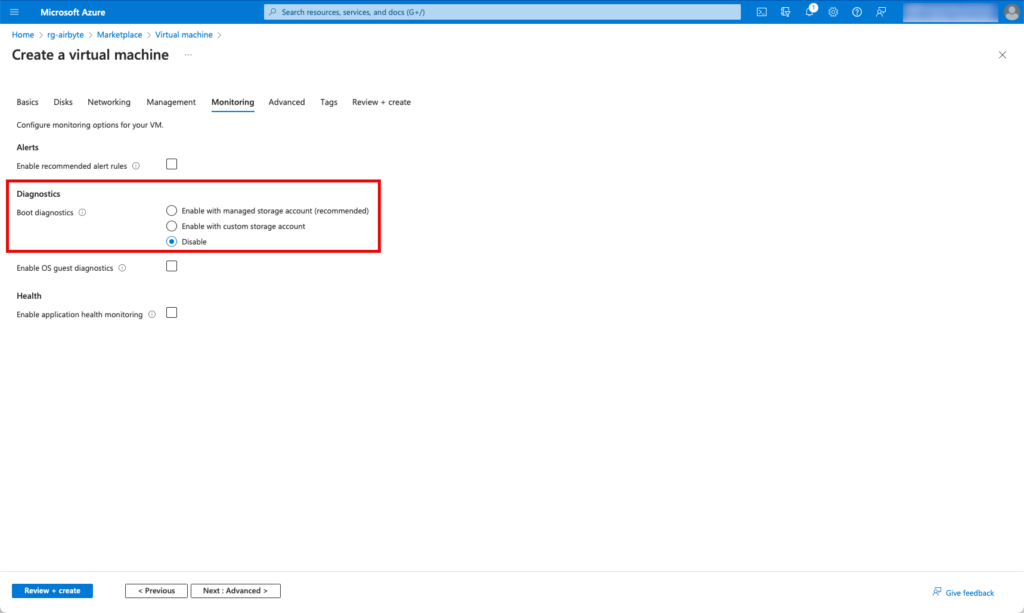
I don’t need Diagnostics, so I also deactivate it.
You can skip the Advanced tab and click on “Review & Create” and then create the VM. A window now pops up in which you can download the private key. It is important to save this in a safe place.

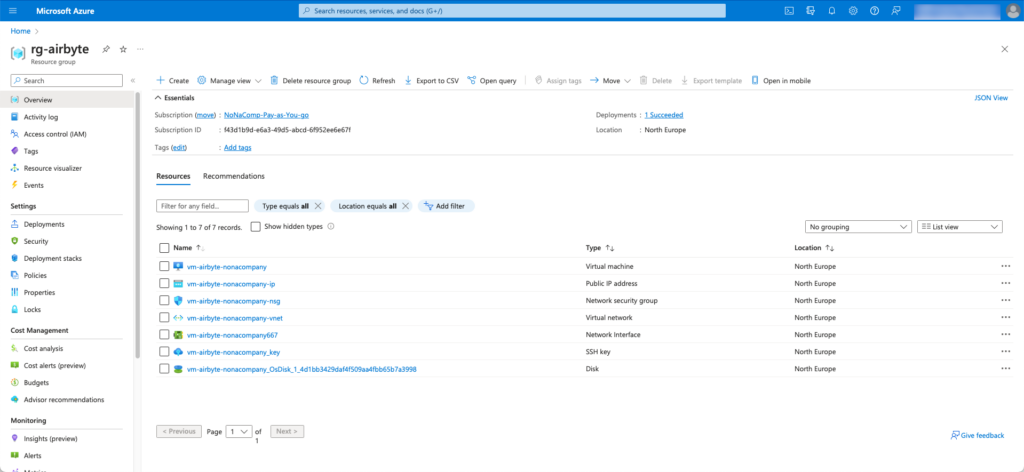
Once the setup is complete, you will see various newly created resources in the resource group, which belong to the VM and were created automatically.
Configure VM
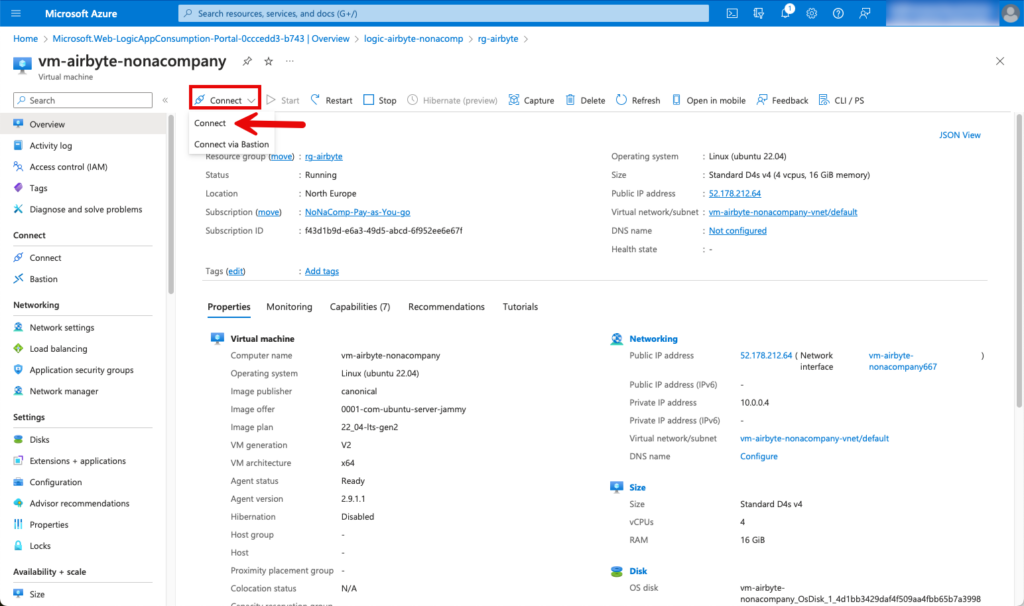
The first step is to connect to the VM using the “Connect” button.
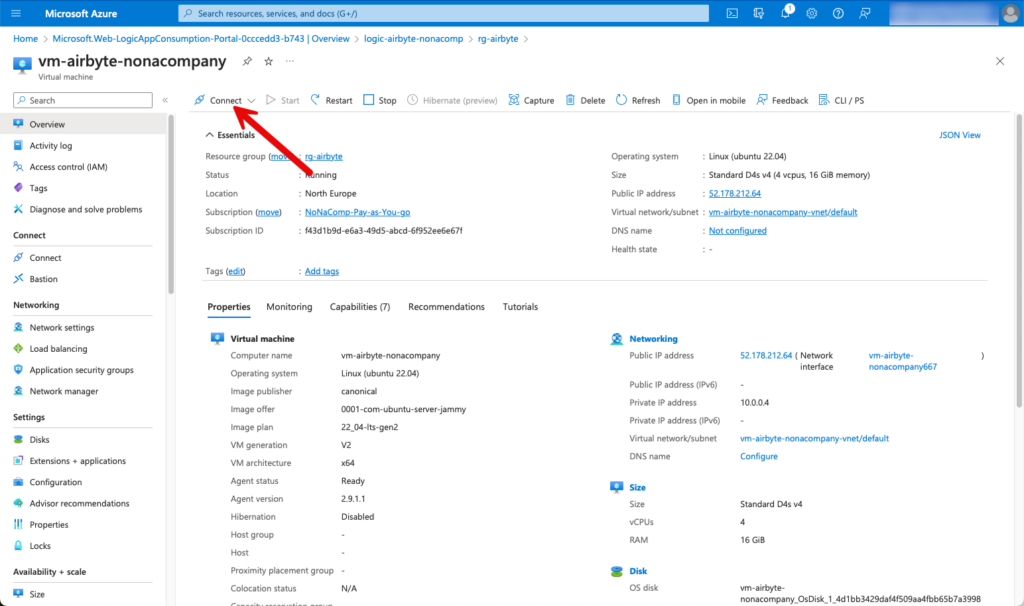
A sub-menu with the same name “Connect” opens.
Now an error message appears because the firewall is blocking my access. I deliberately skipped the setting for the general opening of port 22 during setup. So that I can access the VM, I first have to create a firewall rule. To do this, I go to the network settings and create a rule.
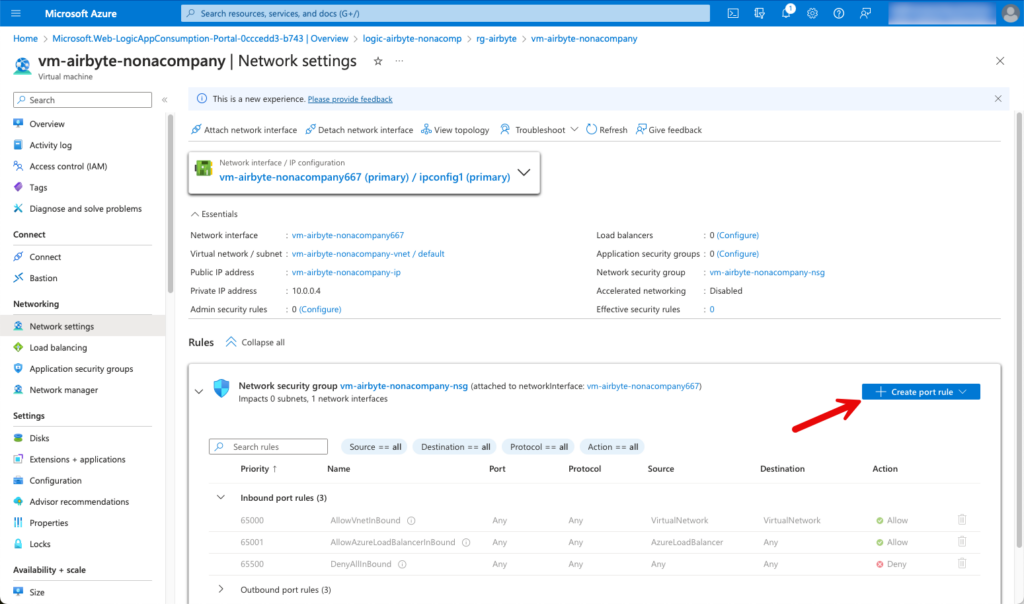
In addition to the destination port 22, I also enter my IP address. The next time I want to log in, I may have to change the IP address in the firewall rule, as my own IP address may change.

I choose Native SSH for the connection, as I want to connect from my local computer.

In the window that opens, you will find instructions on how to connect to the VM.

Below I show the steps in my local terminal. First, I change to the directory in which I have saved the key. The file permissions must be adjusted. I can then connect and am logged into the VM. I have listed the commands below; they still need to be adapted to my own environment.

   cd /path/to/private_key/Airbyte
   ls -lah
   chmod 600 <private_key>.pem
   ls -lah
   ssh -i <private_key>.pem <username>@<public-ip>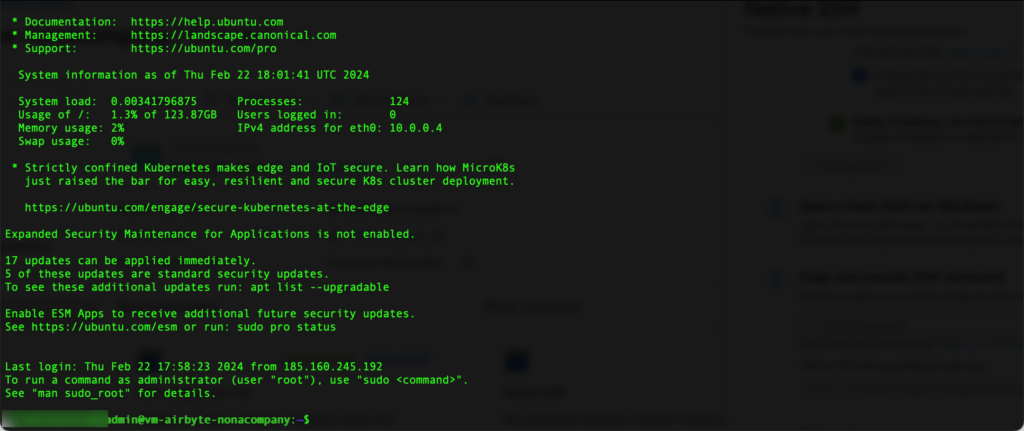
The first step within the VM is to install all updates:
sudo apt-get update && apt-get upgrade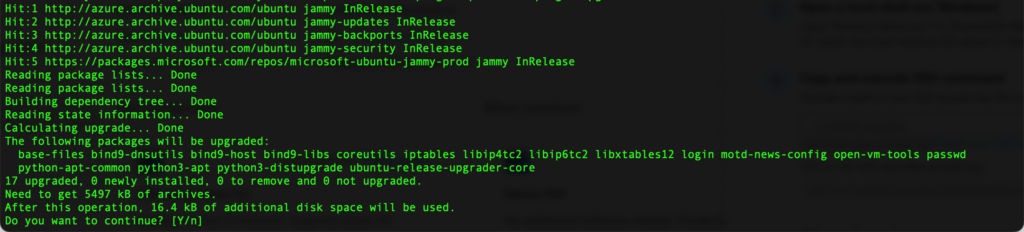
Fail2Ban is an open source program for Linux systems that was developed to protect servers from brute force attacks. Brute force attacks are attacks in which an attacker repeatedly attempts to log in with different combinations of user names and passwords in order to gain access to a system.
Fail2Ban monitors log files on the server to detect repeated failed login attempts. Once a certain number of failed attempts from a specific IP address are detected, Fail2Ban blocks that IP address for a predefined time. This helps to reduce the risk of successful attacks by temporarily blocking potential attackers.
In addition to defending against brute force attacks, Fail2Ban can also be configured for other security purposes, such as blocking IP addresses that show suspicious or unwanted activity on the server. Overall, Fail2Ban is a useful tool to improve the security of Linux servers by proactively detecting and responding to potential threats.
htop is an interactive process monitoring program for Unix-like operating systems such as Linux. It offers an improved user interface compared to older process monitoring tools such as top. With stop, users can view real-time information about CPU, memory and swap utilization, as well as detailed information about running processes and their properties.
Below is the command to install these two tools:
apt-get install fail2ban htopOf course, further optimization steps should be taken, but these depend on the individual needs of the user. I will refrain from further explanations here.
Install Airbyte
There are detailed instructions for installing Airbyte on the following website: https://docs.airbyte.com/deploying-airbyte/on-azure-vm-cloud-shell
I have reproduced these accordingly.
When I see that the installation is complete, I log out
I now stop the service by typing the key combination [ctrl]+[c].
I change to the Airbyte directory and open the file .env
cd airbyte/
nano .env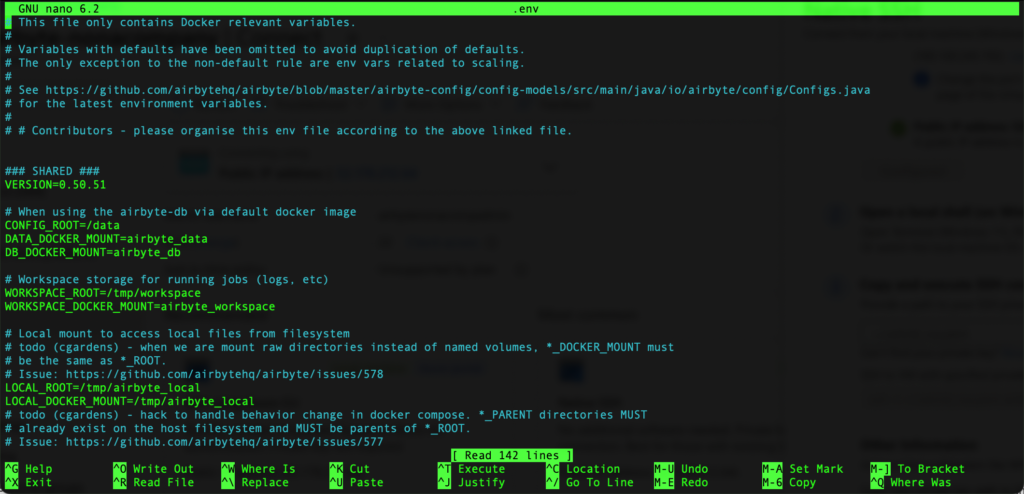
I am changing the following entries:
– BASIC_AUTH_USERNAME
– BASIC_AUTH_PASSWORD

Use the key combination [Ctrl]+[x] to save the changes.
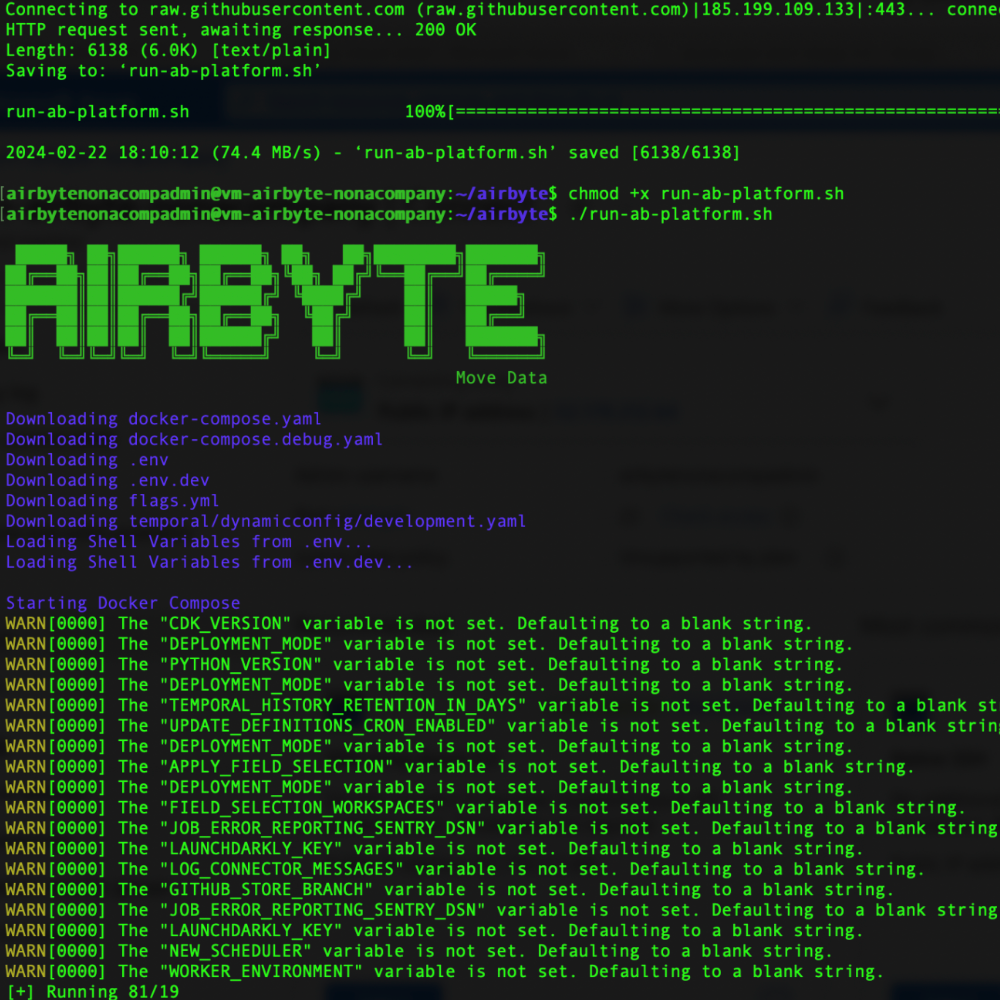
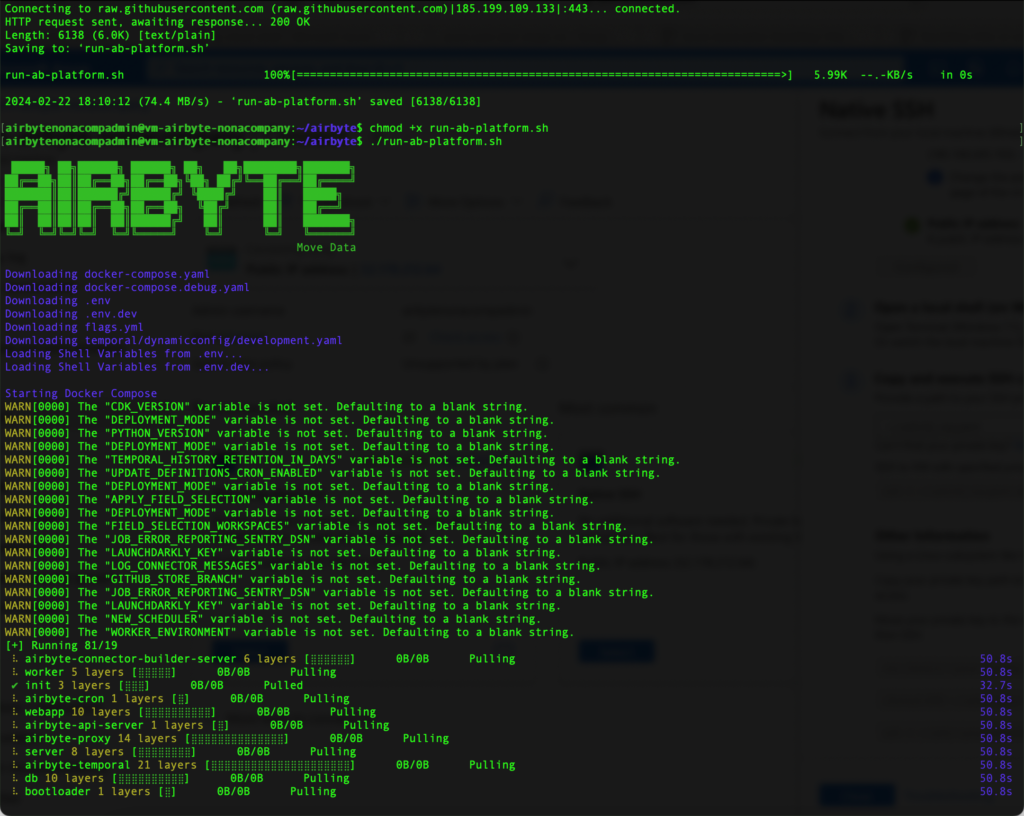
Now Airbyte must be restarted. To do this, I change to the airbyte directory and execute the shellscript:
cd airbyte/
./run-ab-platform.sh 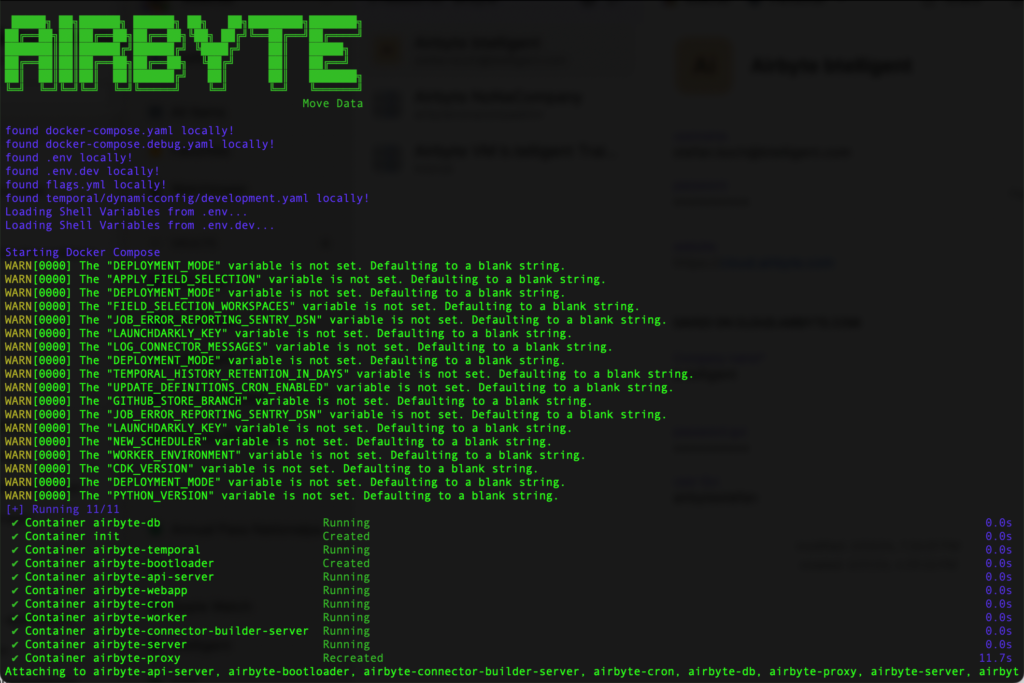
Now Airbyte is running in the foreground. I can see that it’s working, but I can’t work like this. To stop it again, I type the key combination [Ctrl]+[c].
I can run the Airbyte application or containers in the background (in “detach” mode) by executing the following Docker Compose command:
docker compose up -d So Airbyte is executed and I can still continue working in the terminal.
Login to the GUI
As an additional security feature, I do not connect directly to the VM, but create an SSH tunnel. I type the following command line on my local terminal to create the tunnel:
ssh -N -L 8000:localhost:8000 -i <private_key>.pem <user>@<ip-address>Now open the browser and type in the following address: localhost:8000
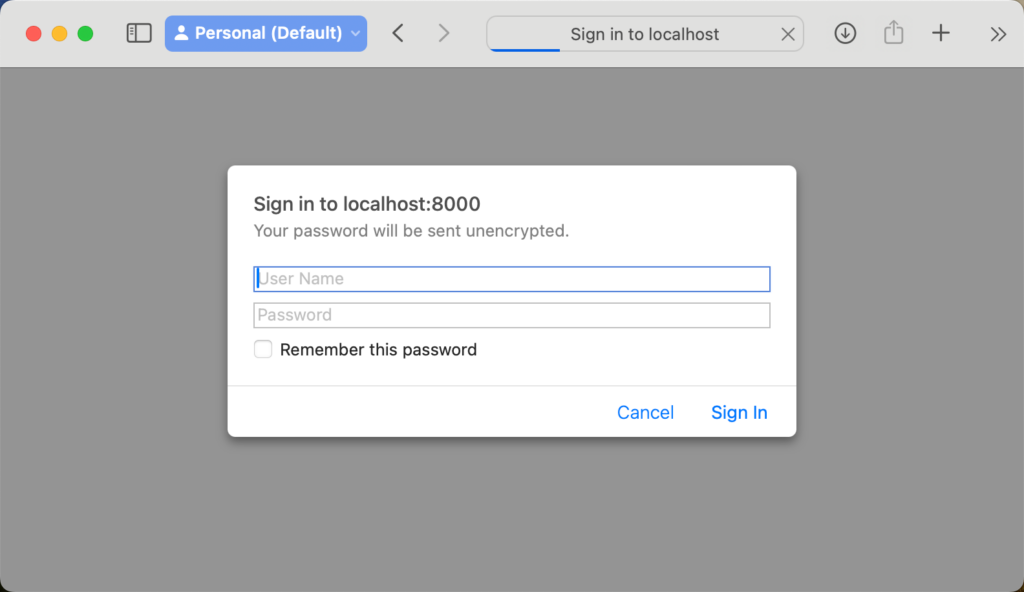
A login screen opens. Here I enter the user name and password that I customized in the .env file in the previous steps. Once I am logged in, a few simple steps follow to set up the environment. These are pretty self-explanatory.
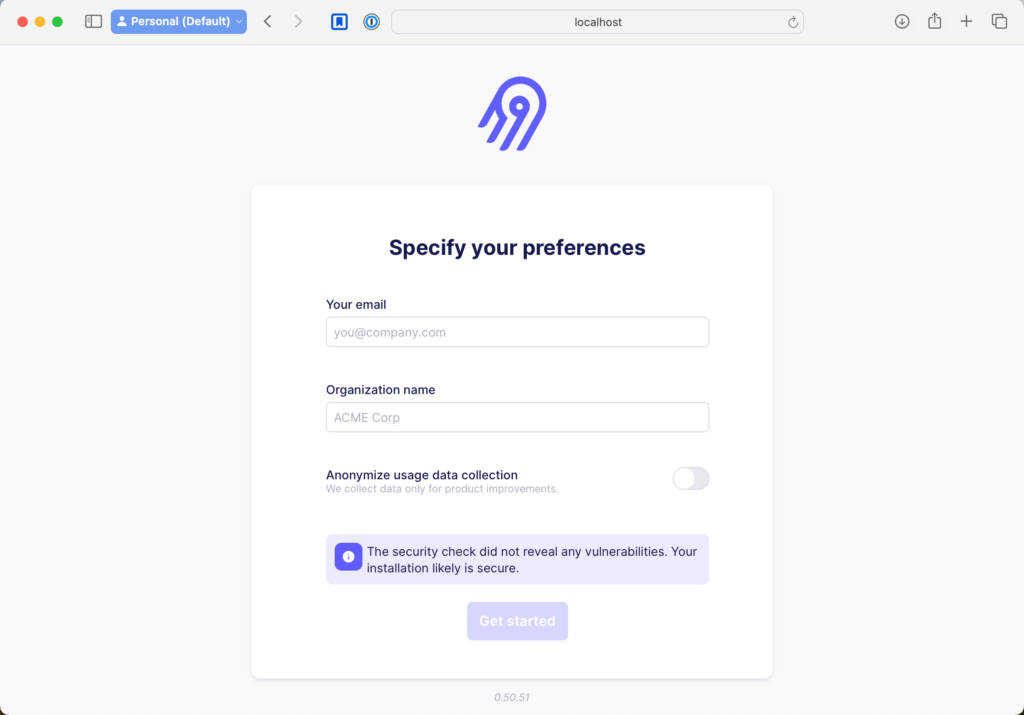
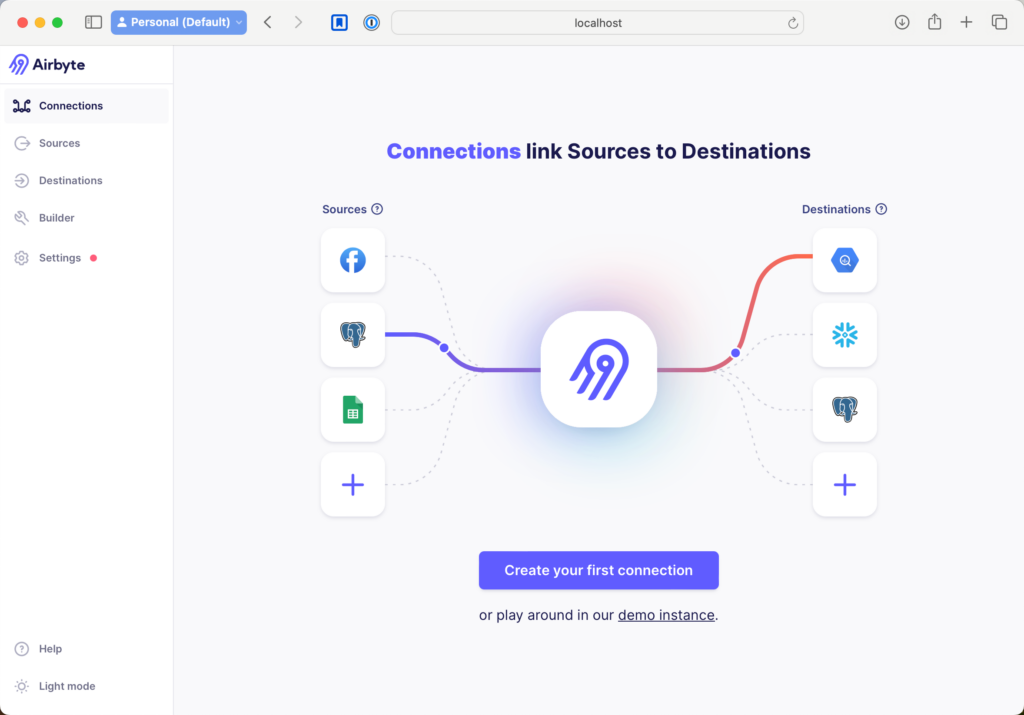
After a few minutes, the environment is ready and you can start creating the first pipelines.
The question now is whether the VM must always be online 24/7. Depending on the size and configuration, this would result in high costs. If I only want to run my data ingestion once a day or at night, the VM can be started automatically and then switched off again. Airbyte starts automatically when the VM is started. You can create this automatism with a Logic app, for example. Or in my case two Logic apps, one to start and one to stop the VM.
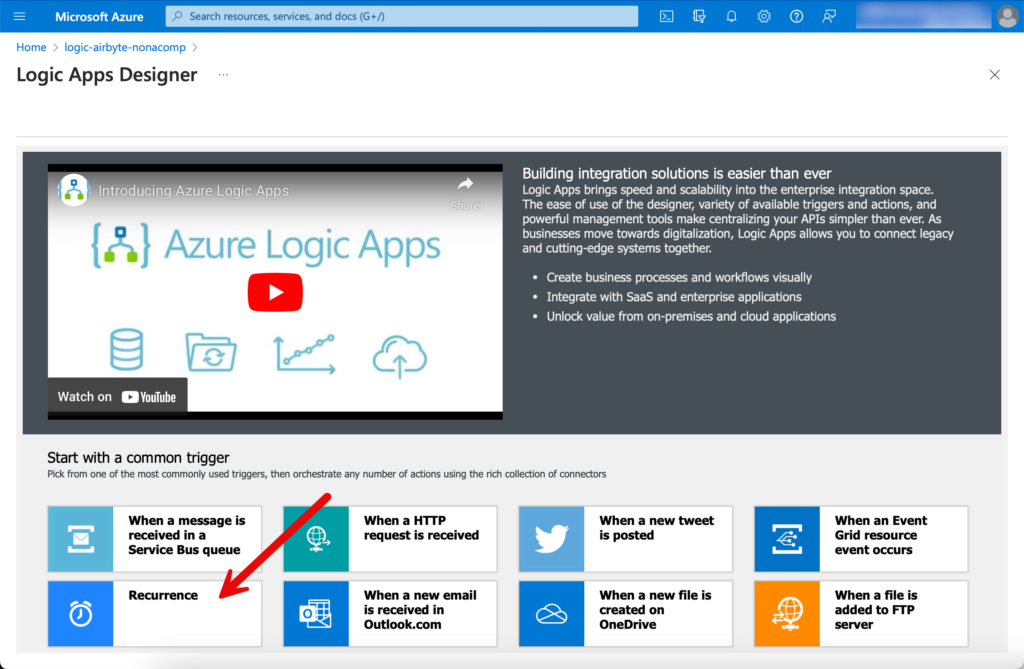
Create Logic App
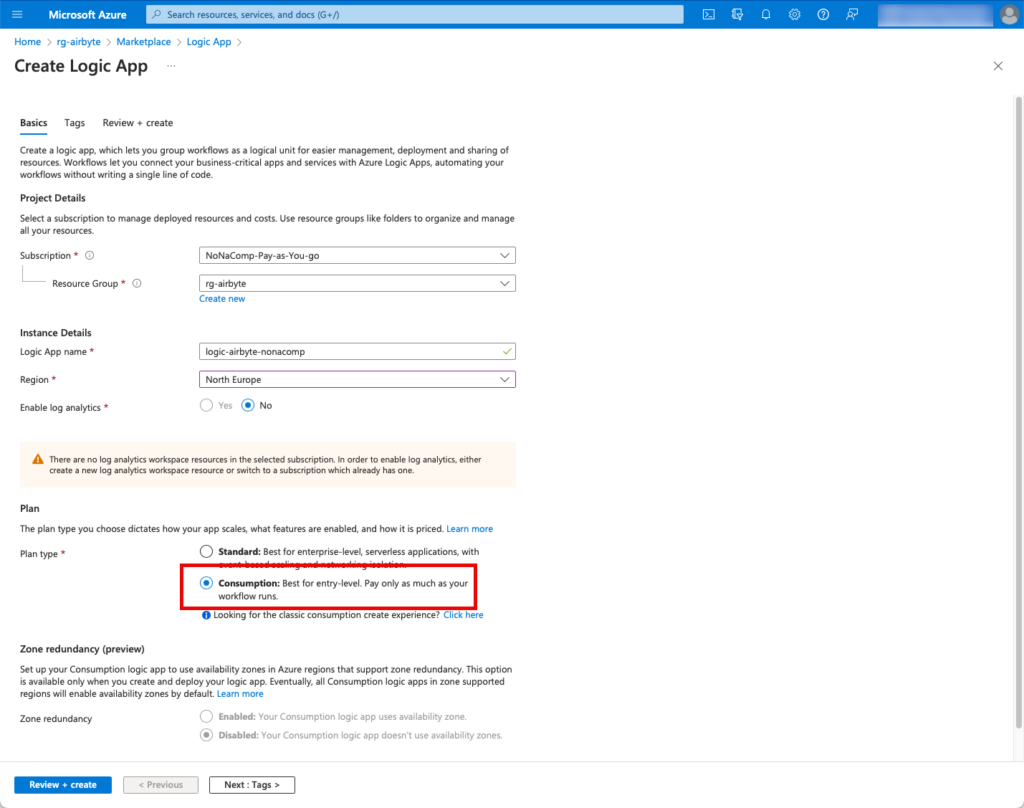
I switch to the resource group in the Azure portal and create a Logic app.

I choose the Consumption plan, which is cheaper and completely adequate.
When the Logic app has been deployed, I switch to edit mode.

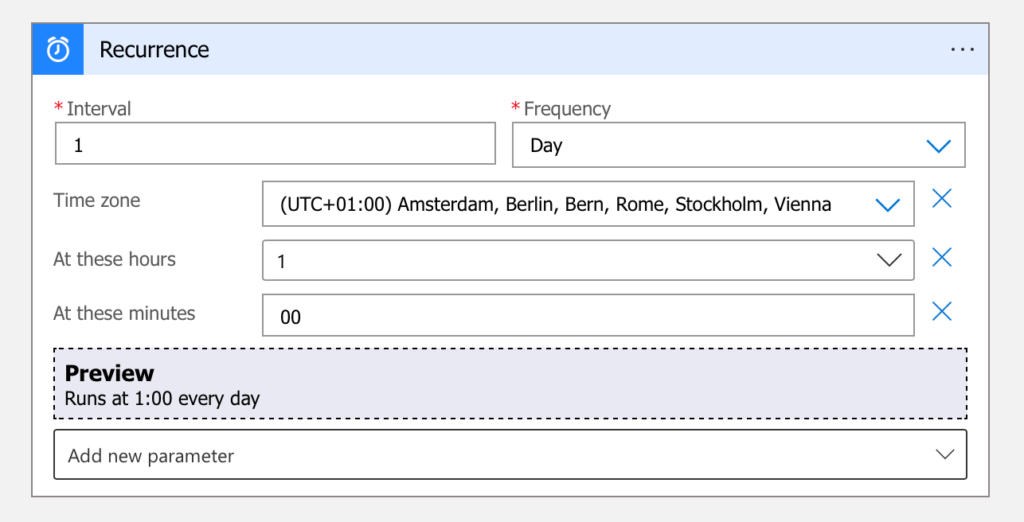
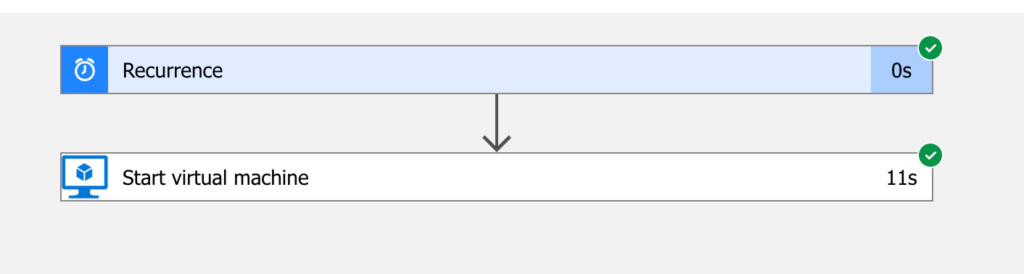
Im Designer starte ich mit dem Trigger “Recurrence”.
I want the VM to start at 01:00 in the night.
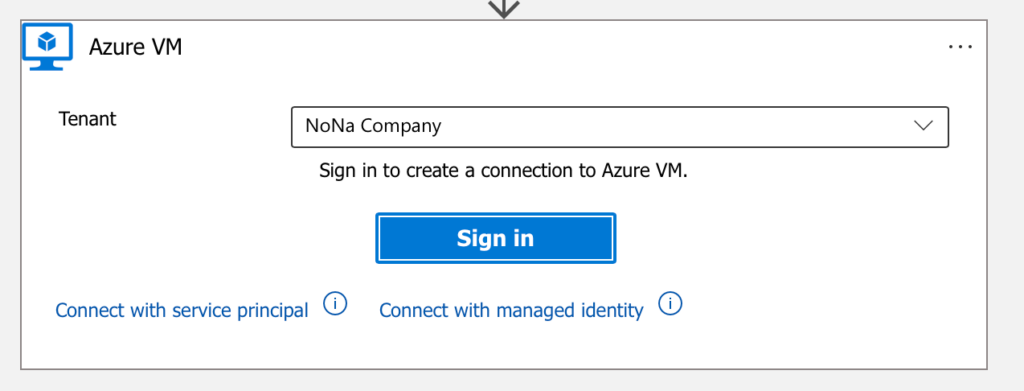
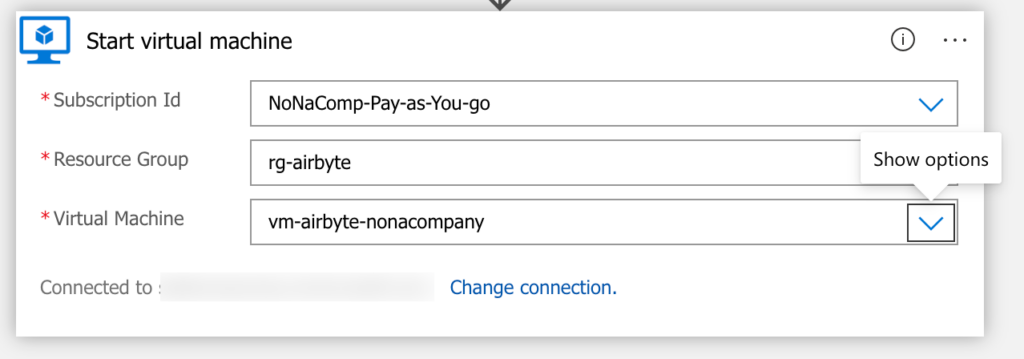
There is a predefined action “Start virtual machine” for the next task.

The simplest way to connect is via “Sign in”. In practice, however, you would not use a personal account, but a service principal or a managed identity. For the sake of simplicity, however, I still use the first method.
The following steps are self-explanatory.
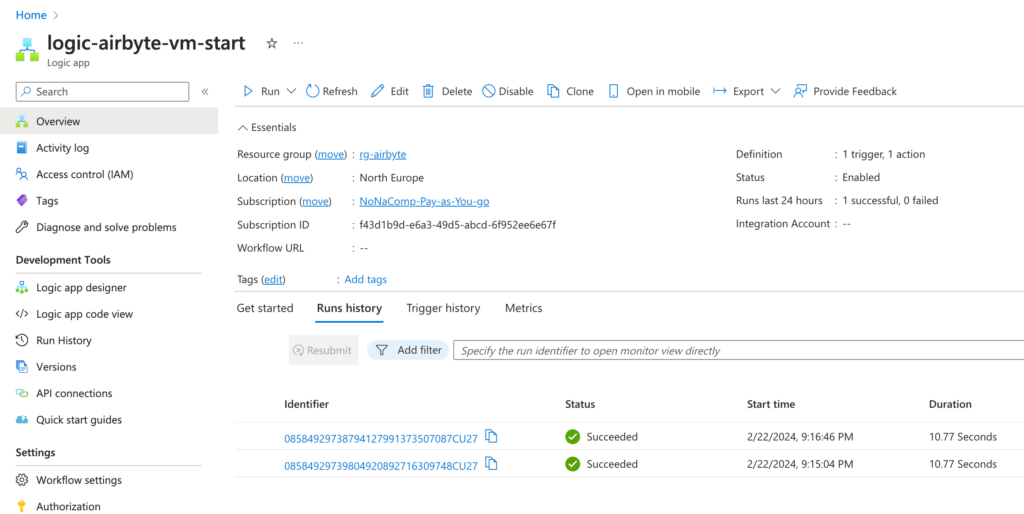
The app can be tested by clicking on “Run Trigger”.

All runs can also be displayed.
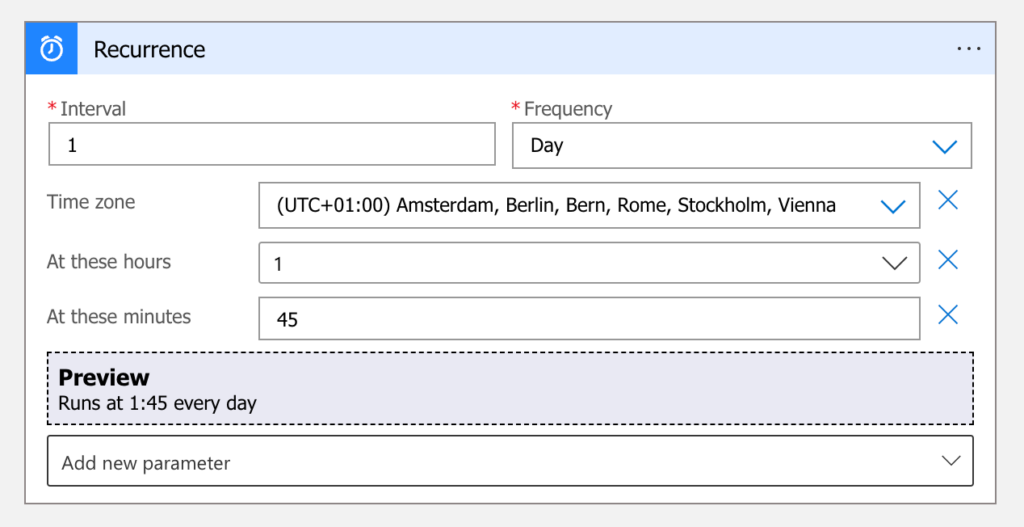
After the scheduled start has worked, I create a second Logic App for stopping the VM. I have to think about how long the pipelines in Airbyte need. If this time window is too short, there is a risk that the data will not be loaded completely. I opt for 45 minutes, which should be more than enough for simple and small amounts of data.
Repeat the same steps for the power off.

I also test the 2nd Logic app to see if everything works as desired. Now I wait a day and check the next day whether the VM was started and stopped as desired and whether the pipelines in Airbyte also ran successfully.