
From SharePoint to Databricks – and Back: Seamless Bidirectional Integration
In modern data workflows, it’s essential to collect data where it originates and deliver it to where it’s needed. In this blog post, I’ll show how to connect SharePoint directly with Databricks – in both directions.
Introduction
Many companies still rely on Azure Data Factory or Logic Apps to extract SharePoint files into a Data Lake before processing them in Databricks. While this approach works, it comes with trade-offs: the architecture becomes more complex, latency increases, any change in the SharePoint structure may break pipelines, and writing data back to SharePoint often requires additional components or workarounds. A direct integration using the Microsoft Graph API is not only more elegant – it’s also faster, more flexible, and easier to maintain.
This means I can read structured files, such as Excel or CSV, directly from SharePoint into Databricks – without the need for mapped drives or manual exports. Just as easily, I can write results from Databricks – such as aggregated reports or machine learning outputs – back to SharePoint, where they are instantly available to business users or downstream systems.
This turns SharePoint from a static input source into a fully integrated part of a data-driven workflow on the Databricks Lakehouse platform.
To allow Databricks to access SharePoint, I use an App Registration in Azure – a Service Principal that authenticates against the Microsoft Graph API. This app is granted the necessary permissions (e.g., Sites.ReadWrite.All) to read and write files in SharePoint. Access is handled via an access token used within my Databricks notebooks, with no need for interactive logins or manual approvals. This creates a secure and fully automated connection between Databricks and SharePoint.
Creating an App Registration in Azure
Go to the Azure Portal and navigate to App Registration. Click New registration.

Choose a name (e.g., databricks-sharepoint-access) and keep the default setting for single-tenant access. In my example i called it “sharepoint”. Copy the Application (client) ID and the Directory (tenant) ID to a safe place.

Then, create a new secret.
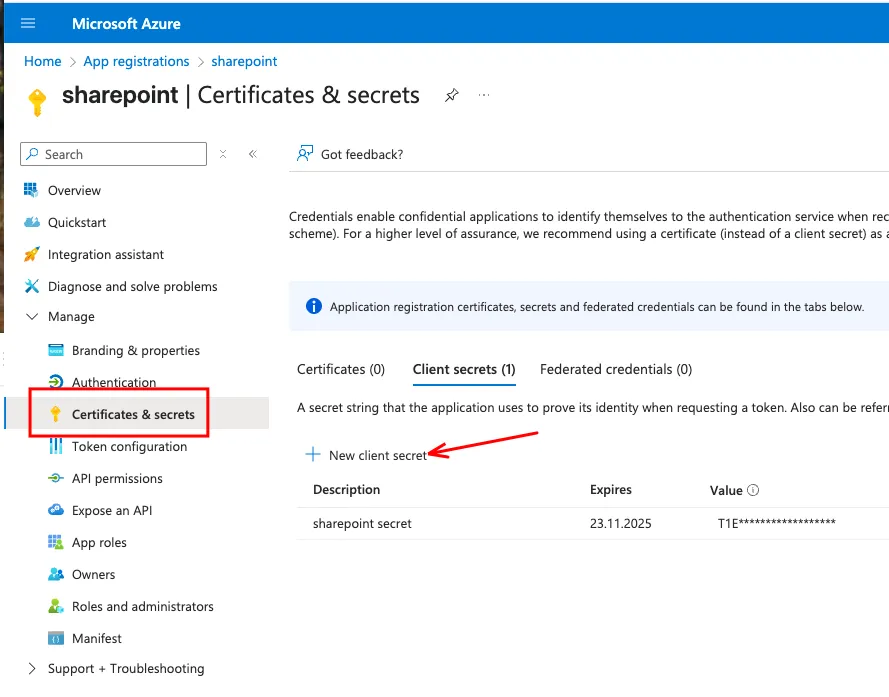
After the secret is created, copy the value to a safe place. You only see the secret once.
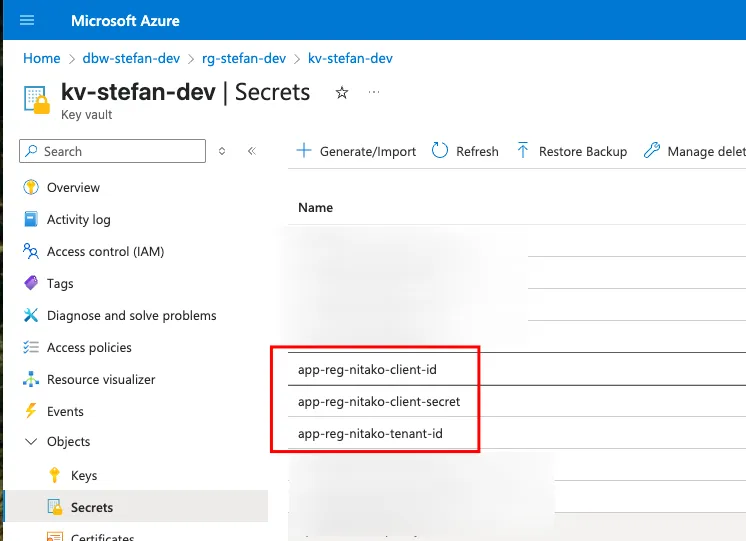
 The safe place for Secrets in Azure is a KeyVault. So, I save the three secrets for the App registration in the Key Vault.
The Sharepoint Folder
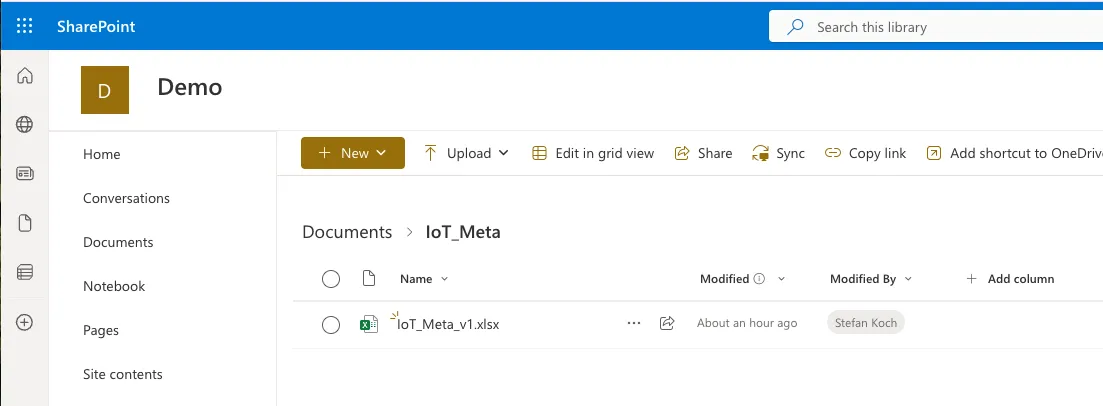
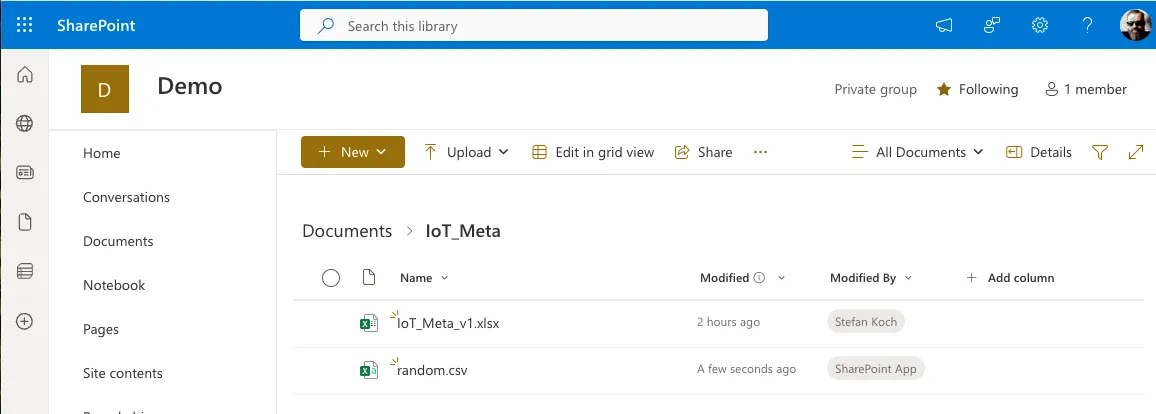
In my example, I created a new SharePoint site named Demo. Inside the Documents Section, I made a folder IoT_Meta and uploaded an Excel file.
Grant Permission on SharePoint to the App Registration
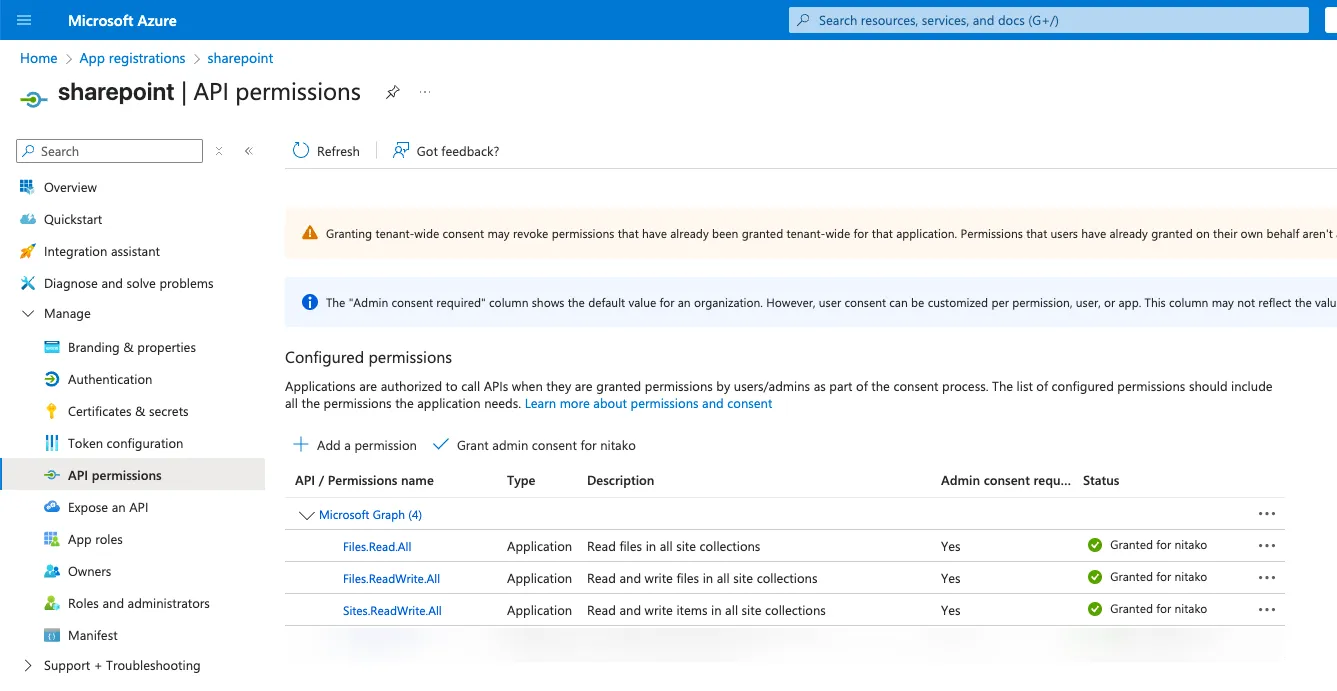
To read and write to the SharePoint folder, we need to grant the proper permissions to the App Registration. For this, you set the Permissions on the App Registration. On the App registration, go to API Permissions. For Microsoft Graph, I set the following permissions:
- Files.Read.All
- Files.ReadWrite.All
- Sites.ReadWrite.All
Of course, these permissions have to be clarified with your SharePoint Administrator.
Then I have to set the permissions on the SharePoint site. For this, open the following URL in your web browser:
https://<YOUR_TENANT>.sharepoint.com/sites/<YOUR_SITE>/_layouts/15/appinv.aspxReplace <YOUR_TENANT> and <YOUR_SITE> with your values.
Fill in the needed Information in the fields:
App Id: Application Id from your App registration
Title: Whatever Title you want
App Domain: localhost
Redirect URL: https://localhost
Permission Request XML: You can choose read or write:
Read:
<AppPermissionRequests AllowAppOnlyPolicy="true">
  <AppPermissionRequest Scope="http://sharepoint/content/sitecollection/web" Right="Read" />
</AppPermissionRequests>
Write:
<AppPermissionRequests AllowAppOnlyPolicy="true">
  <AppPermissionRequest Scope="http://sharepoint/content/sitecollection/web" Right="Write" />
</AppPermissionRequests>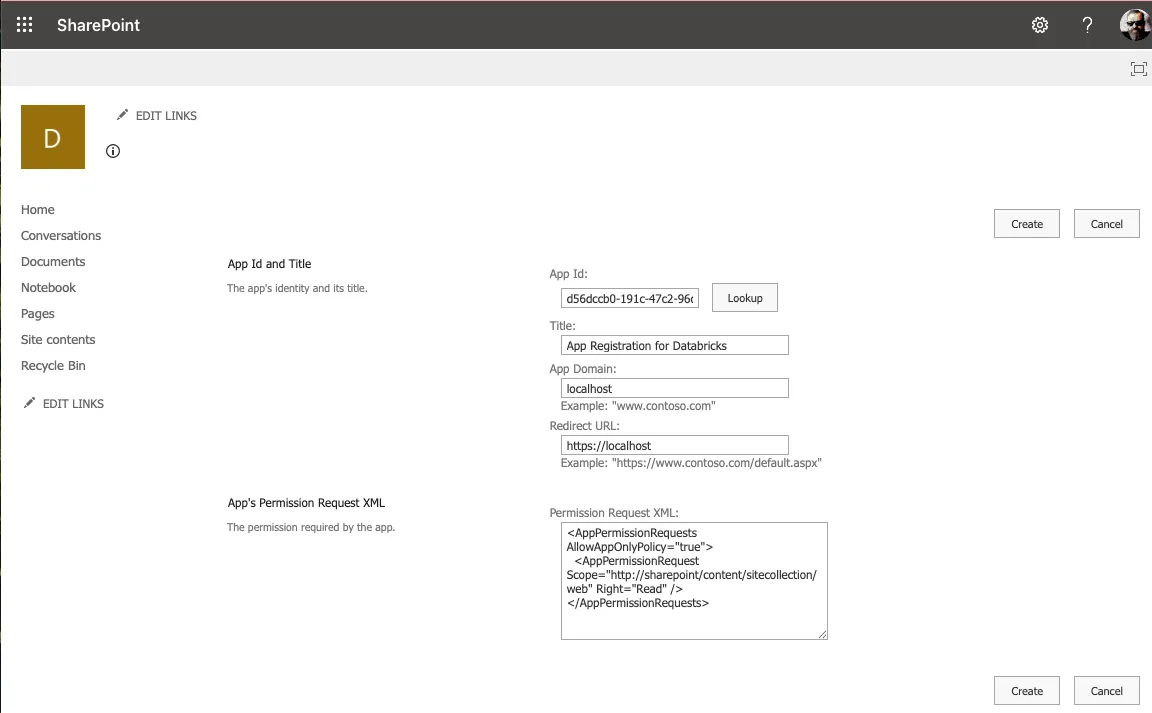

Databricks Preparation
In Databricks, you can implement your code. The following code is for demo purposes only. In production, you should improve it with error handling, parameters, and so on.
We will retrieve the files using the Python requests method, so that I will import the library and some other necessary libraries as well.
import requests
import pandas as pd
import numpy as np
import os
Set the secrets from the key vault.
tenant_id = dbutils.secrets.get(scope = "kv", key = "app-reg-nitako-tenant-id")
client_id = dbutils.secrets.get(scope = "kv", key = "app-reg-nitako-client-id")
client_secret = dbutils.secrets.get(scope = "kv", key = "app-reg-nitako-client-secret")
Create an access token.
auth_url = f"https://login.microsoftonline.com/{tenant_id}/oauth2/v2.0/token"

auth_data = {
    "grant_type": "client_credentials",
    "client_id": client_id,
    "client_secret": client_secret,
    "scope": "https://graph.microsoft.com/.default"
}

auth_response = requests.post(auth_url, data=auth_data)
access_token = auth_response.json().get("access_token")
Create the request’s header and get the site ID from the SharePoint site.
headers = {"Authorization": f"Bearer {access_token}"}

site_res = requests.get("https://graph.microsoft.com/v1.0/sites/root:/sites/Demo",headers=headers)

site_id = site_res.json()['id']
print(site_id)
Read from Sharepoint
Get the Excel file from SharePoint. As this is just an example, the path and file are hardcoded; however, you can make this code more generic.
download_url = f"https://graph.microsoft.com/v1.0/sites/{site_id}/drive/root:/IoT_Meta/IoT_Meta_v1.xlsx:/content"

raw_file_path = "/Volumes/stefan_koch/raw/files/IoT_Meta_v1.xlsx"

file_response = requests.get(download_url, headers=headers)

print(file_response.status_code)

if file_response.status_code == 200:
    with open(raw_file_path, "wb") as f:

        f.write(file_response.content)

    print(f"file was created")

else:

    print(file_response.status_code)
I get a message when the code finishes run:
200
The file was created
Have a look at the destination folder. Now we have the file in a Databricks Unity Catalog Volume.
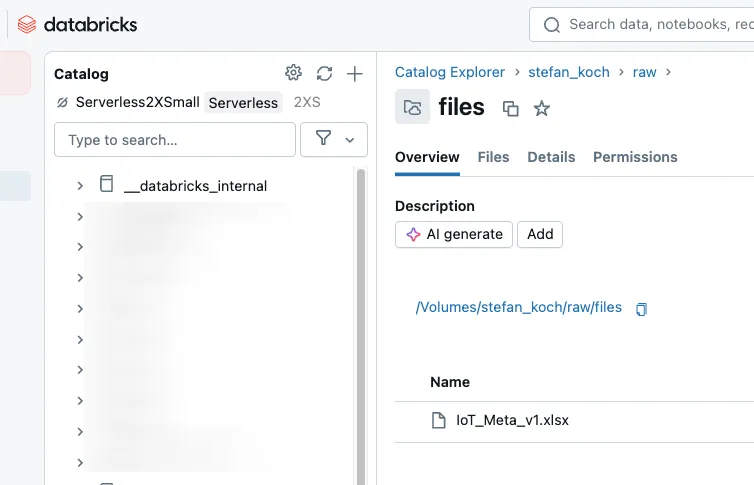
Here we can start additional pipelines to read the content from the Excel file.
Write to Sharepoint
In the following example, I want to write to SharePoint from Databricks. To achieve this, I generate some random data and store it in a dataframe.
data = np.random.rand(10, 5)
columns = [f"col_{i}" for i in range(1, 6)]

df = pd.DataFrame(data, columns=columns)

display(df)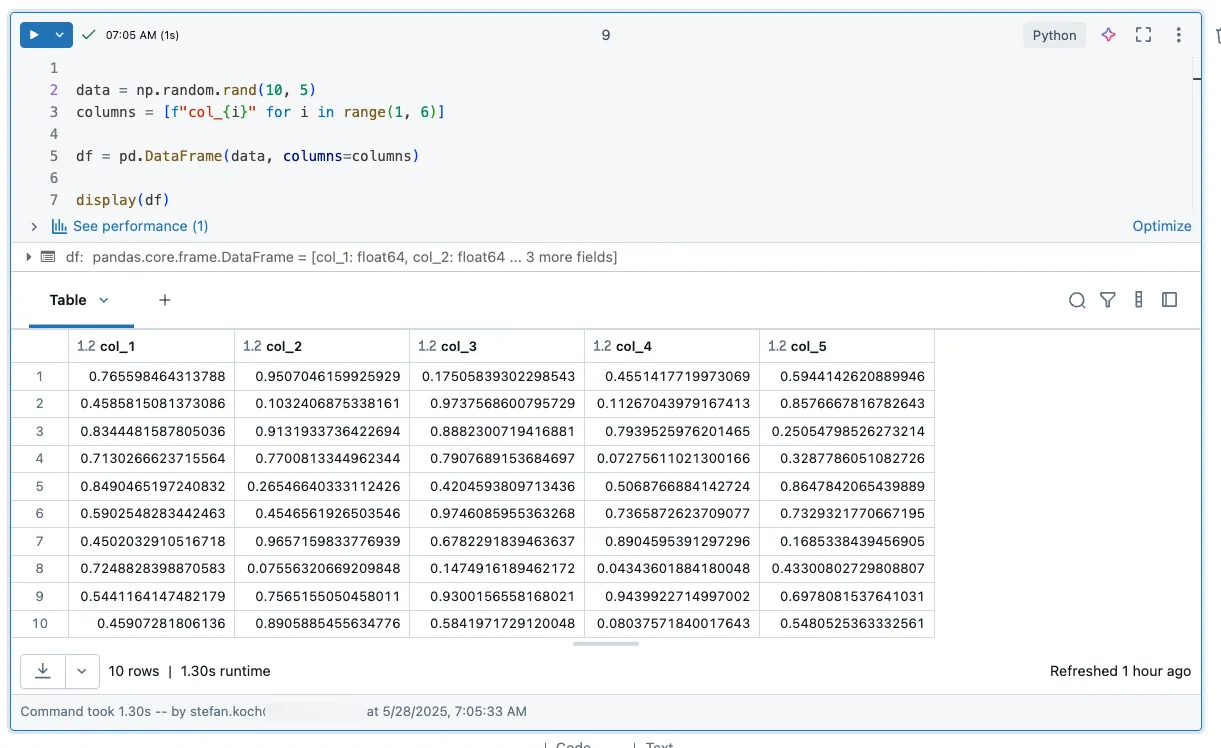
Now, save the CSV file on SharePoint.
csv_filename = "random.csv"
local_csv_path = f"/tmp/{csv_filename}"
df.to_csv(local_csv_path, index=False)

upload_url = f"https://graph.microsoft.com/v1.0/sites/{site_id}/drive/root:/IoT_Meta/{csv_filename}:/content"

with open(local_csv_path, "rb") as f:
    file_bytes = f.read()

response = requests.put(upload_url, headers=headers, data=file_bytes)

if response.status_code in [200, 201]:
    print("CSV successfully uploaded to SharePoint.")
else:
    print(f"Error during upload: {response.status_code}")
    print(response.text)
Refresh your SharePoint site, and you will see the newly created file.
Related Articles

From Snapshots to CDC: How to load Snapshot-Data with Databricks Delta Live Tables
In this article I describe how to load data from recurring full snapshots with Delta Live Tables relatively easily and elegantly into a bronze table without the amount of data exploding.

Step-by-Step in Databricks: Creating a Date and Time dimension for BI Analytics
In this article, you will learn how to set up date and time dimensions in Databricks to enable precise time-based analyses and reports.
Trigger and Monitor Data Factory Jobs from Databricks Workflows
In data engineering in the Azure Cloud, a common setup is to use Azure Data Factory to orchestrate data pipelines. If you wanted to orchestrate Databricks pipelines, you had a powerful tool at hand wi
Comments
Comments are powered by giscus. You need a GitHub account to comment.