I will show you different methods to authenticate with the Databricks CLI to Azure Databricks in this quick guide.
Why this blog post?
There’s a lot of documentation on the web on how you can authenticate with the Databricks CLI. However, some tripping hazards exist, such as creating a service principal in Azure. I have therefore decided to describe the various options in a step-by-step guide.
What is Databricks CLI
The Databricks command-line interface (the Databricks CLI) provides a tool to automate the Azure Databricks platform from your terminal, command prompt, or automation scripts.
You can find more information here: https://learn.microsoft.com/en-us/azure/databricks/dev-tools/cli/
Of course, there is also documentation describing the various authentication methods, which can be found here: https://learn.microsoft.com/en-us/azure/databricks/dev-tools/cli/authentication
Run CLI on Databricks workspace using web terminal
A no-brainer, no need to install anything: Using a web terminal, you can run Databricks CLI commands from within a Databricks workspace.
The requirements for this are as follows:
- The cluster must have Databricks Runtime 15.0 or above installed.
- The workspace must not be enabled for Private Link.
More Infos: https://learn.microsoft.com/en-us/azure/databricks/compute/web-terminal#cli-workspace
I create a single-node cluster with the smallest node type:

For the Databricks Runtime Version, I chose 15.4 LTS and the Node type Standard_F4s, so it will be cheap to run this cluster.
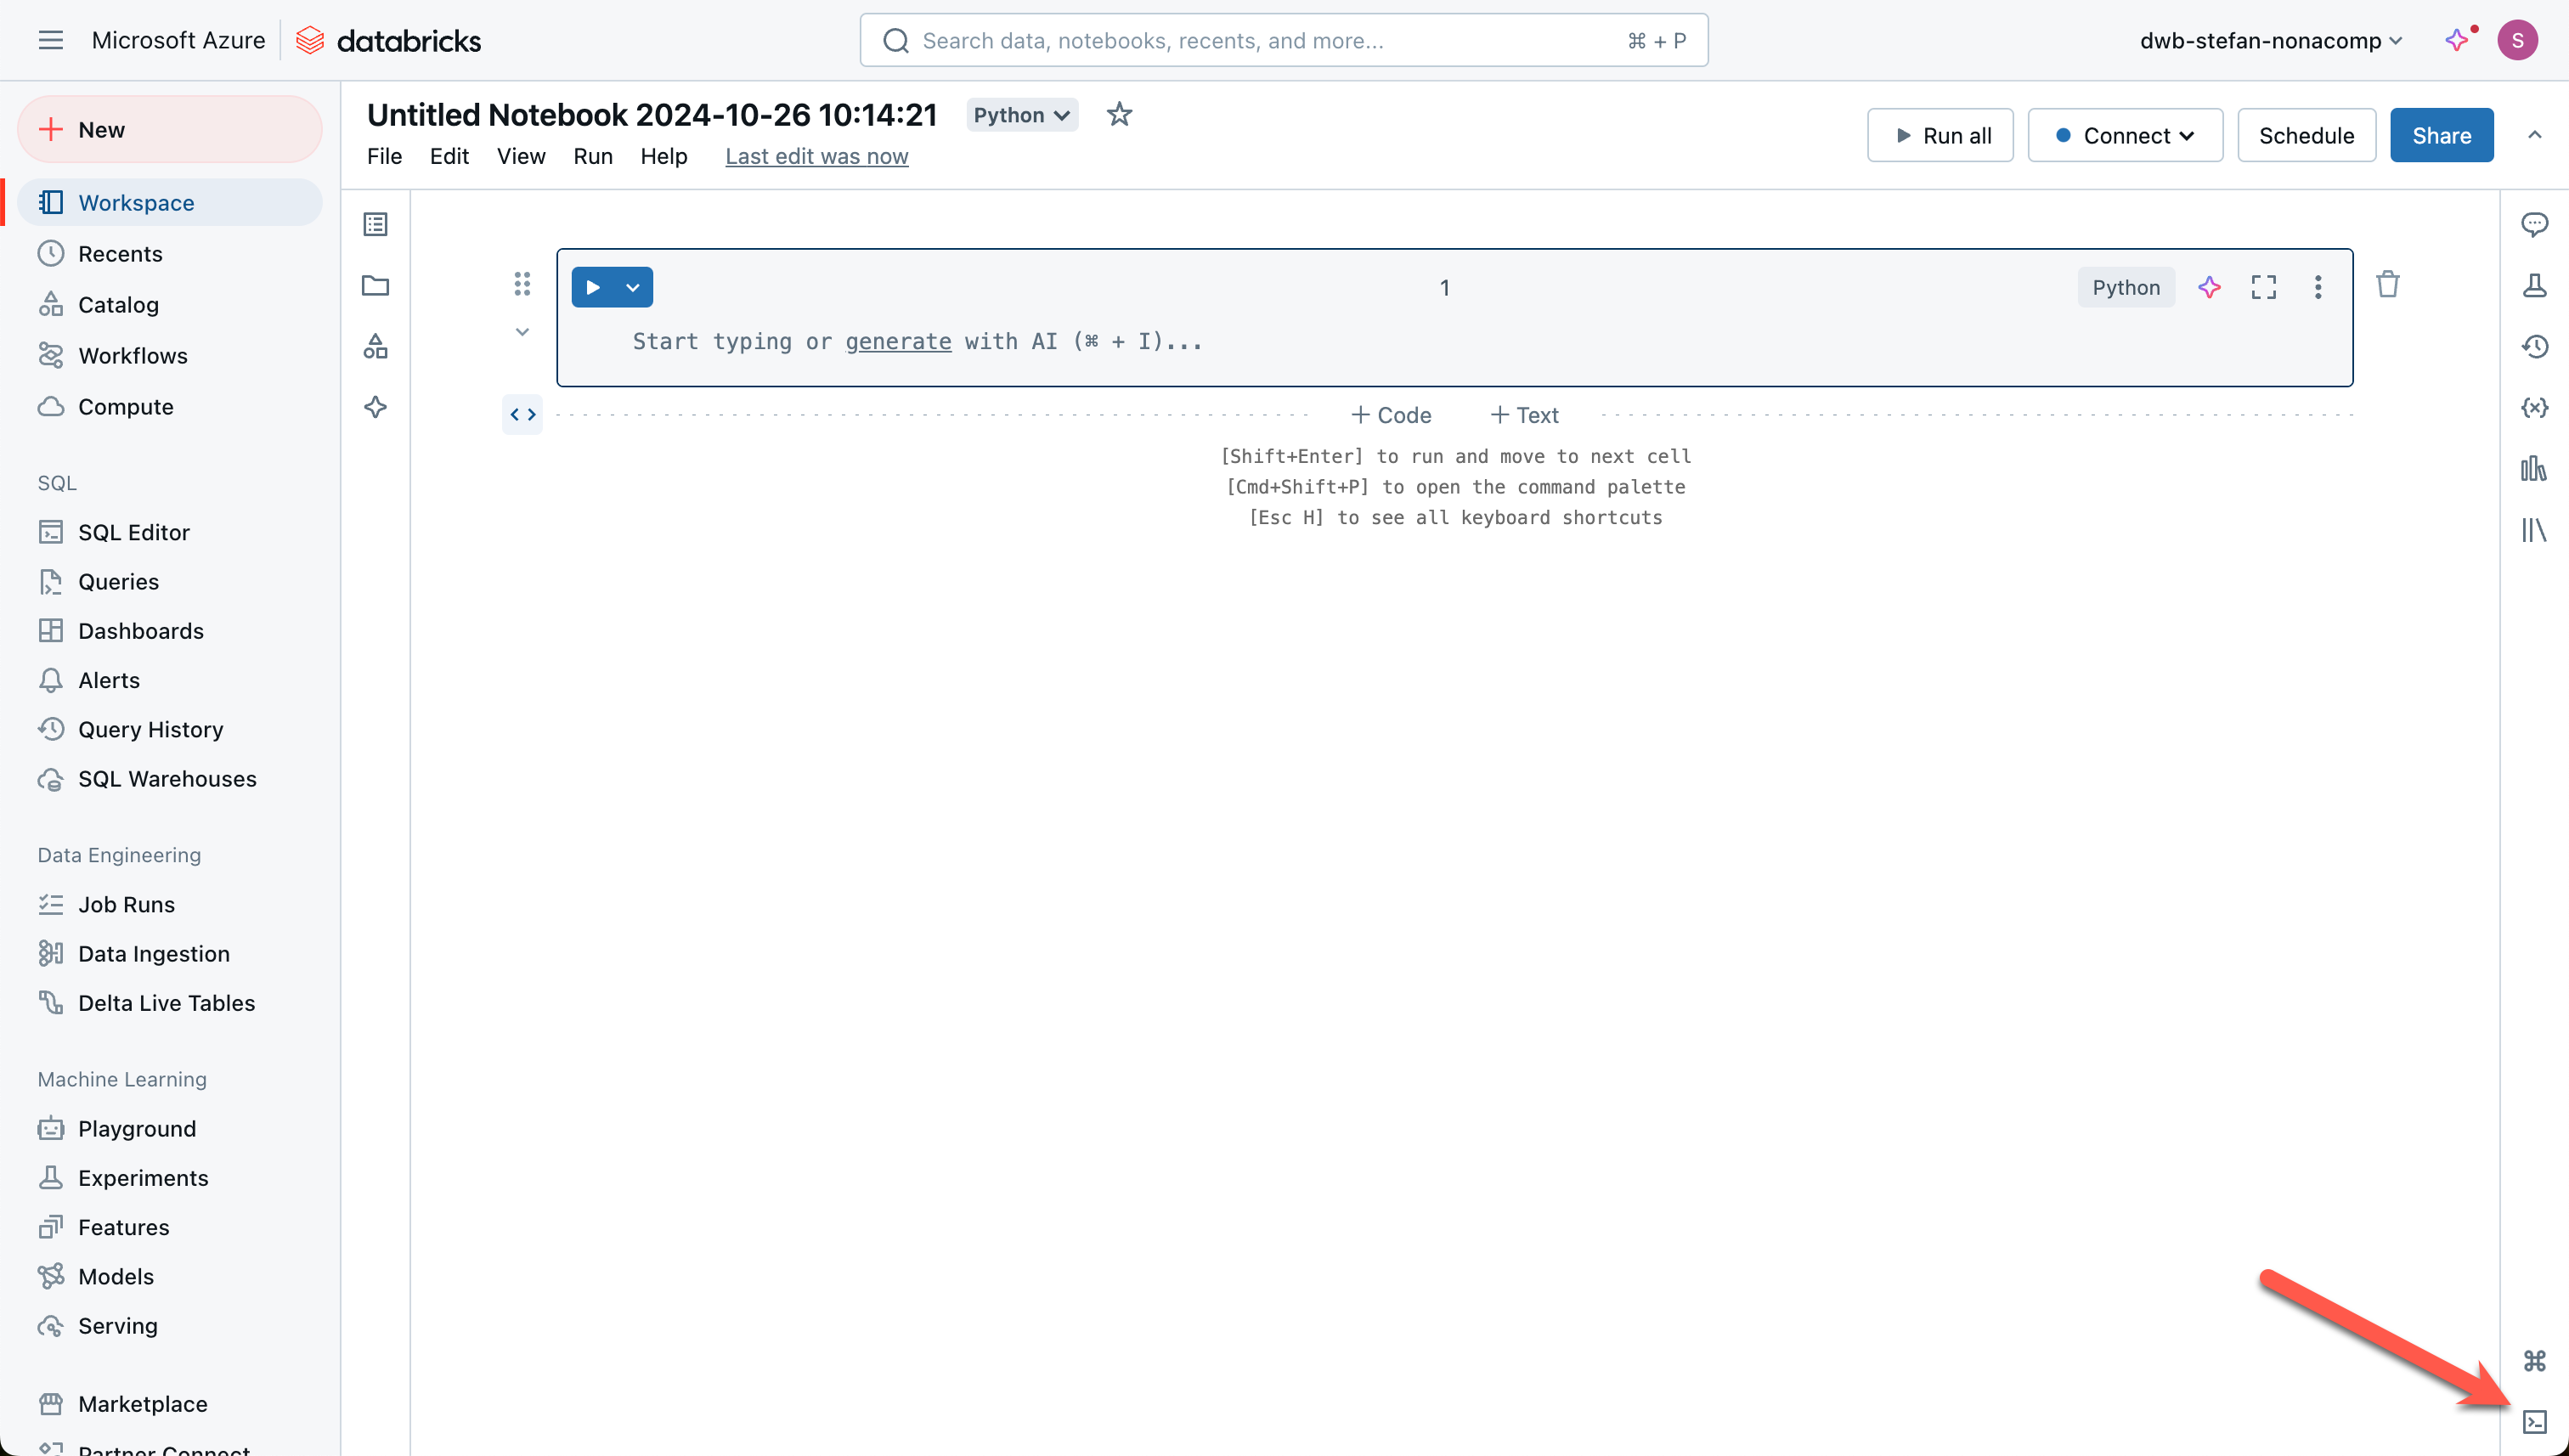
Start the cluster and open a new notebook. The button for starting a terminal is in the lower right corner.
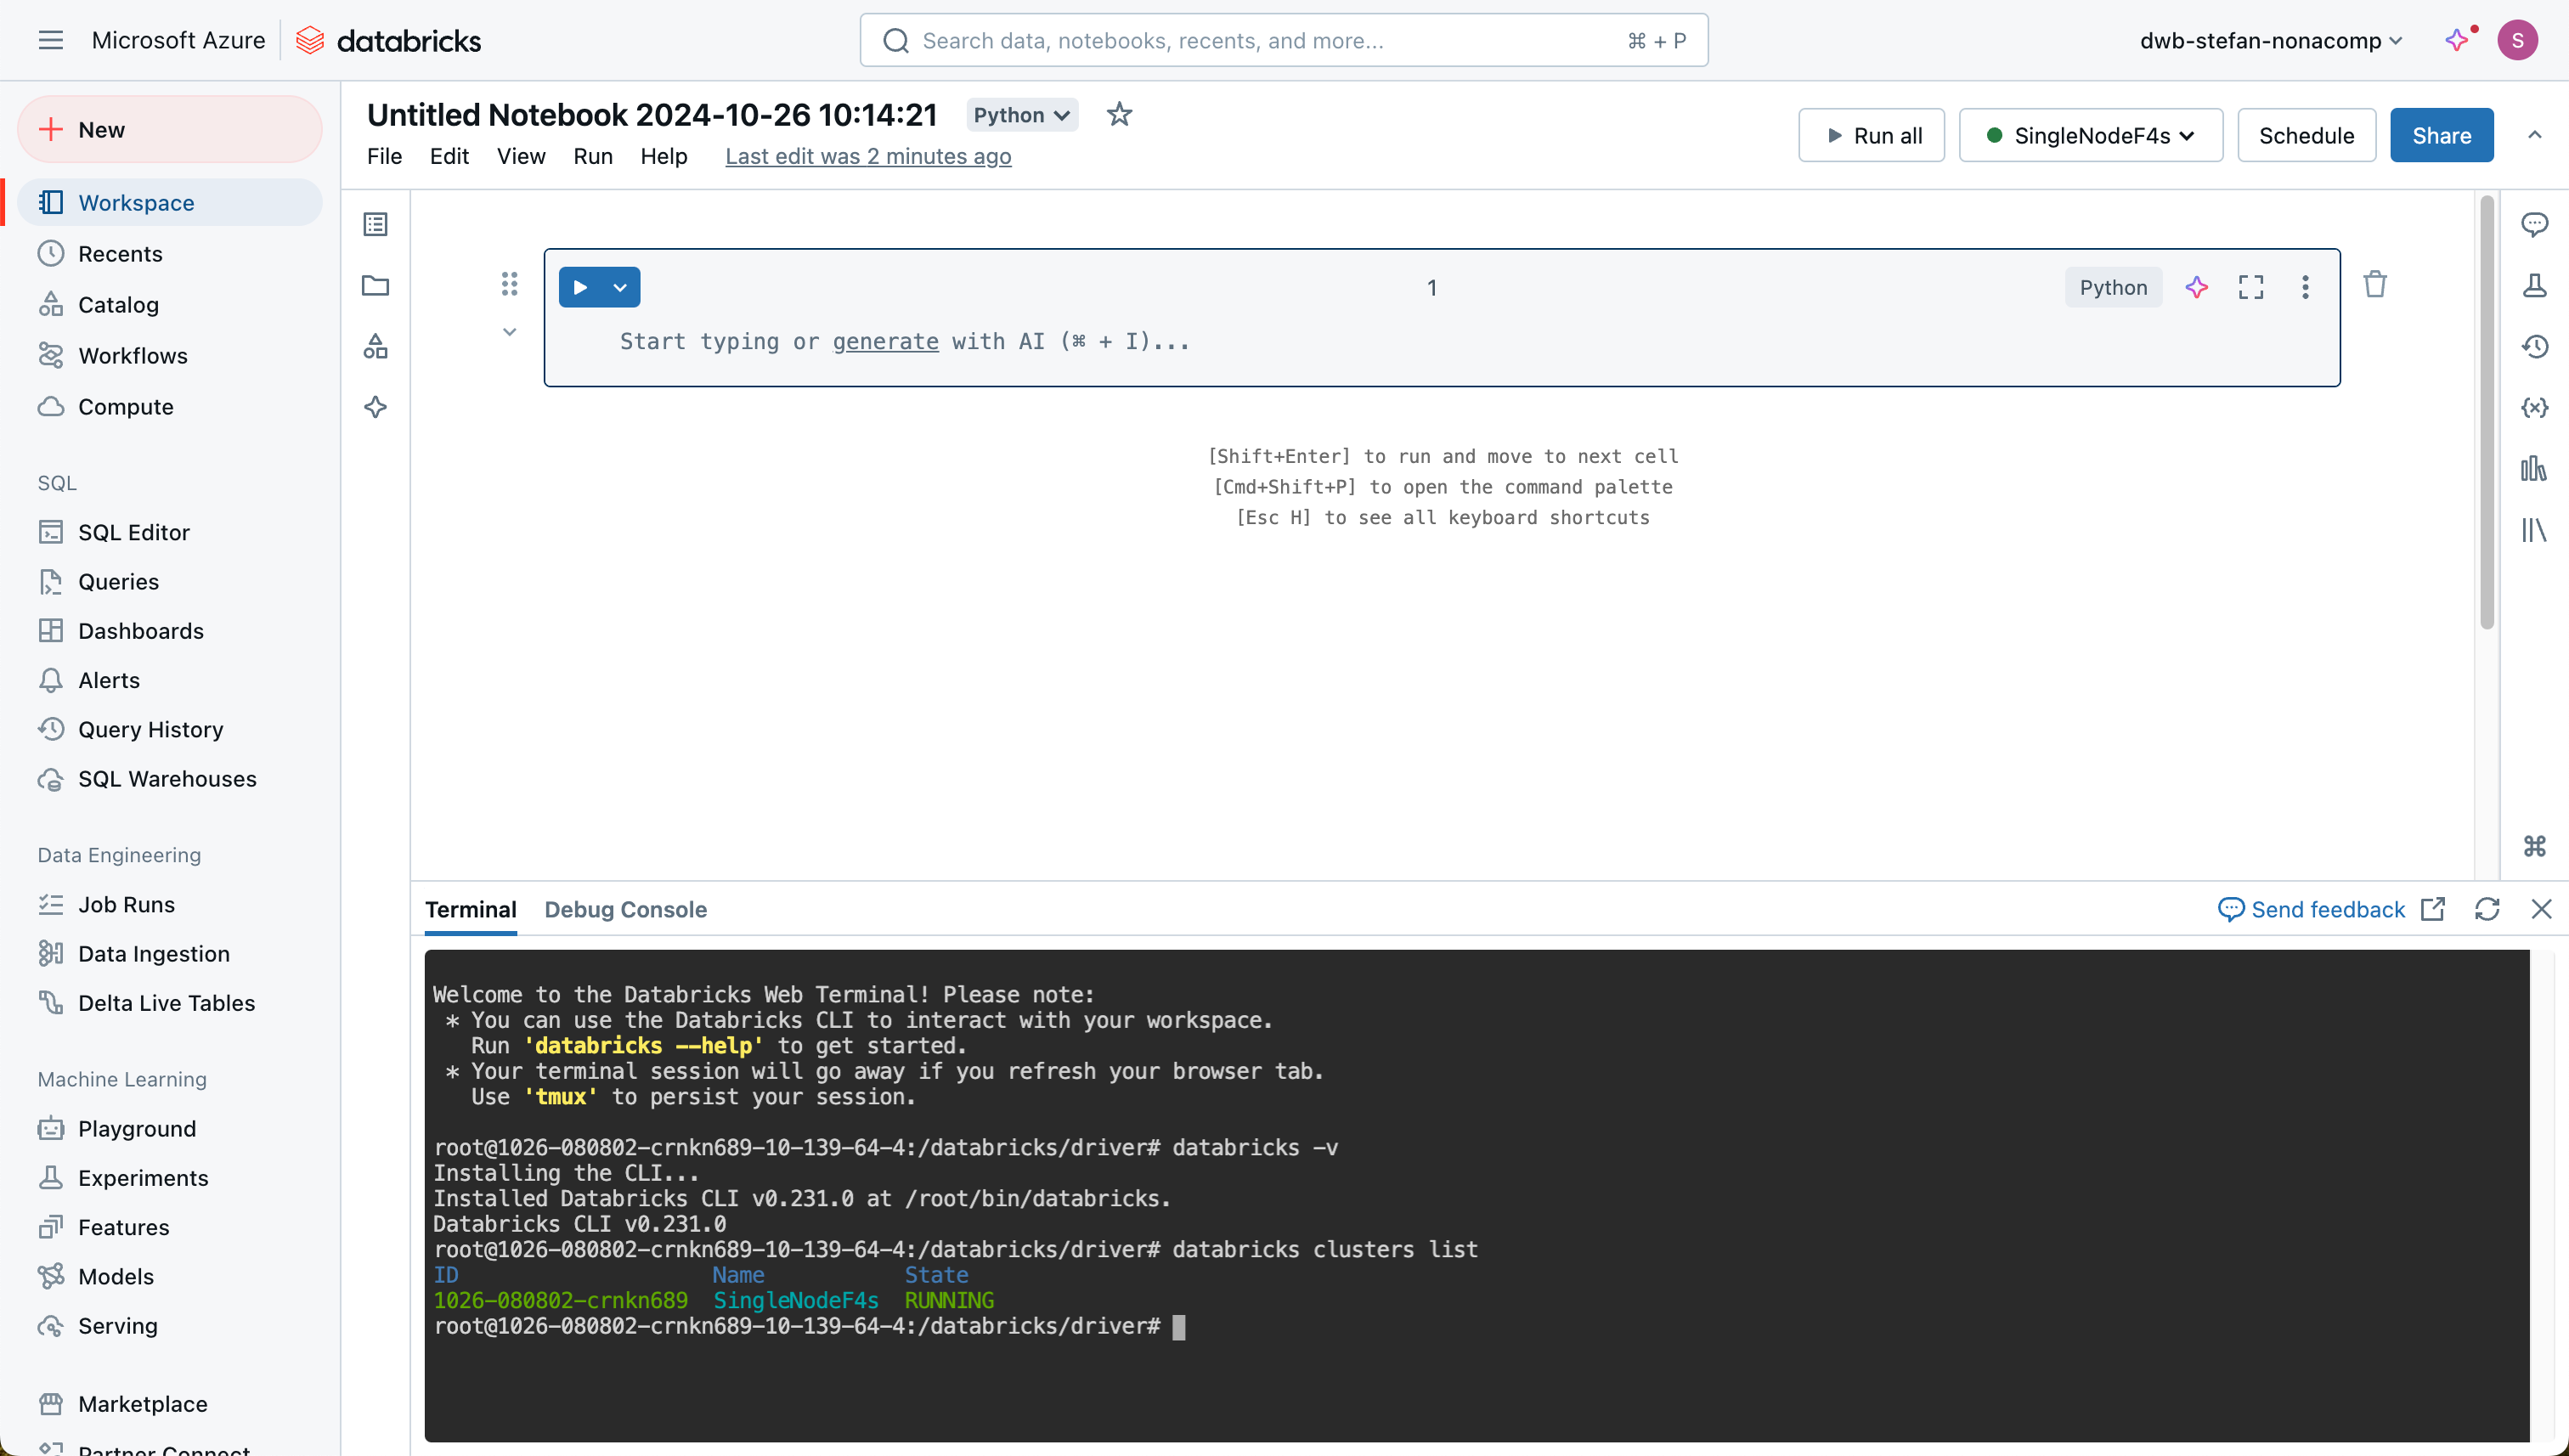
If you open the terminal and execute a command in the Databricks CLI, the latest version of the CLI is installed in the first step and can be used after a few seconds.
Use Personal Access Token
The easiest method is using the Databricks CLI from my local computer.
In the Databricks workspace, you can click on the user’s icon, which is located at the top right.

Then click on Settings.

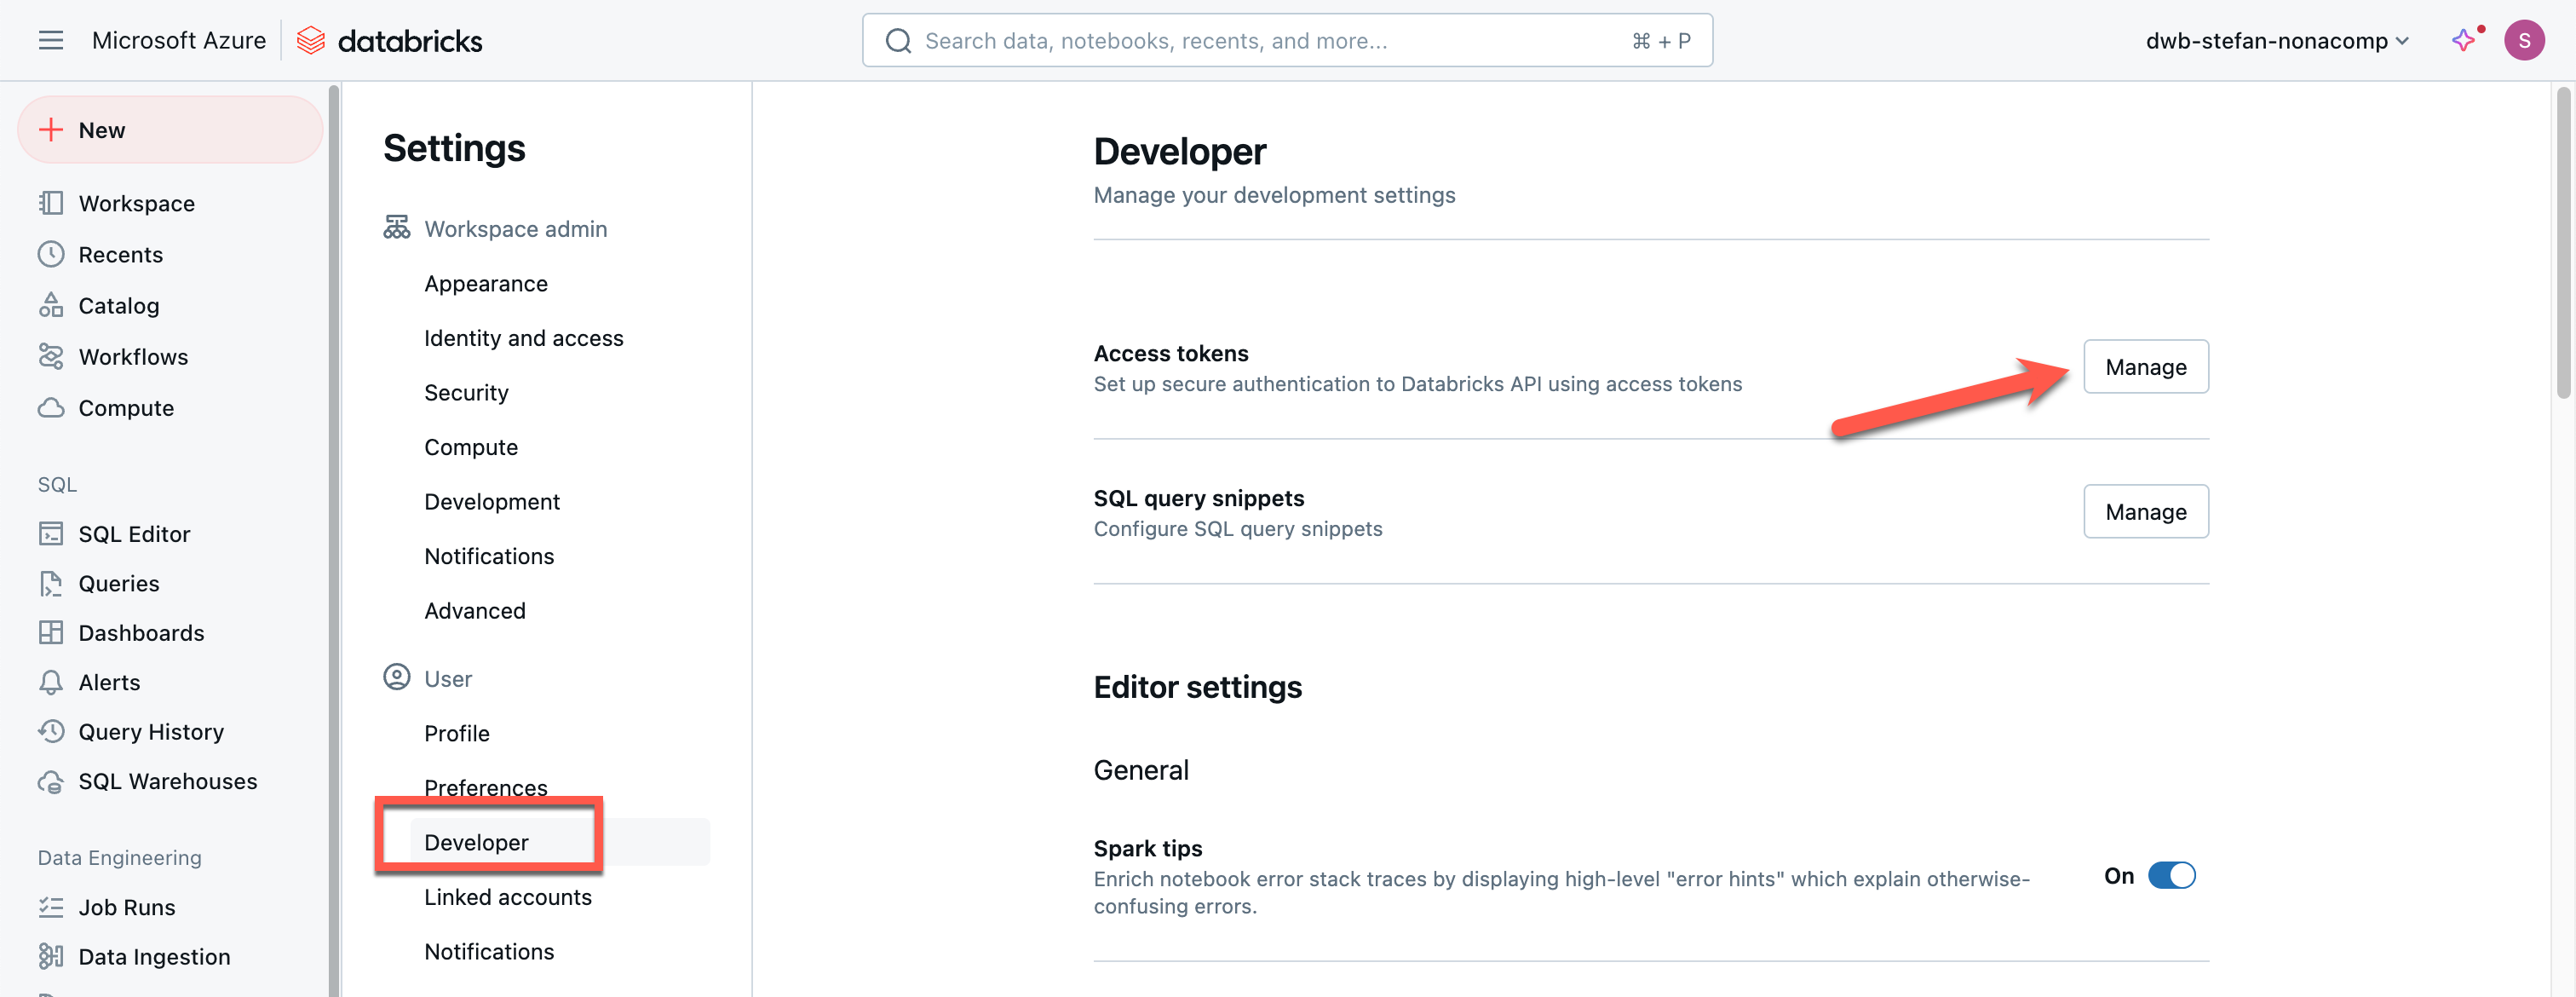
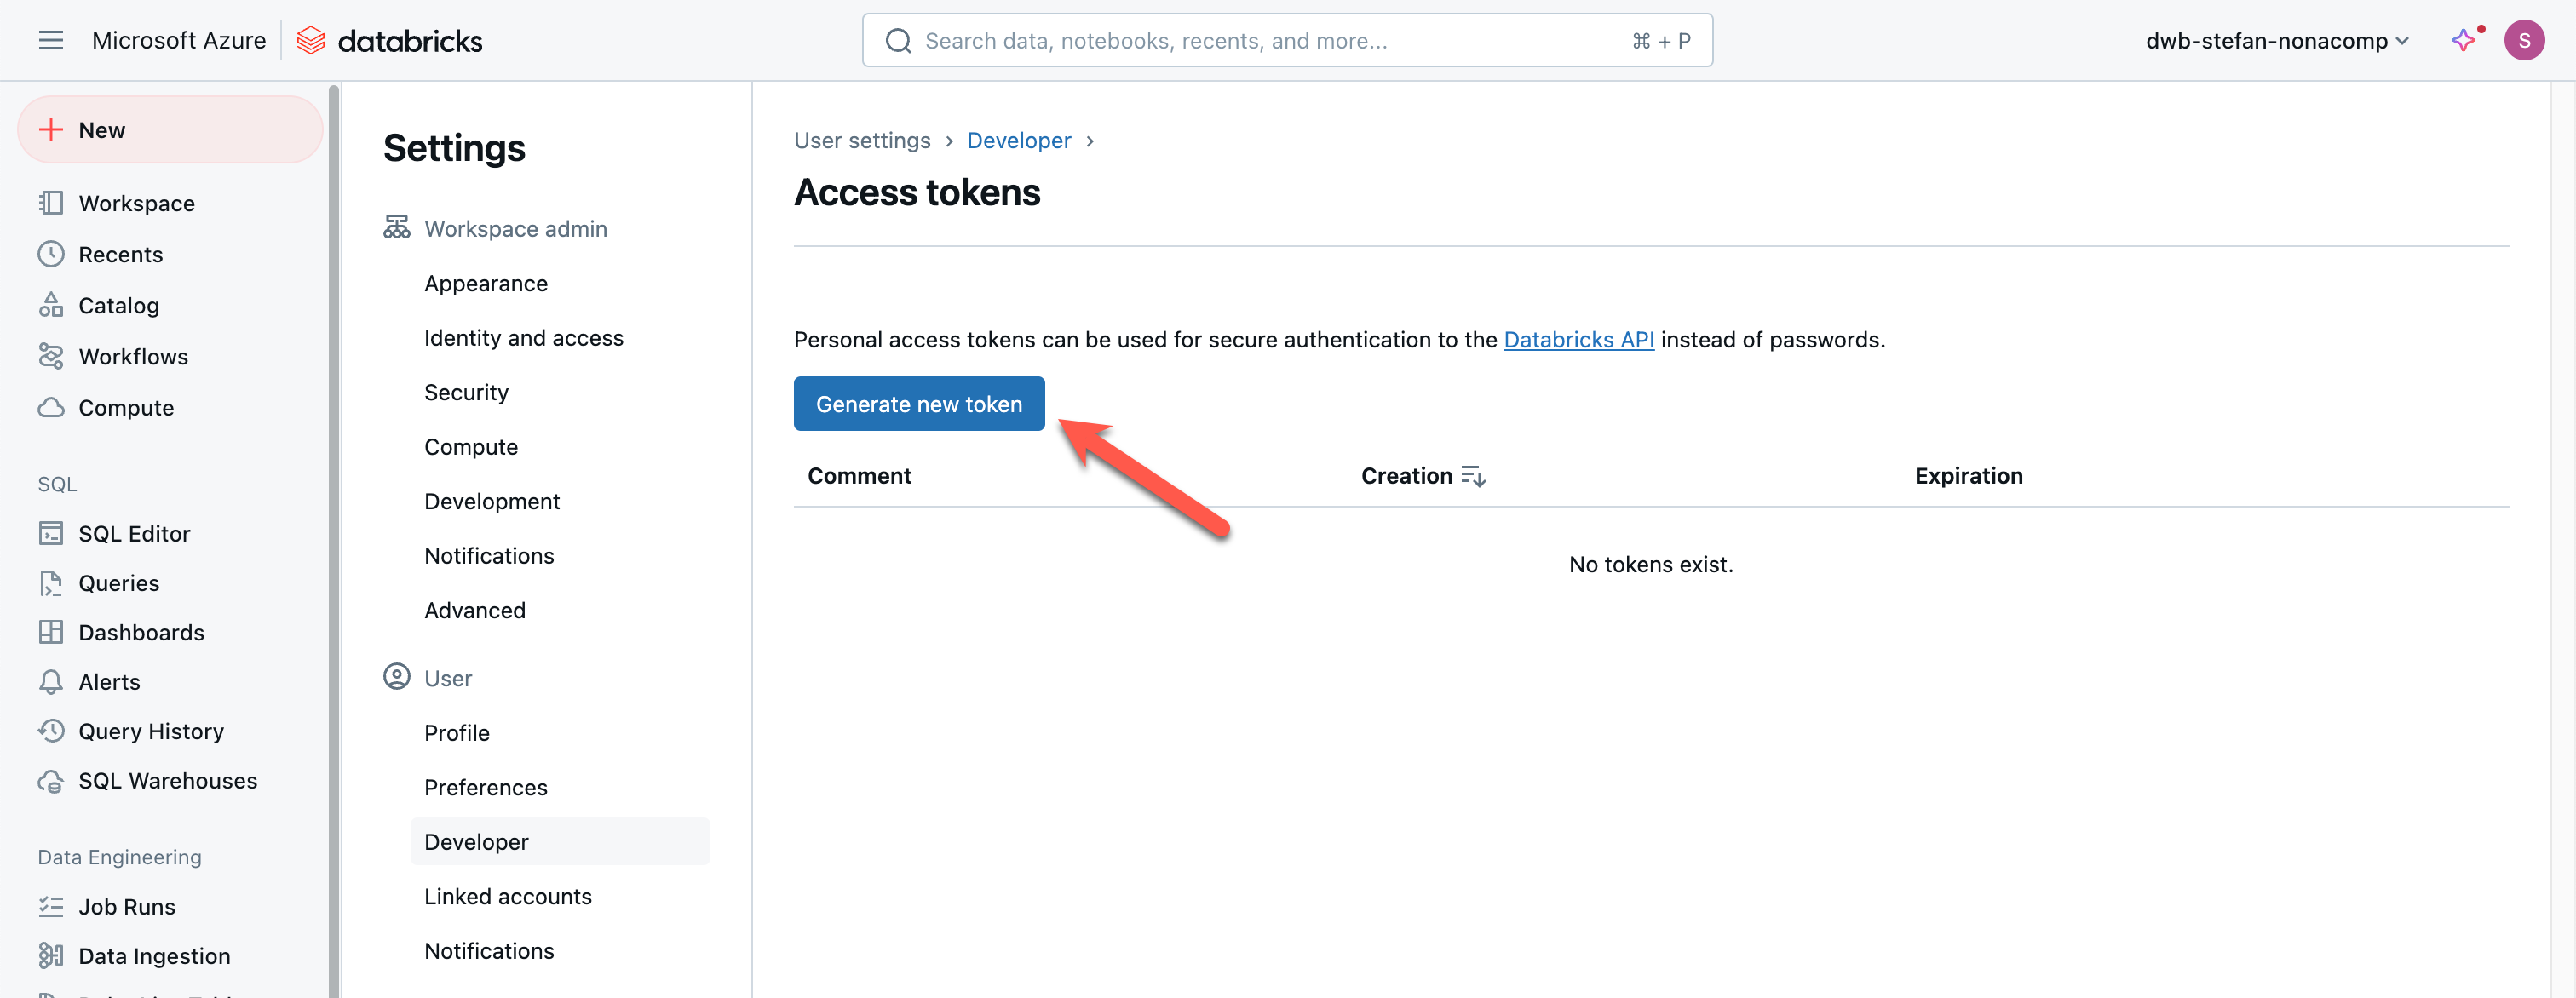
I can manage the access tokens under the Developer tab.
Creating a new token is self-explanatory.
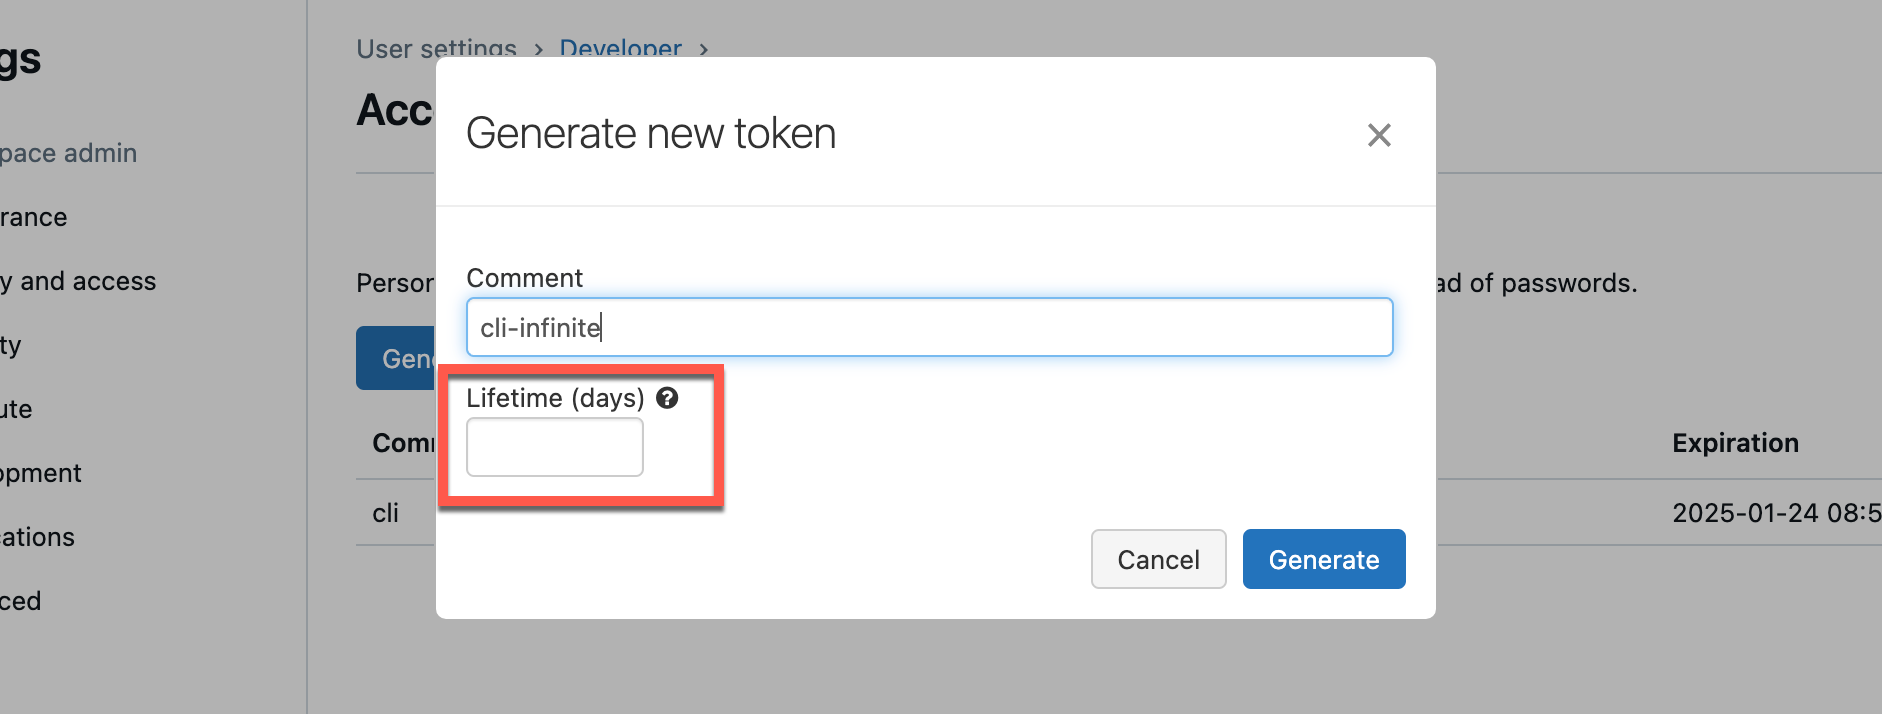
I assign a descriptive name. You can also specify how many days the token should be valid.

After clicking on Generate, the token will be displayed. You should save it in a safe place. The token can only be shown once. If you lose it, a new PAT must be created.

If you leave the Lifetime field empty, you can have a token created that remains valid indefinitely. However, there are better practices than this.
You can see how long a token is valid for in the overview.

Now, I configure the Databricks CLI by typing the following command in the terminal. I usually use the integrated Visual Studio Code terminal.
|
|
The URL of the workspace must be entered on the terminal; this can be found in the web browser:

When prompted, I paste the URL in the terminal and then immediately paste the Personal Access Token.

The advantage and disadvantage of this method is that the token is saved in plain text in the .databrickscfg file. You should, therefore, refrain from using this method on a shared computer.

As a test, I have the clusters listed in the workspace.

Interactive Authenticate without token
Choose an interactive method if you do not want to create a token. To do this, enter the following command, once with and once without the workspace URL:
|
|
Or you can specify the workspace URL:
|
|
A web browser will then open automatically, where you can authenticate yourself.

After successful login, the following window appears:
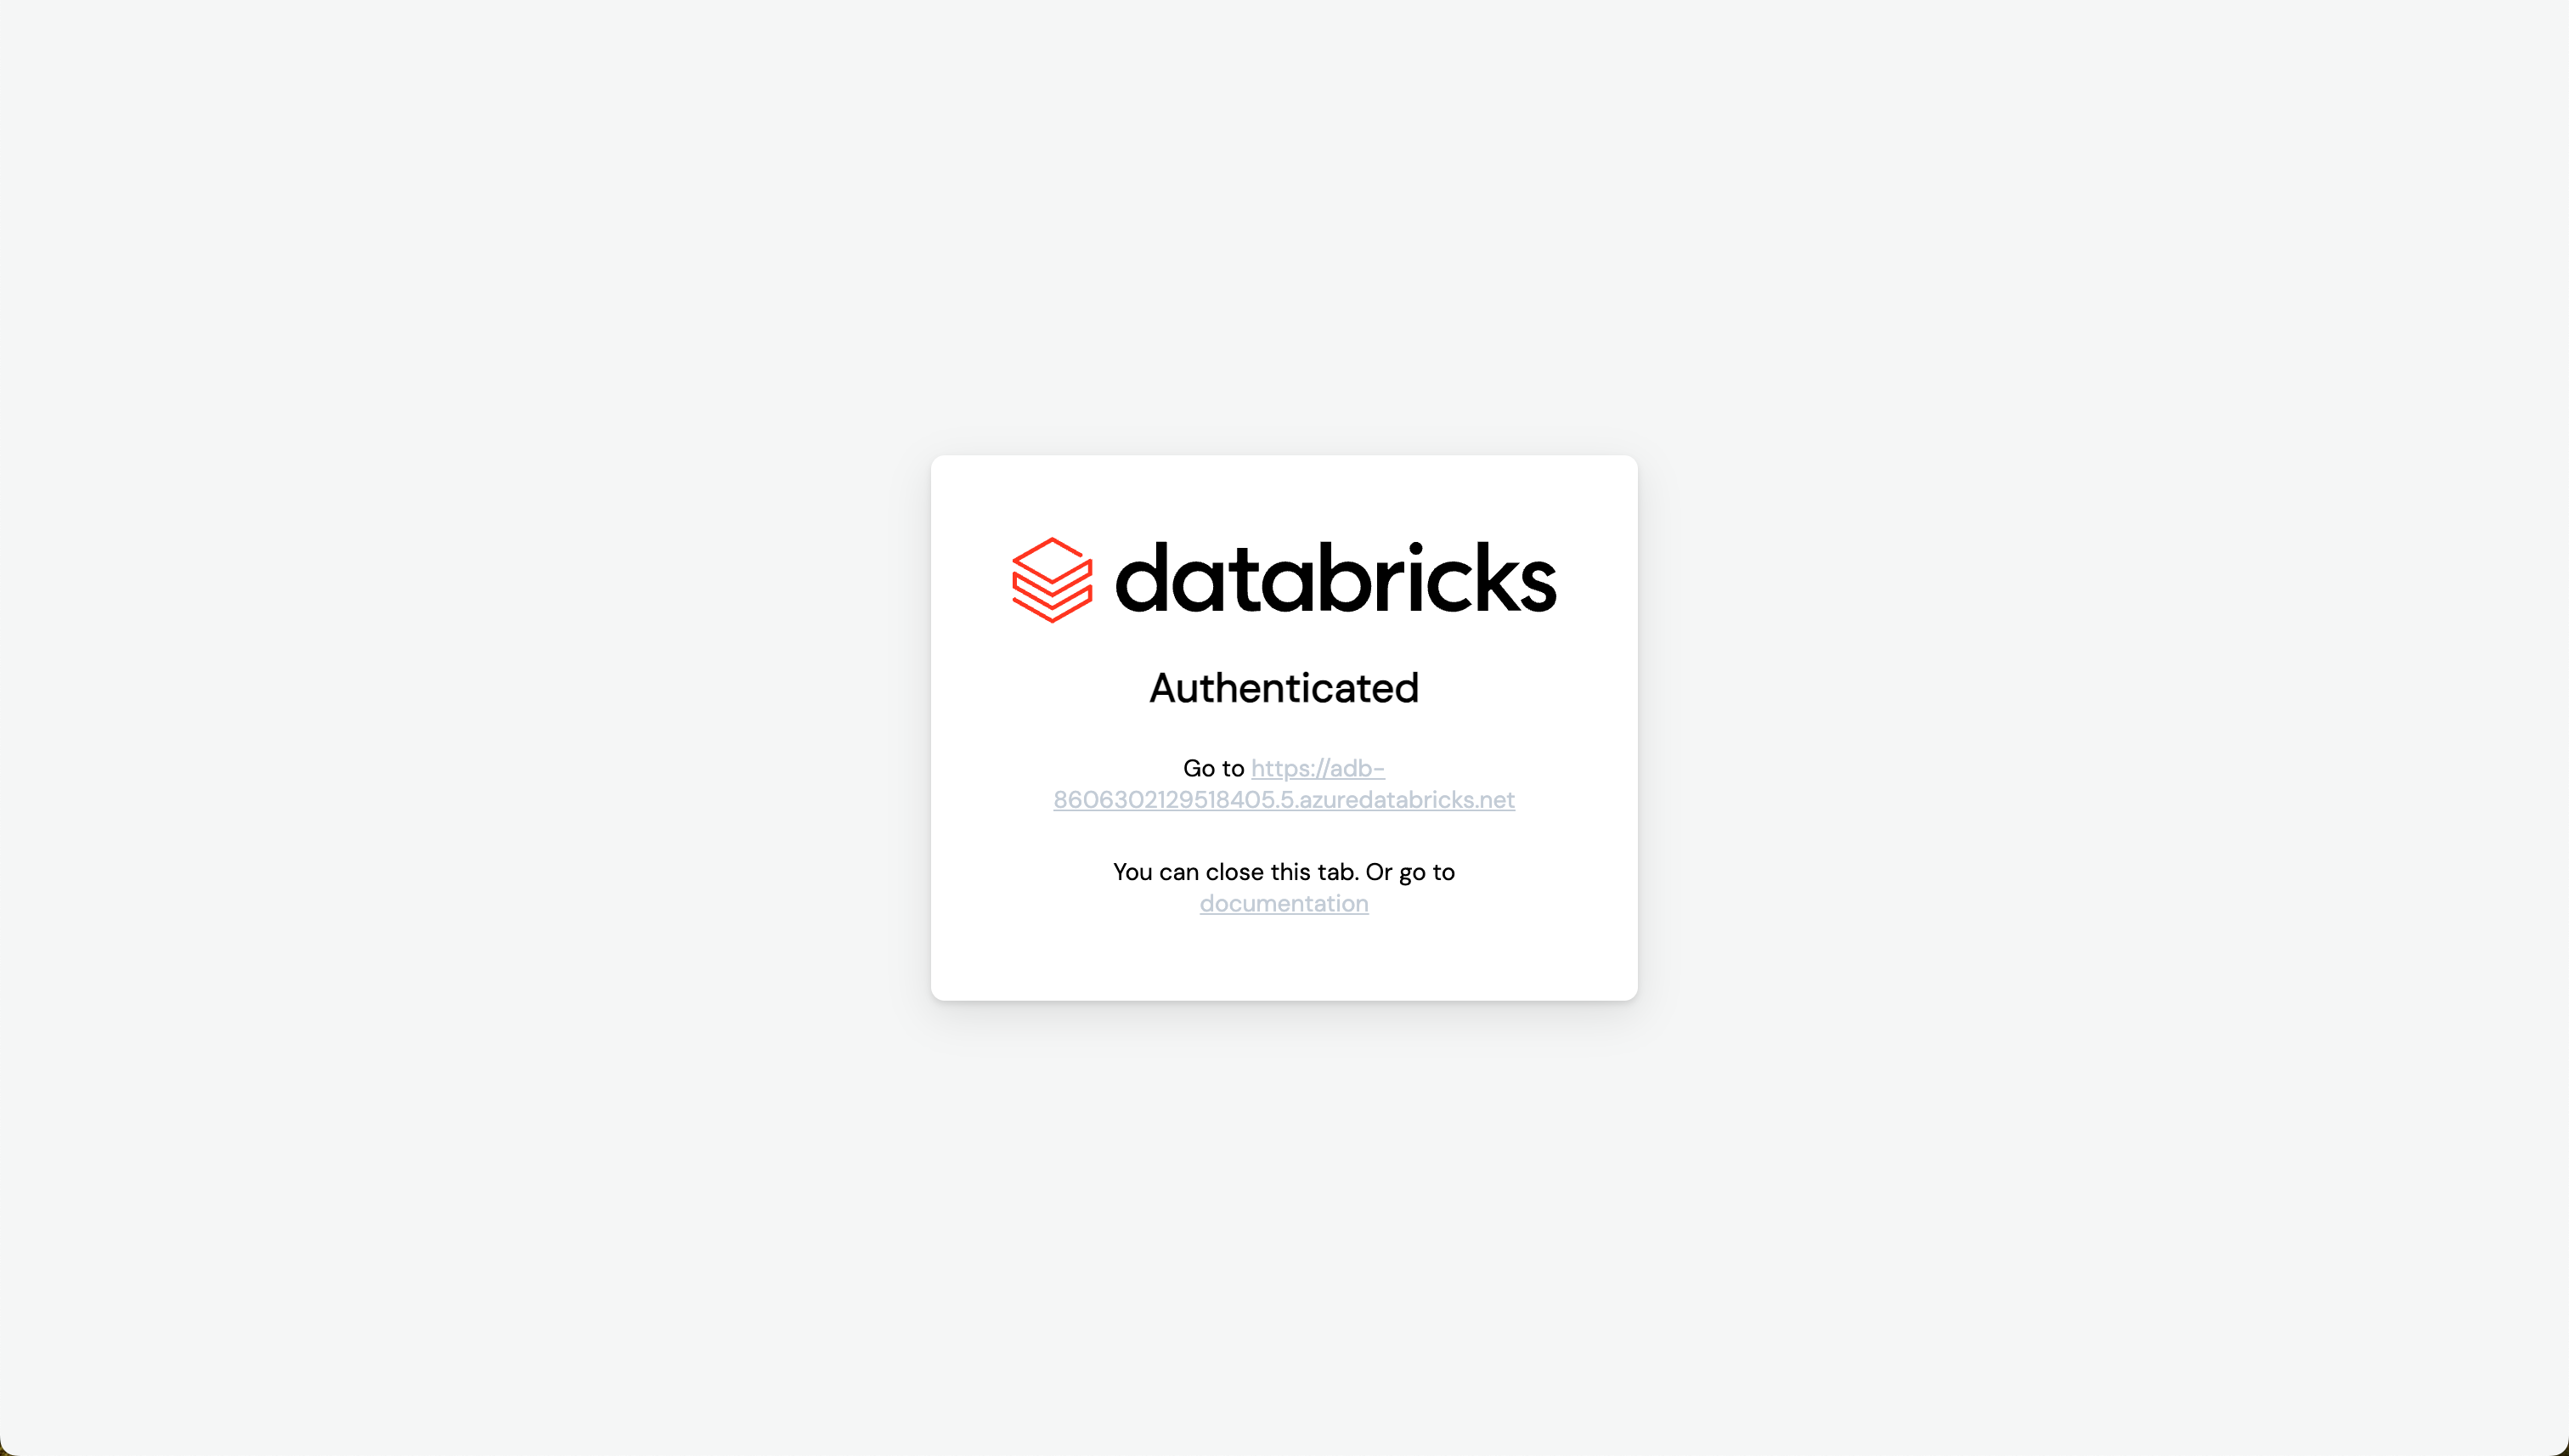
During the process, you are asked for a profile name, for which I have chosen “dev.” You can log in to different Databricks workspaces with these different profile names. The content of the .databrickscfg file then looks like this:

Again, I do a small test by listing the clusters. In addition to the command, I also enter the profile name as an option:
|
|

OAuth user-to-machine (U2M) authentication
To authenticate to the Databricks account, we need the URL of the account and the account ID. The command must be structured as follows:
|
|
You can find the information you need by logging into your account. You can log in to the account from the workspace, or you can use the URL you already know. Click on the name of the Databricks workspace, and the “Manage Account” option will appear.

The information can be seen in the browser’s address bar. The account ID can also be displayed on the user icon.
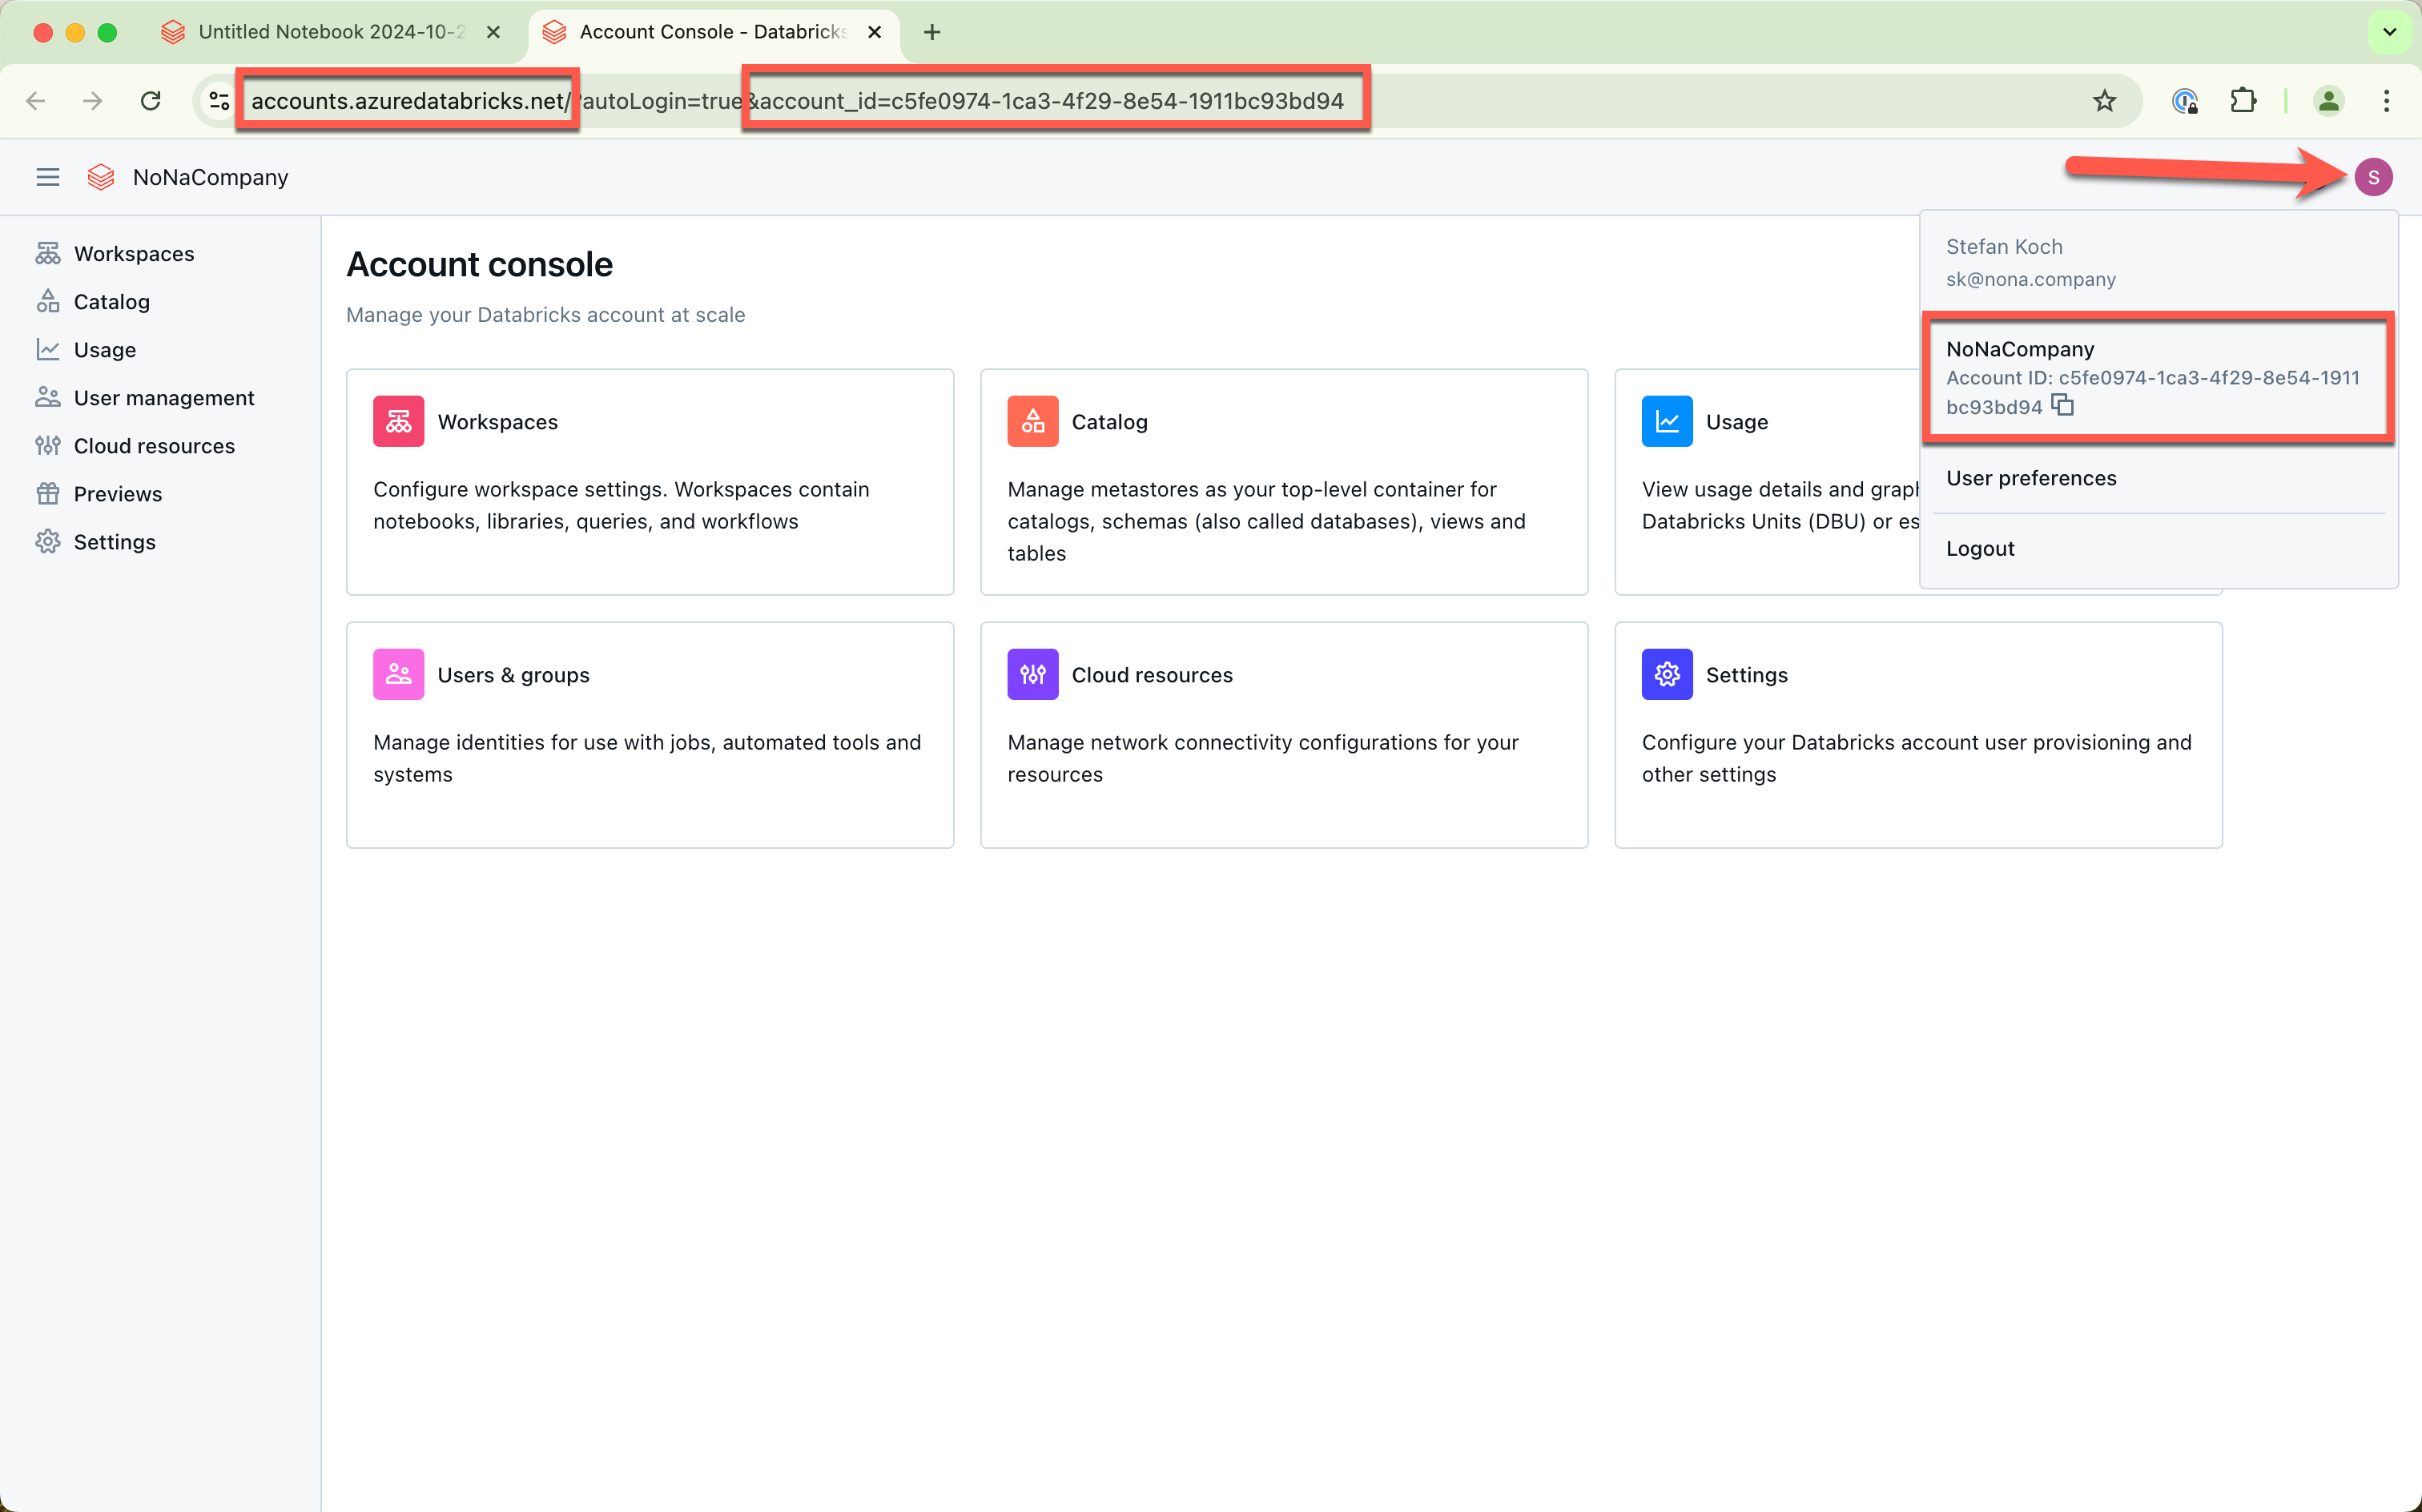
In my case, the command is then composed as follows:
|
|
A web browser opens again, and the login window for the Databricks account appears.
The following success message appears after successful login:
Again, you can enter an appropriate name for the profile in the terminal:

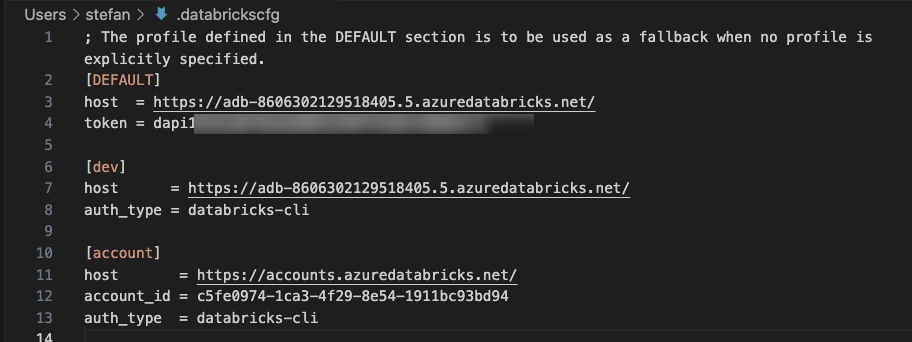
And again, the view of the content of the .databrickscfg file:
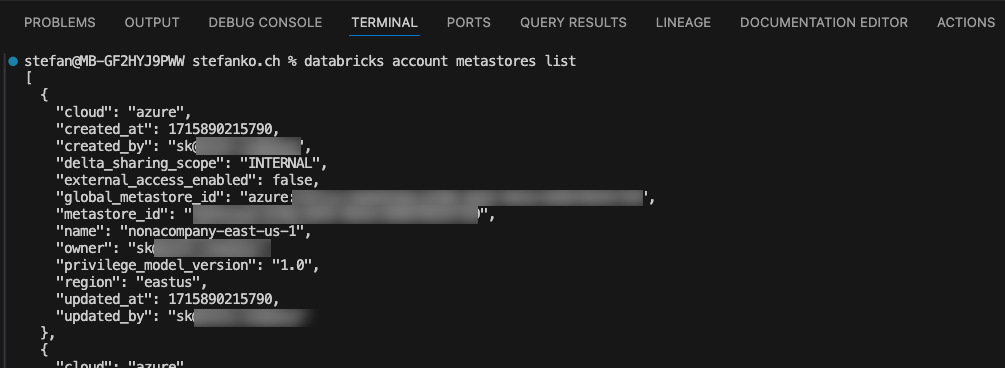
Now I can execute commands that are on the Account level:
Authenticate access to Azure Databricks with a service principal using OAuth (OAuth M2M)
There are already instructions available from Microsoft, which can be found here: https://learn.microsoft.com/en-us/azure/databricks/dev-tools/auth/oauth-m2m
I have gone through the steps below.
Create Service Principal (App registration)
First, you must create a service principal; this is called App Registration in Azure.
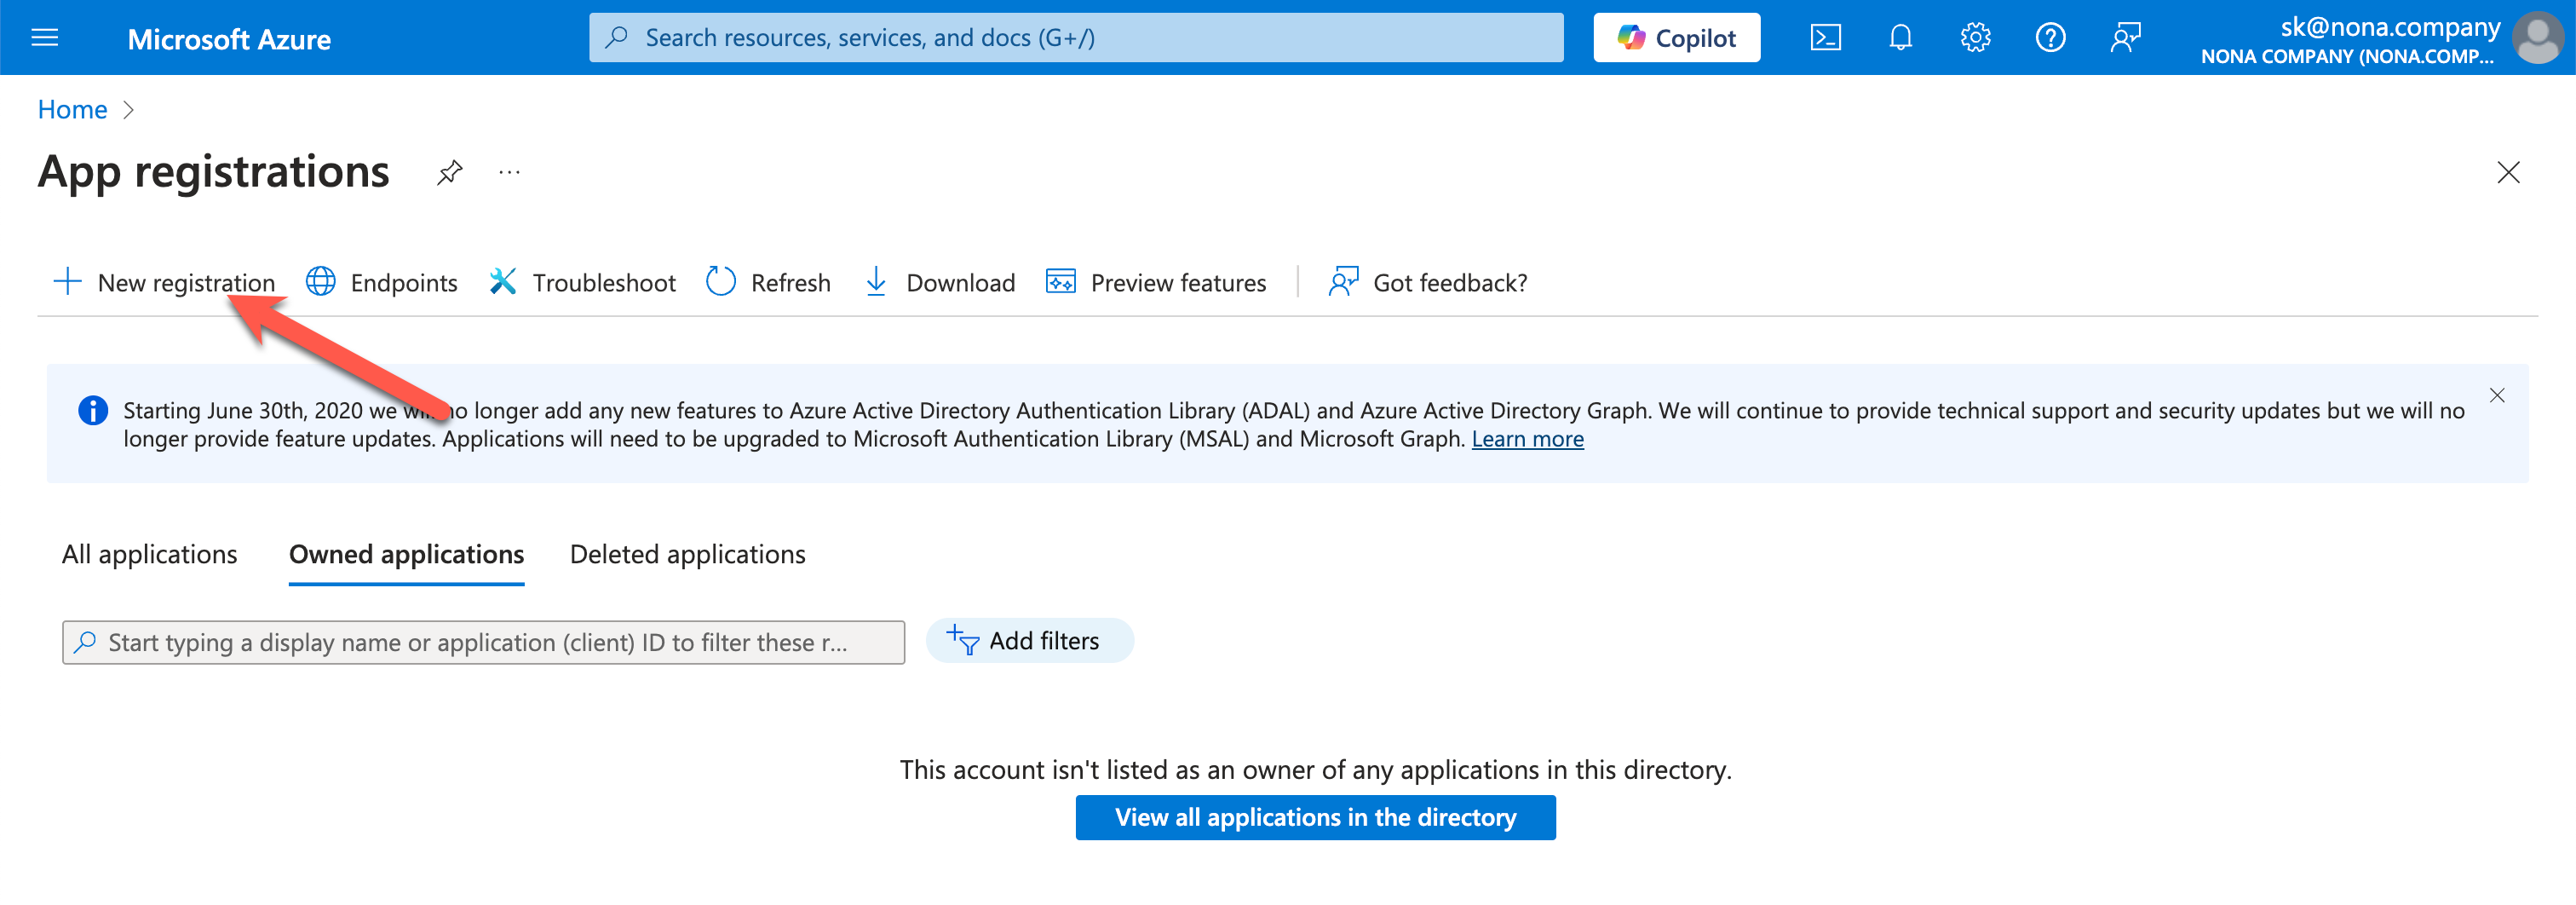
You should use a descriptive name so that it is clear what the service principal is used for.
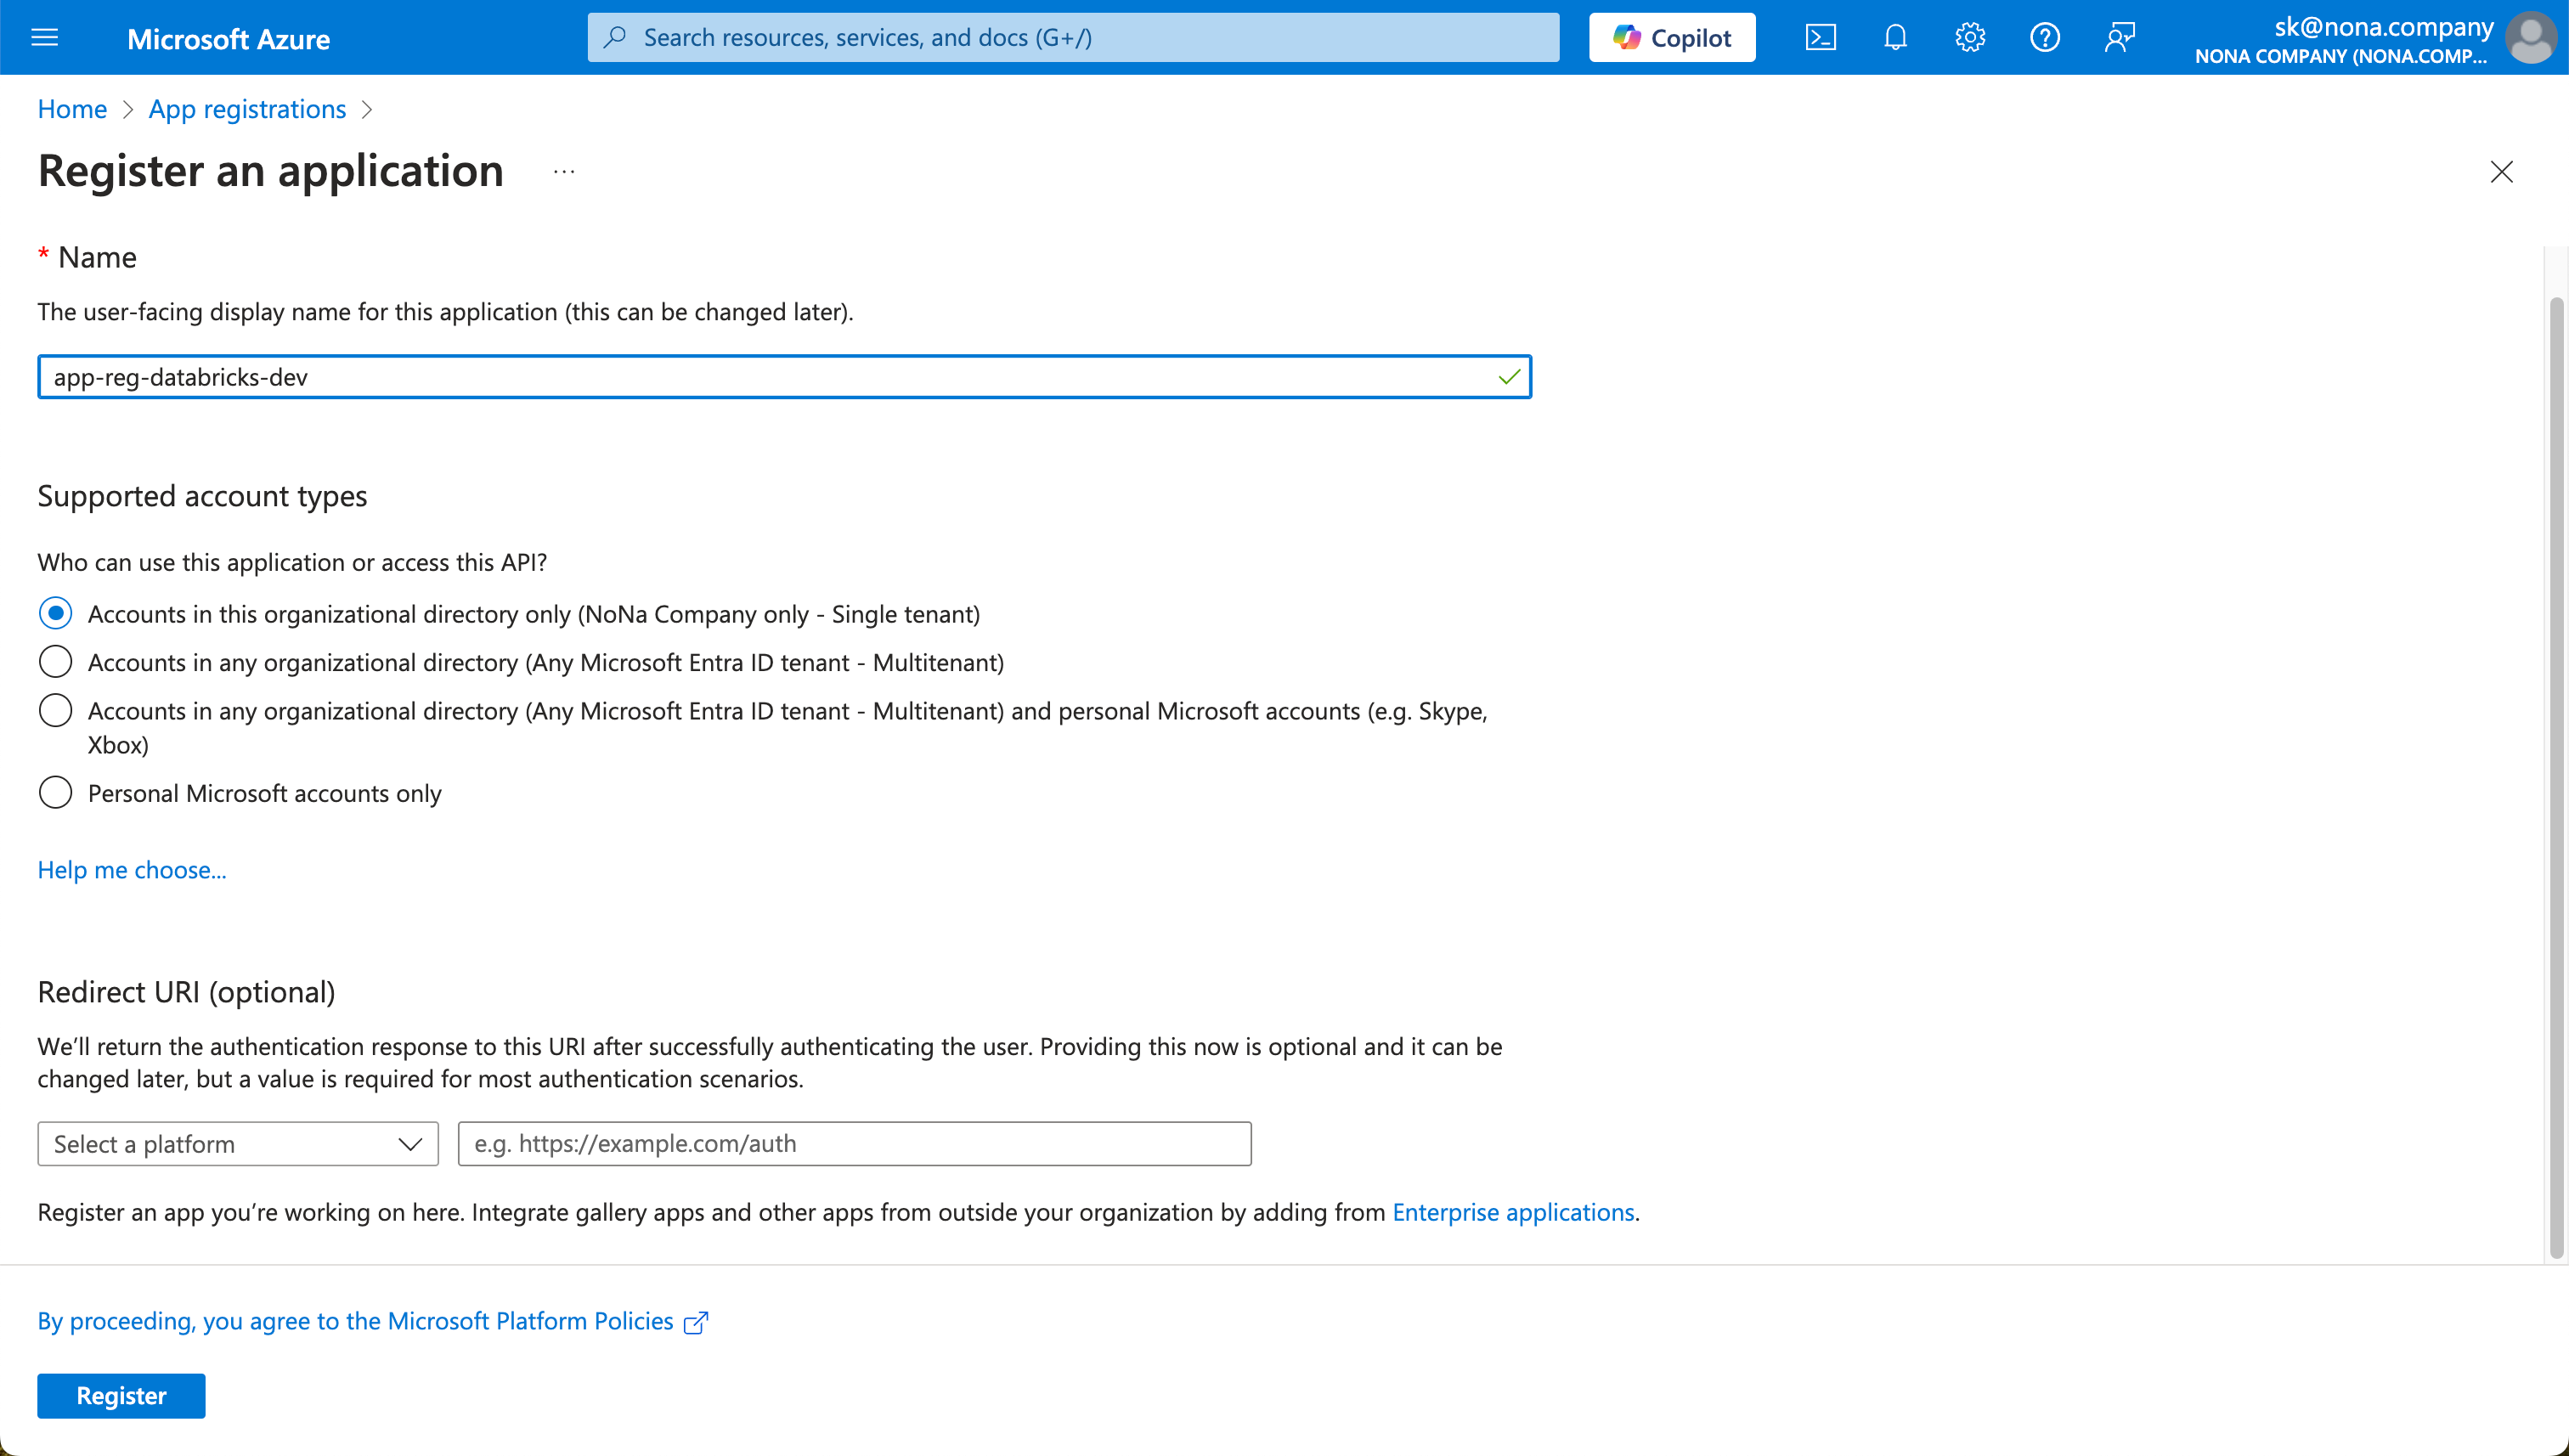
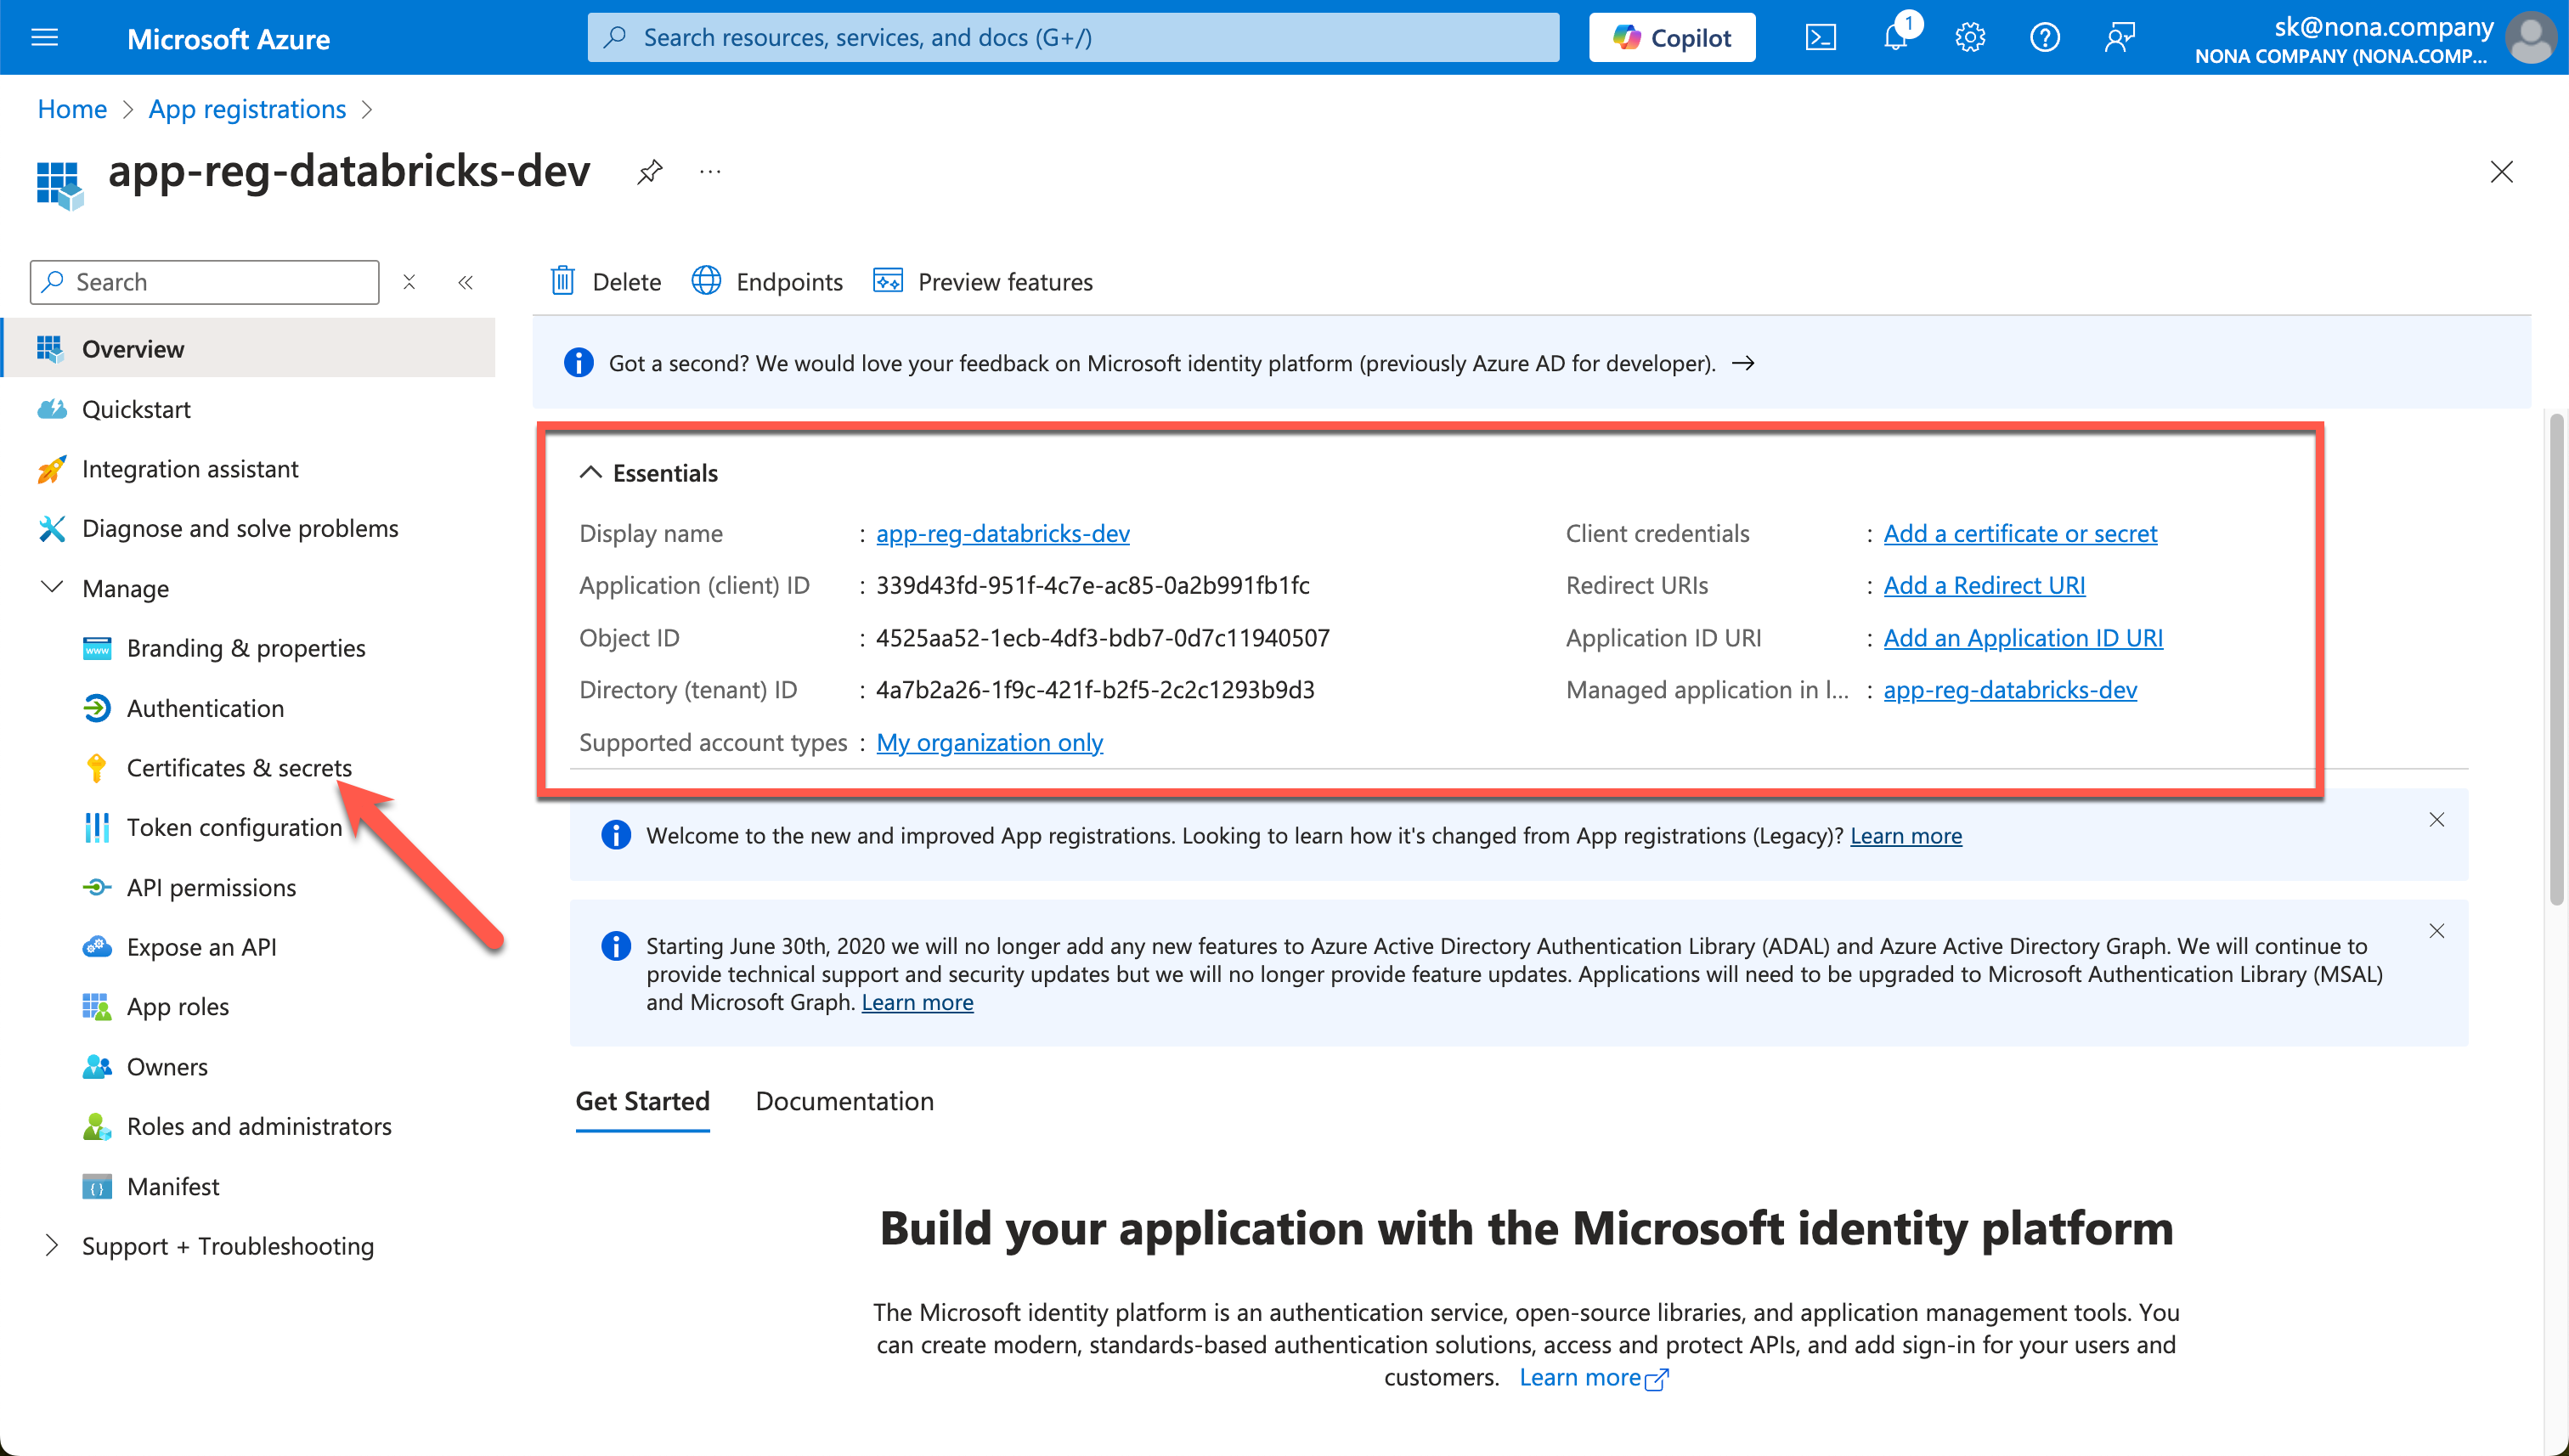
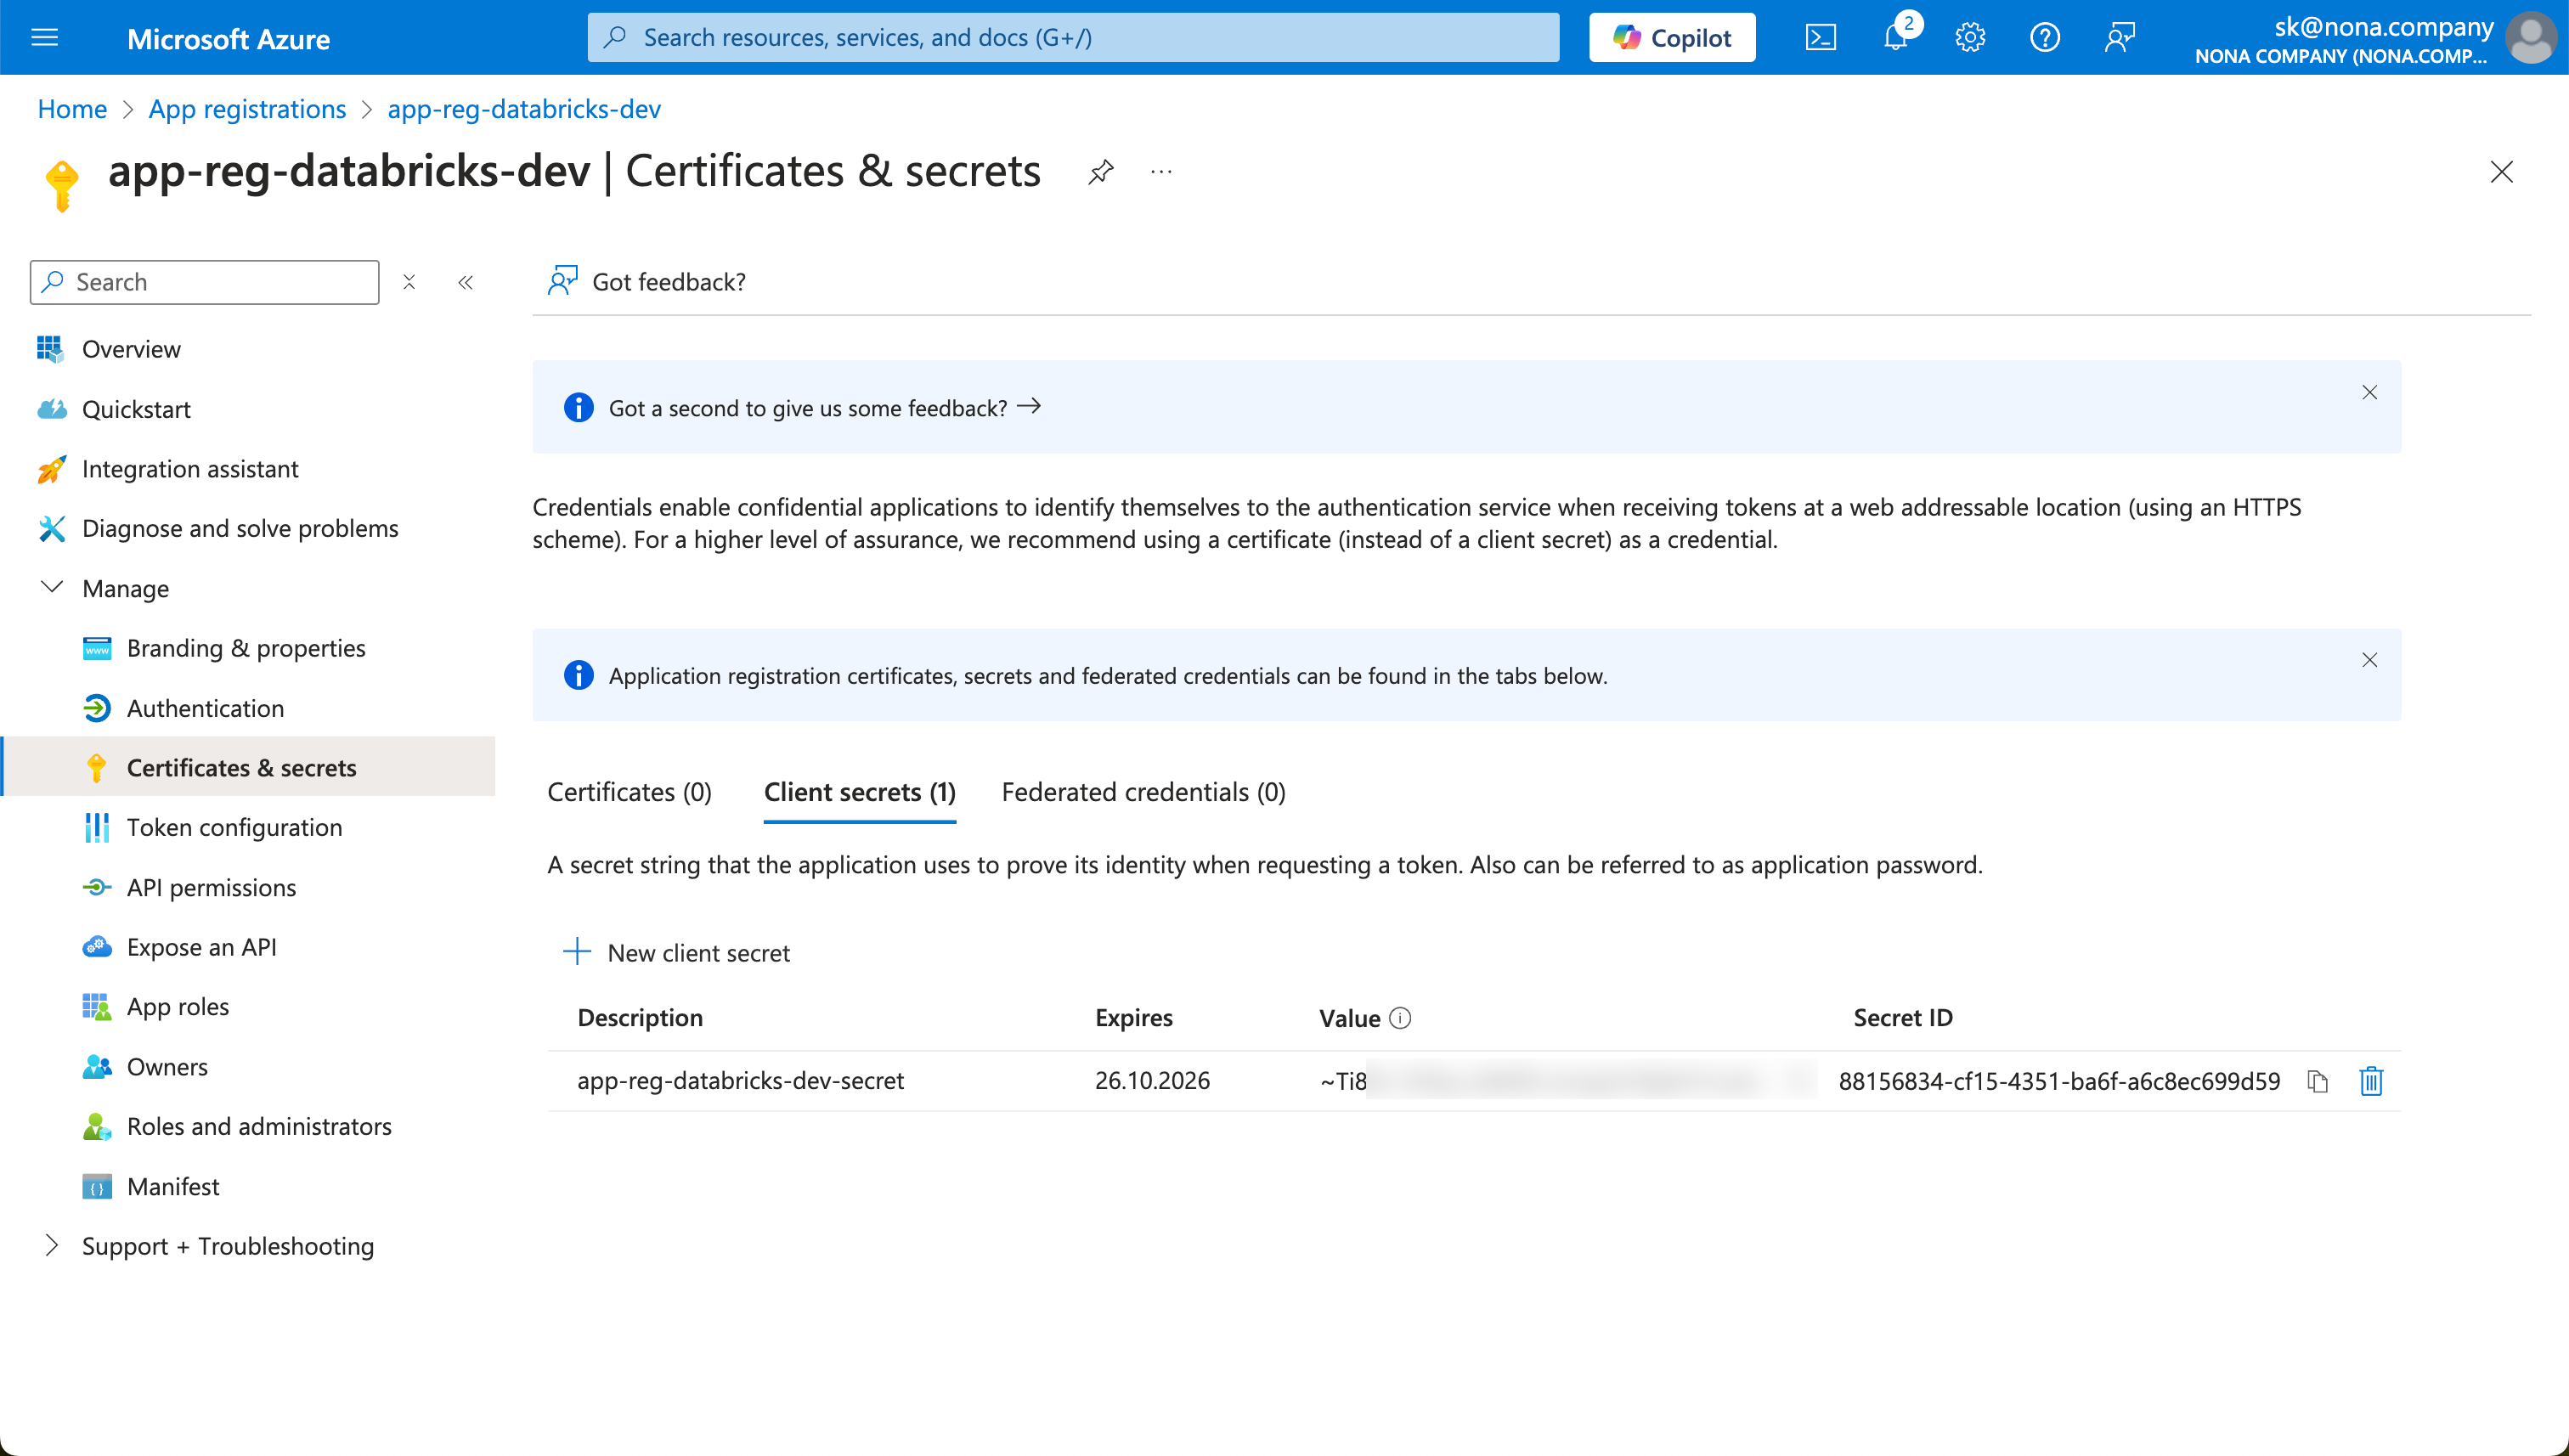
The most important information about the Service Principal can be found on the Overview page. You can also create a Secret.
Also, use a descriptive name for the Secret.
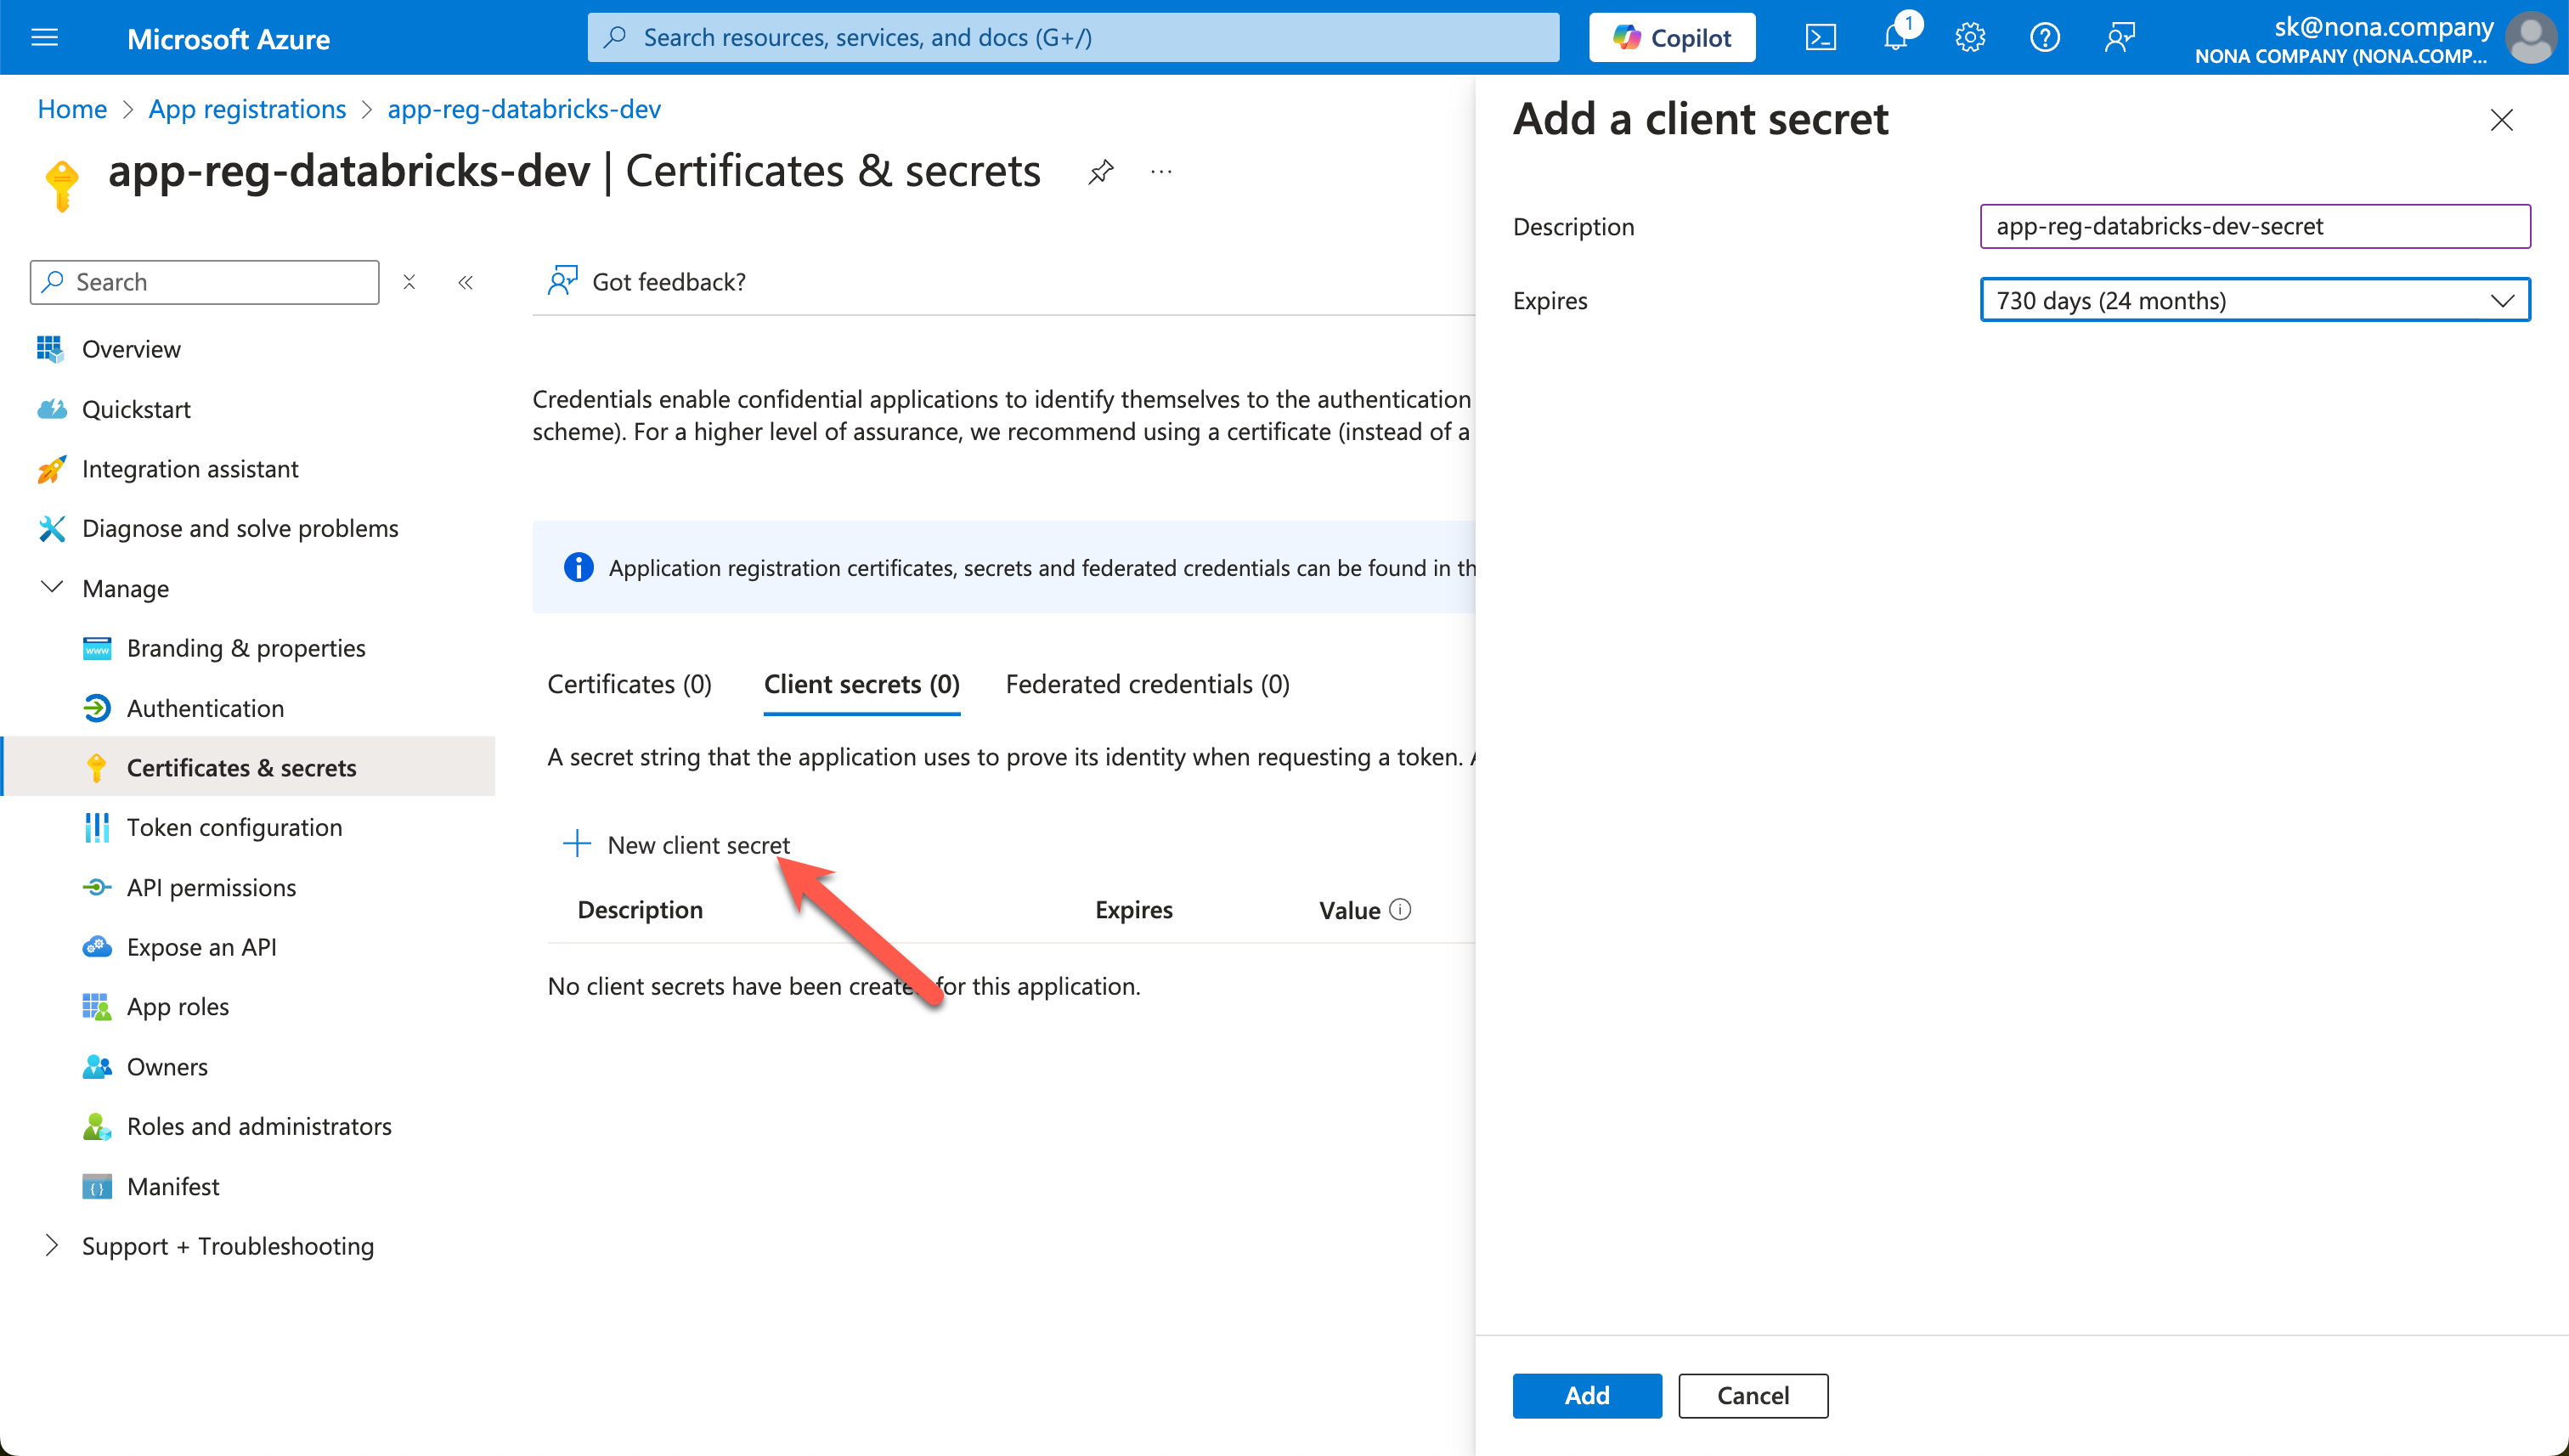
The secret, i.e., the password, is then displayed once. You cannot do this again, so you should save the secret in a safe place.
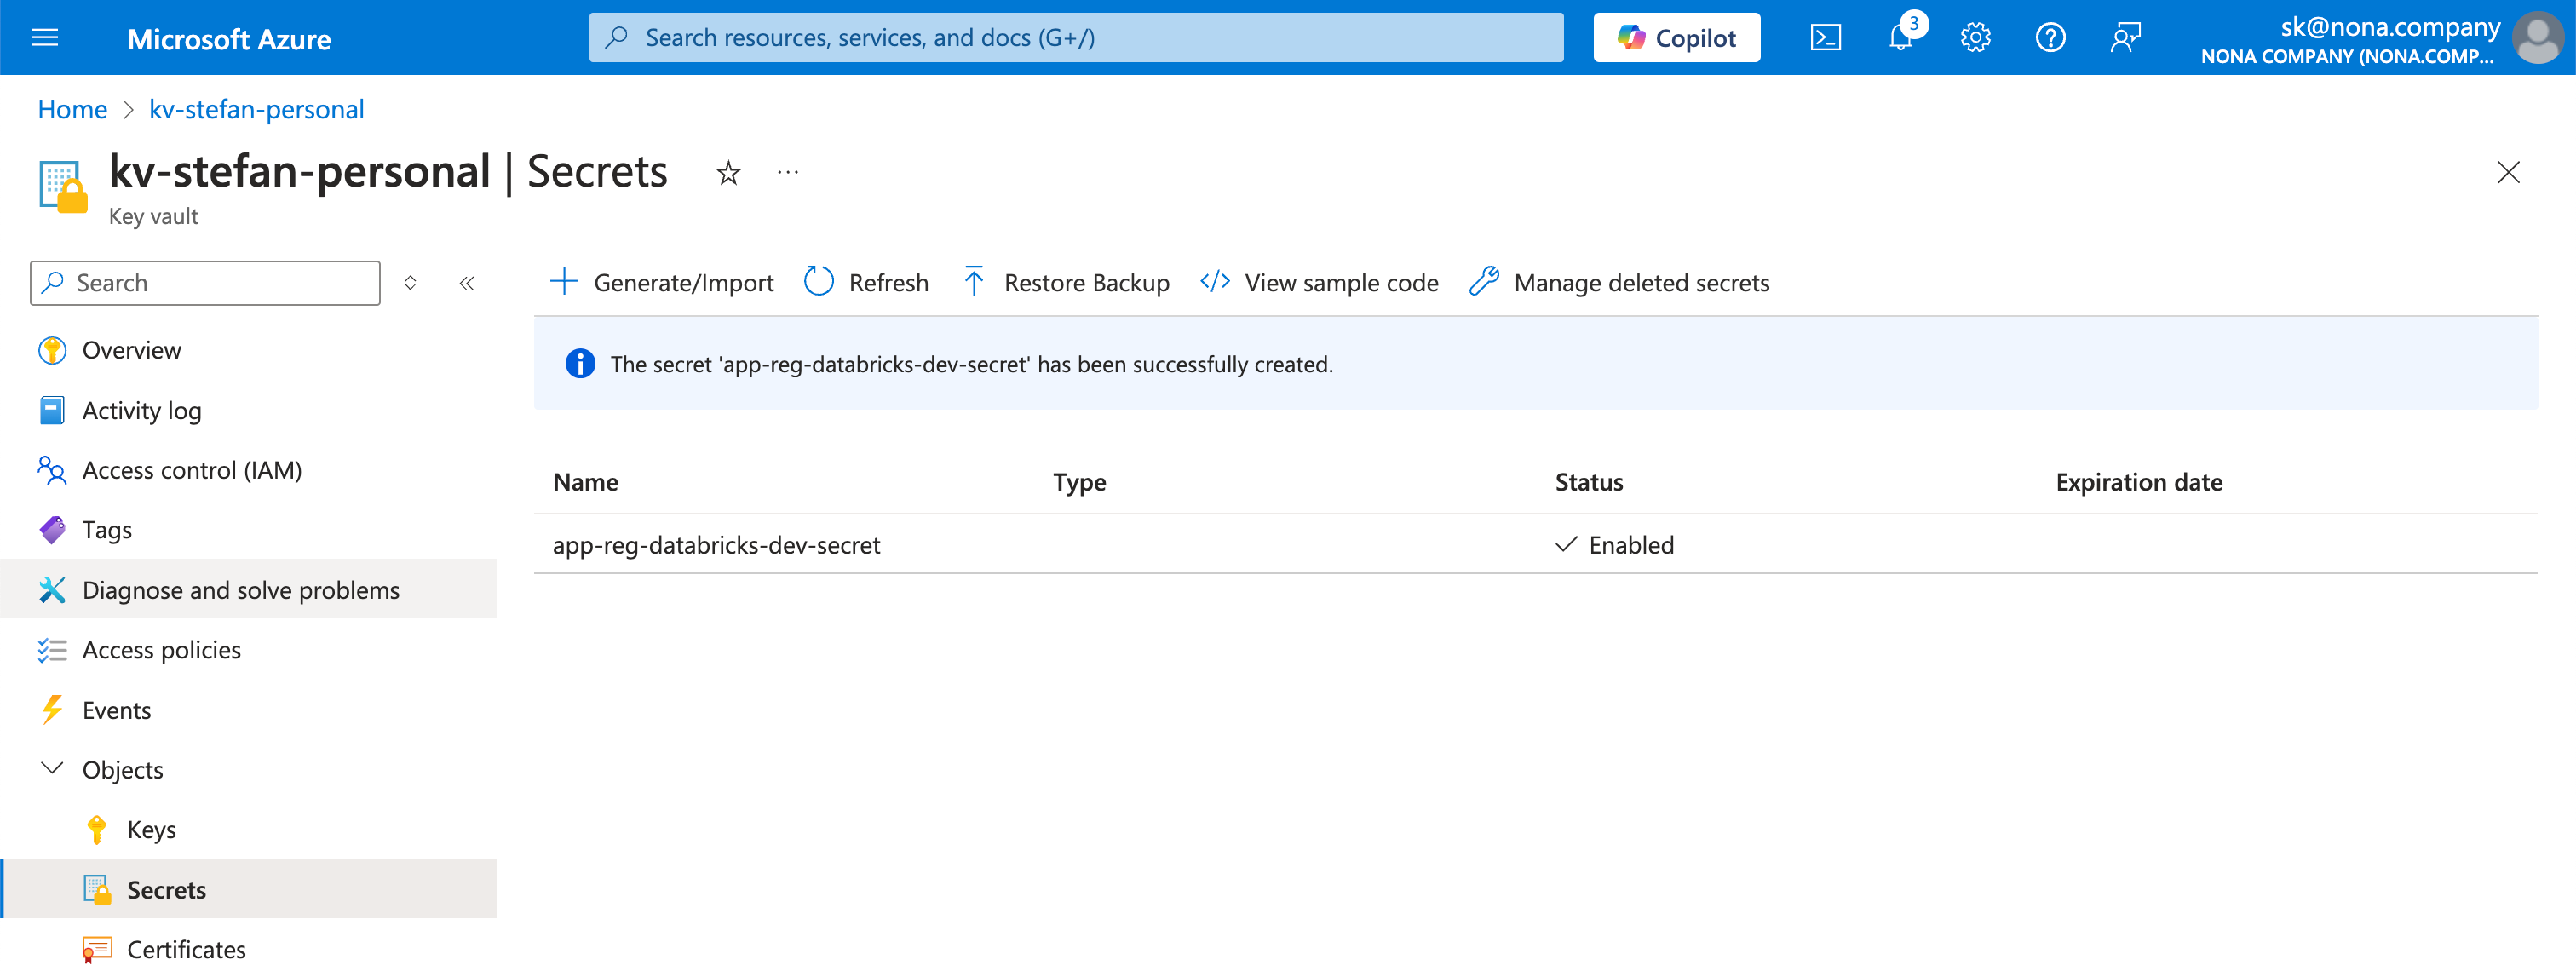
I store such information in an Azure Key Vault.
Add Service Principal to the Databricks Account and Workspace
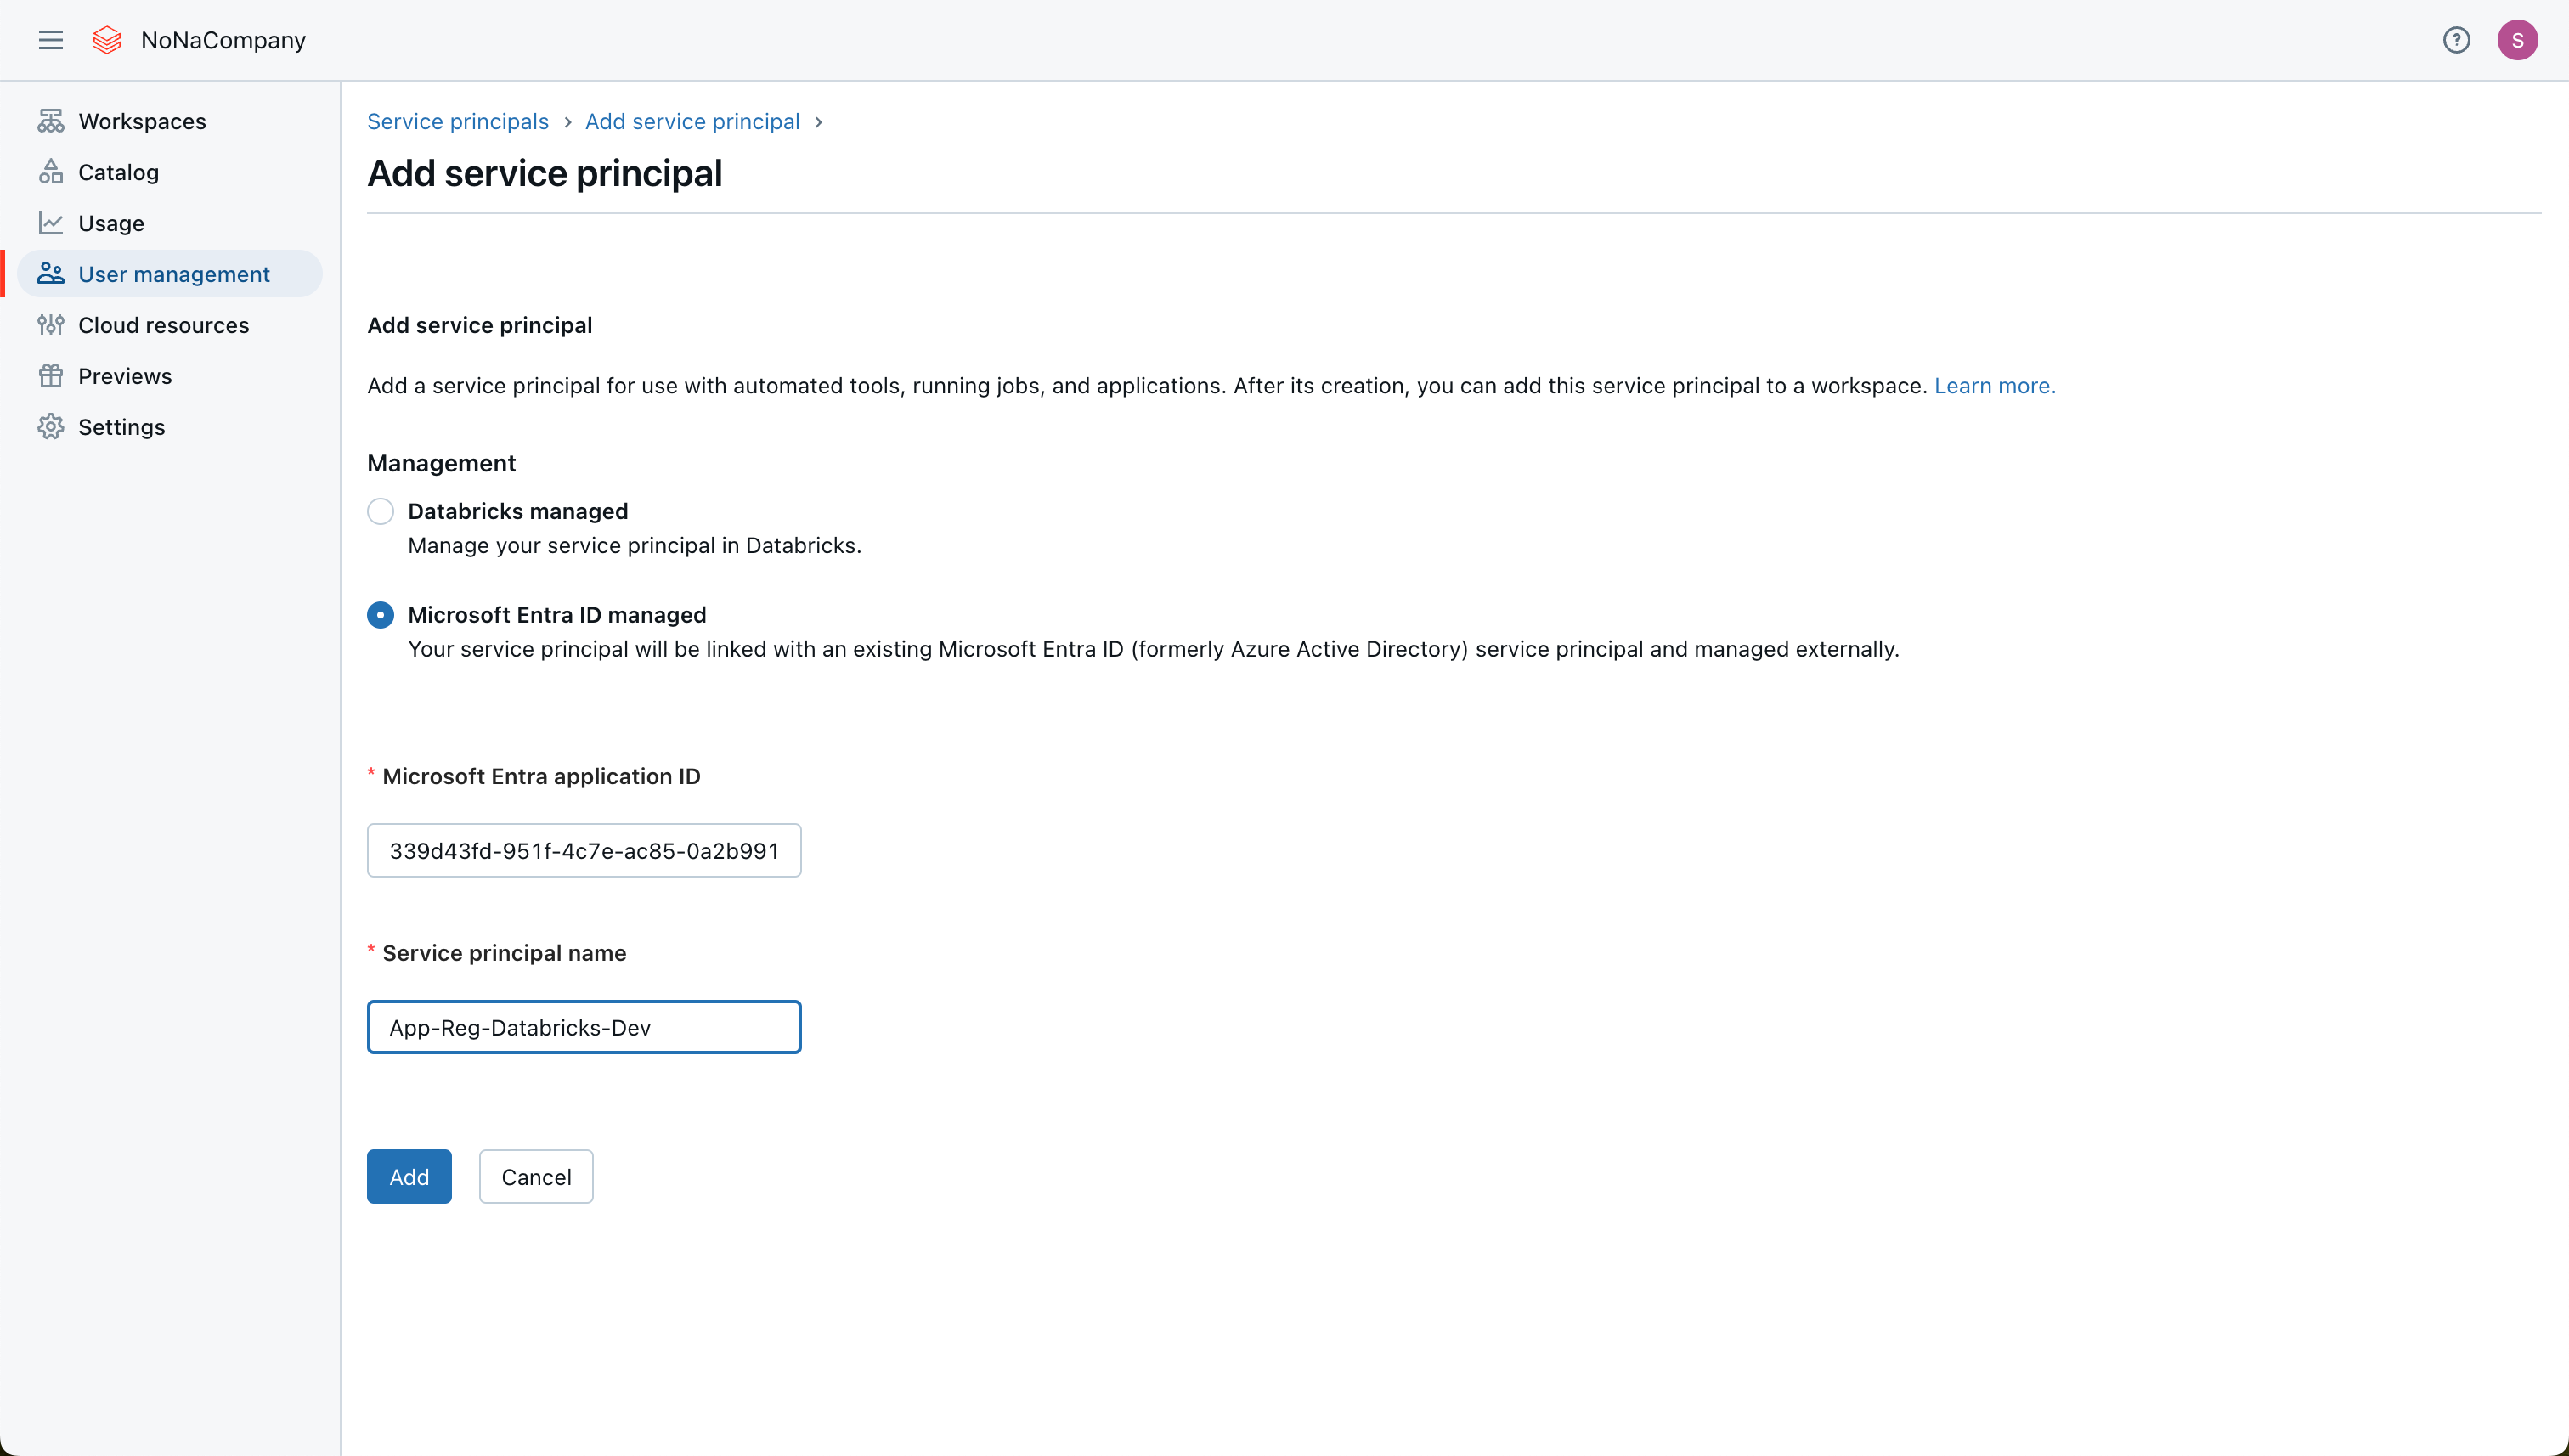
I go to the Databricks account for user management in the next step. I add a new service principal under the “Service principals” tab.

I select “Microsoft Entra ID managed” and assign a descriptive name accordingly.
Now I switch to the Databricks Workspace, go to Settings, “Identity and access,” and click Manage for the Service Principals.
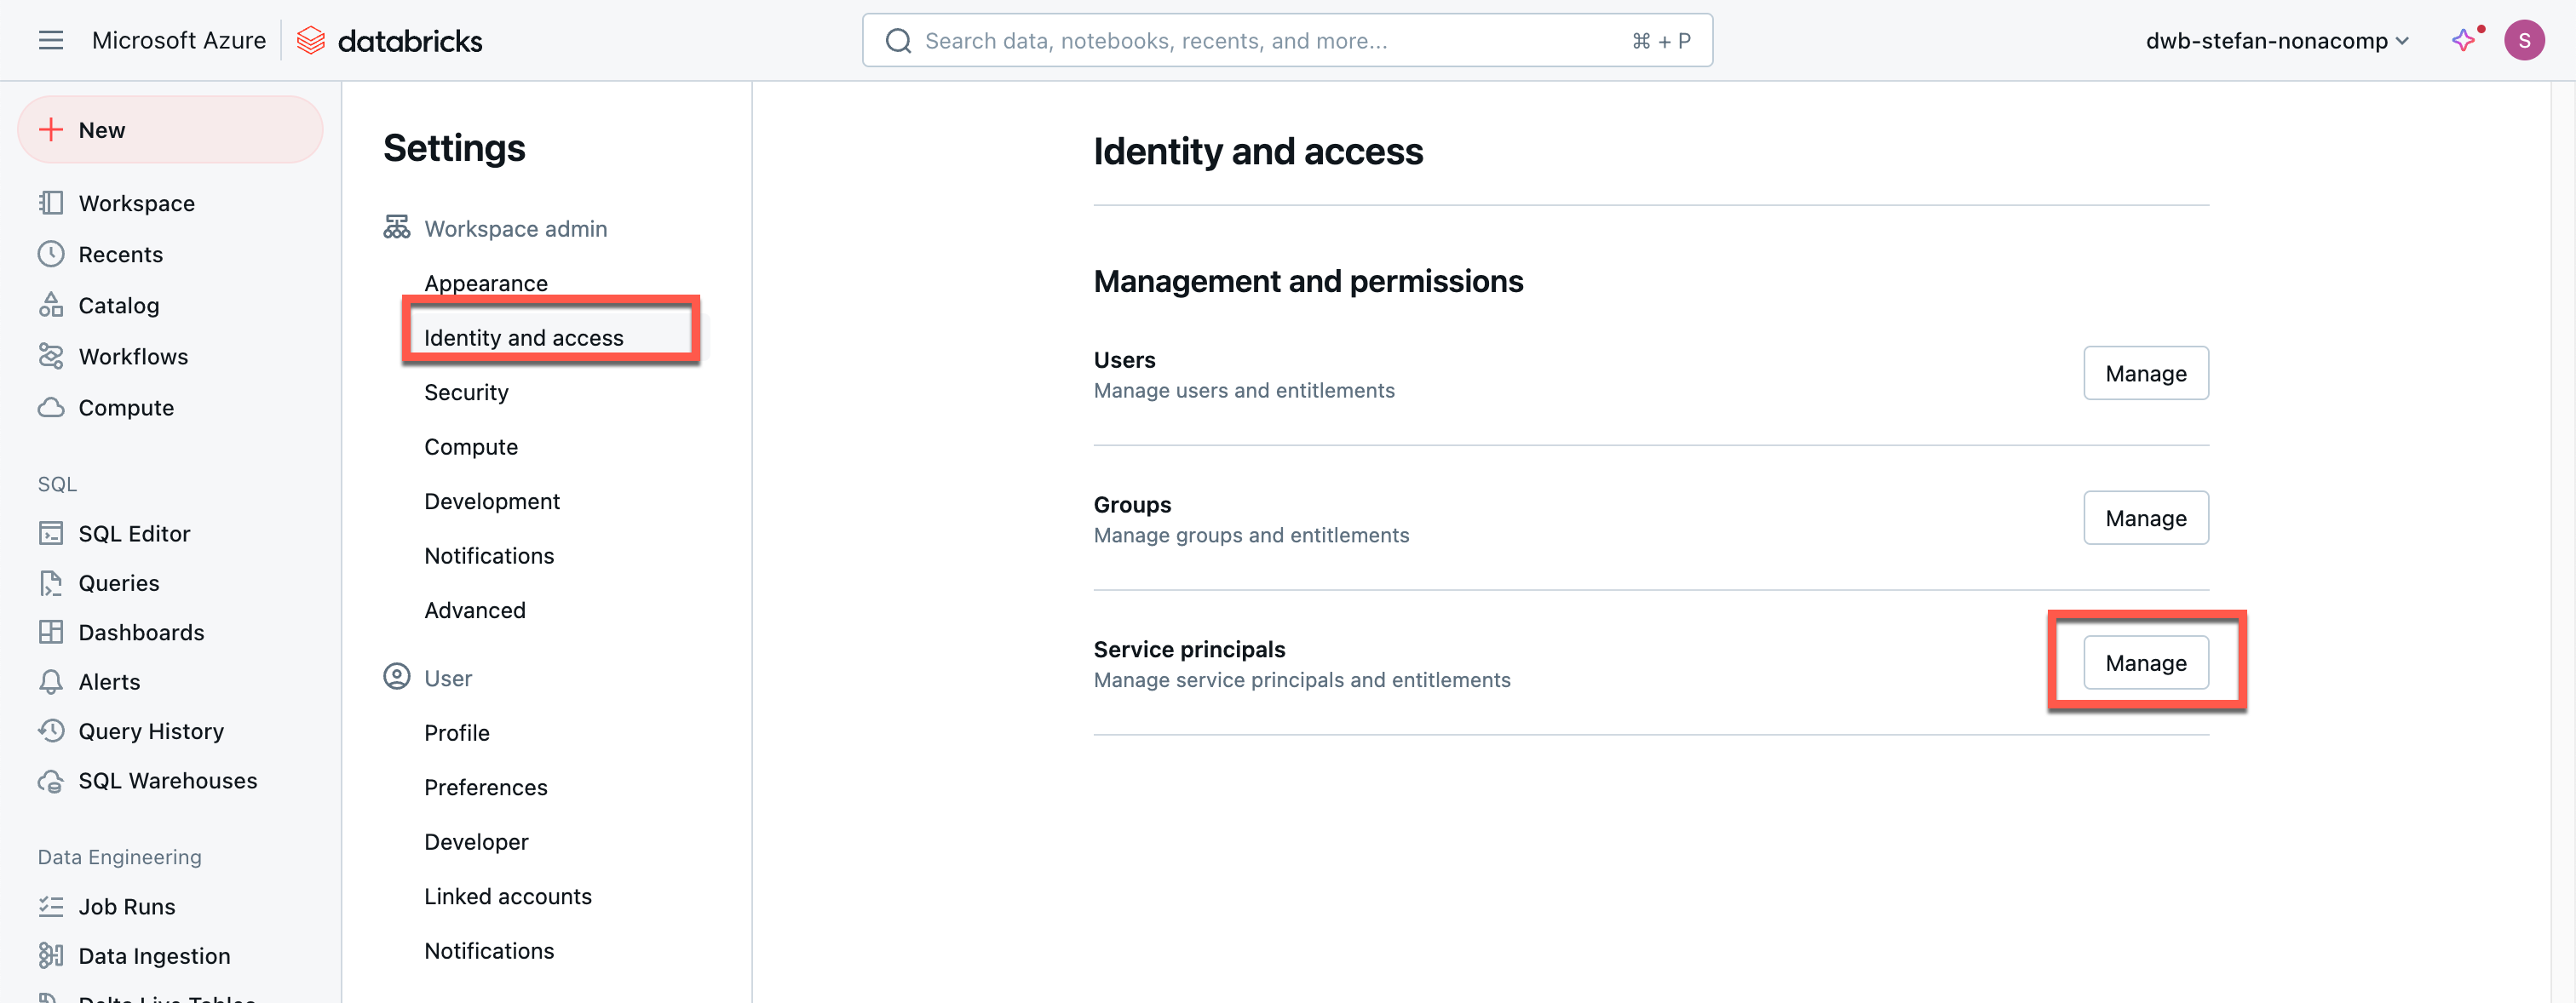
The service principal can now be searched for by name.
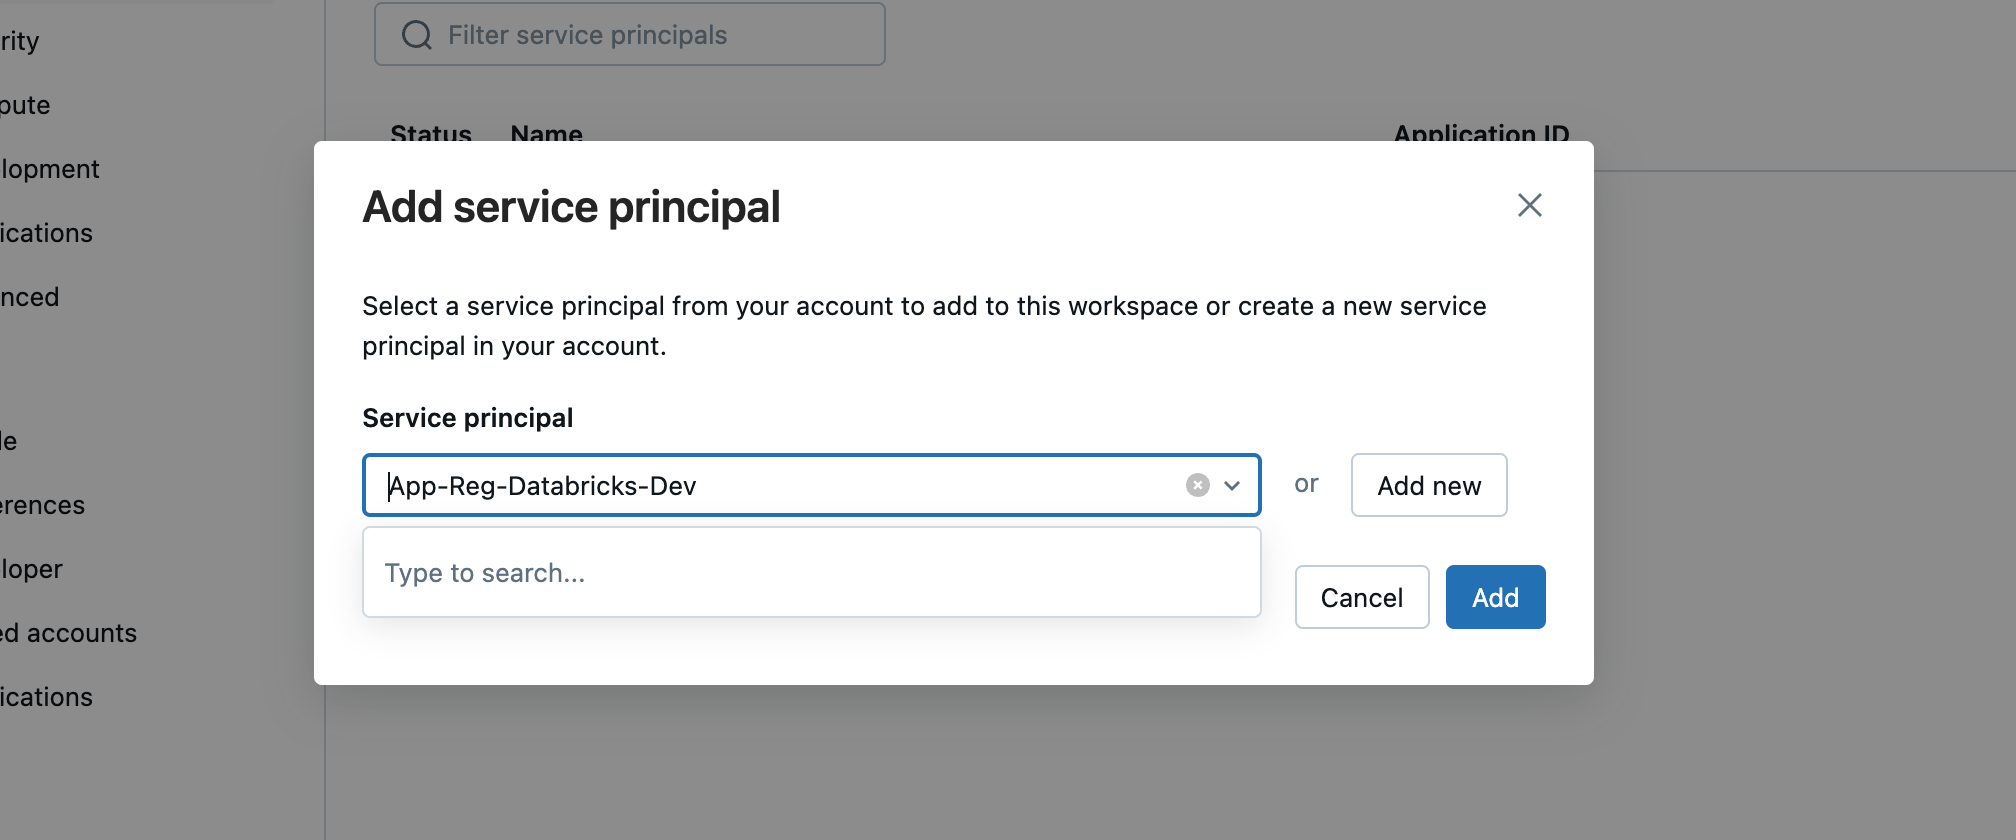
When the service principal has been added, I click on the name.

Now, I can make various settings, such as creating a secret.
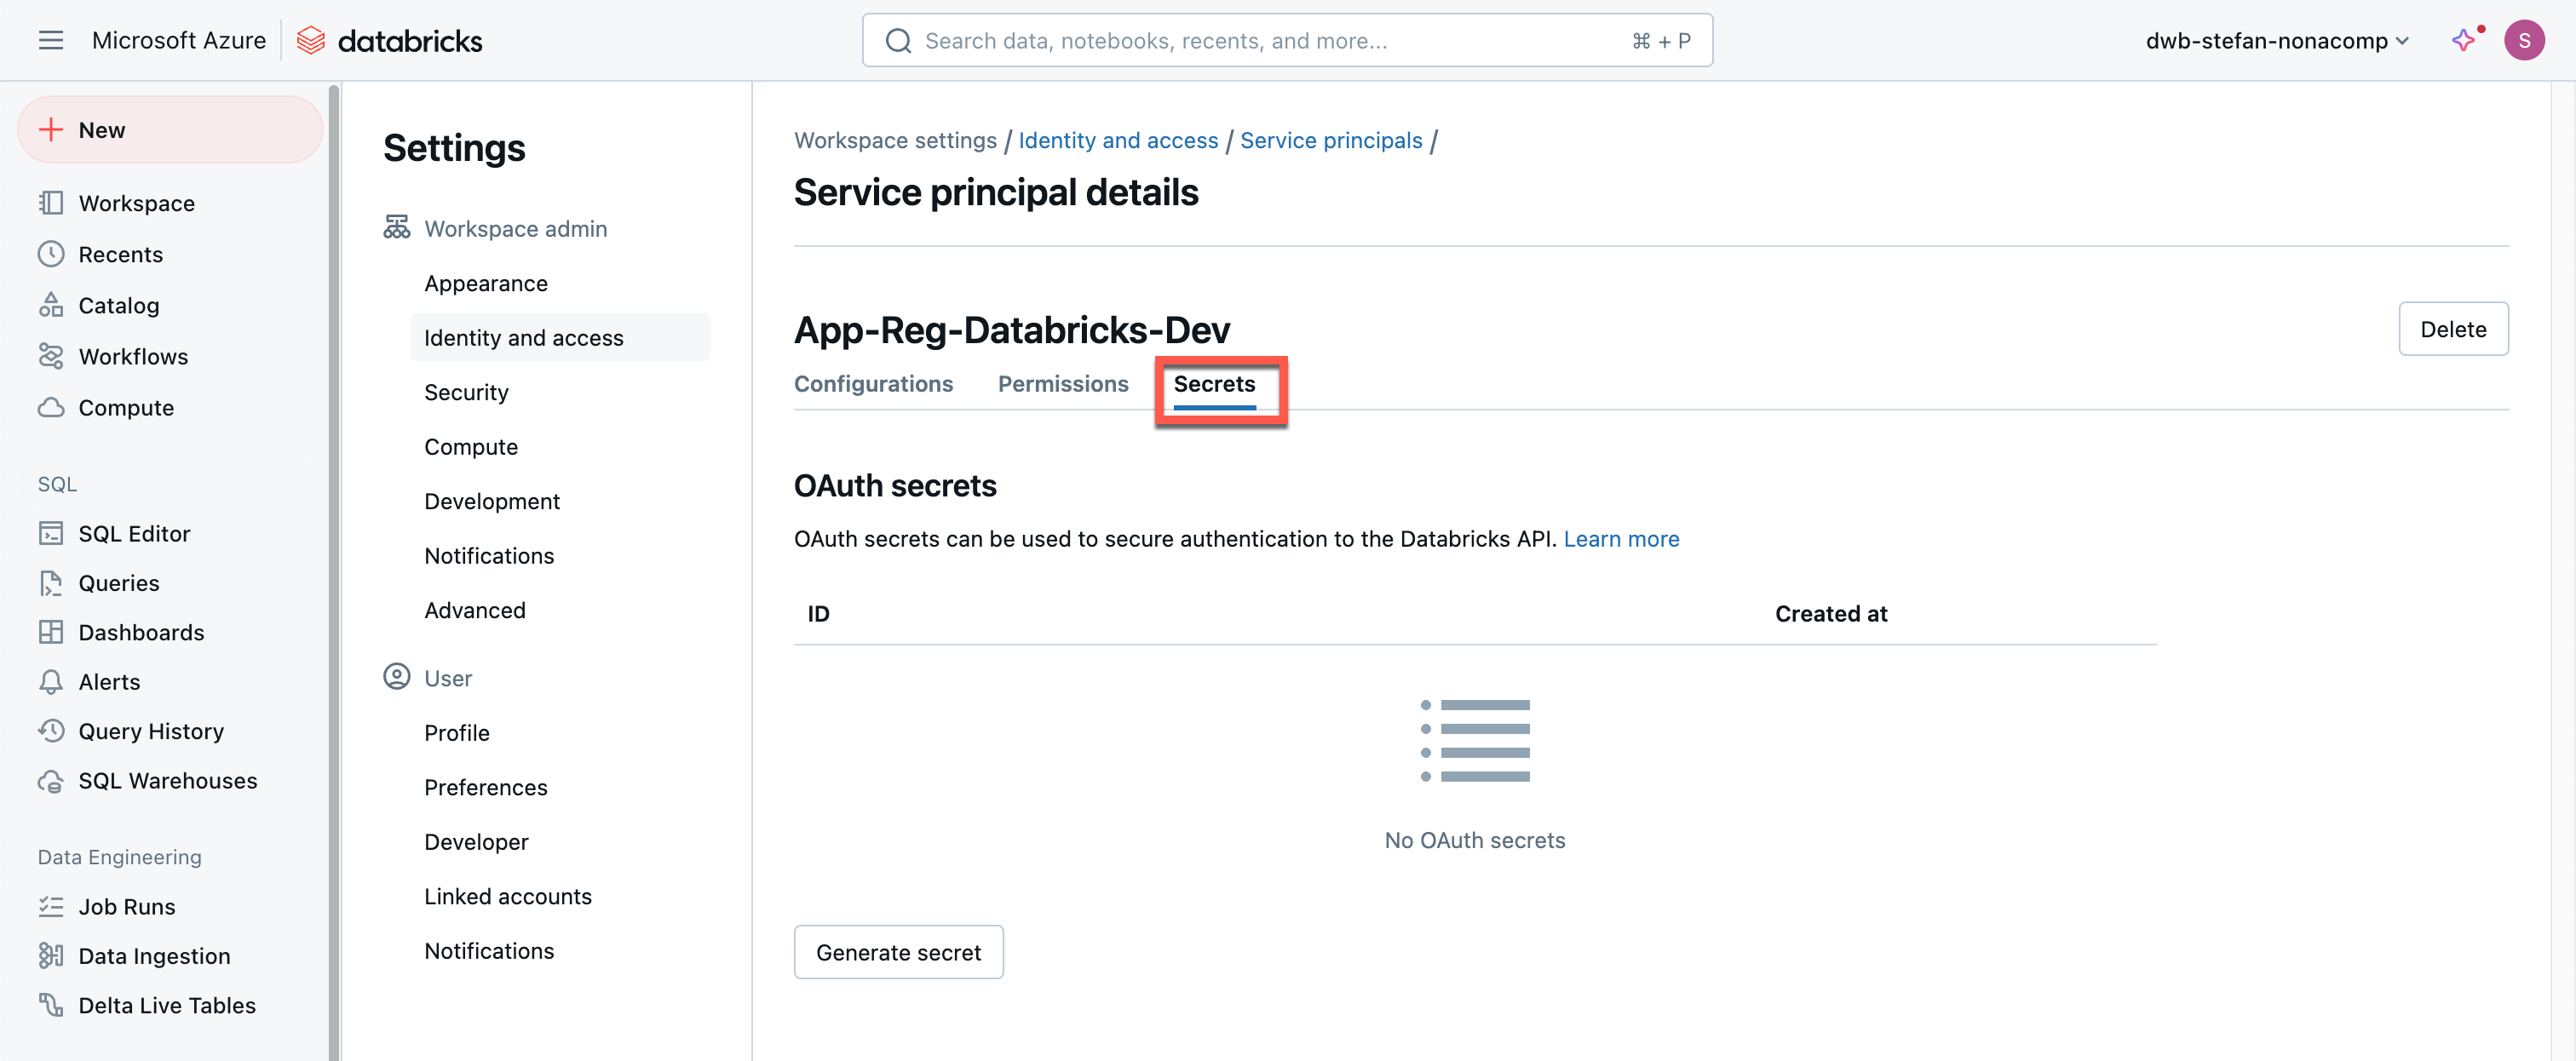
After I have created a new secret, it will be displayed once, and you can copy it.
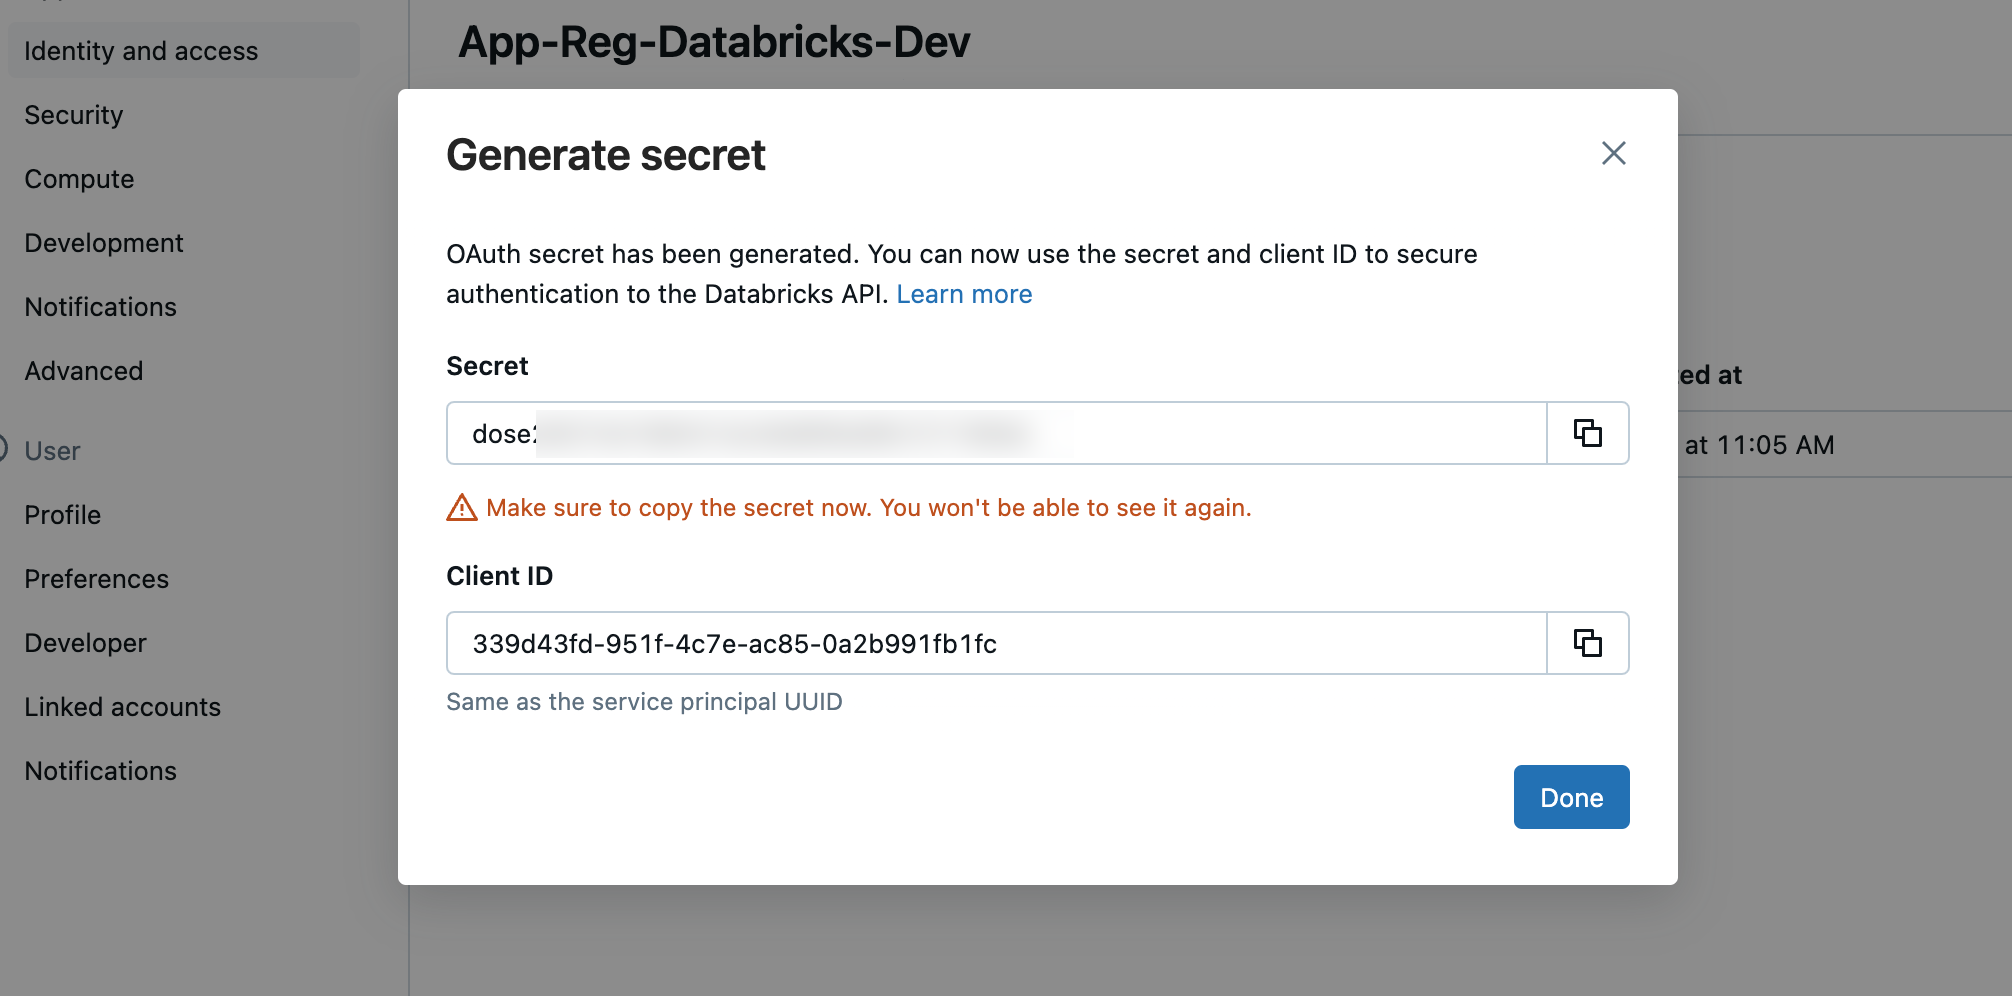
I will also save this secret in my KeyVault.
Now, I want to add this Authentication method. For this, I will directly add the entries in the .databrickscfg-File. The first Entry is for Account-Level operations and should look like this:
|
|
In my example, it looks like this:
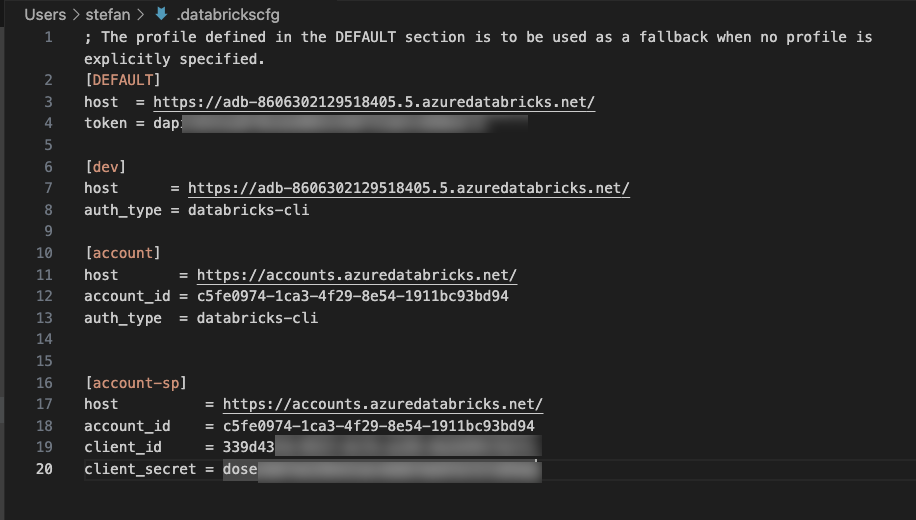
Important: You must add the OAuth Secret from Databricks, not the one generated in Azure!
I then want to run a command and add the profile name to the command.
|
|
When I run a command, I get this error message:

That’s because the Service Principal doesn’t have enough rights. So, I went to the account under User Management, Service Principal, and added the “Account admin” role to the Service Principal.

For Workspace-Level commands, I add another entry in the databrickscfg-File:
|
|
In my example, it looks like this:
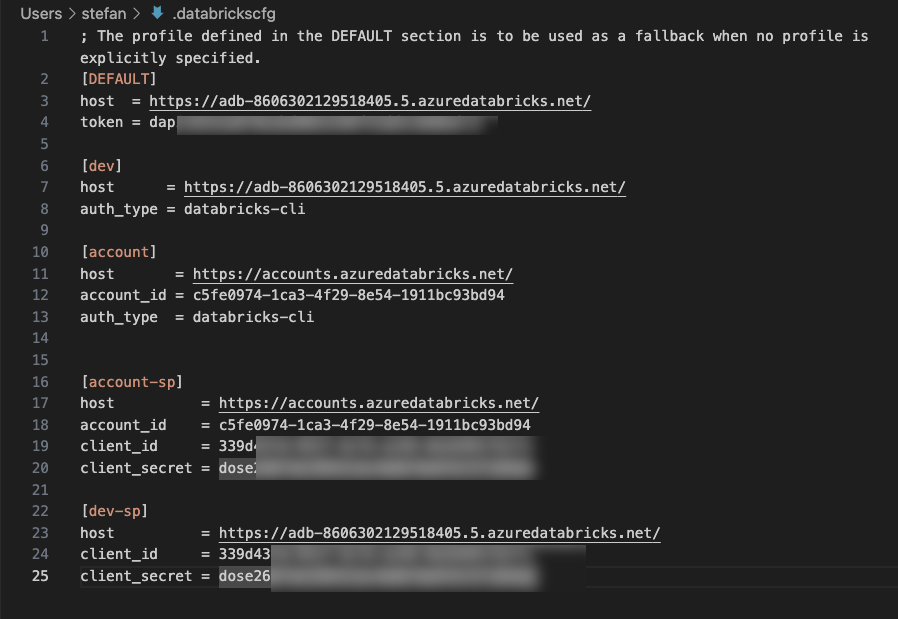
To test the connection, I again specify the corresponding profile in the command.

However, I do not get a value back here, but with the dev profile, I get the information. Again, a missing authorization is the problem. In the Databricks workspace, I add the service principal to the administrator group:
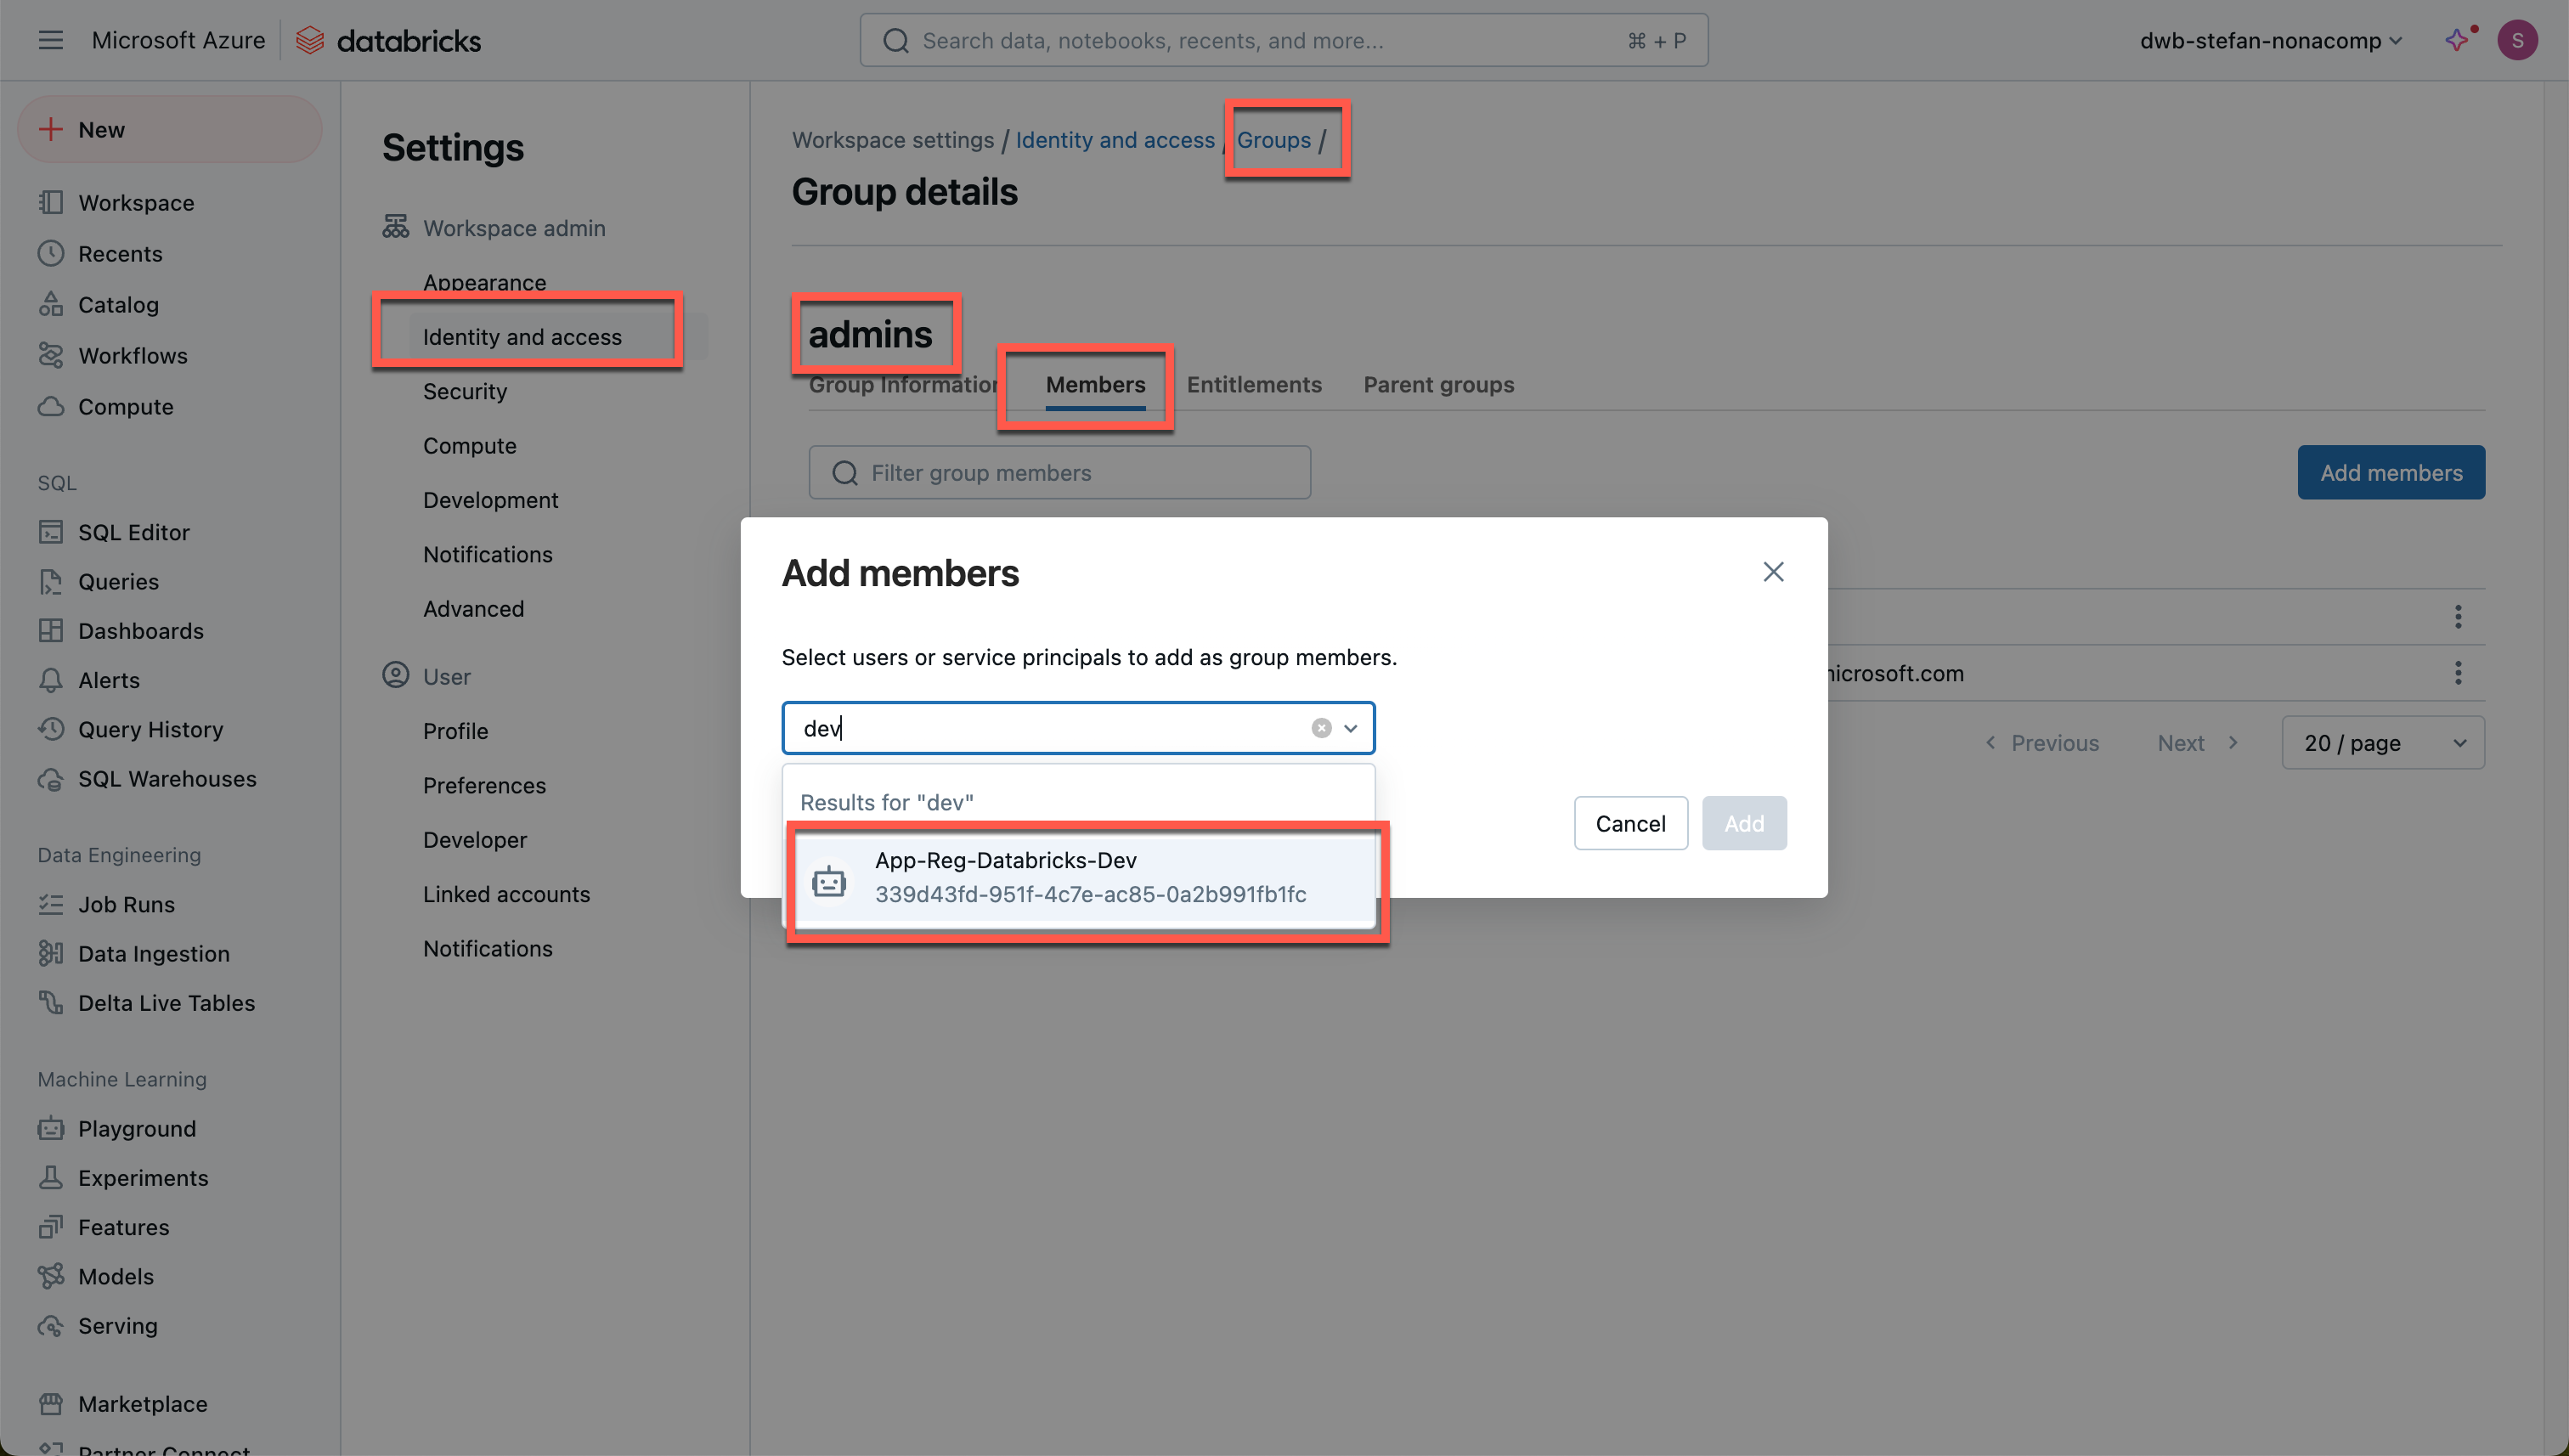
If I now call up the command again, it works accordingly:

In a following article, I will deal with the individual commands of Databricks ClI.
