Introduction
It is the typical situation of a legacy data warehouse: there are not enough hours in the night! This means that for one of my customers, the nightly loading of the data warehouse takes longer and longer. The nightly ETL route takes around 5 hours to load a few GB of data into the server. Sometimes it even takes 7 or 8 hours.
The SQL server was installed several years ago. For cost reasons, the DWH, SQL Server Integration Services (SSIS), and SQL Server Analysis Services (SSAS) are operated on the same server. It is, therefore, quite possible that the preparation of the data is not completed until 10 o’clock in the morning. This situation is not satisfactory.
For this reason, we decided to replace the ETL pipeline with Databricks. A new pipeline was built that processes the data directly with Databricks, and thanks to parallelization, the ETL pipeline now only takes 5 minutes instead of 5 hours.
But now we are faced with the task of getting the data from Databricks back into the SQL Server. Databricks is in the Azure Cloud; the SQL Server is in an on-prem data center. Well, there are various options. You could establish a network connection, for example, by setting up a VPN with IPSec or using Azure Data Factory to transfer the data from Databricks to on-prem via Self-hosted Integration Runtime. Or we could set up Airbyte locally in a Docker image. Or or or or. But we also had in mind that the local DWH and the associated SQL server would be replaced by Databricks in the near future anyway, so we wanted to find another solution that wouldn’t cause a lot of effort and costs. We then came across the solution of integrating Databricks directly into the SQL server as a linked server.
Source data in Databricks
Of course, I can’t show the customer’s data in this blog post. That’s why I’ve set up a small test environment. In my Databricks instance, I have a customer table that I would like to make available in my SQL server. It looks like this:

Databricks SQL Warehouse
To read the data from Databricks, I need an SQL warehouse. As an SQL warehouse in Databricks, I created the smallest serverless version, which terminates after 5 minutes. This should be more than sufficient in terms of performance, as we are only making one simultaneous connection. If required, this could be scaled.

When I click on “Connection details,” I see the information I need to establish a connection with it:
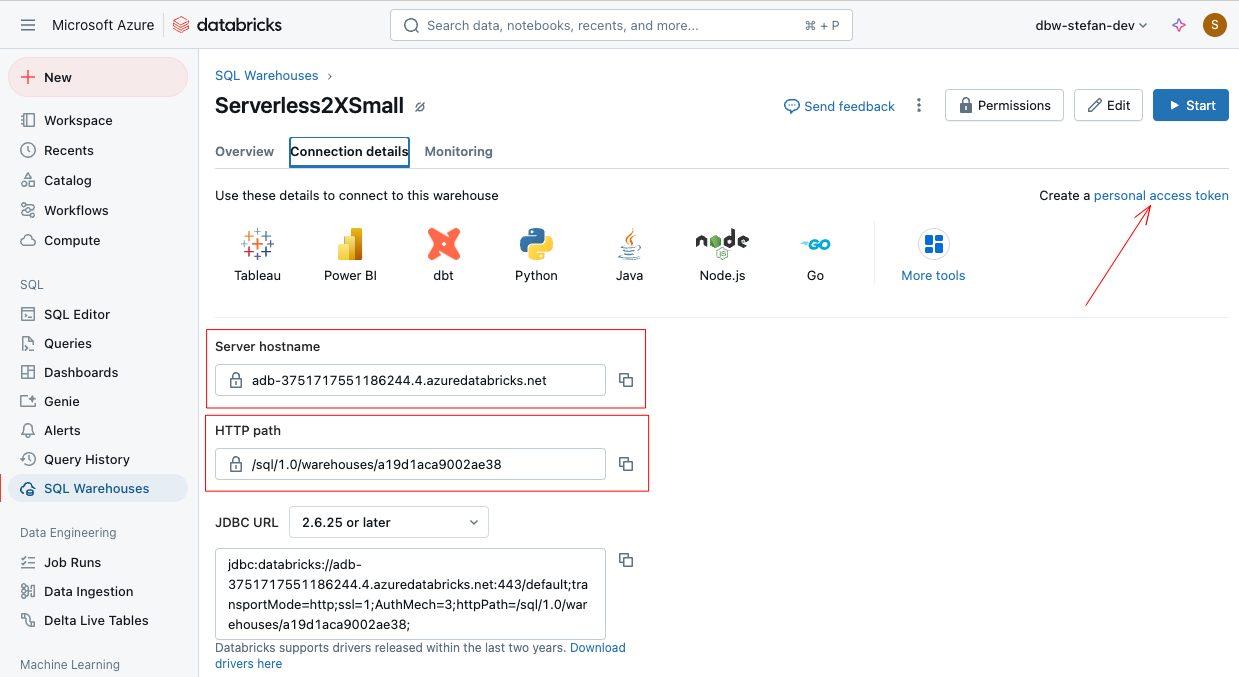
The “Server hostname” and the “HTTP path” are important here. I copy and save both values in a safe place. For authentication, I also need a personal access token, which I can create at the top right.
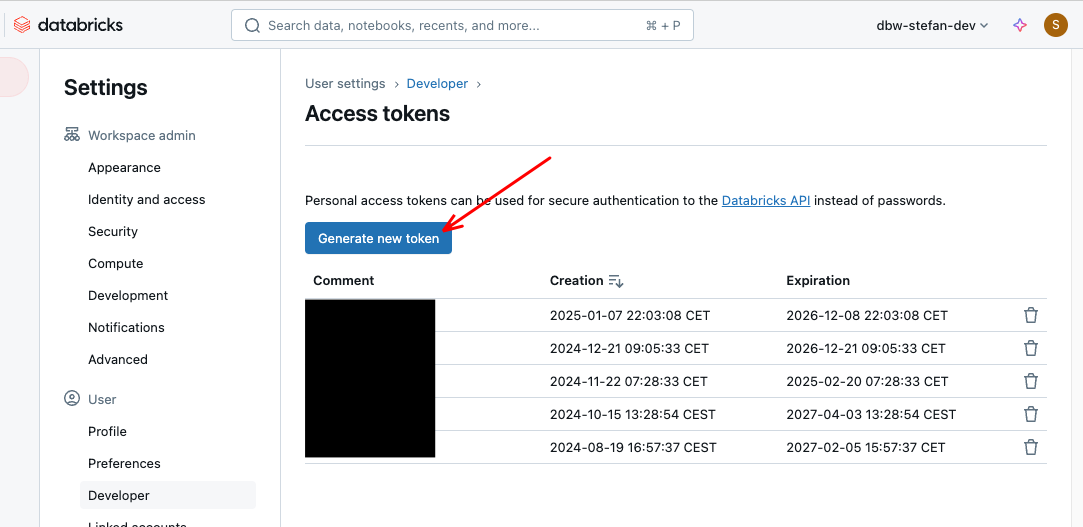
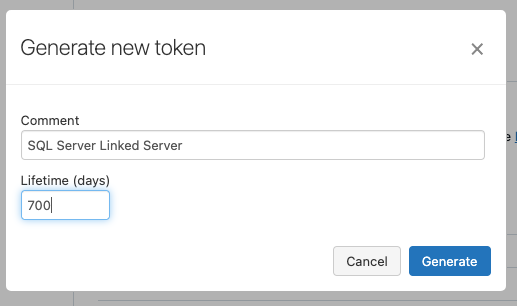
I click on “Generate new token,” assign a descriptive name, and define the lifetime of the token.
The content of the token is then displayed once. I also copy this content and save it in a safe place.
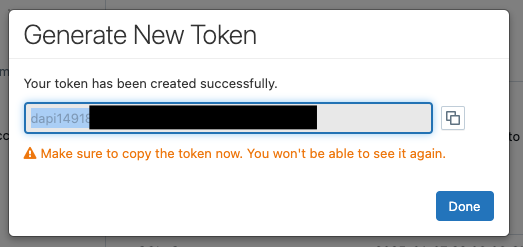
‼️Caution! Personal Access Tokens should be used with caution. If I use this token somewhere, then it is used in the context of my user account. This means that if I have elevated rights, then the process7person using this token has the same rights as my user account. You should also bear in mind that tokens do not offer the same level of security as machine-2-machine authentication. In our case, we were aware of these challenges. It must also be clearly stated that this is a simple transitional solution, as the SQL Server will soon be replaced.
Setting up SQL Server
In order to read the data in the SQL Server from Databricks, we need a corresponding driver. These are provided by Databricks on the following website:
https://www.databricks.com/spark/odbc-drivers-download
As our SQL Server runs on a Windows operating system, I choose the appropriate version.

After installing the Simba driver, the server may need to be restarted. After the restart, I log back into the server and start the SQL Server Management Studio. When I connect to the local SQL Server, I open the structure in the Object Explorer and navigate to “Server Objects.” There is a folder called “Linked Servers”.

With the right mouse button, I click on “Linked Servers” and create a new one.

Only three fields need to be filled in below:

- Linked Server: Name of the linked server connection
- Provider: Here, I select “Microsoft OLE DB Provider for ODBC Drivers” in the dropdown.
- Provider String: The Provider String contains the connection information to the Databricks SQL Warehouse. This string should be entered on one line. The information is clearly shown below. You only have to adapt three entries (<REPLACE….); the rest can be copied 1:1.
|
|
After clicking on “OK”, the new linked server is displayed.

I can now navigate to it and open the catalog. If the warehouse is not started, it takes a moment until it is online. With serverless, this does not take long. If you have a Pro or Classic Warehouse, you will have to wait longer.

A query can now also be sent. But beware, Databricks Unity Catalog has a 3-level namespace, unlike SQL Server! This means that we cannot query with pure T-SQL; we must use an OpenQuery. A simple query then looks like this:
|
|
And the results are returned.

So that I don’t have to copy the data from the linked server over the Internet every time; I can also save the data to a local table in one go.
|
|

The data can now be processed locally as usual.
|
|

Conclusion
In this post, we explored how to seamlessly integrate Databricks SQL Warehouse as a linked server in MS SQL Server to bridge the gap between cloud and on-premise environments. This approach allowed us to replace a time-consuming ETL process with a more efficient pipeline that drastically reduced processing time from several hours to just minutes.
By leveraging Databricks’ parallel processing capabilities and the simplicity of a linked server setup, we were able to create a cost-effective, low-effort transitional solution. However, it’s important to note that this setup is not intended as a long-term architecture but rather as a practical workaround while transitioning to a fully cloud-based data platform.
Ultimately, this solution demonstrates the flexibility of Databricks Lakehouse and its ability to support hybrid scenarios. It highlights that even legacy systems can benefit from modern cloud services without requiring an immediate and costly overhaul. By iteratively improving the data infrastructure, businesses can ensure operational continuity while paving the way for future innovation.
The next step in our journey will be to complete the migration and fully unlock the potential of Databricks, allowing for even more efficient data processing, real-time insights, and simplified maintenance.
