Intro
In this step-by-step guide, I describe how to create a Databricks Lakehouse environment in the Azure Cloud within 30 minutes. This guide is aimed at people who are new to Databricks and want to create an environment for a proof of concept or for practicing.
Of course, you can take your first steps with Databricks with the Community Edition of Databricks, which is available free of charge.However, this environment has various limitations, for example no Unity Catalog and various other functionalities are also missing. I therefore recommend creating a Databricks setup in your own environment in which you can test all functionalities. No major costs are generated for operation, as small clusters can be used for most tests.
I would like to point out that the aim of this guide is to set up an environment quickly. In a productive environment, you would not do manual setups, but create the respective resources with IaC frameworks such as Terraform.
Before starting the actual setup, you need an Azure subscription in which you can create the corresponding resources. If you have never worked with Azure before, it is worth reading this article: https://stefanko.ch/en/first-steps-with-the-azure-cloud/ As a starting point, I assume that a working subscription is available in the Azure Cloud.
Medallion Architecture
The setup is based on the Medallion architecture from Databricks:
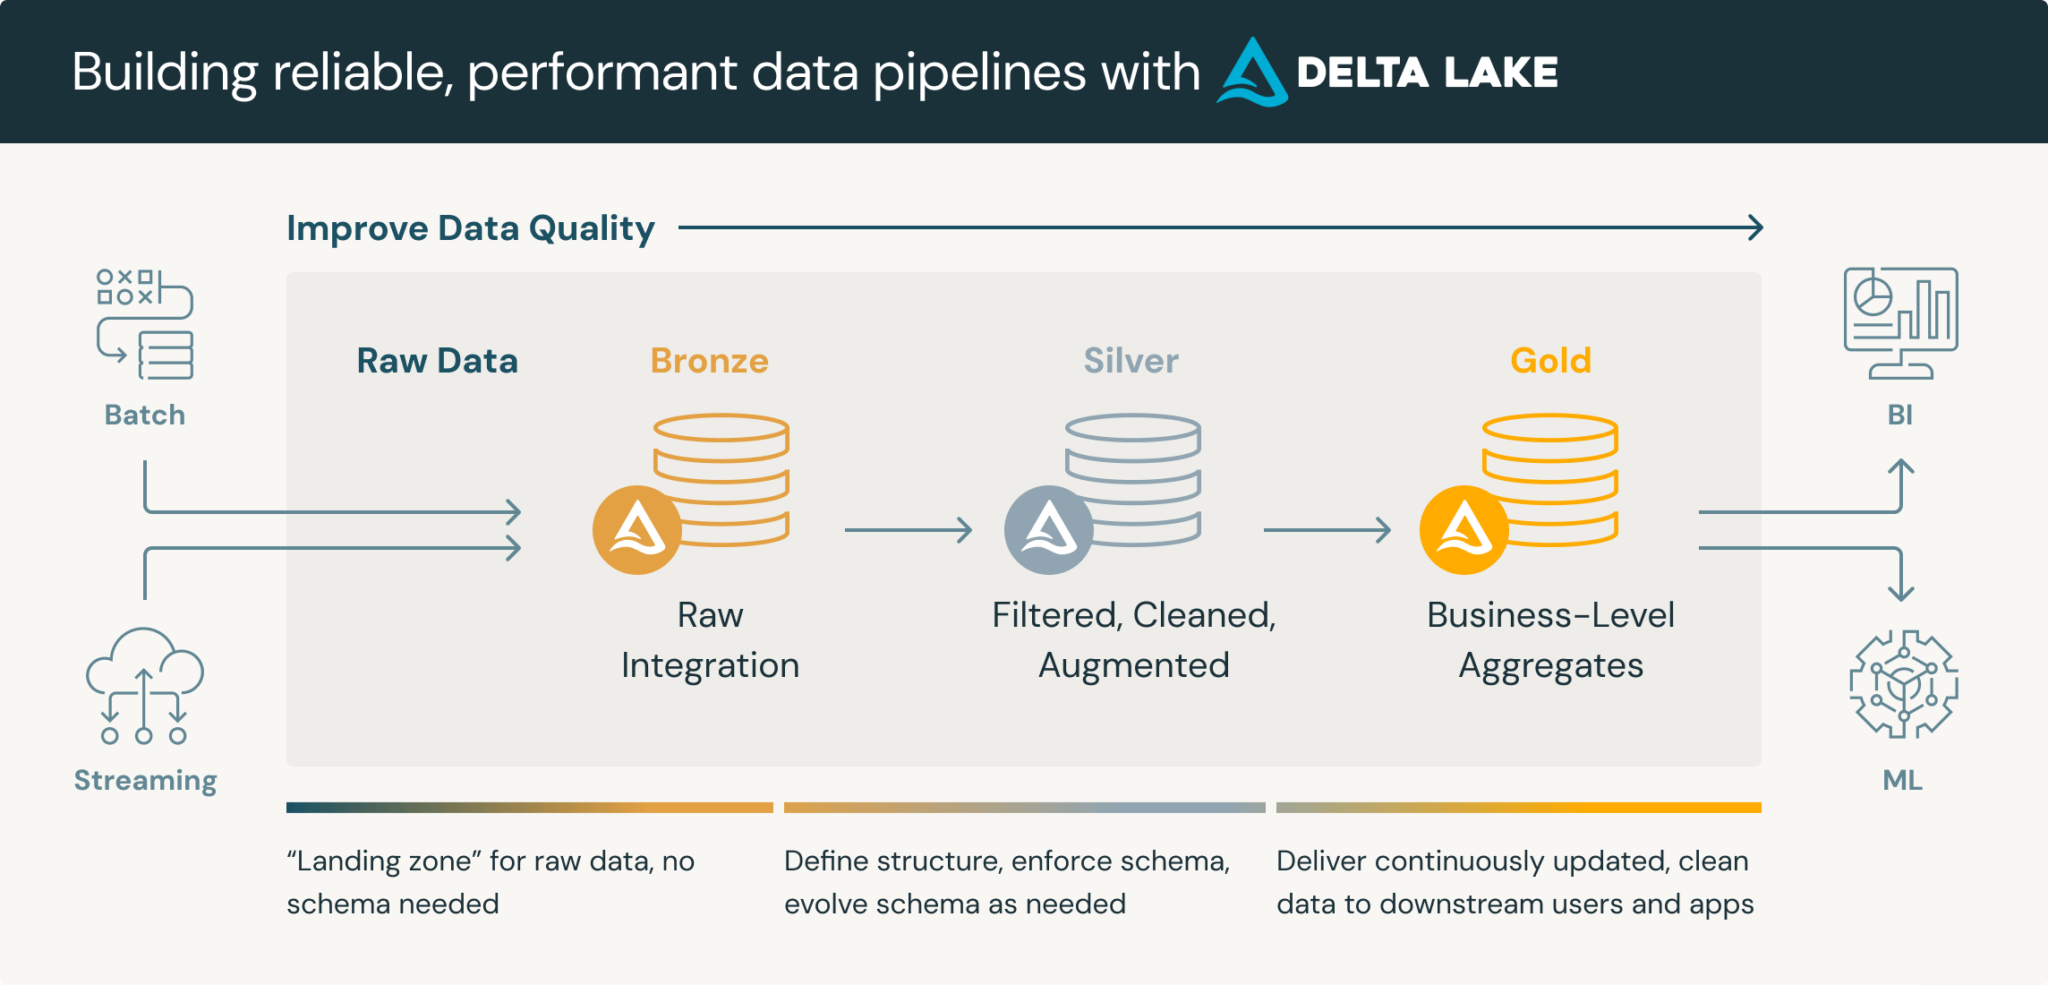
I extend the architecture with two additional zones, the “landing zone” and the “raw zone”. As the name suggests, these are used accordingly.
Landing zone: Delivery of files from third-party systems. This zone is transient, i.e. the data is only stored temporarily, processed by the data pipeline and the files are either moved to Raw or only the content is stored in Bronze. After processing, the data in the landing zone is deleted.
Raw-Zone: This is where the raw data is saved. In other words, the files are saved as they are delivered. This offers the advantage that the corresponding original data can always be accessed at a later date.
When the data is written to Raw or Landing depends on the corresponding use case. For certain scenarios, these zones can also be skipped completely and the data can be written directly to Bronze. Below is a schematic representation of the zones:
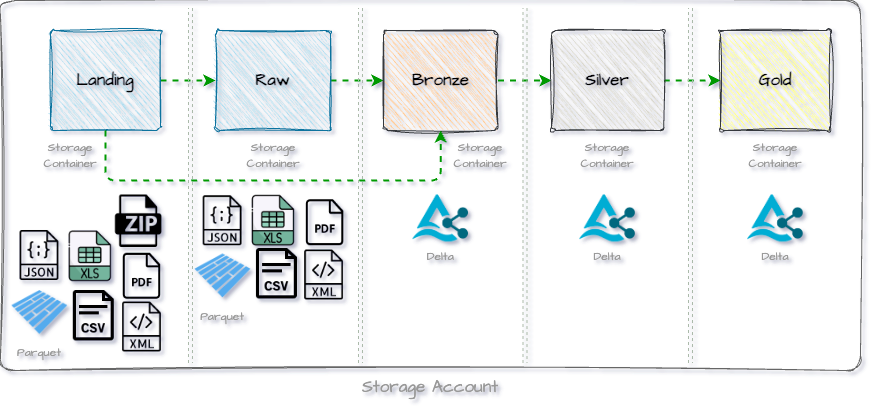
In the following setup, we will create a separate storage container for each zone.
Resource group
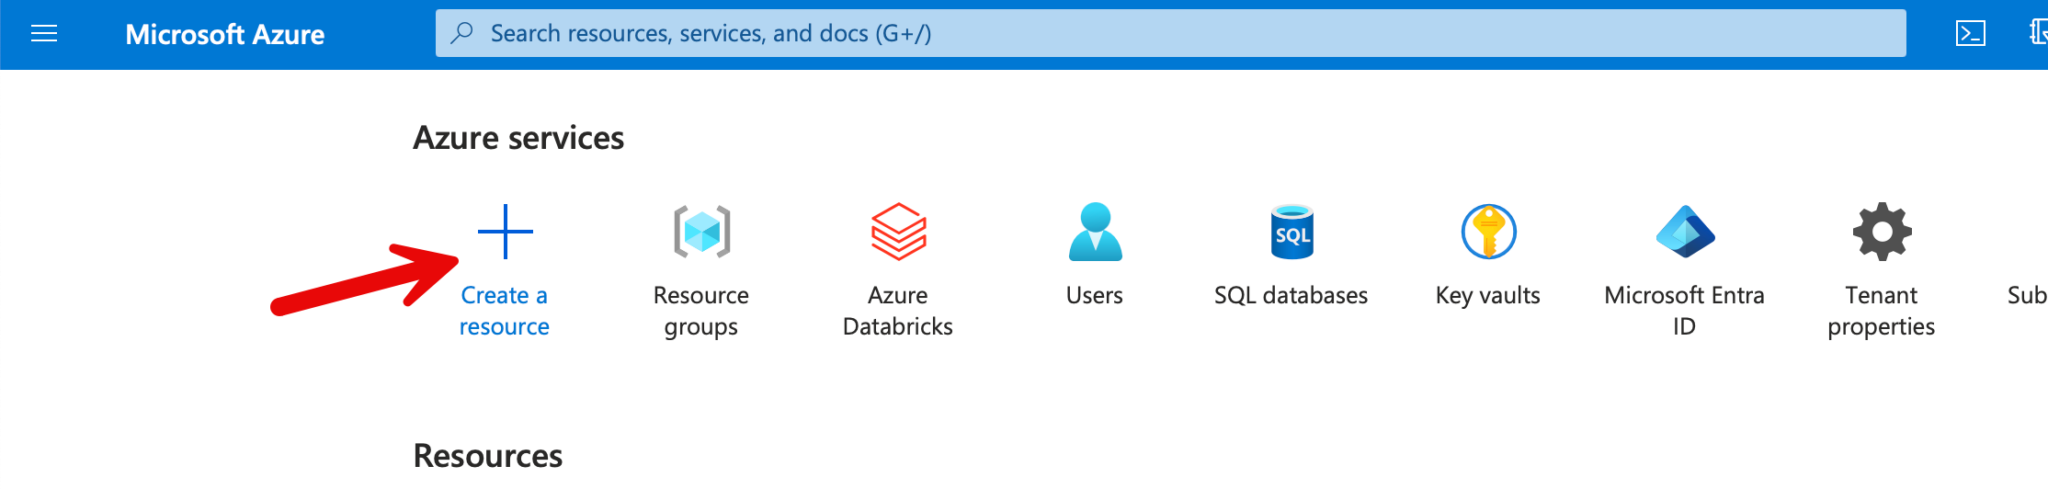
The first step is to create a resource group in which the workspace and the storage account are deployed. To do this, I click on “Create a resource”.
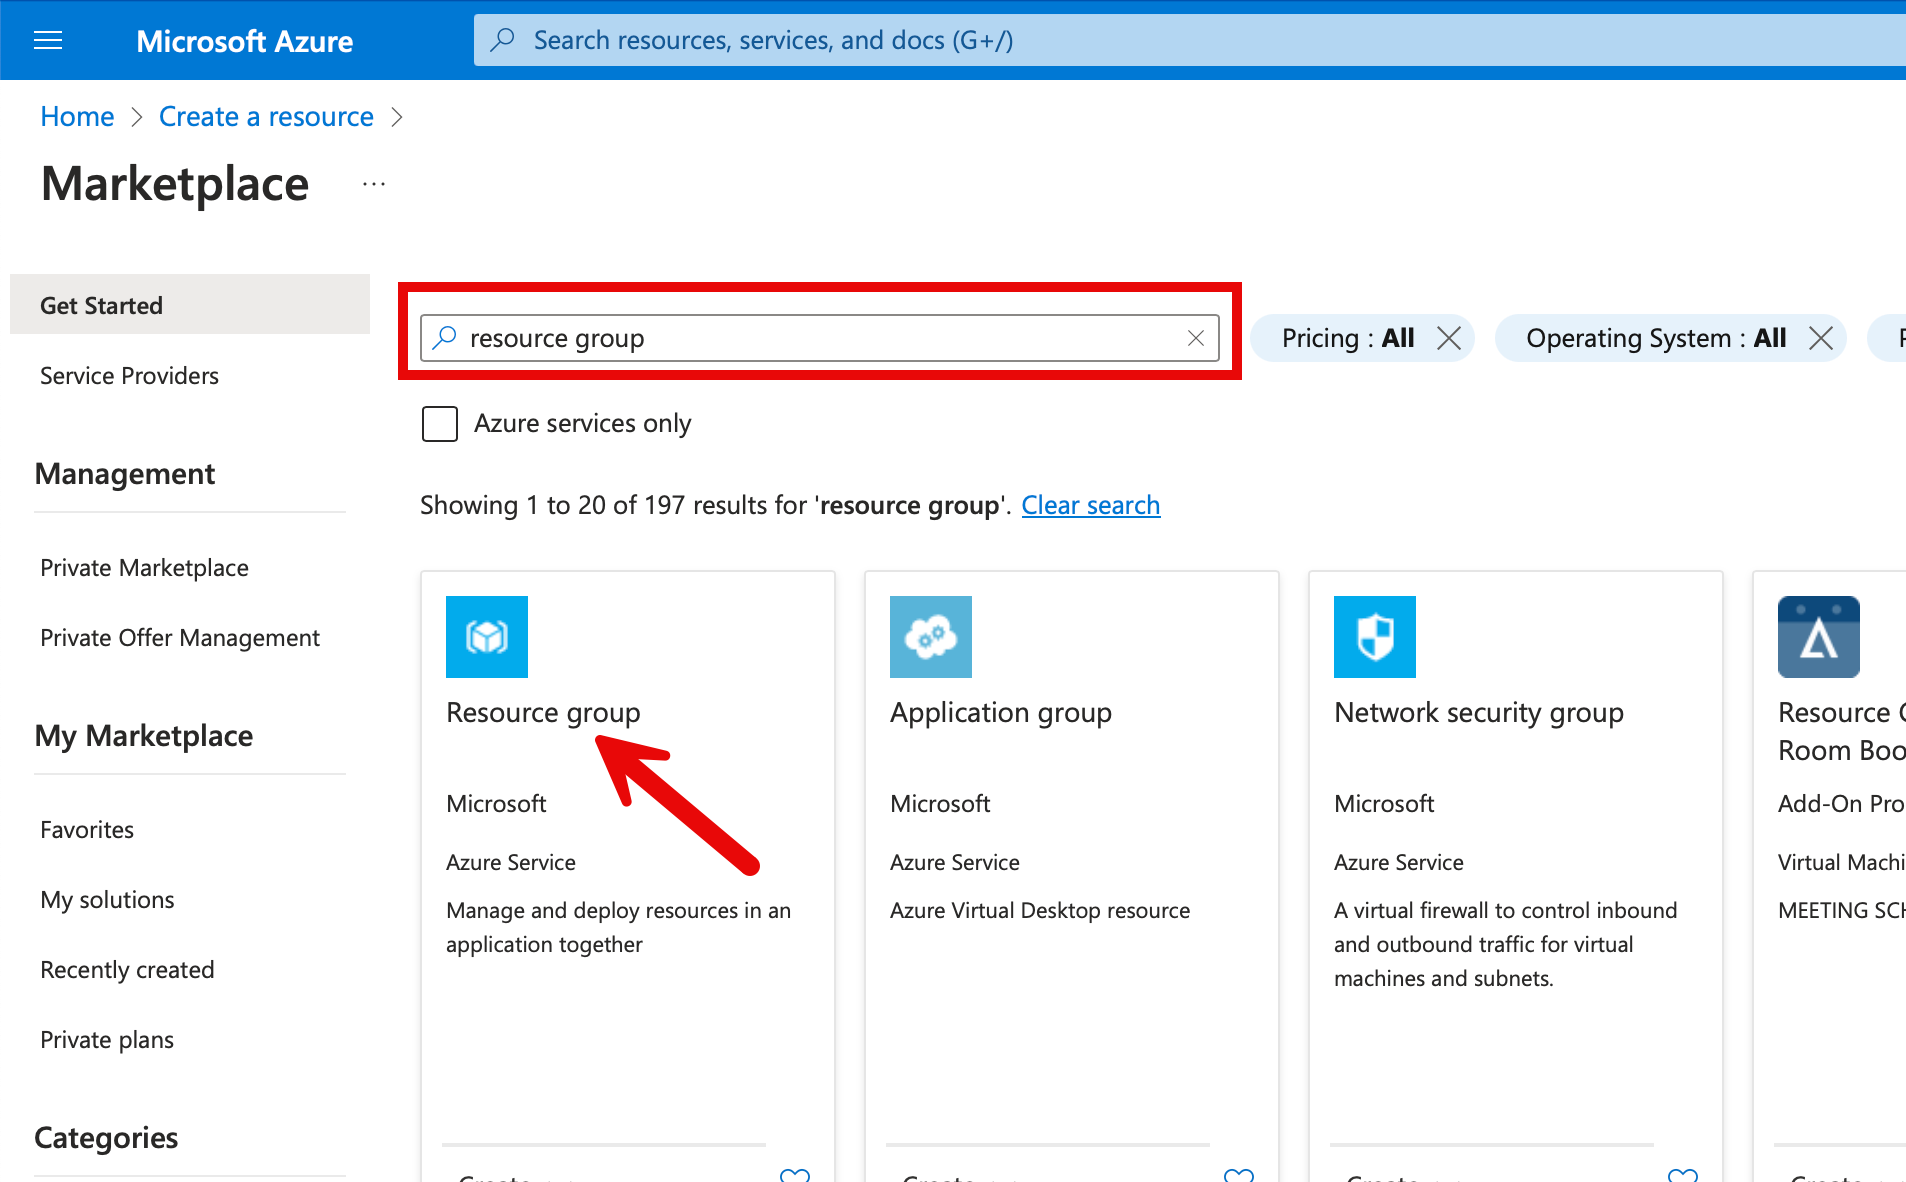
You can search for “resource group” in the search field, where the suggestions are then displayed. Click on the relevant resources to go to the settings.
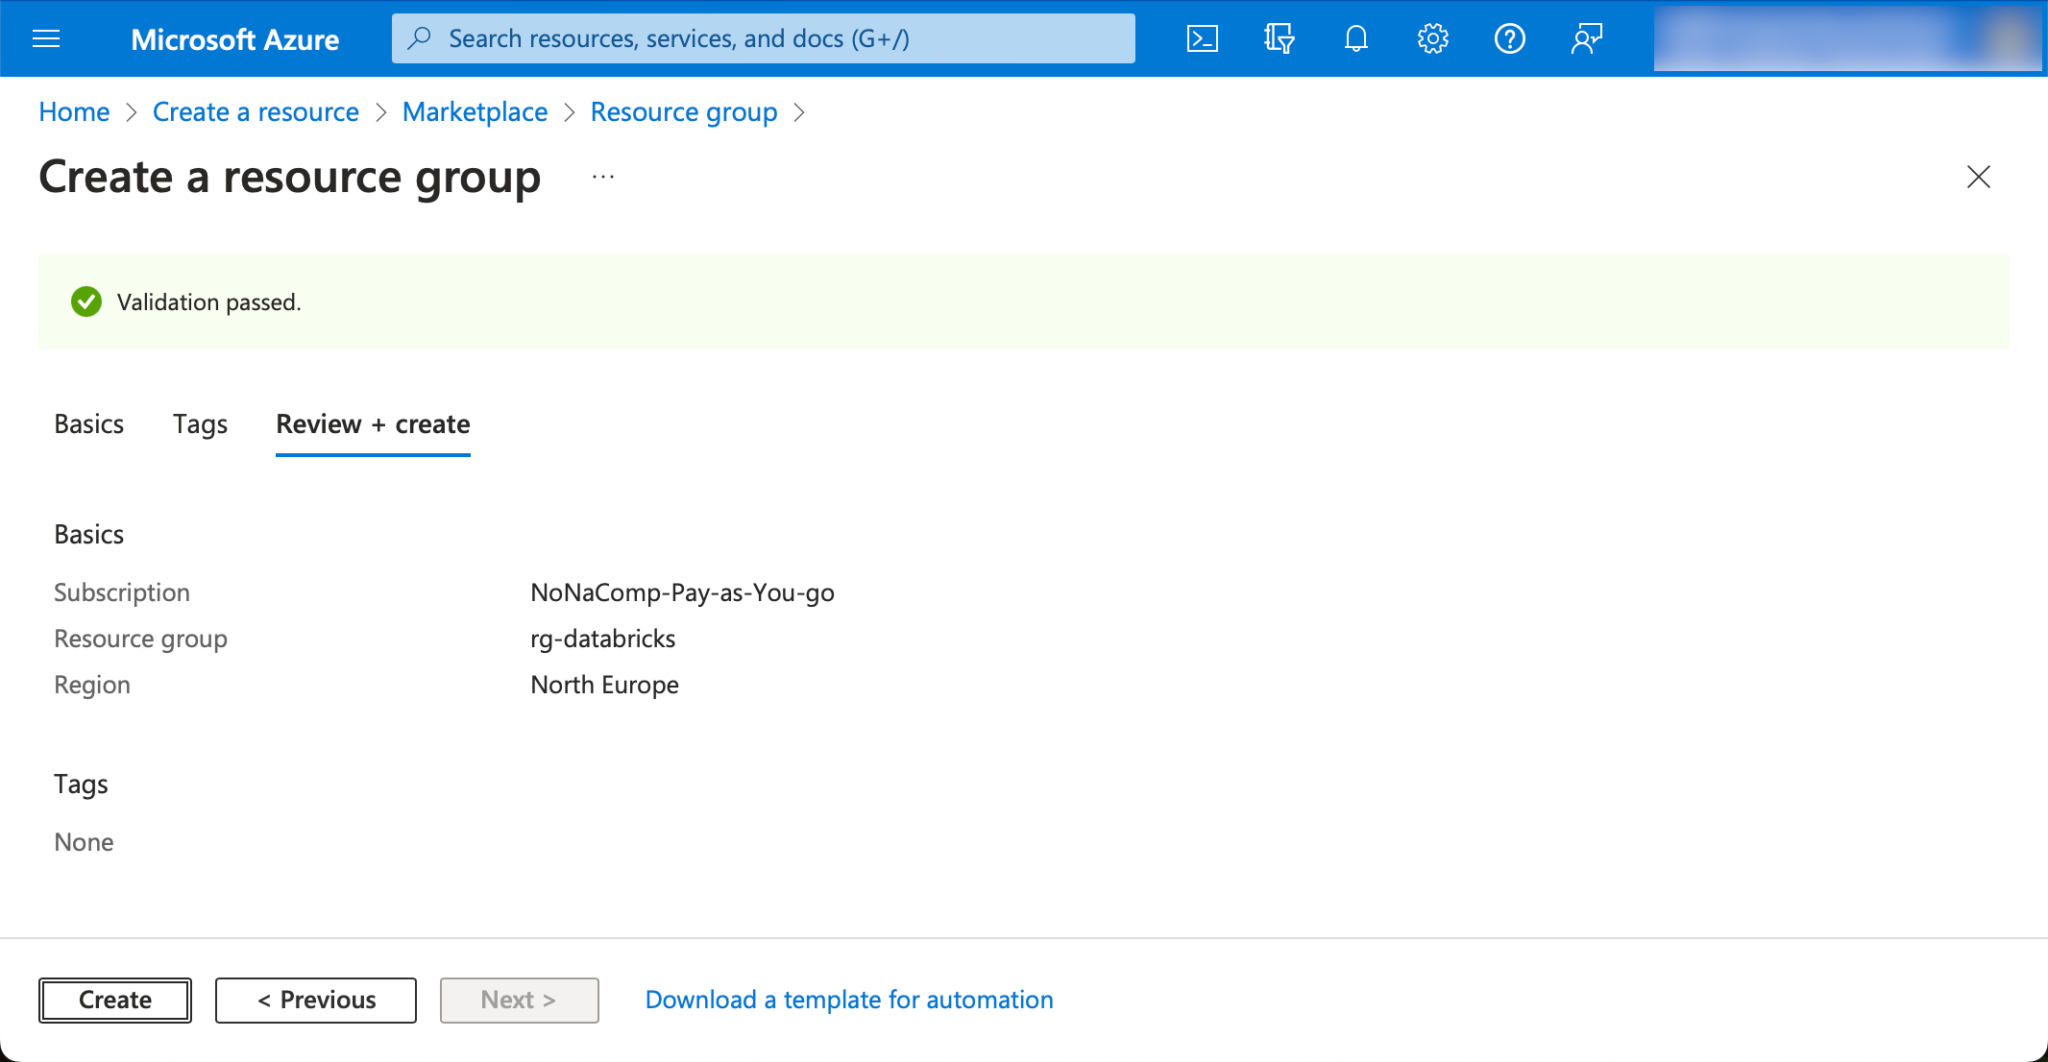
I name the resource group “rg-databricks”. Of course, other names can be used. I use the region “North Europe” as the location. I am based in Switzerland, so a region in “Switzerland North” or “Switzerland West” would be closer, but the regions in Europe are a bit cheaper. I also create all subsequent resources in this region.
You also need to create a concept for naming the respective Azure resources. I usually follow the official recommendations from Microsoft: https://learn.microsoft.com/en-us/azure/cloud-adoption-framework/ready/azure-best-practices/resource-abbreviations
I will adhere to this naming convention in the following steps.
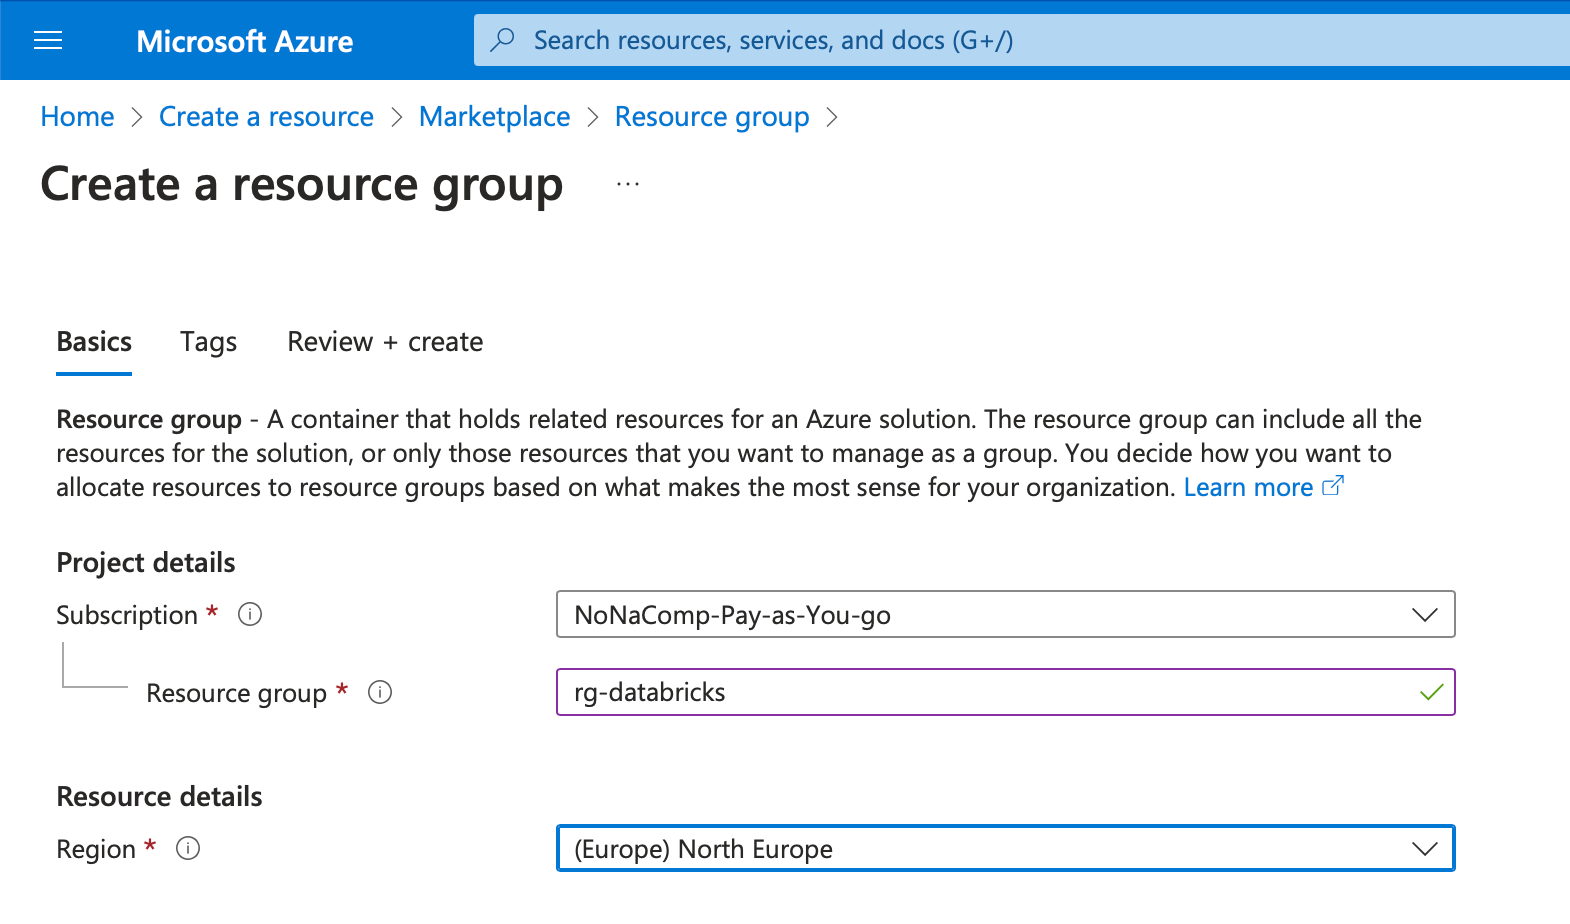
You can leave all other settings as they are and then click on “Create”.
Create Databricks Workspace
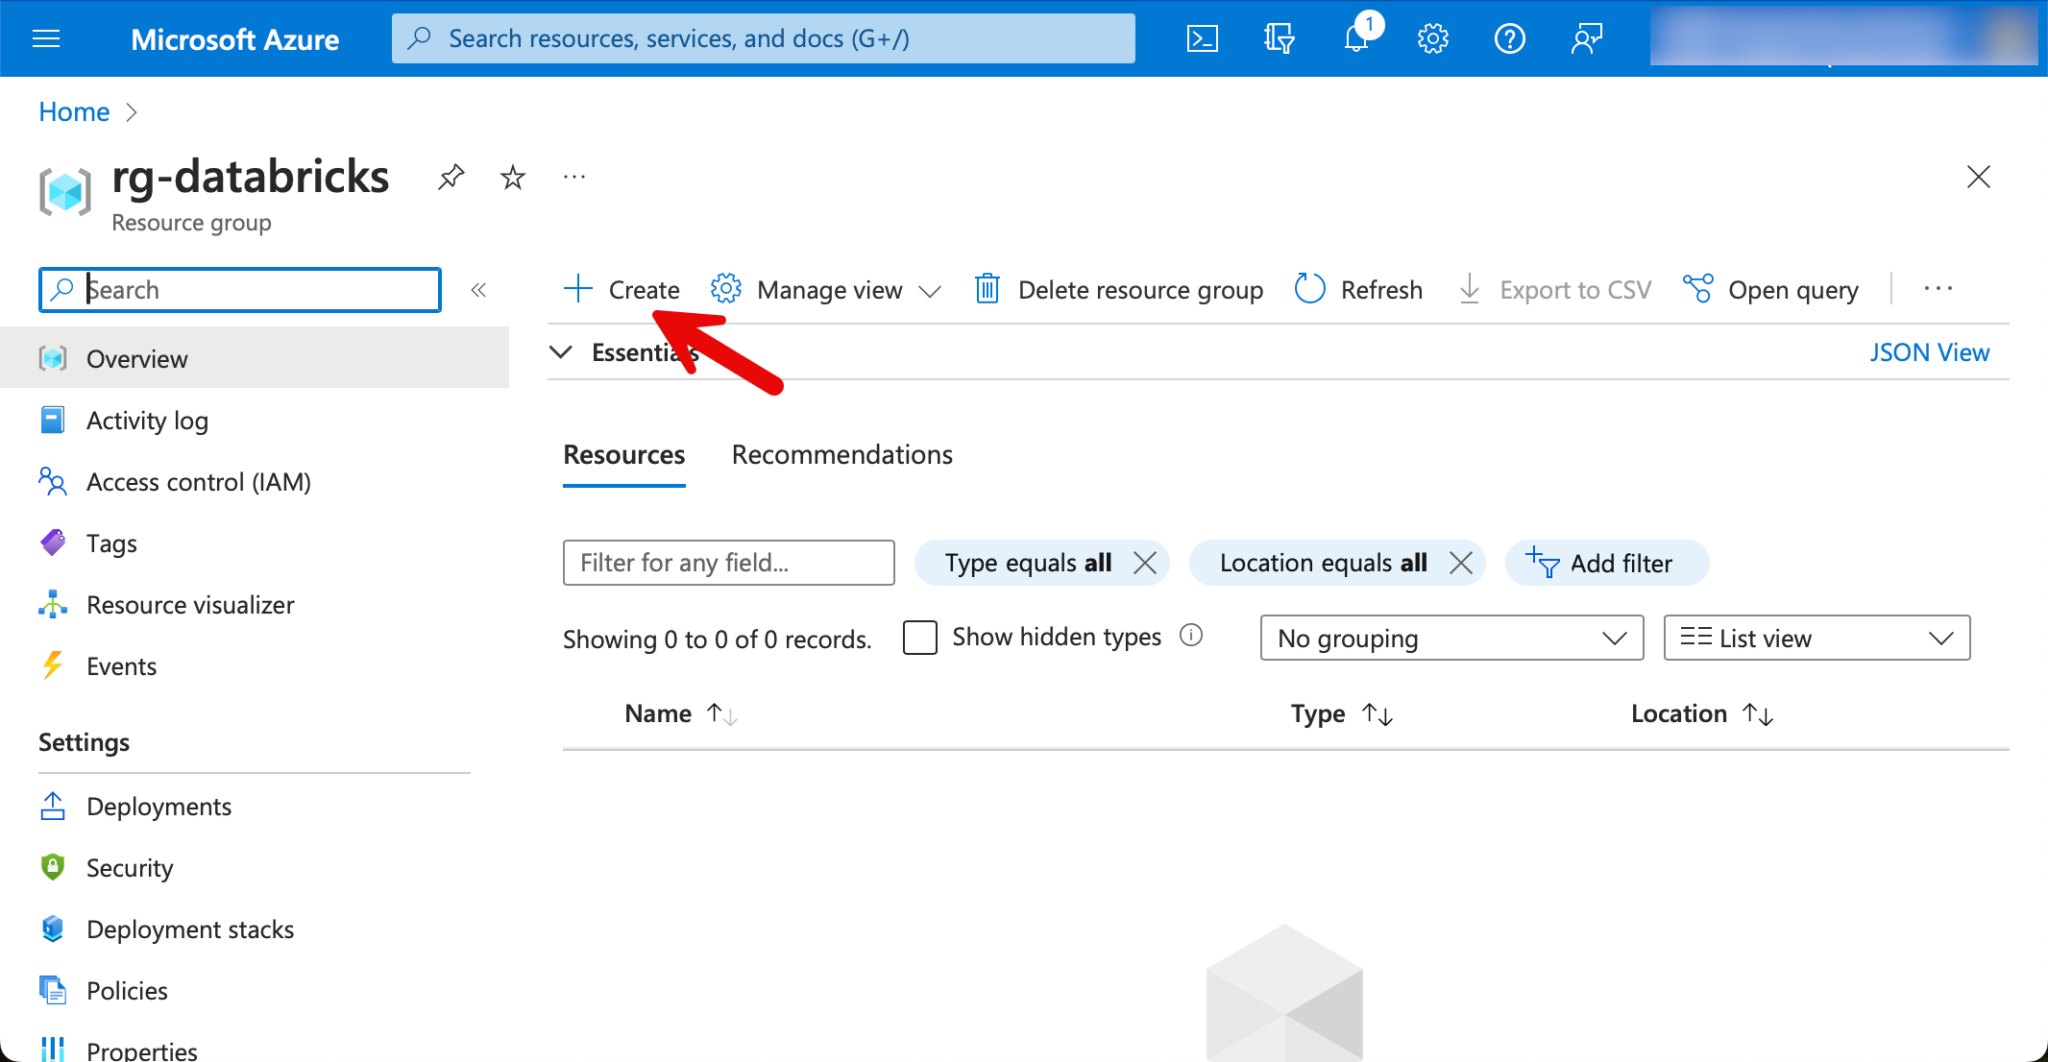
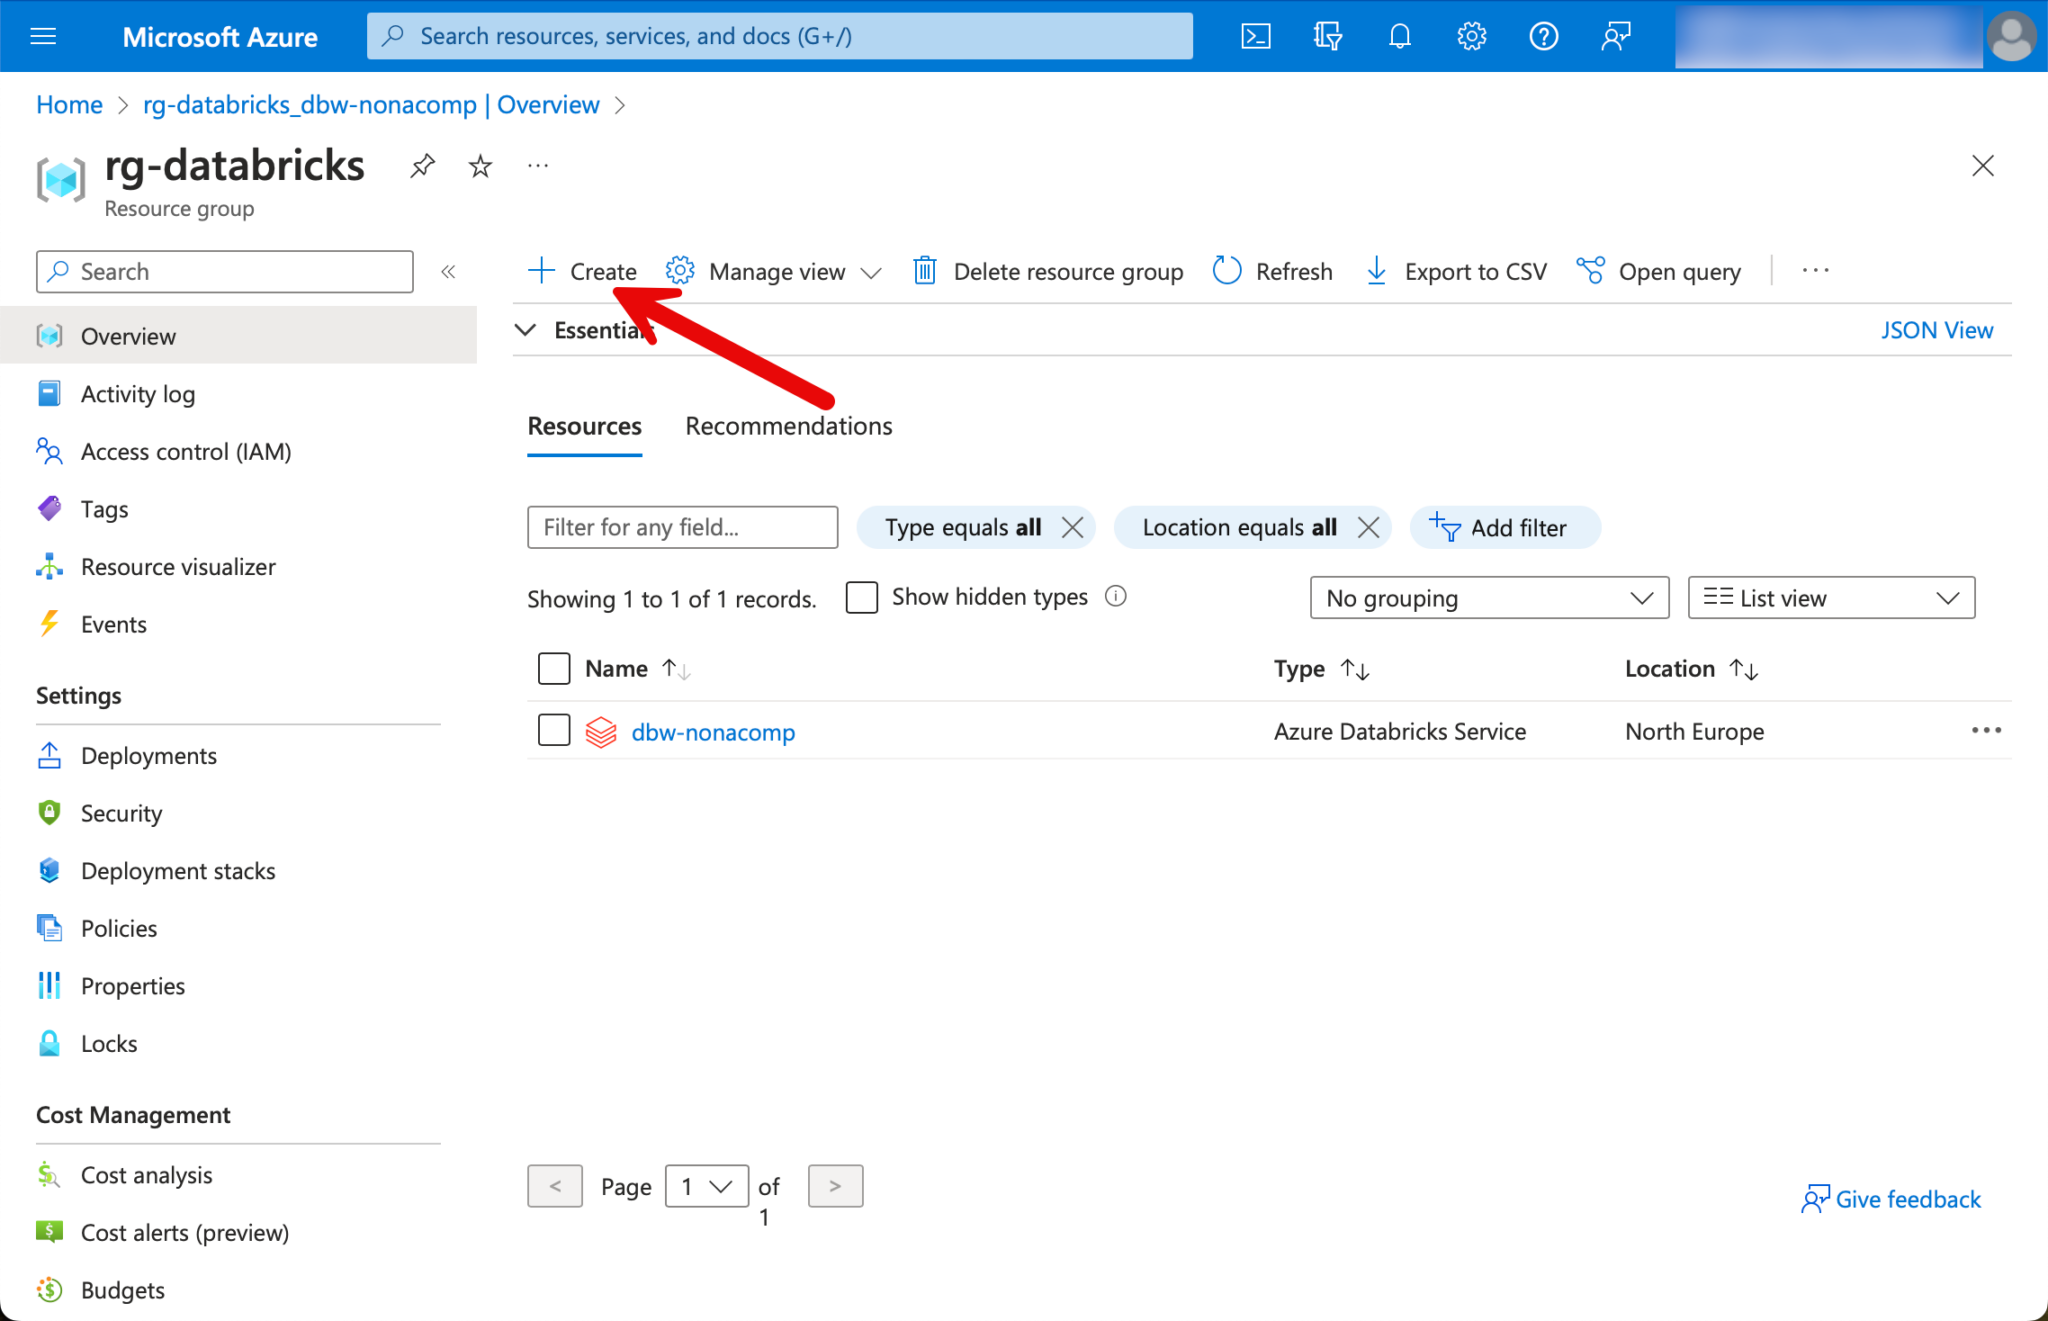
Once the resource group has been created, I switch to the resource group. At the top left, there is a button with which you can create new resources.
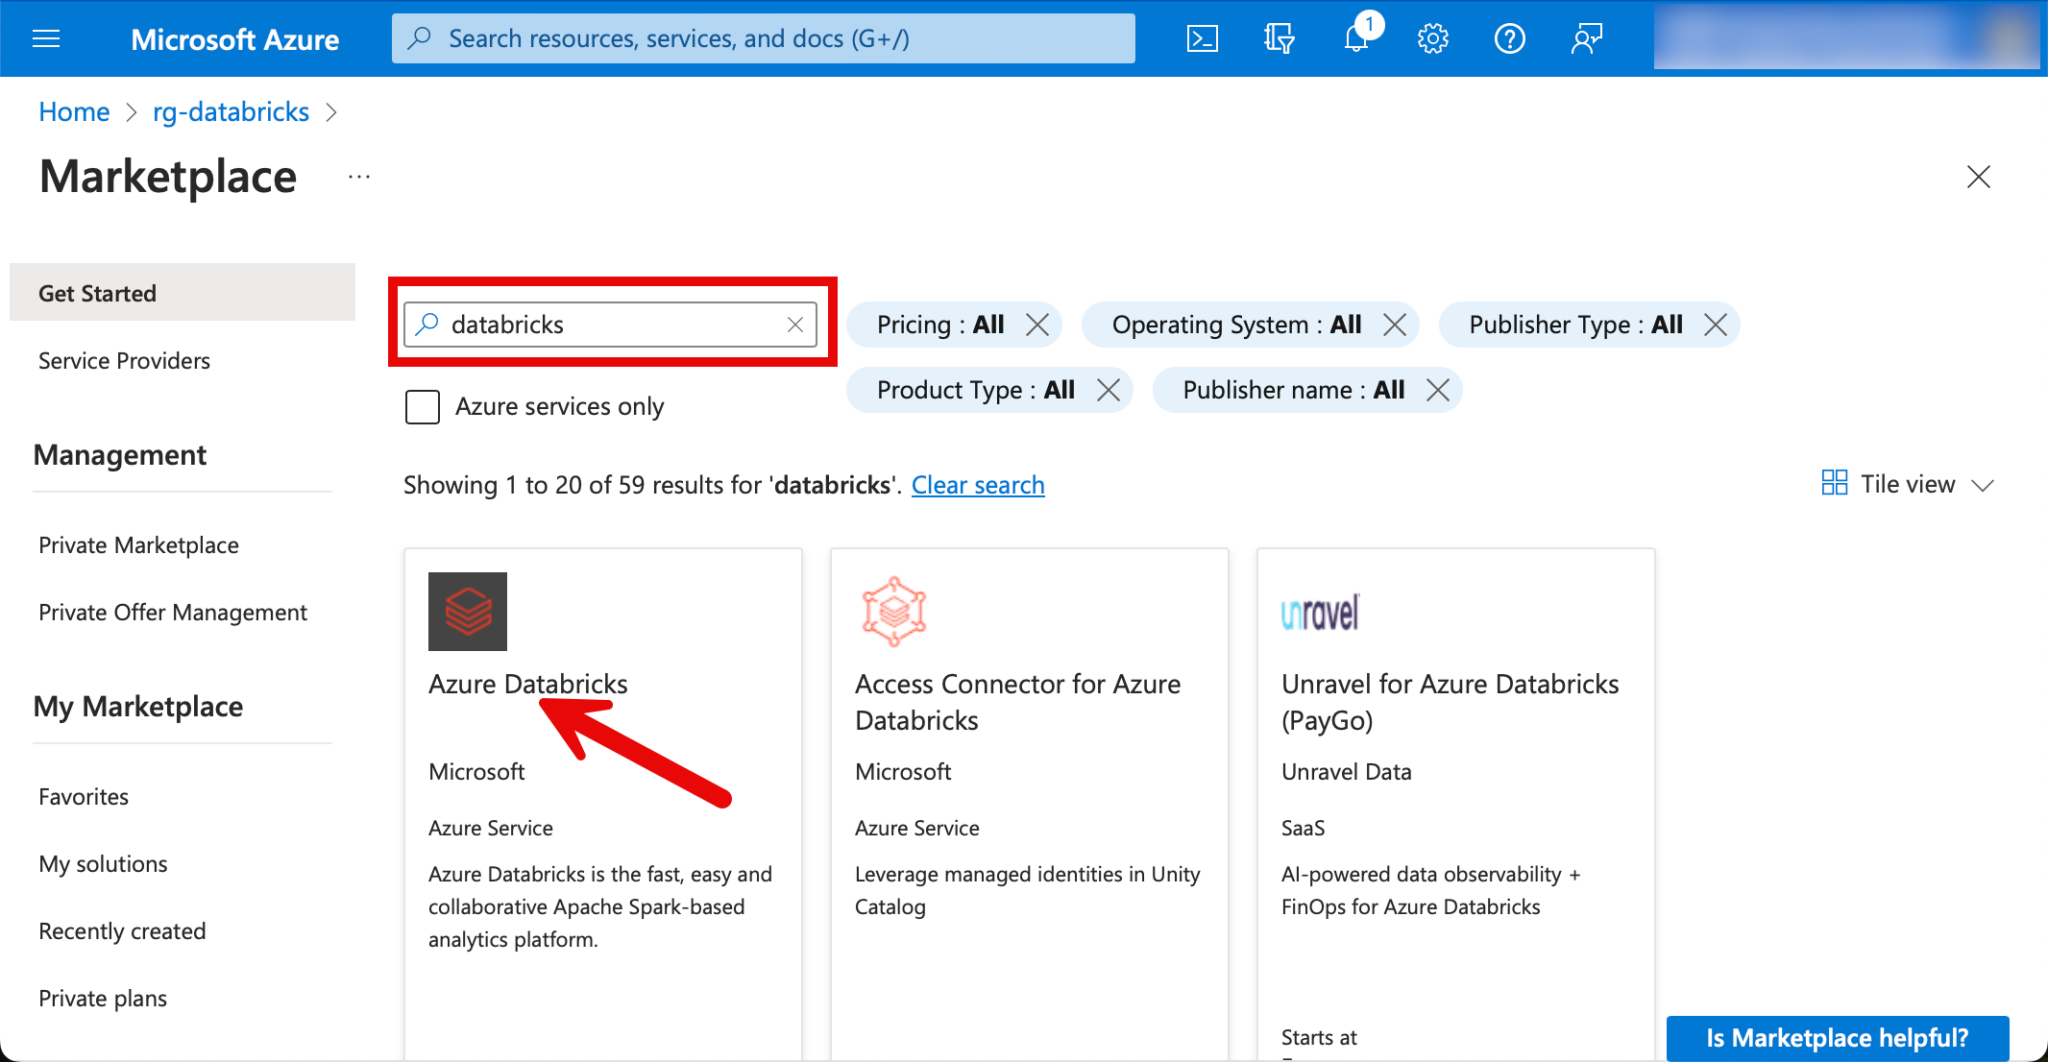
I search for Databricks and select the resource “Azure Databricks”.
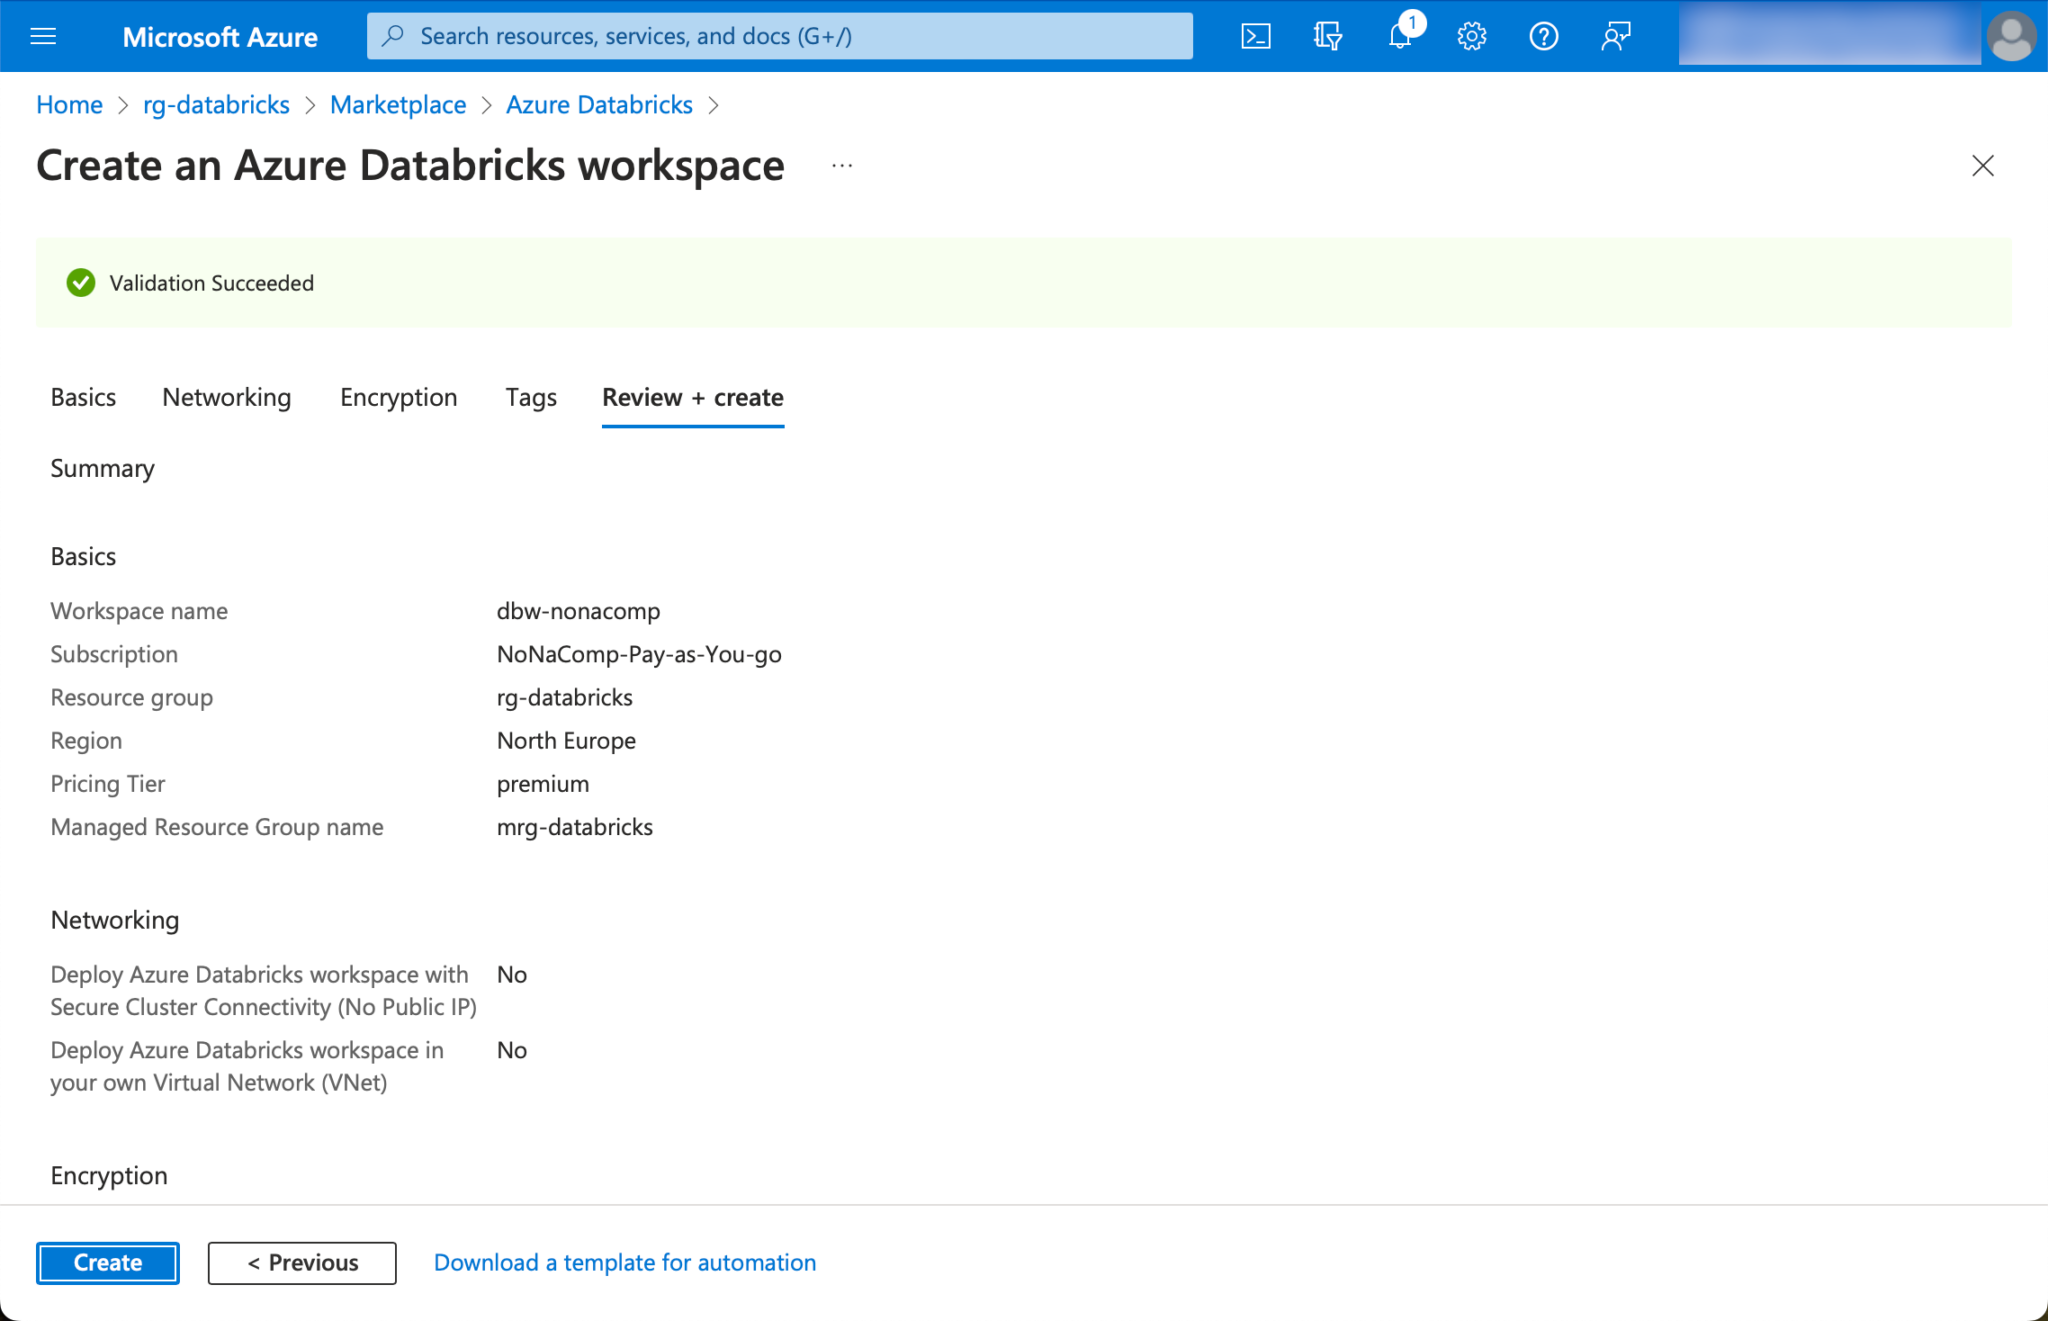
For the workspace name, I assign a meaningful name accordingly. I have an example of a fictitious company “NoNameCompany”, which I abbreviate to “nonacomp”. As already mentioned, I select the region in the same way as the resource group.
🚨🚨🚨 Attention! Be sure to select Premium for the pricing tier!🚨🚨🚨 Otherwise, not all functionalities are available in the workspace and Unity Catalog cannot be used with the standard version.
When the Databricks Workspace is created, an additional “Managed Resourcegroup” is created. This contains resources that are automatically created and required for operation. I use a similar name for it as the original resource group by prefixing it with an m, as “mrg-databricks”.

The remaining settings for the workspace can be left as they are suggested.
Create a Storage Account
To create the storage account, we switch back to the resource group and click on “Create”.
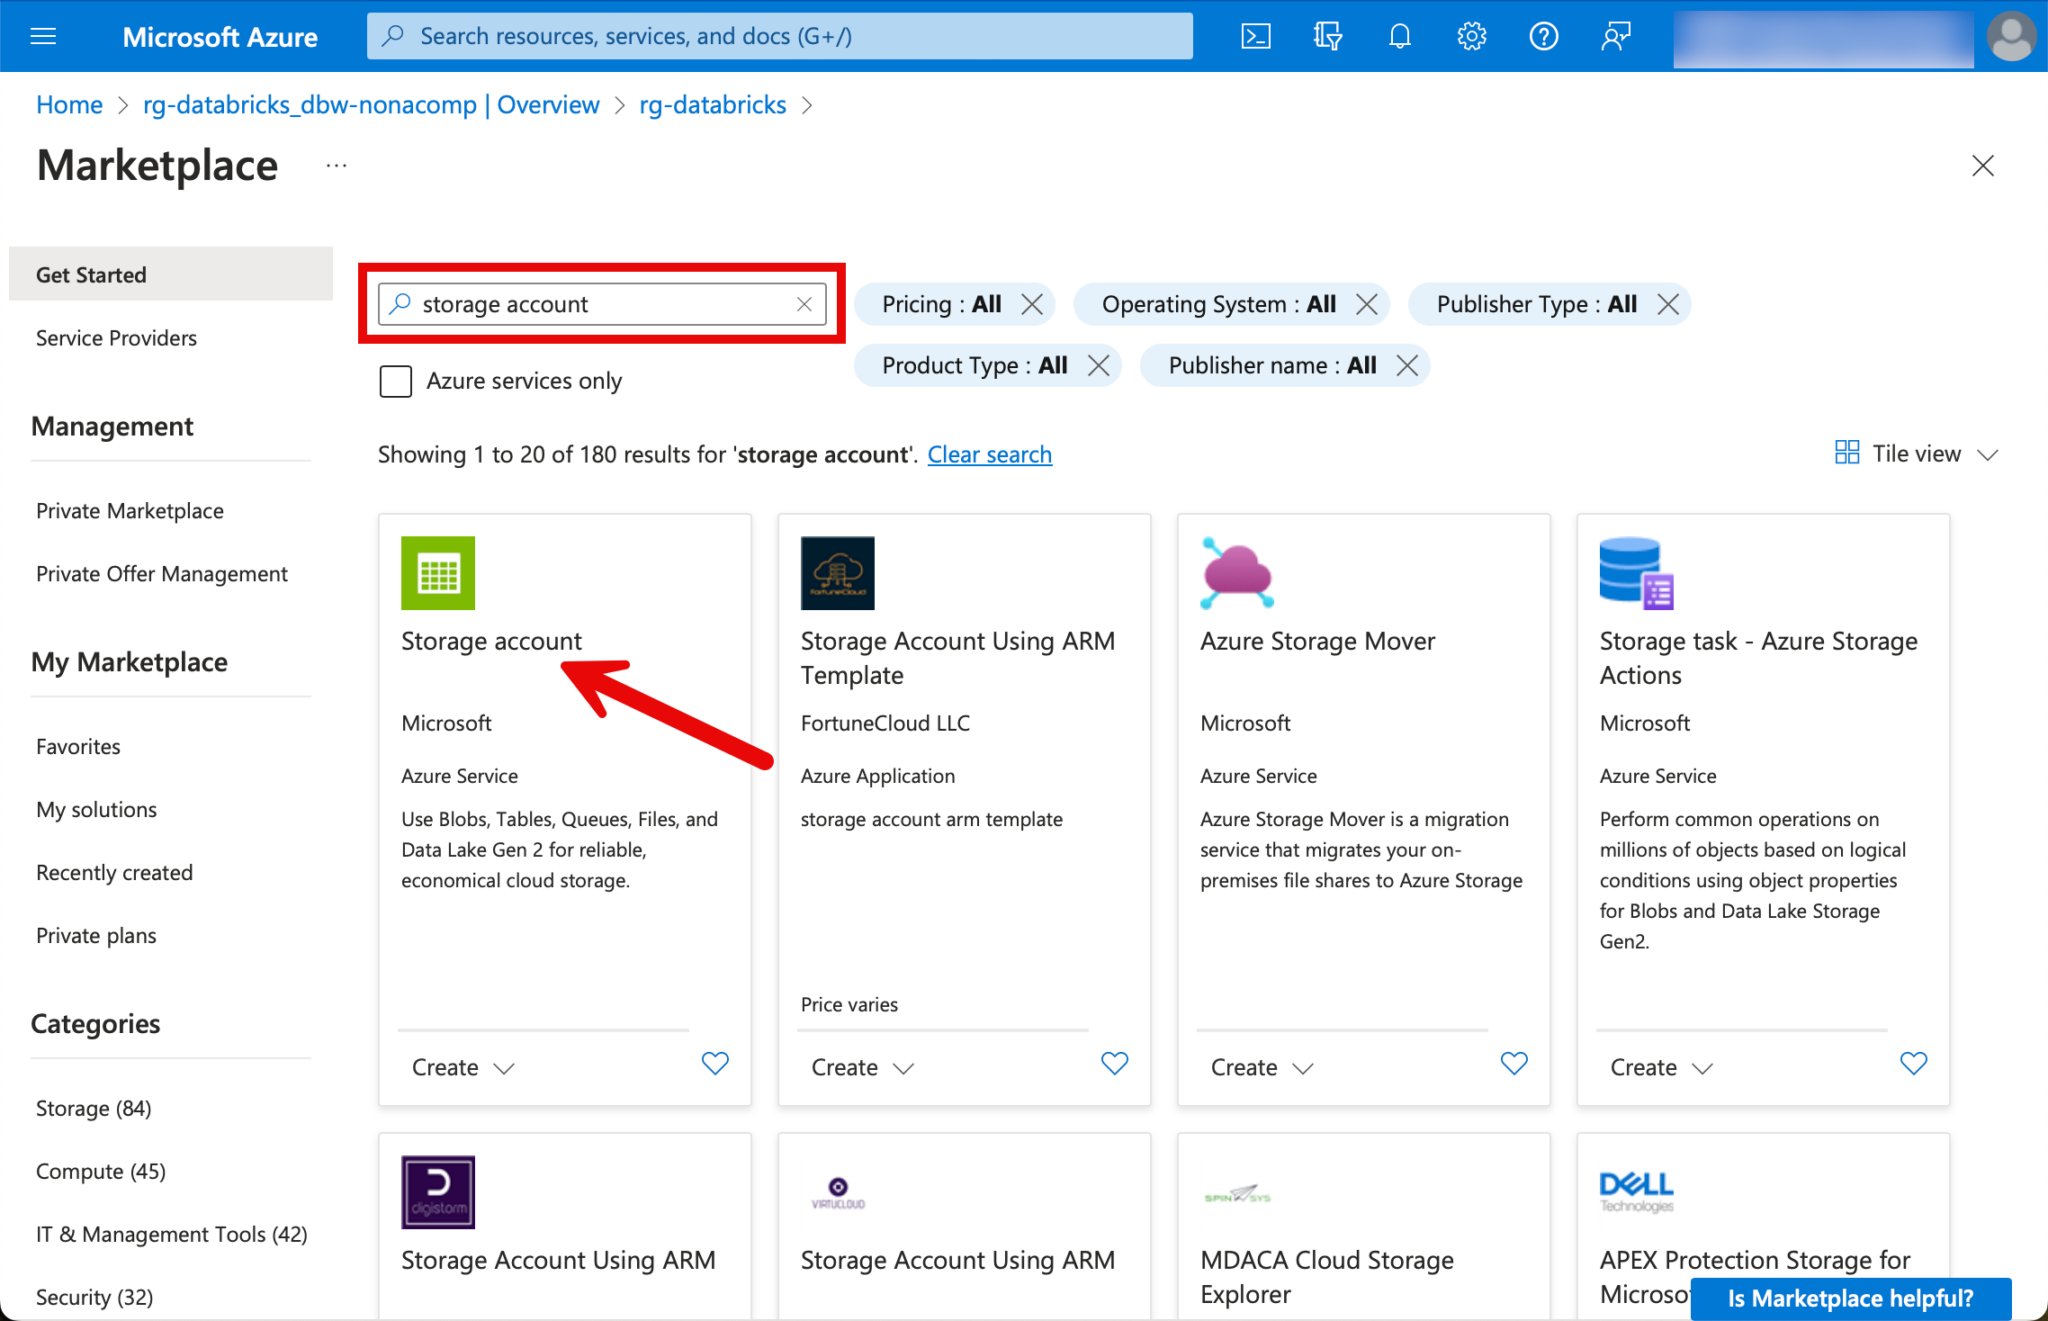
I search for “Storage Account” and select this resource.
The following setup is a simple example. In a PoC or training environment, this is completely sufficient. In a productive environment, additional security considerations should be taken into account.
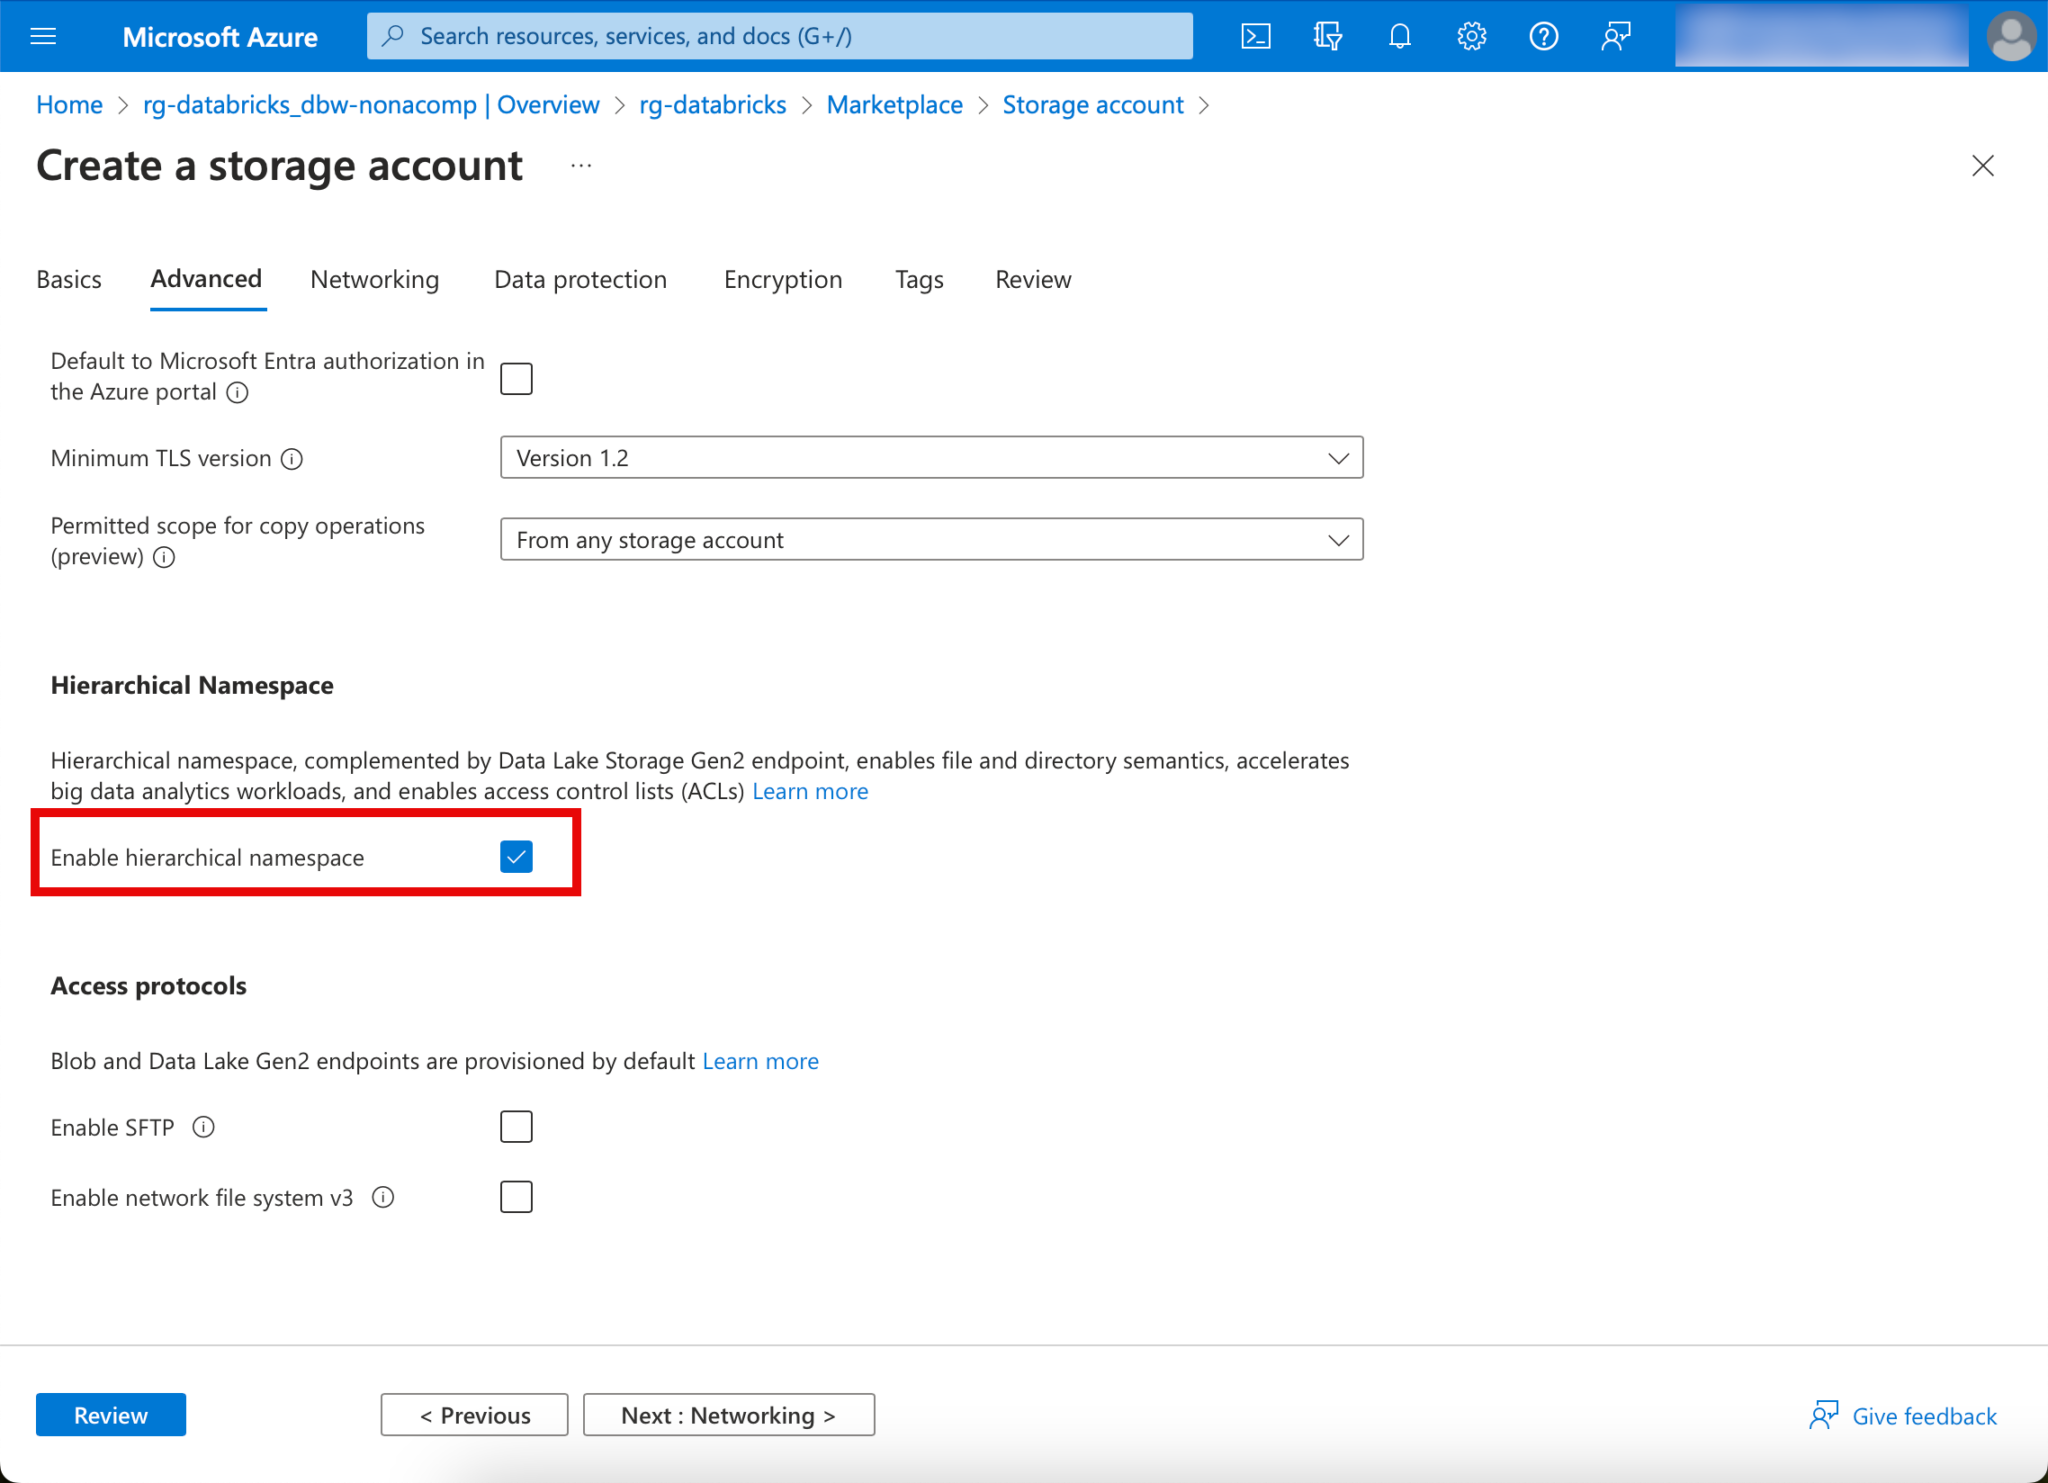
For cost reasons, I choose “Standard” for Performance and LRS for Redundancy.
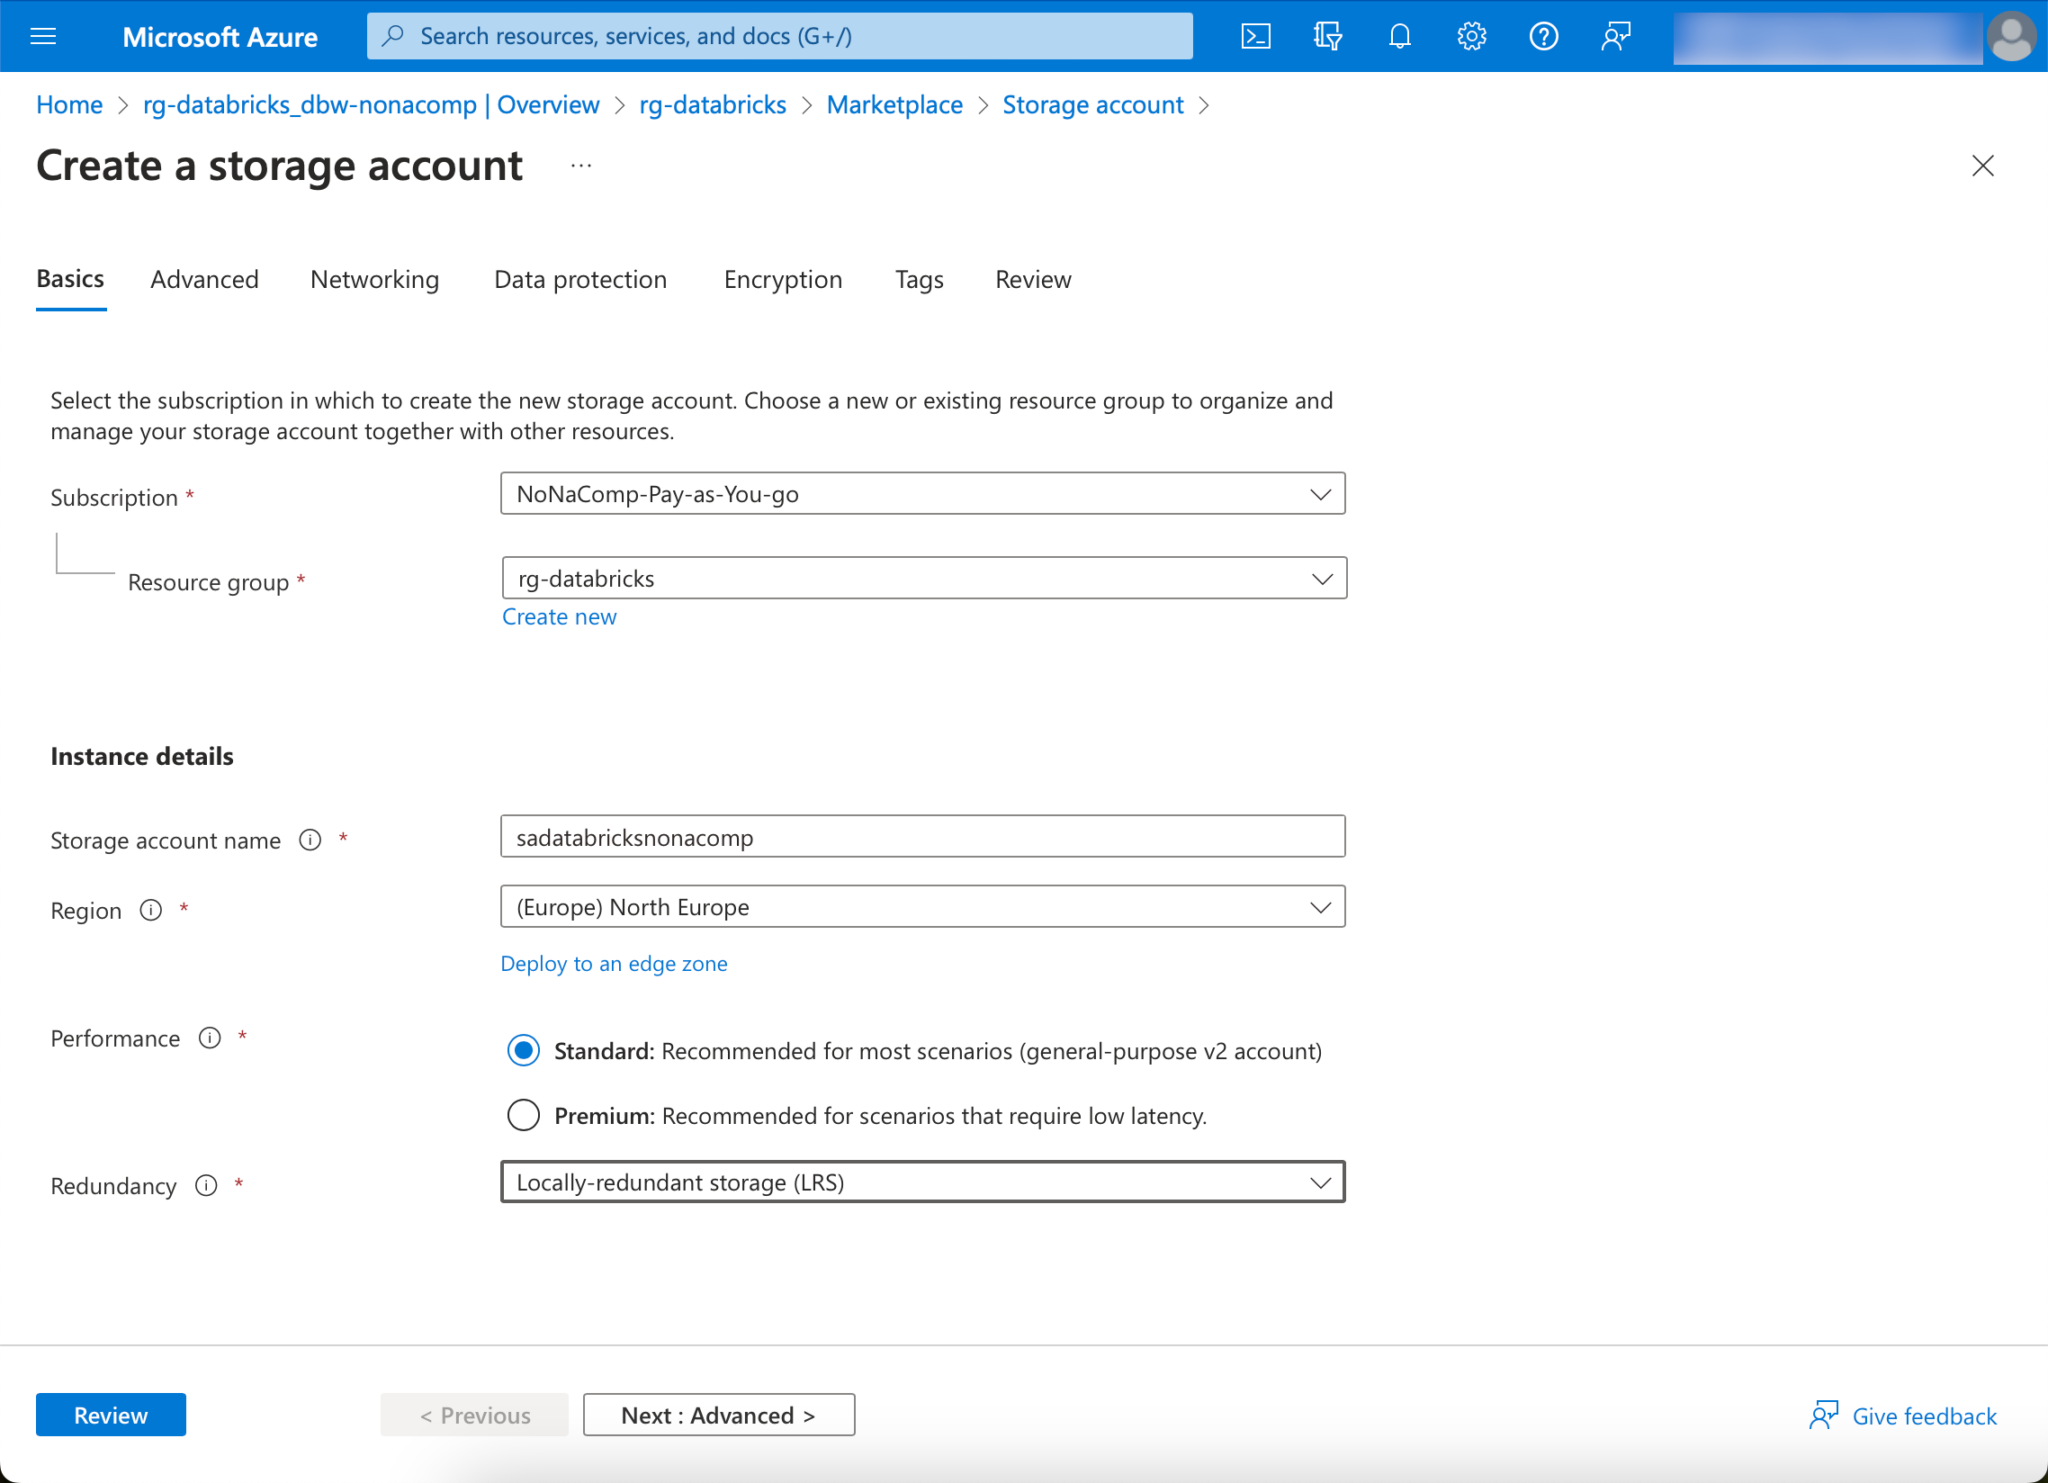
🚨🚨🚨 Important: “Enable hierarchical namespace” must be activated! 🚨🚨🚨
I apply all other settings as suggested and then click on “Create”.
Once the storage account has been deployed, the next step is to create the containers. To do this, you can switch to the “Containers” tab in the context of the storage account.
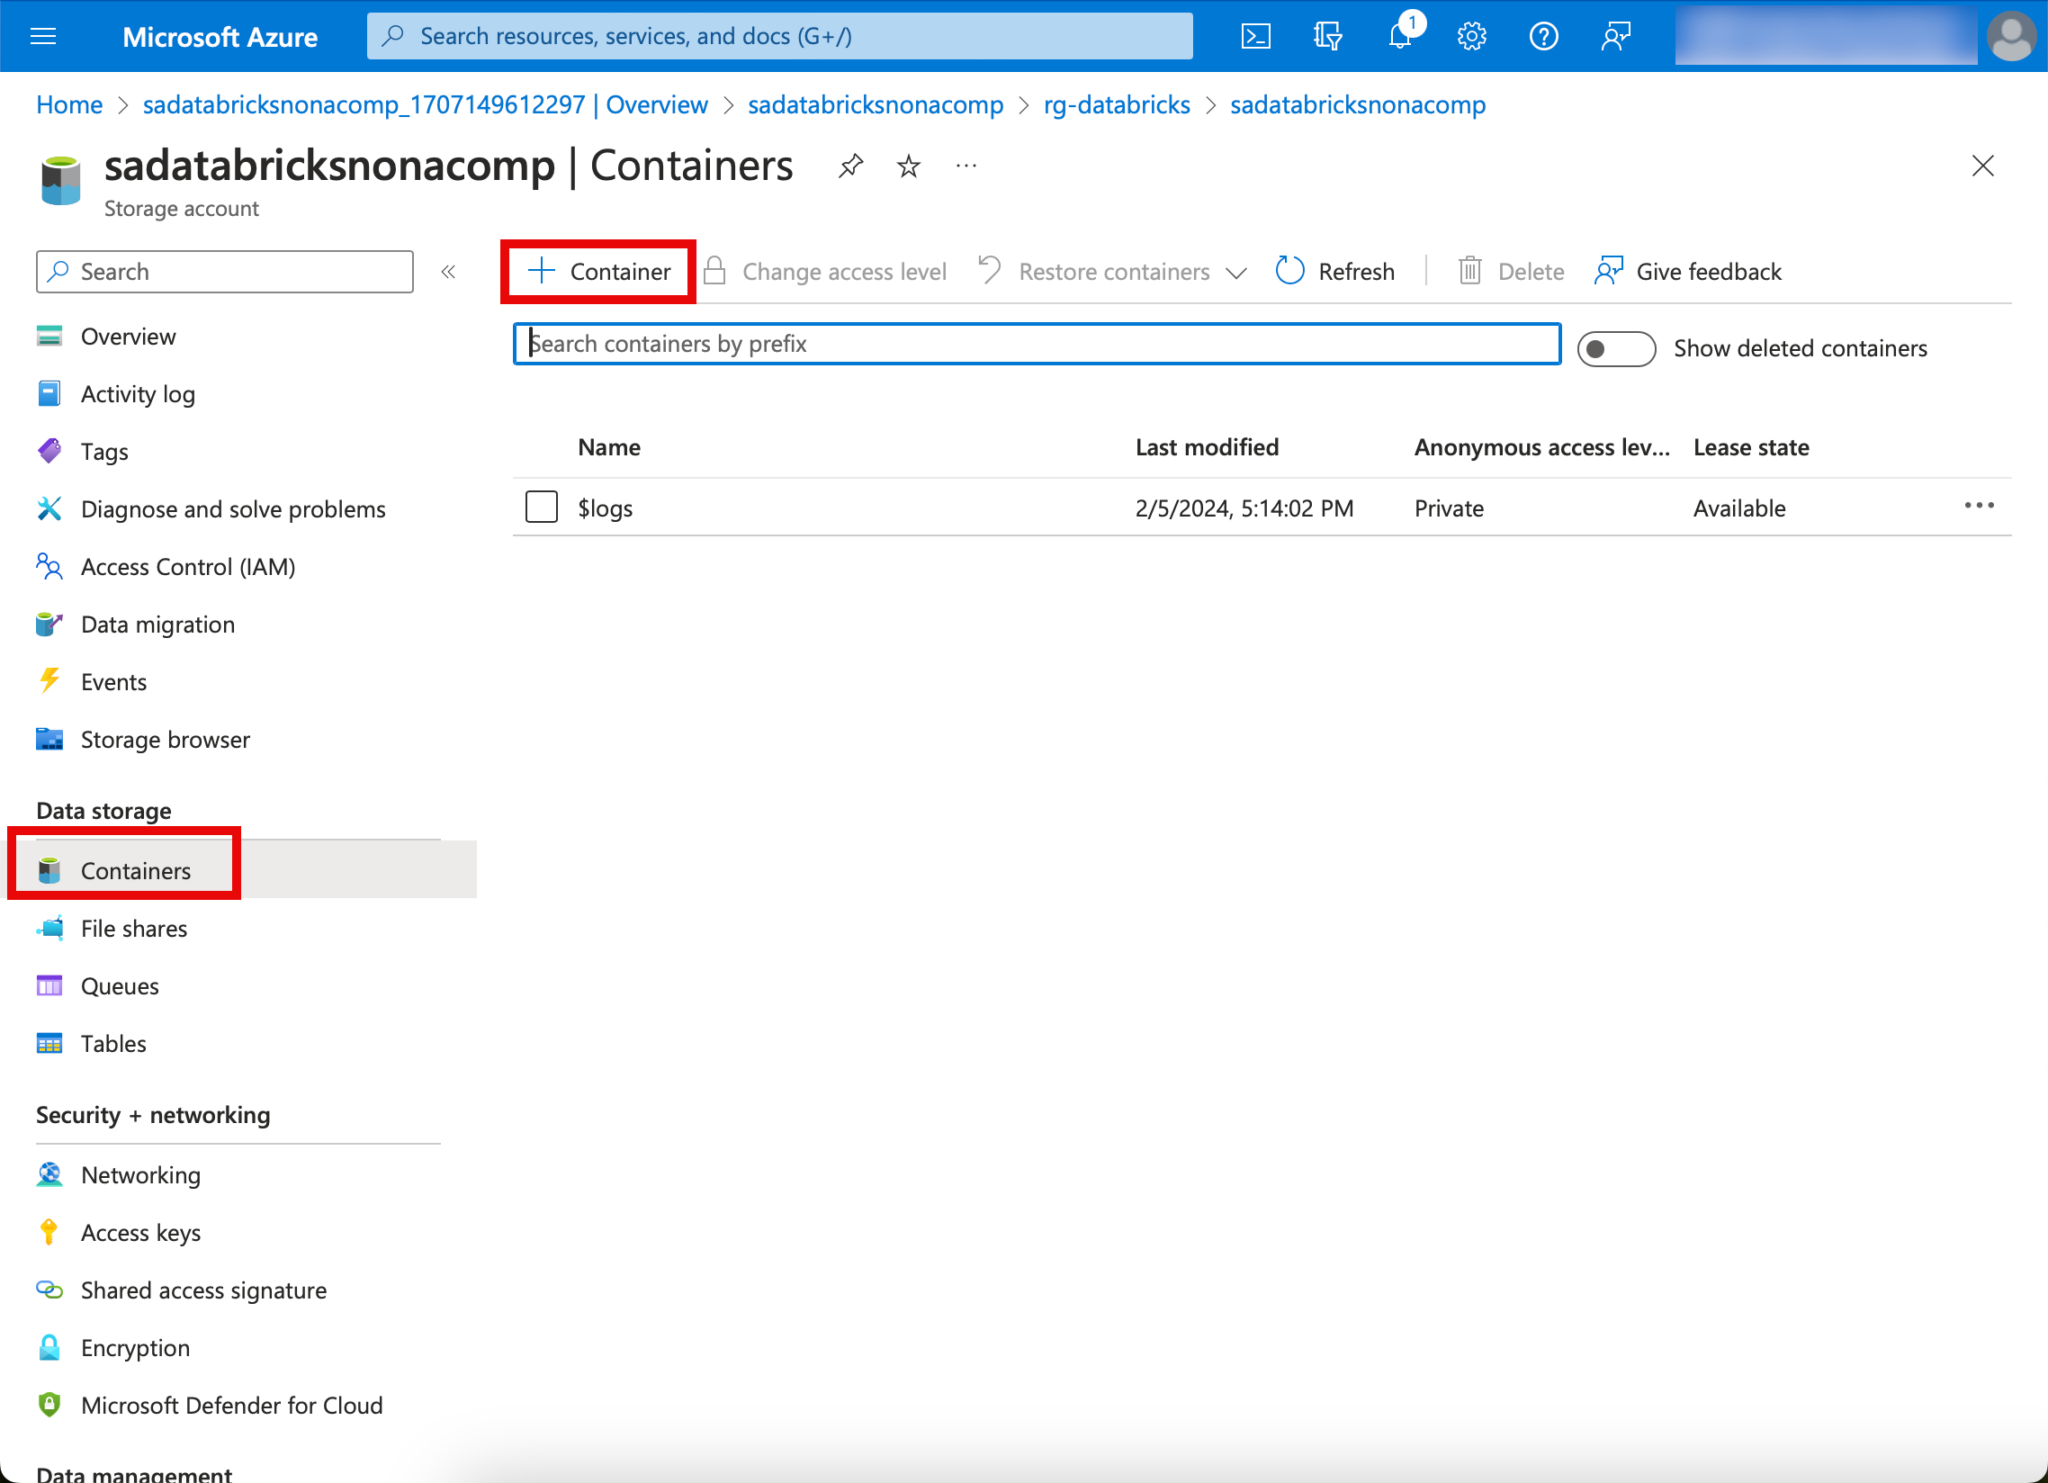
In this example, I create the container for the landing zone.
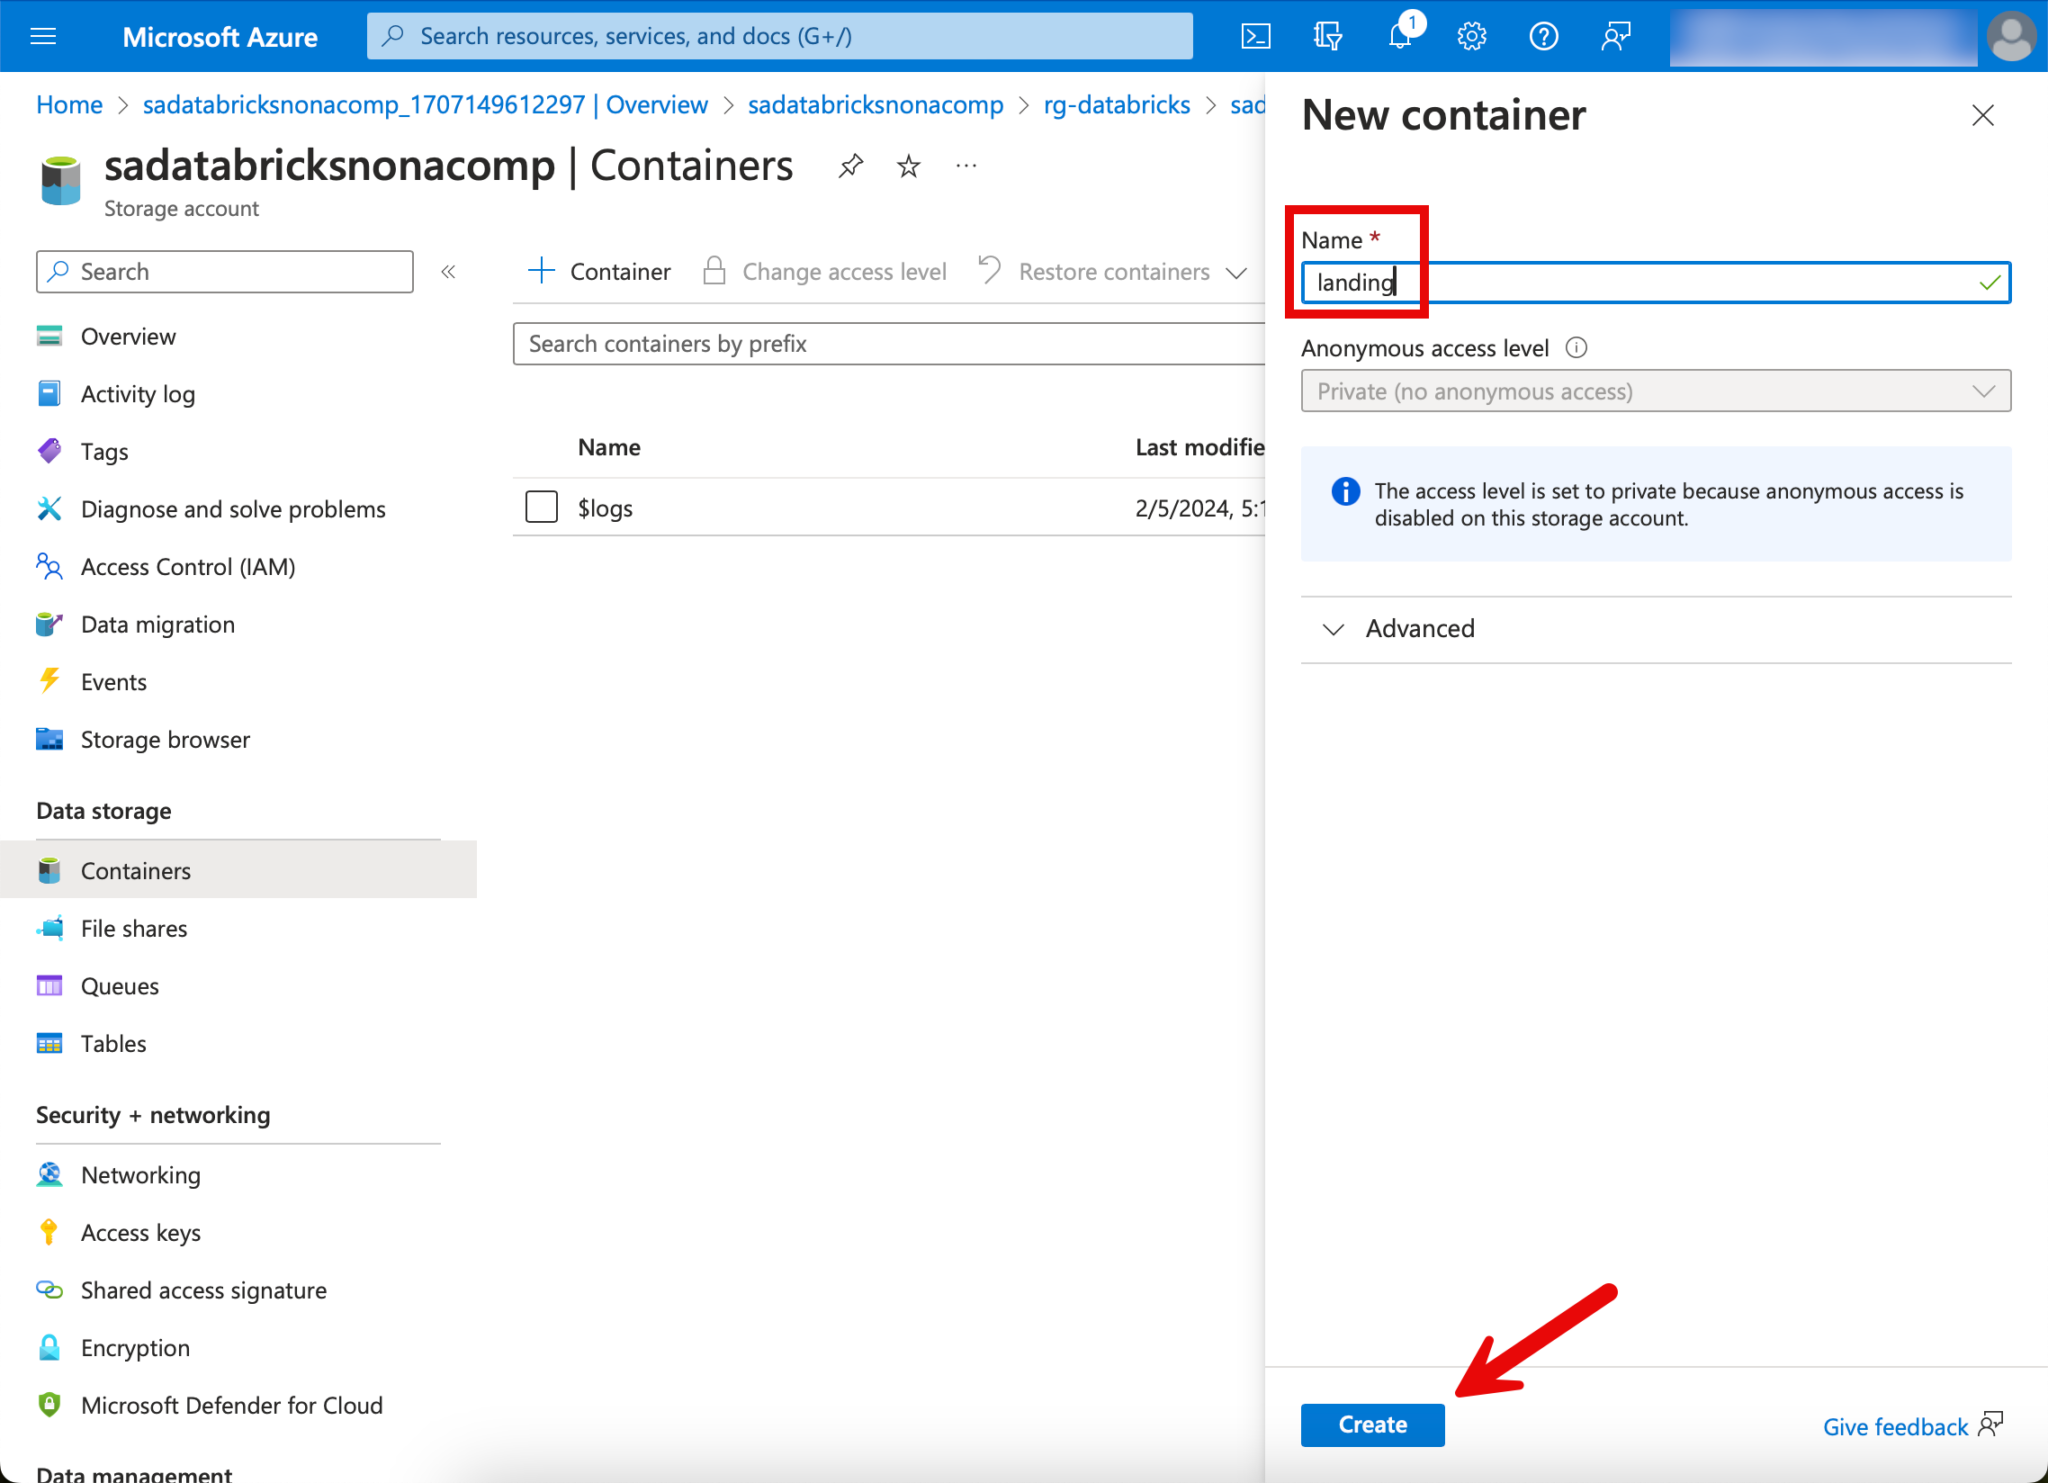
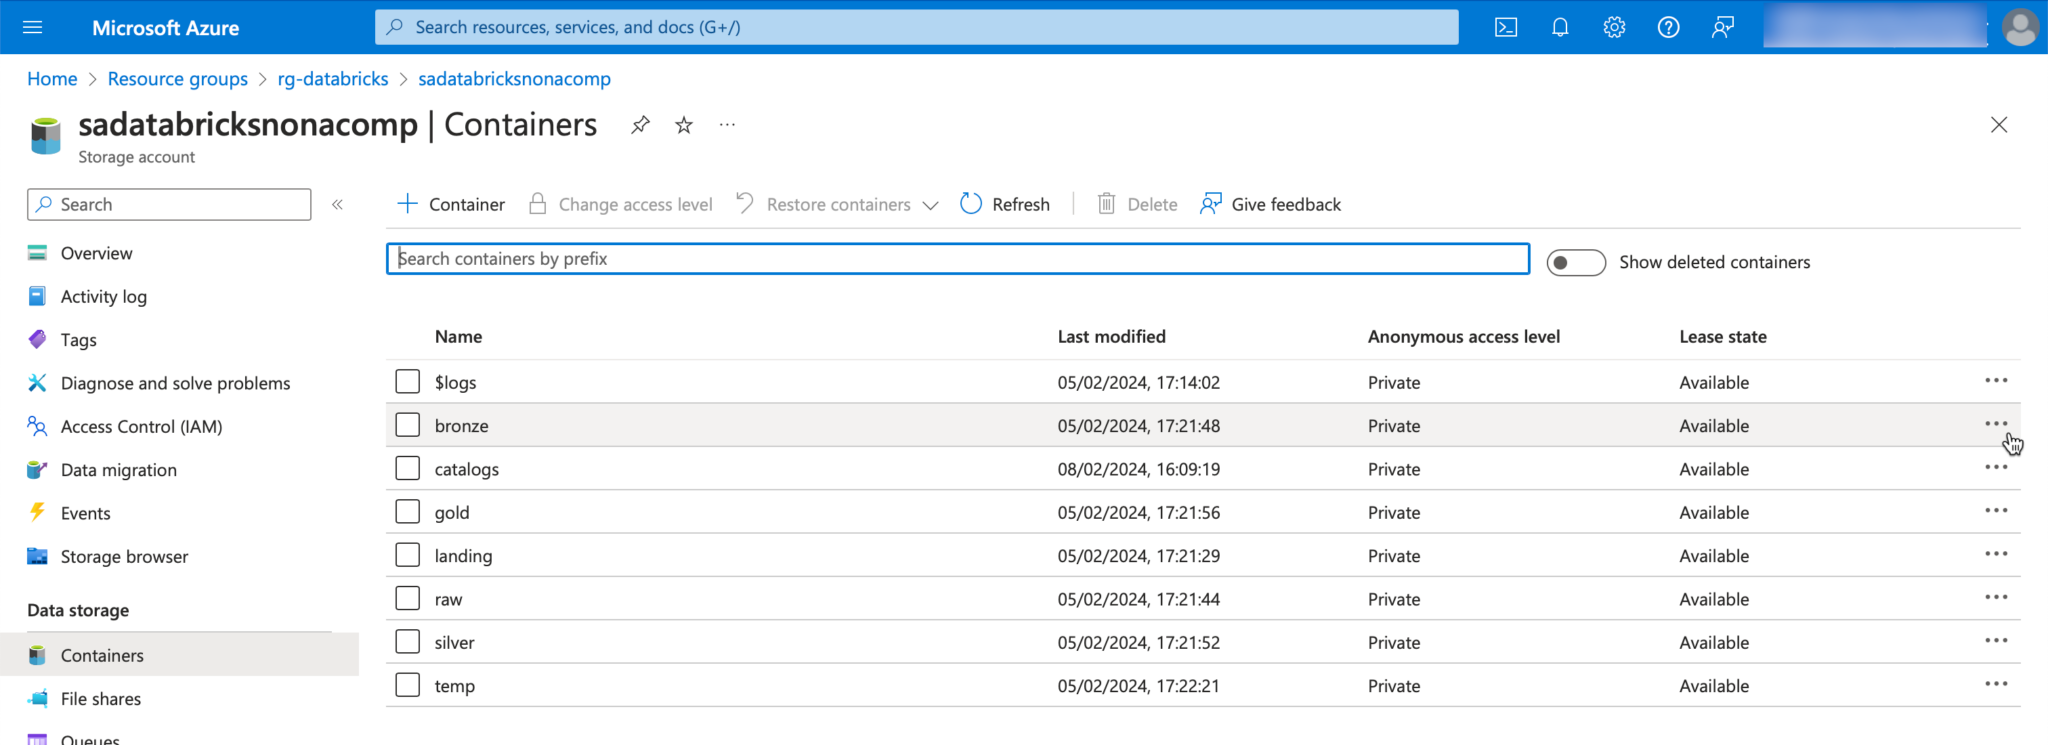
This step is repeated for all containers. In addition to the zones mentioned, I also create a “temp” container and a “catalogs” container. temp, as the name suggests, is used for temporary objects. I use the catalogs container to make these available as storage for the catalogs in Databricks.
Set authorizations on the data lake
In order to be able to work with the data in the containers, appropriate authorizations must be set. Governance and access is implemented with Unity Catalog. This means that the respective users do not have to be authorized directly on the data lake, but can be administered centrally in Unity Catalog. To enable Unity Catalog to manage the authorizations, the “Access Connector for Azure Databricks” resource must be authorized on the storage. This resource was automatically created with the Databricks setup and is located in the “Managed Resourcegroup”. You can find the resource by looking in this resource group.
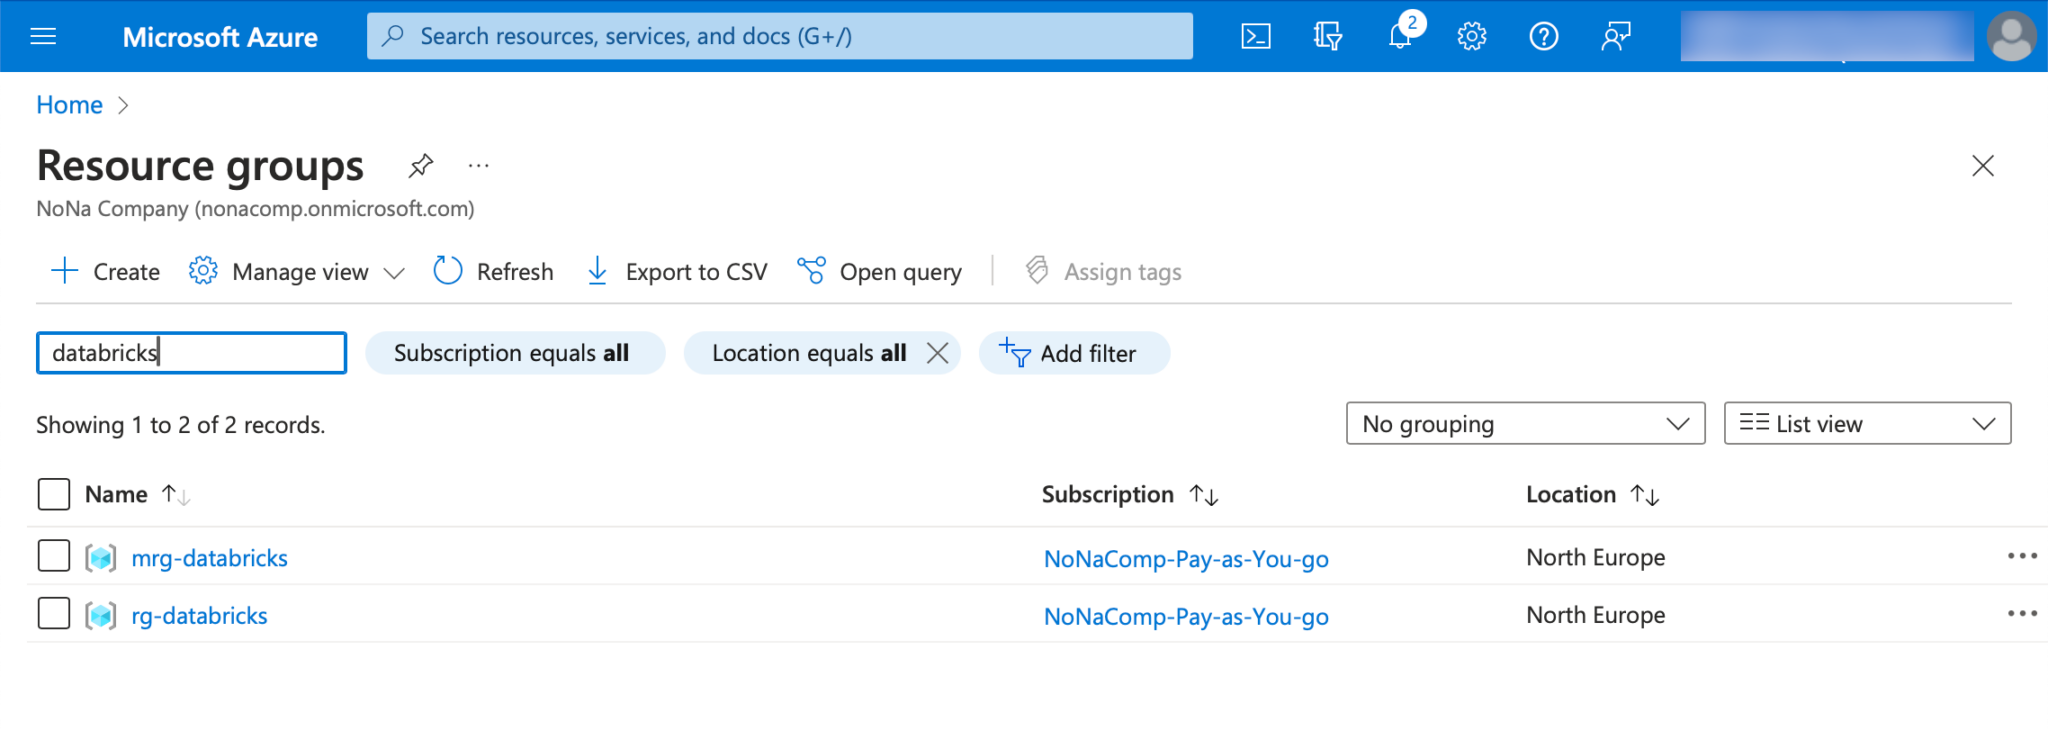

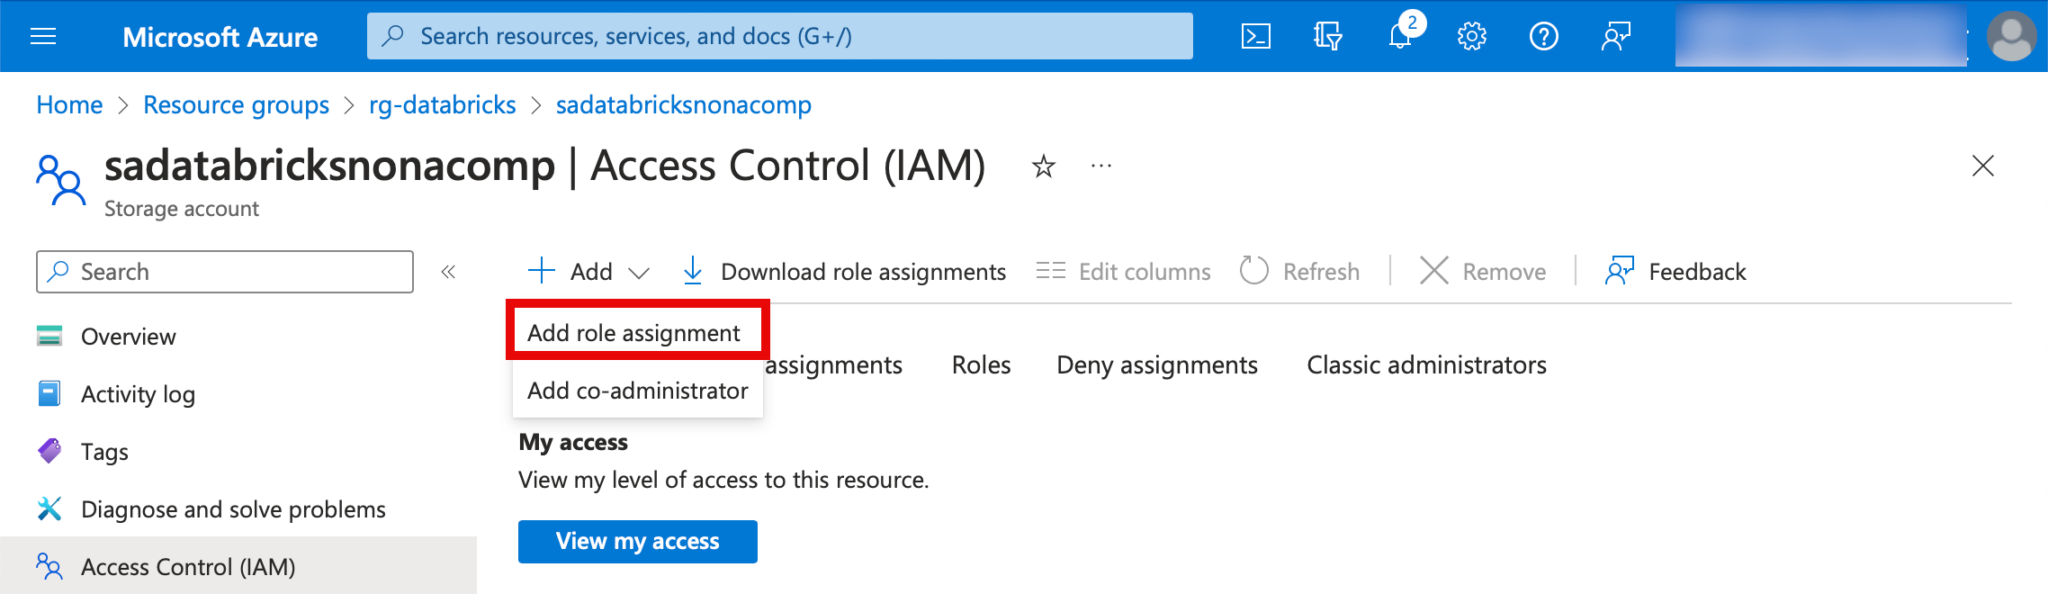
I go back to the storage account and switch to the “Access Control (IAM)” tab. There I click on “Add” and then “Role Assignment”.

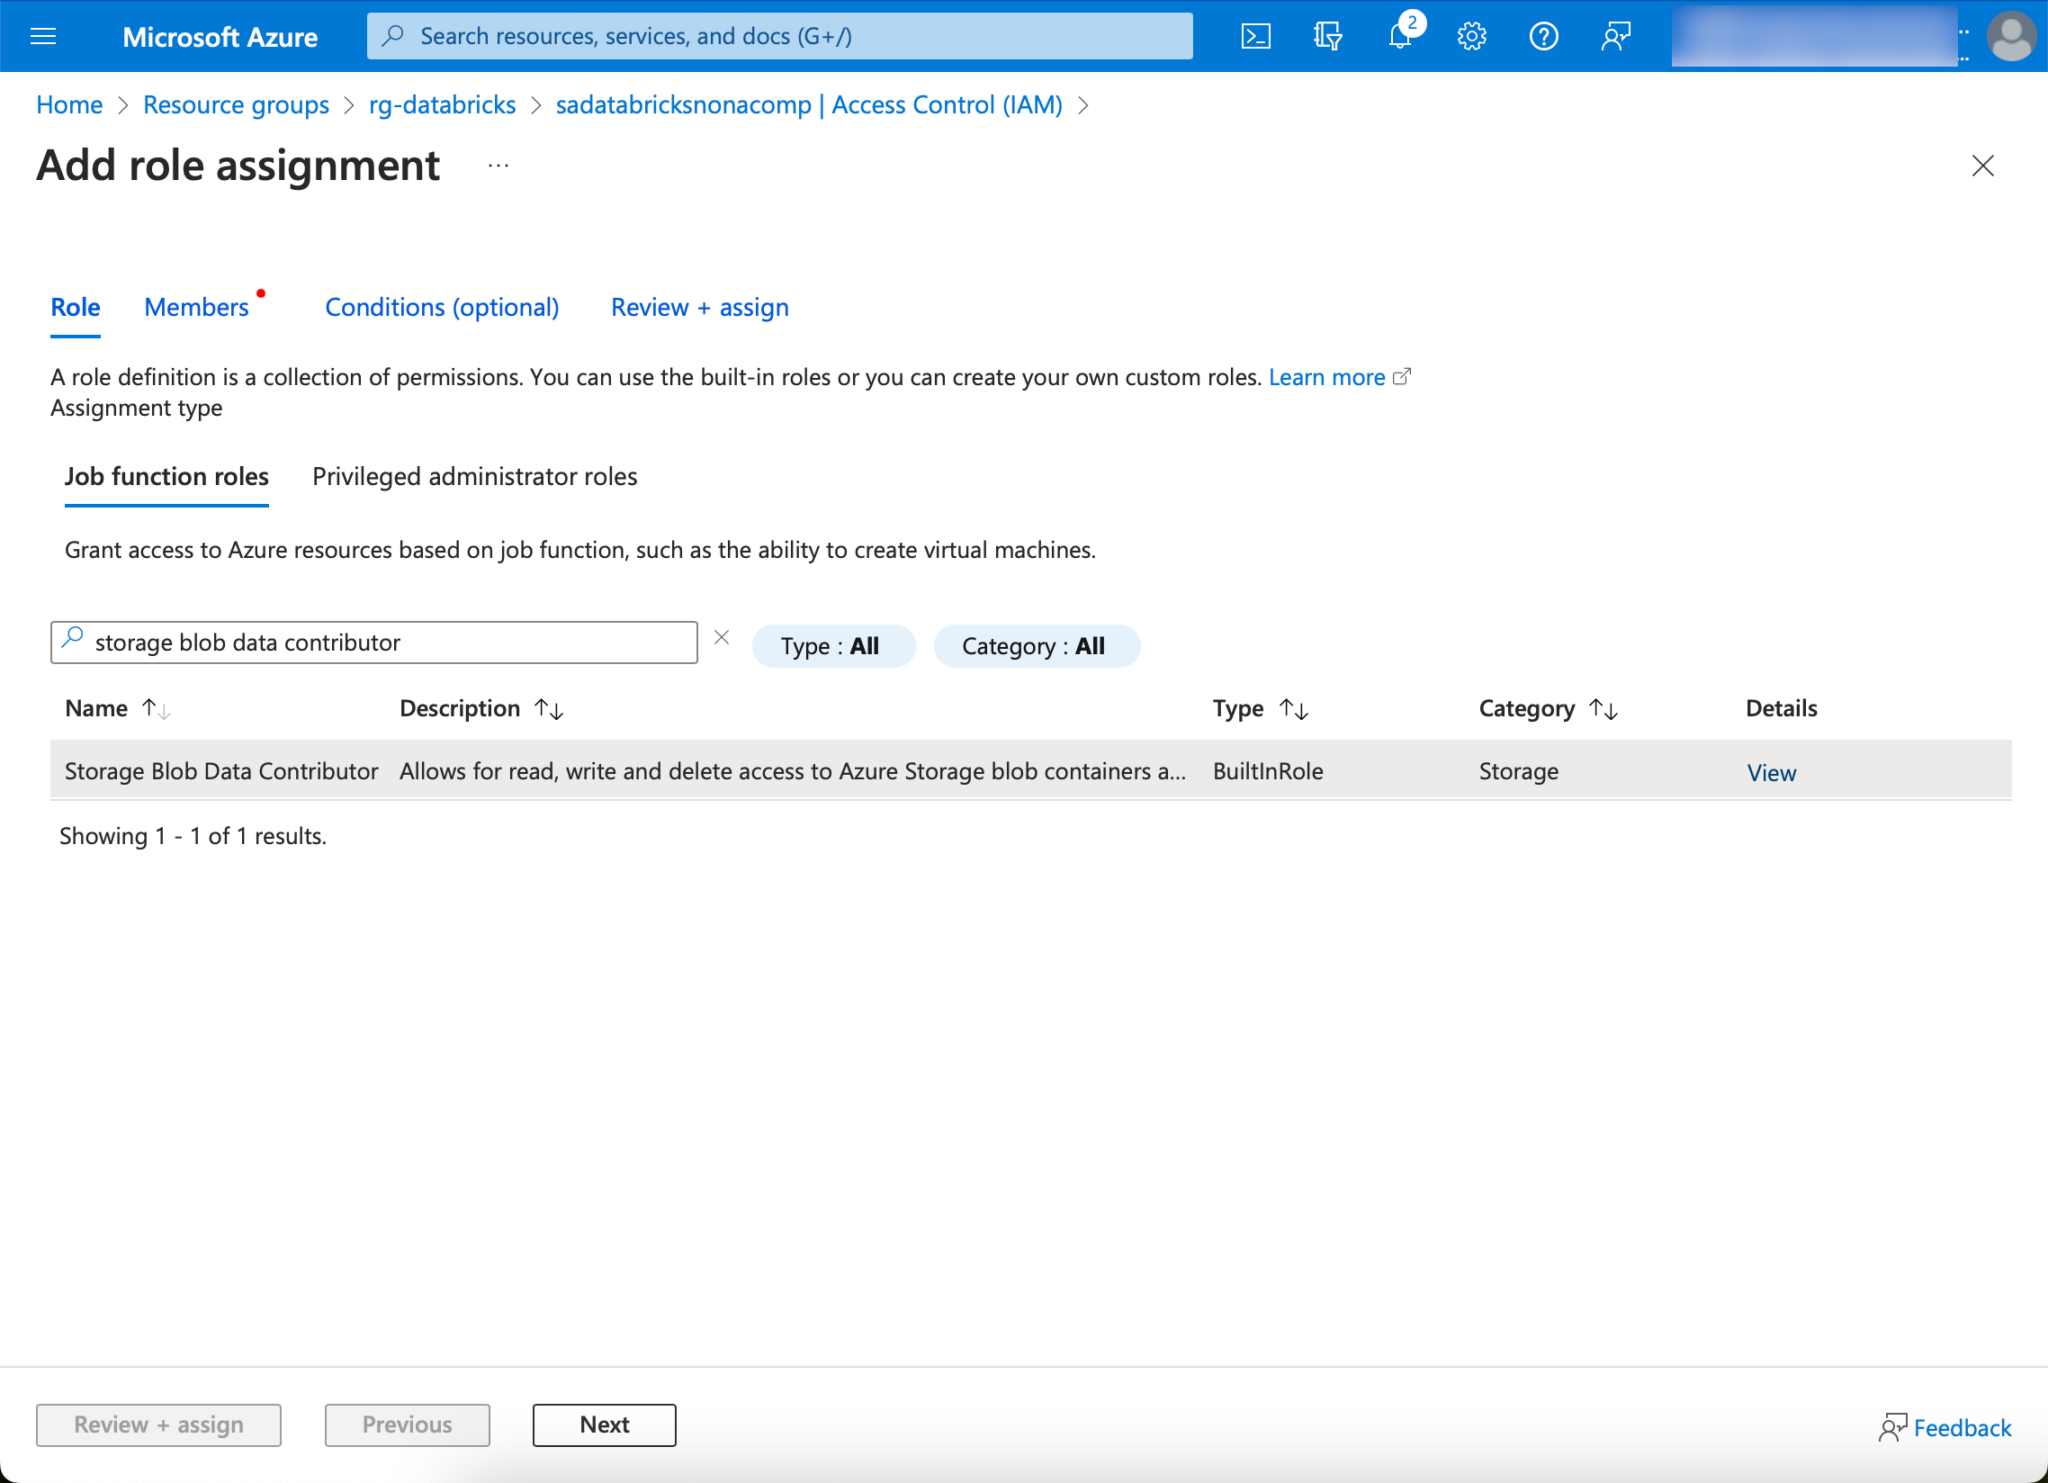
I am looking for the role “storage blob data contributor”.
On the Members tab, I click on “Managed Identity”, Select members and search for the Access Connector.
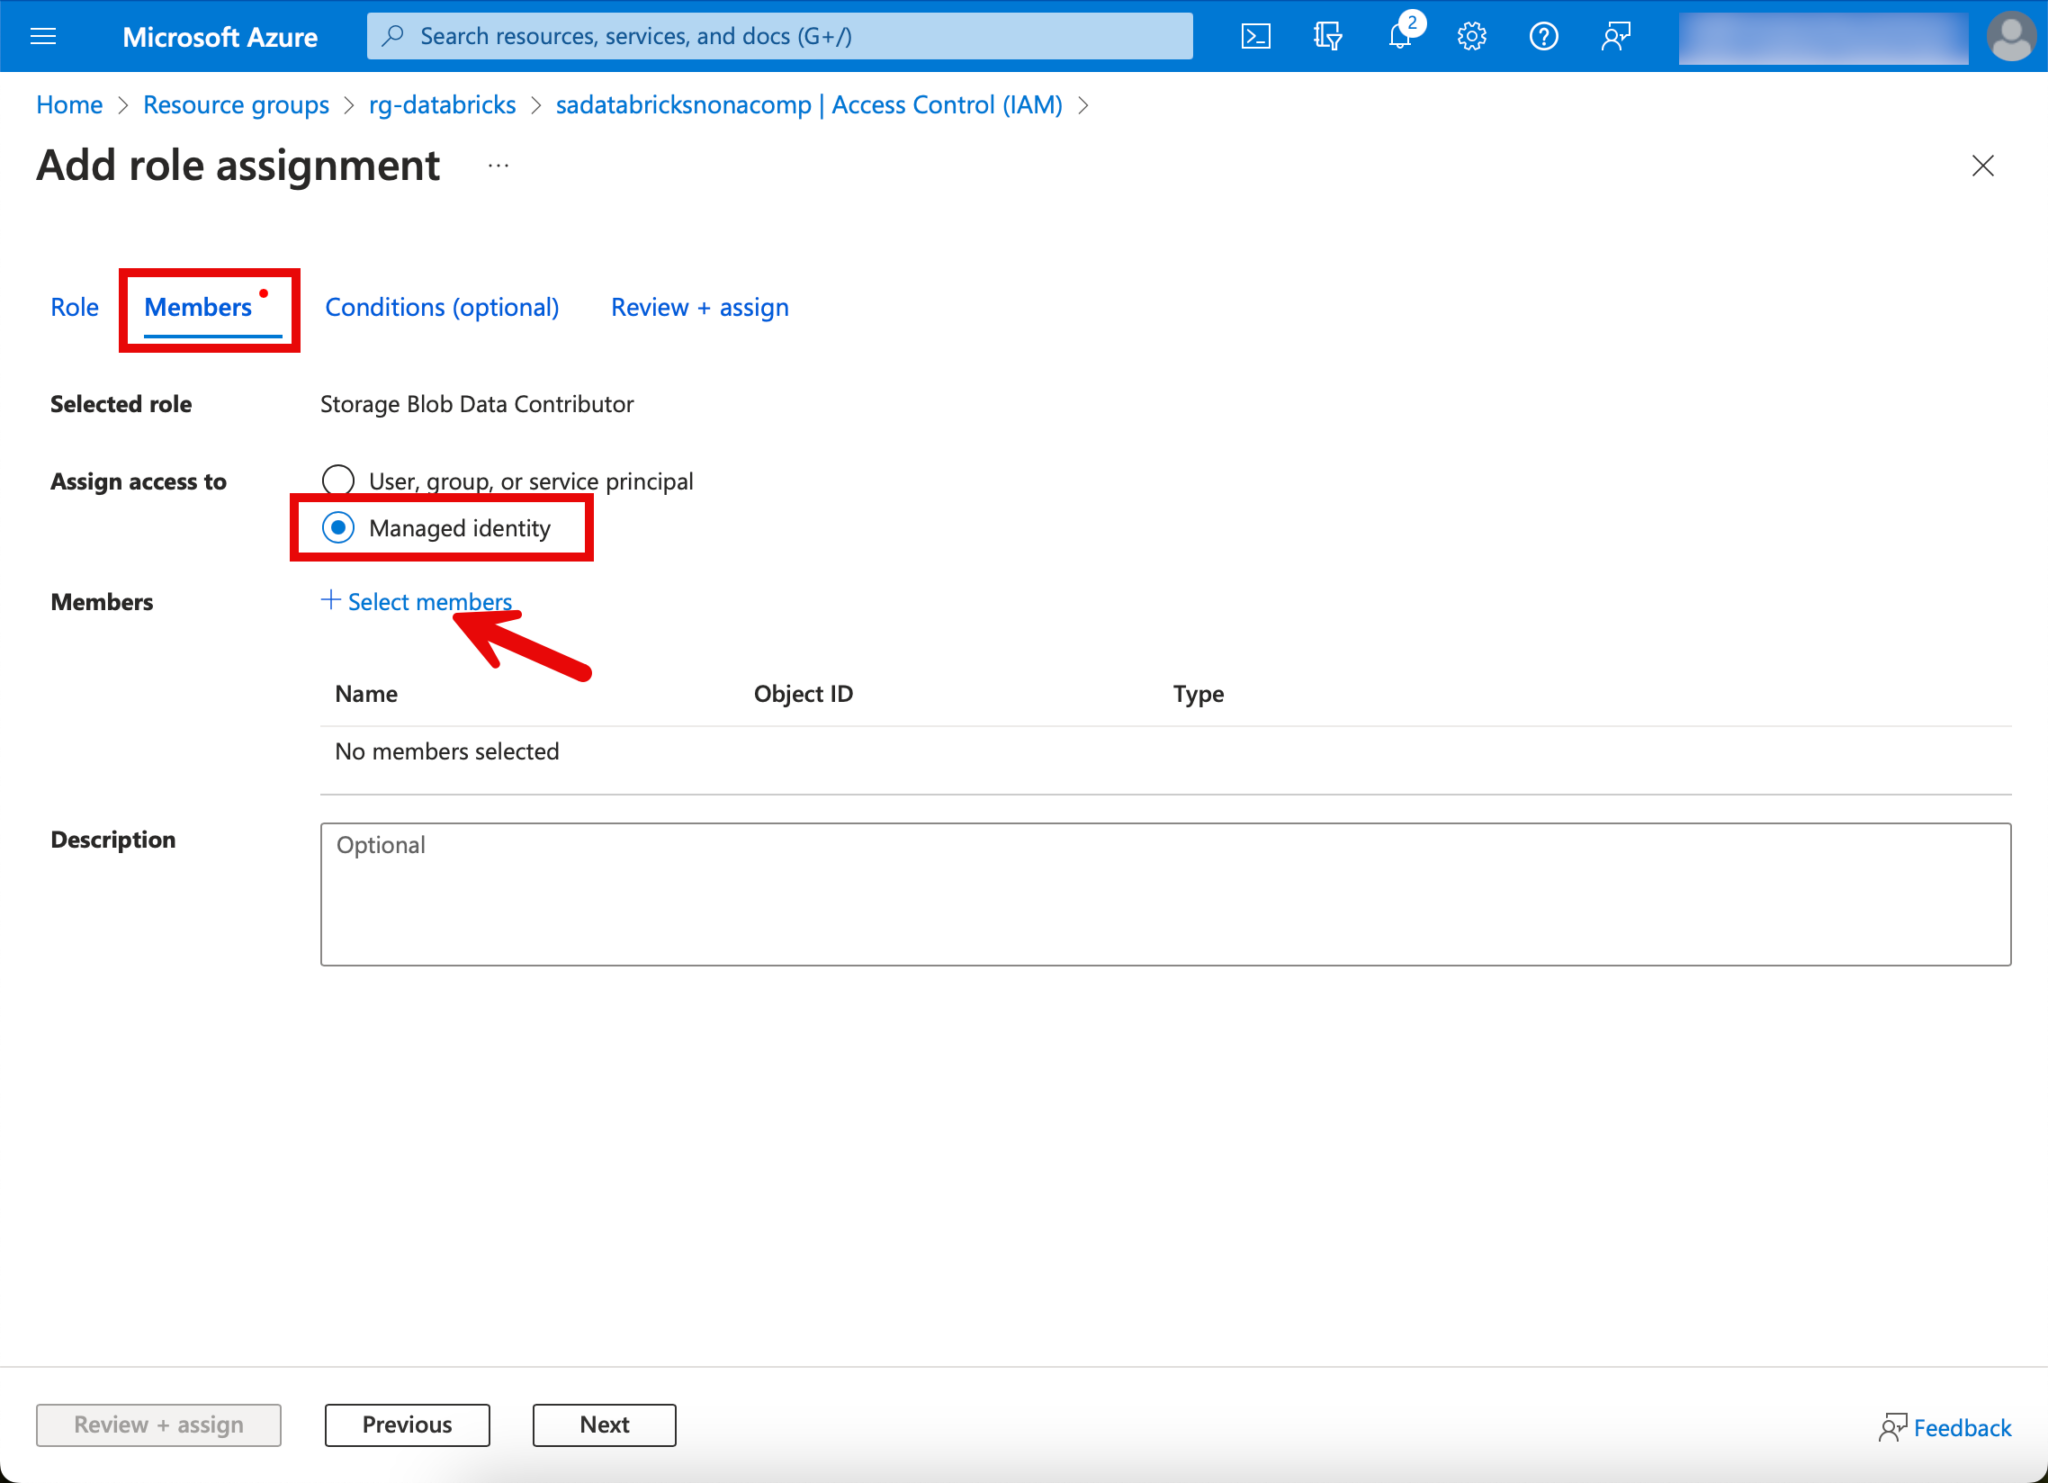

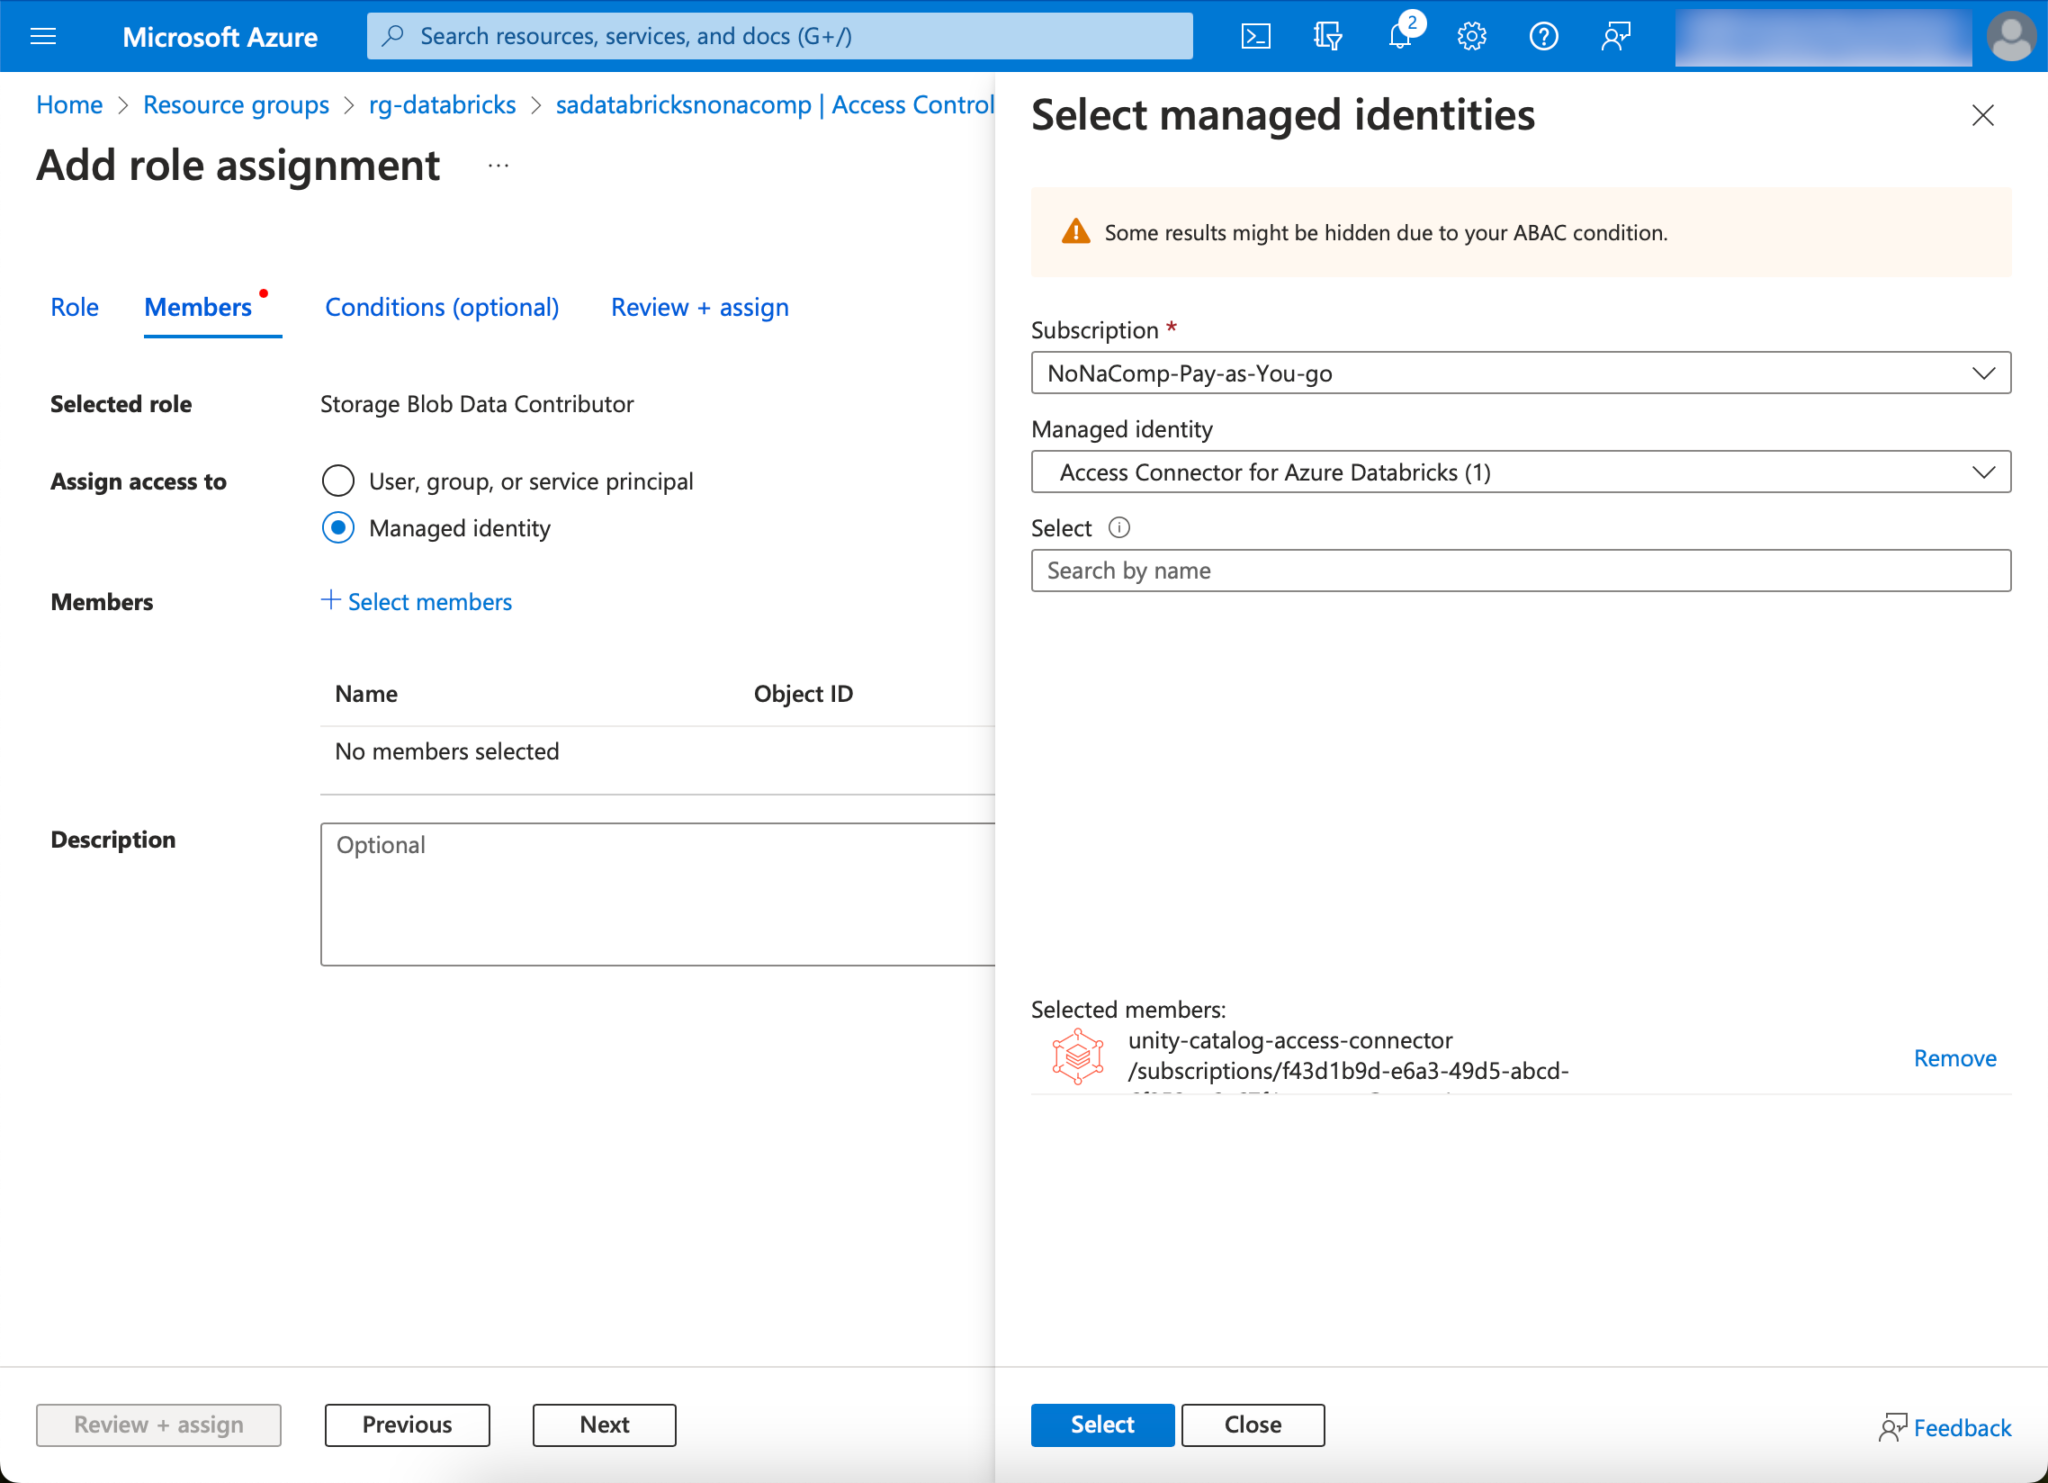
Finally, click on “Review & Assign”, so we have already set the corresponding authorizations.
Setup in the Databricks Workspace
Now I log in to the Databricks workspace. This can be done via the resource in the Azure portal.
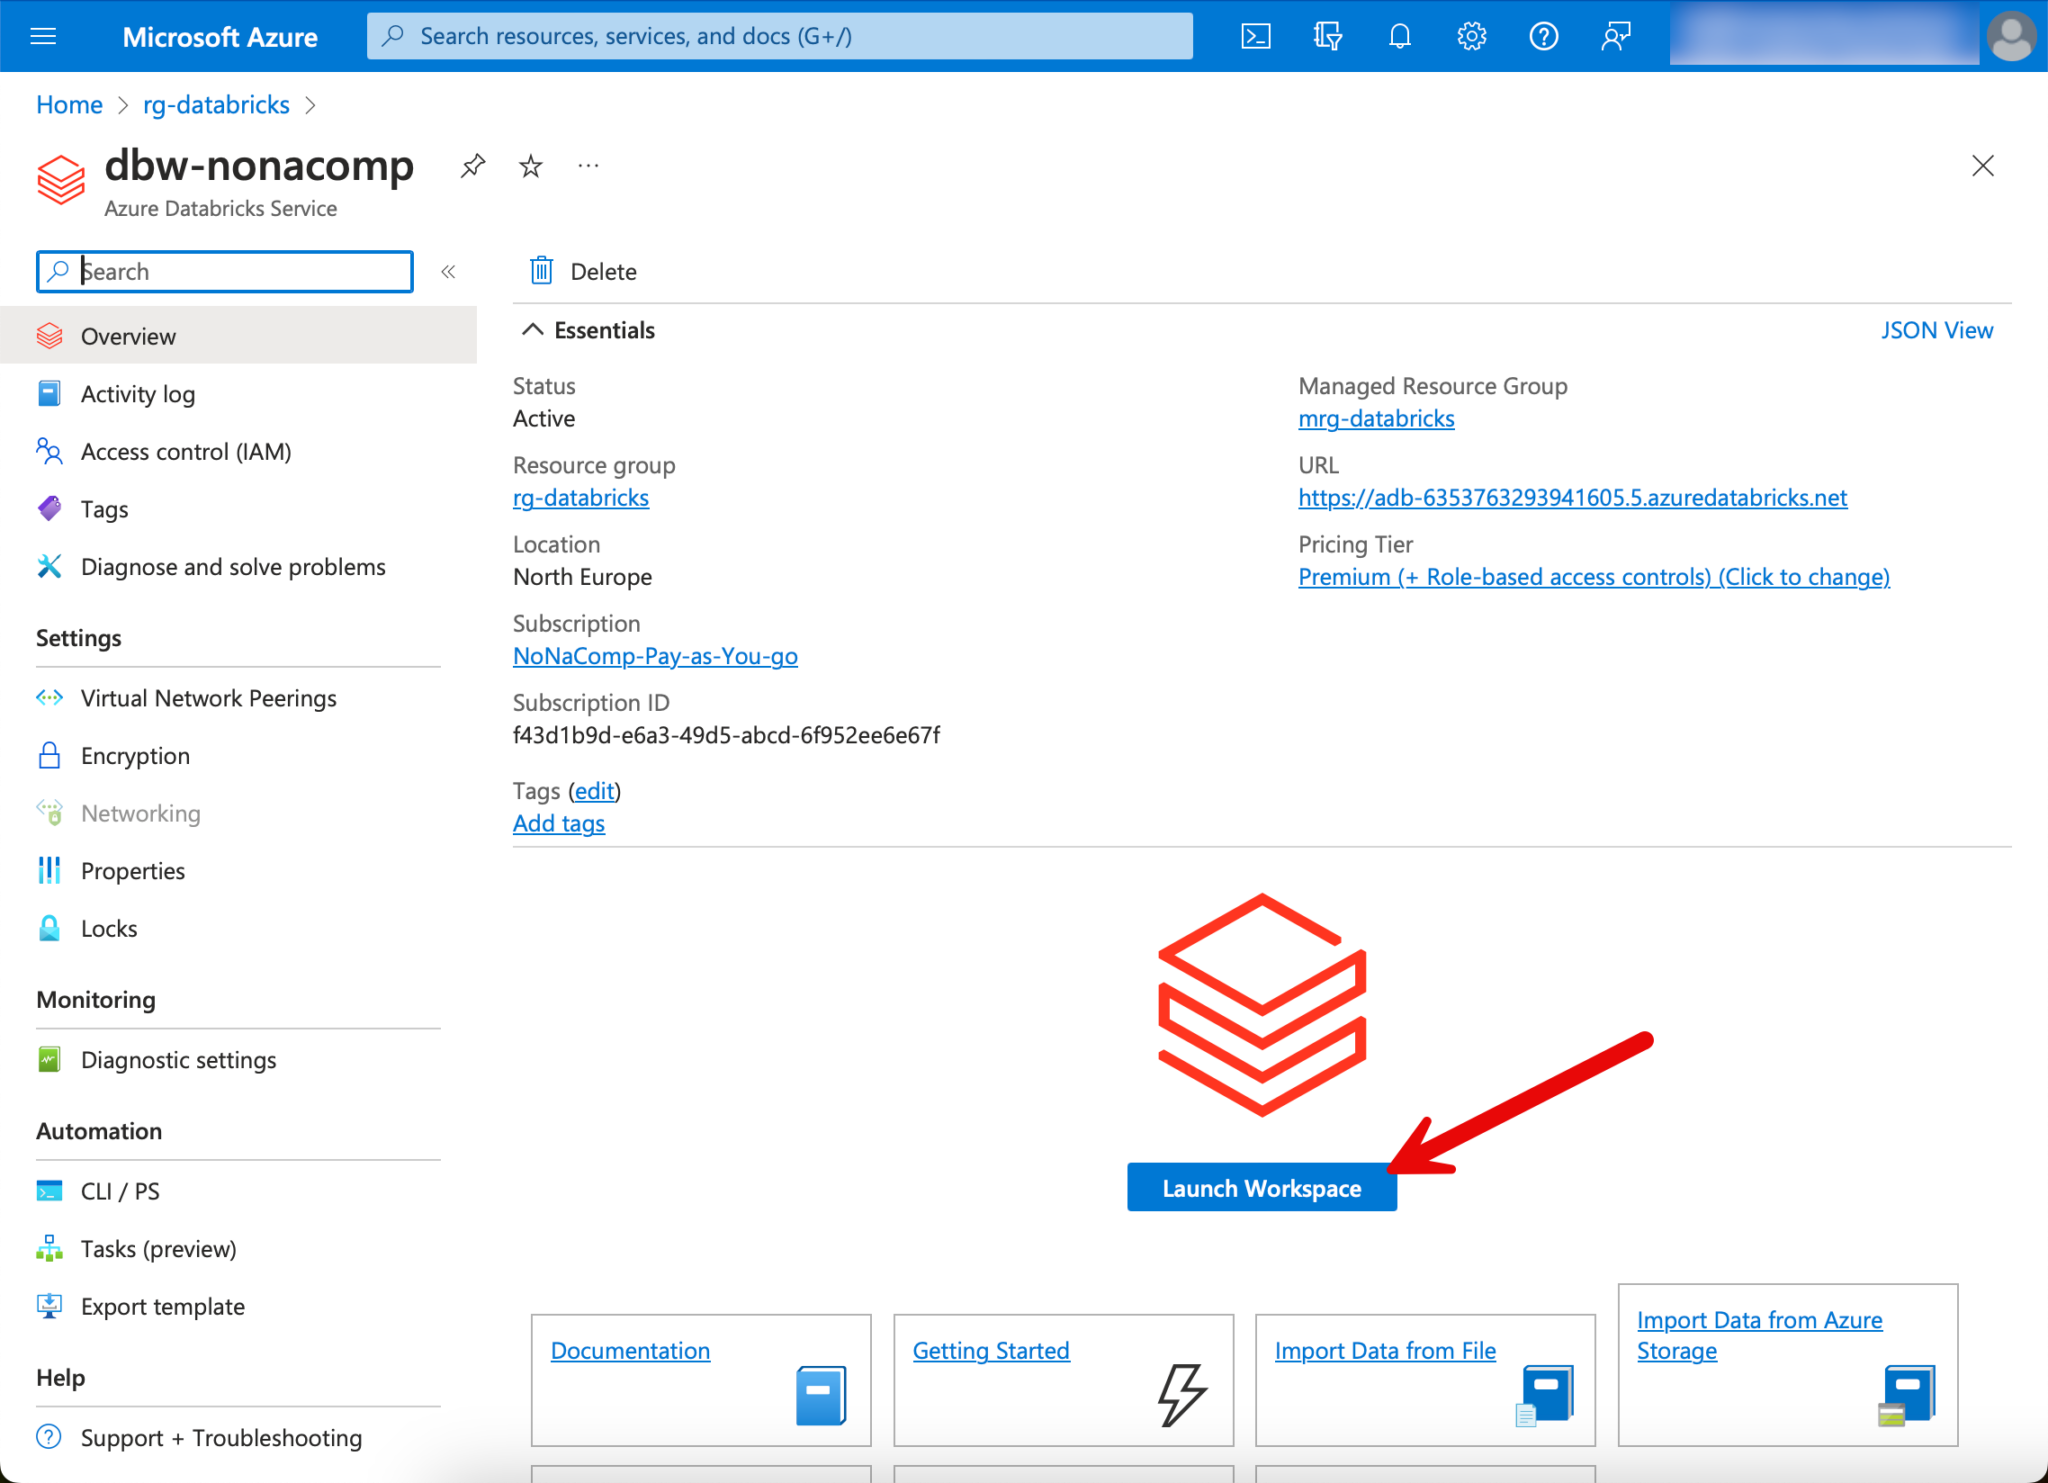
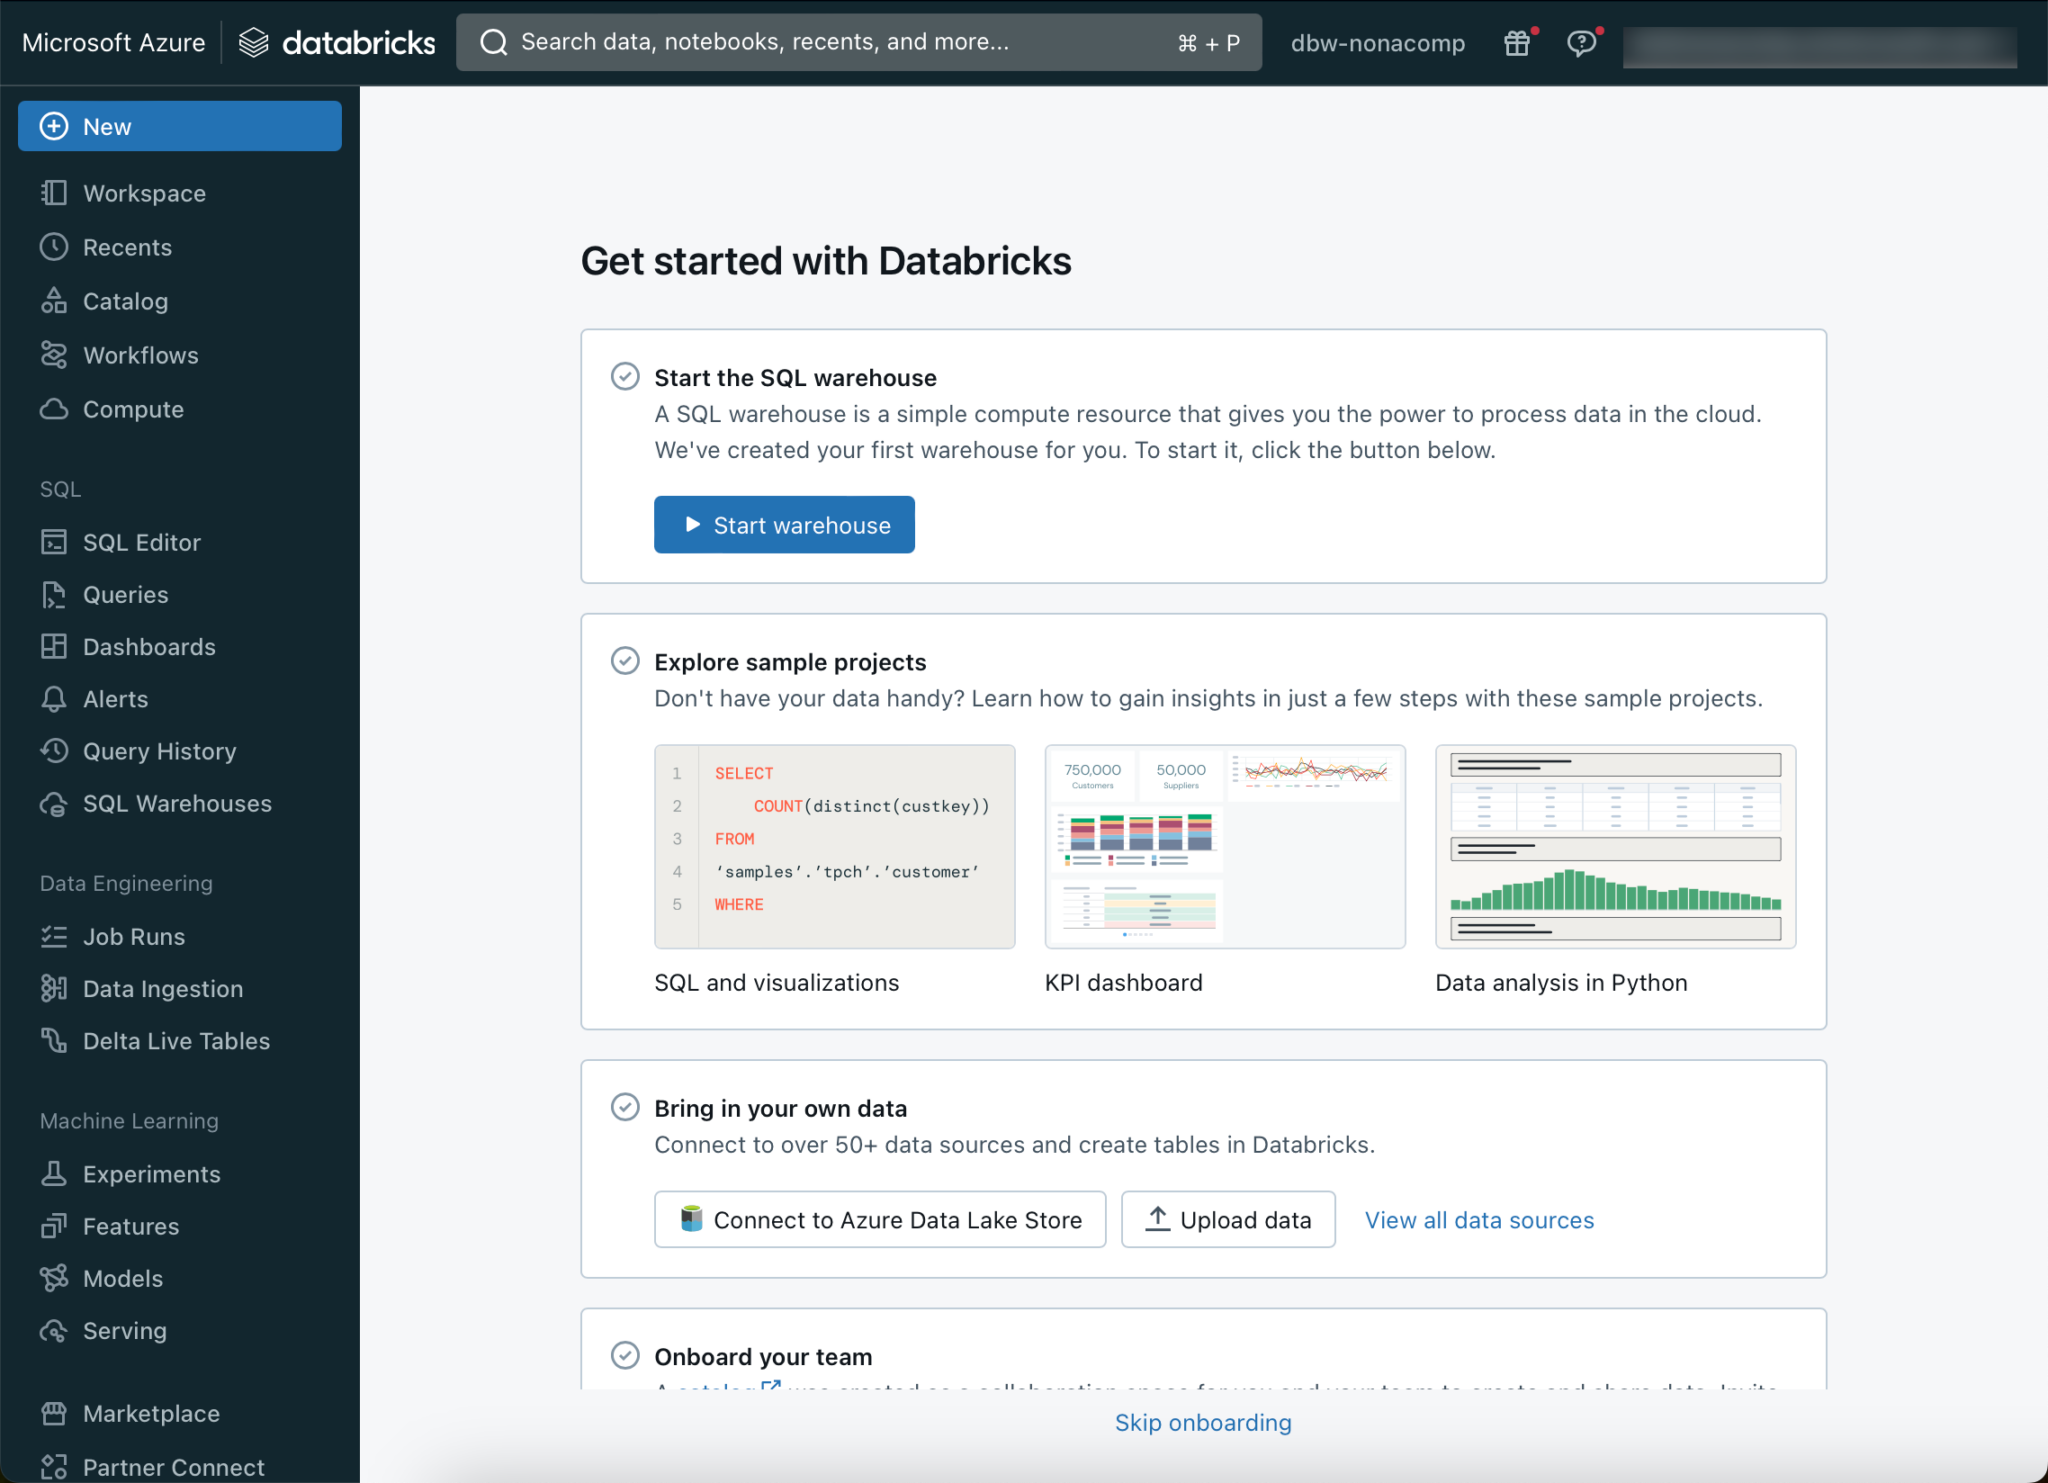
Another browser tab opens, in which the GUI of the workspace is located.
In order to set up Unity Catalog, you must log in to your Databricks account. This is done by clicking on the corresponding menu item of my user.
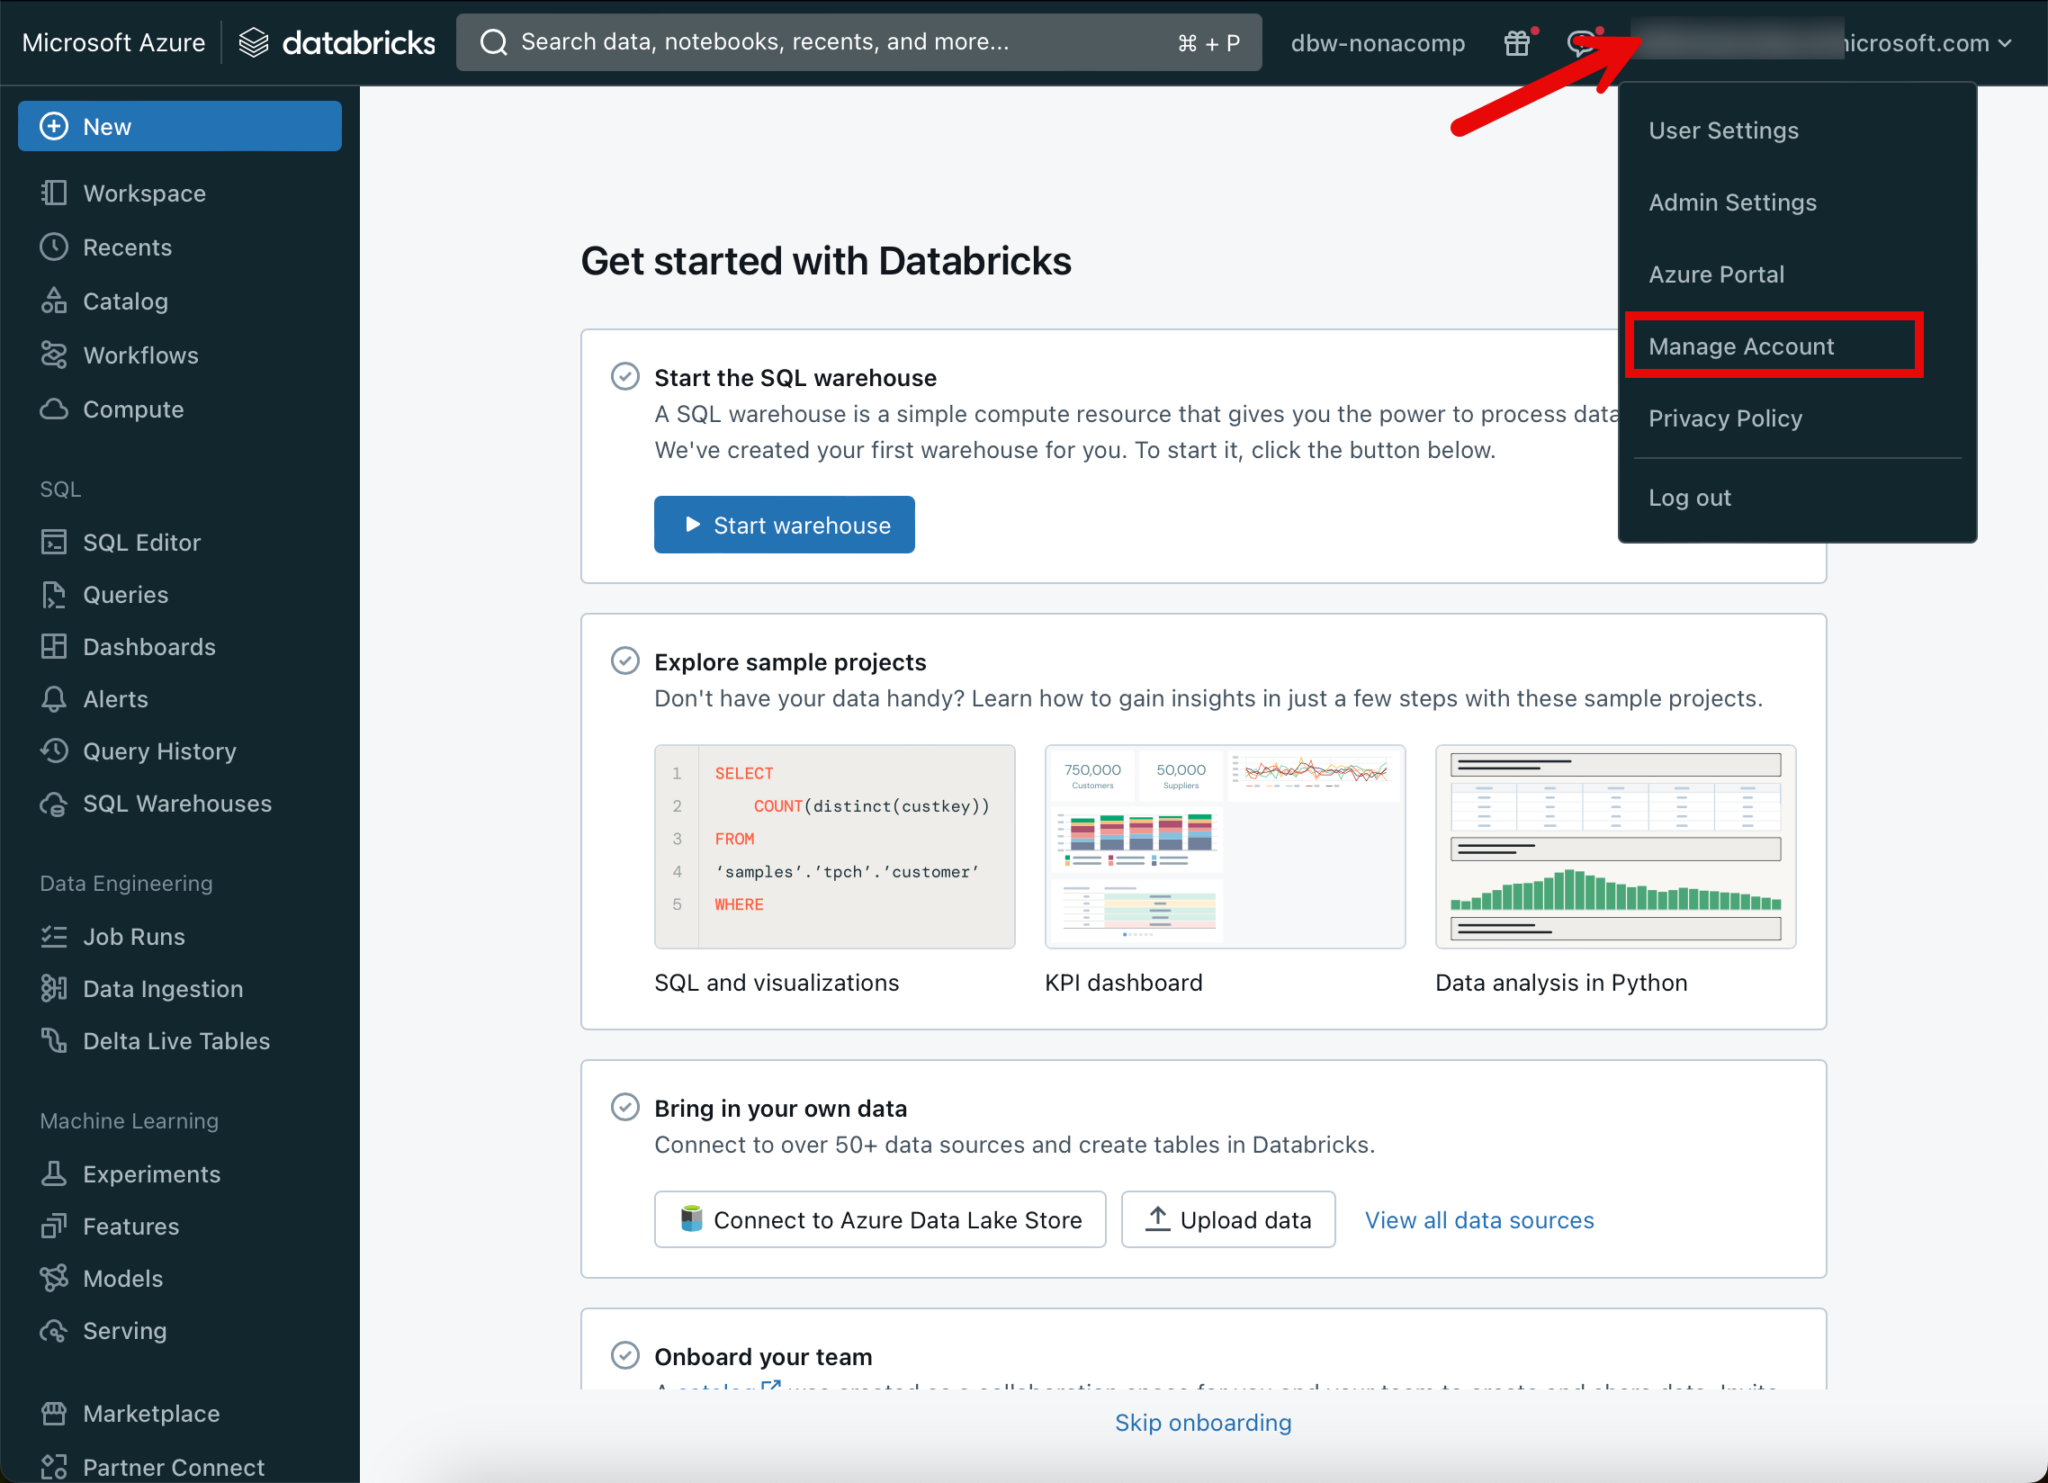
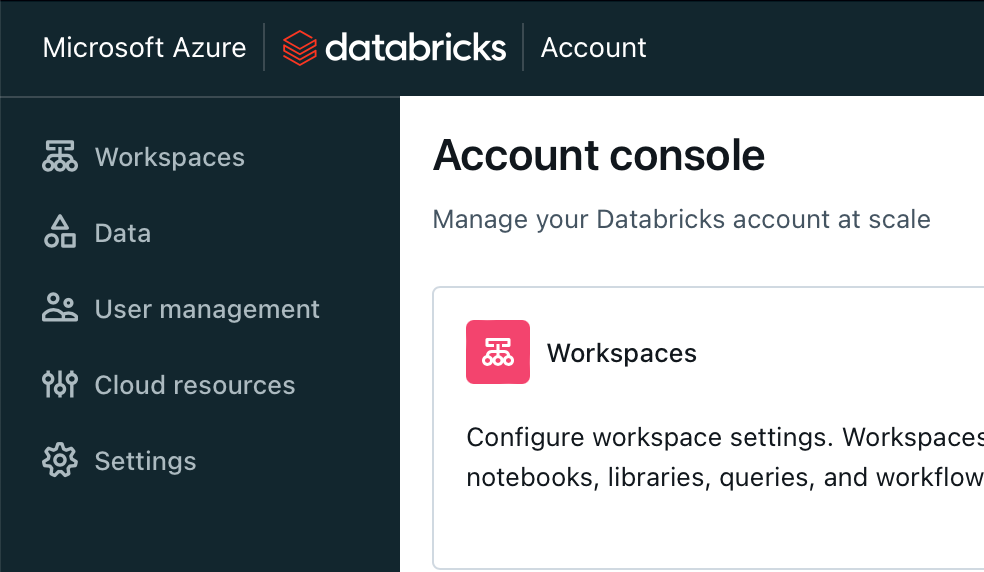
Again, another tab opens in which the Account Console is located. For the sake of clarity, I set the menu on the left-hand side to always expand.
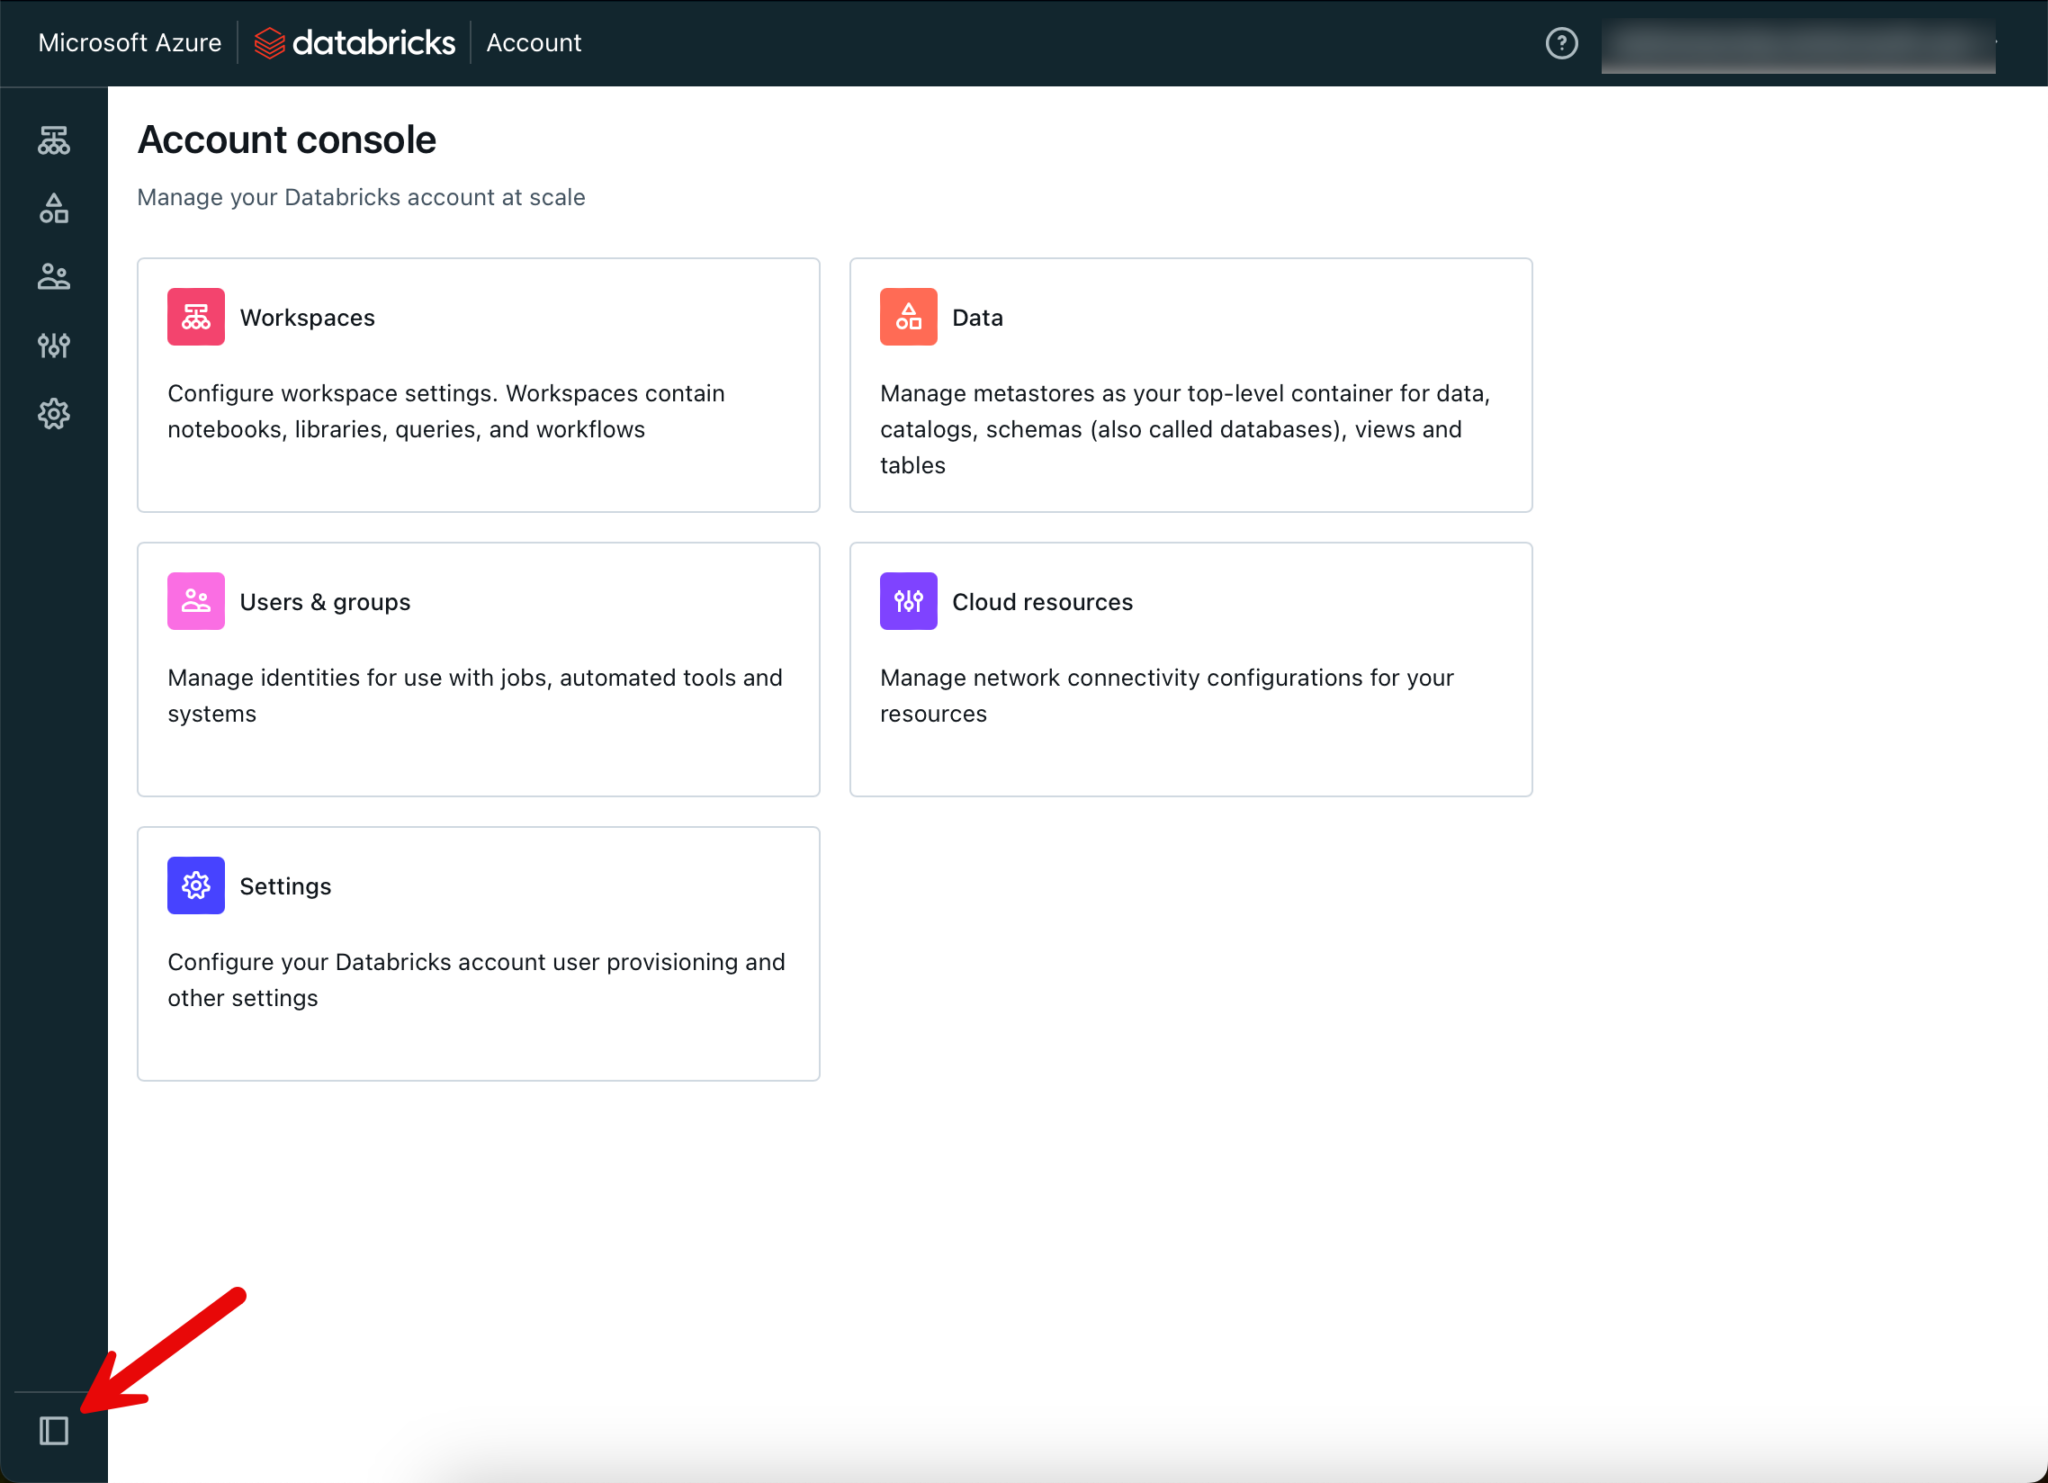
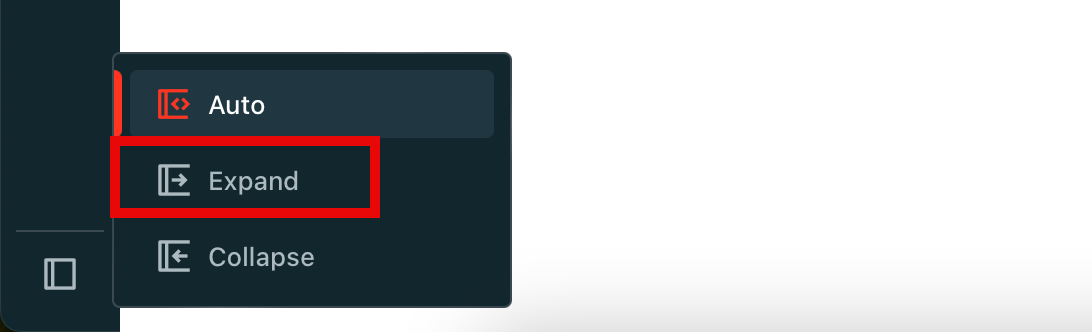
With this setting, the menu items are always displayed nicely.
Create metastore
The topmost object in the Unity Catalog is the metastore. This can be created under the “Data” menu.
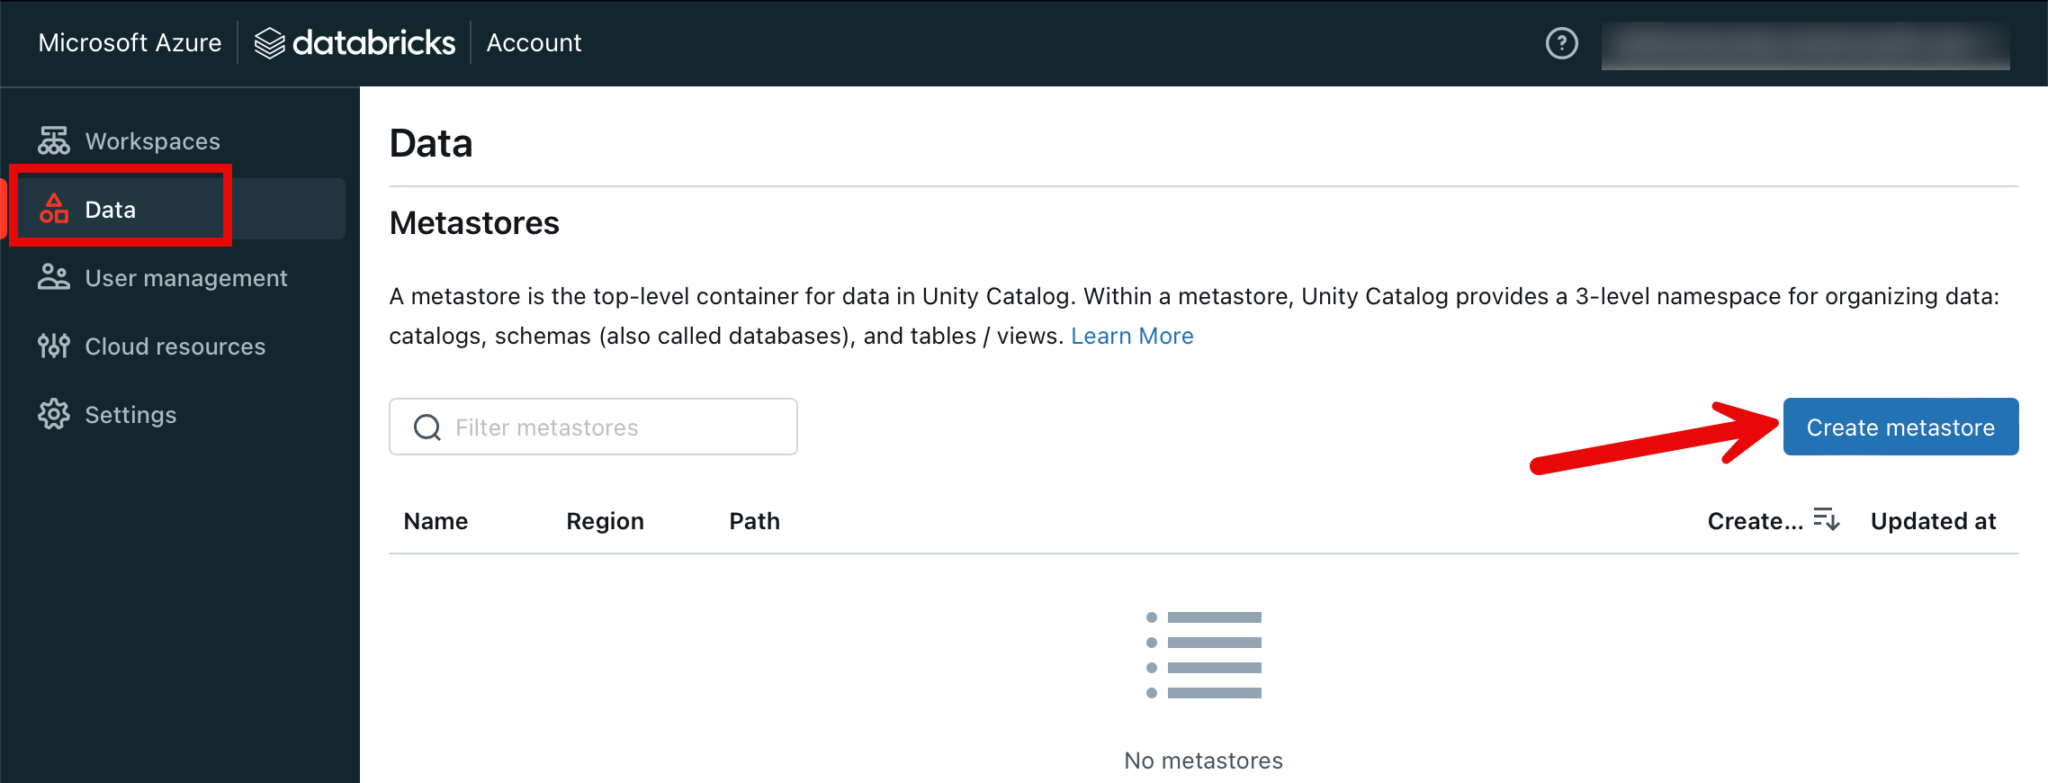
Only one metastore can be created per region. I choose the same region as my Azure resources.
I leave out the path to an ADLS Gen 2 path, as well as the Access Connector id.
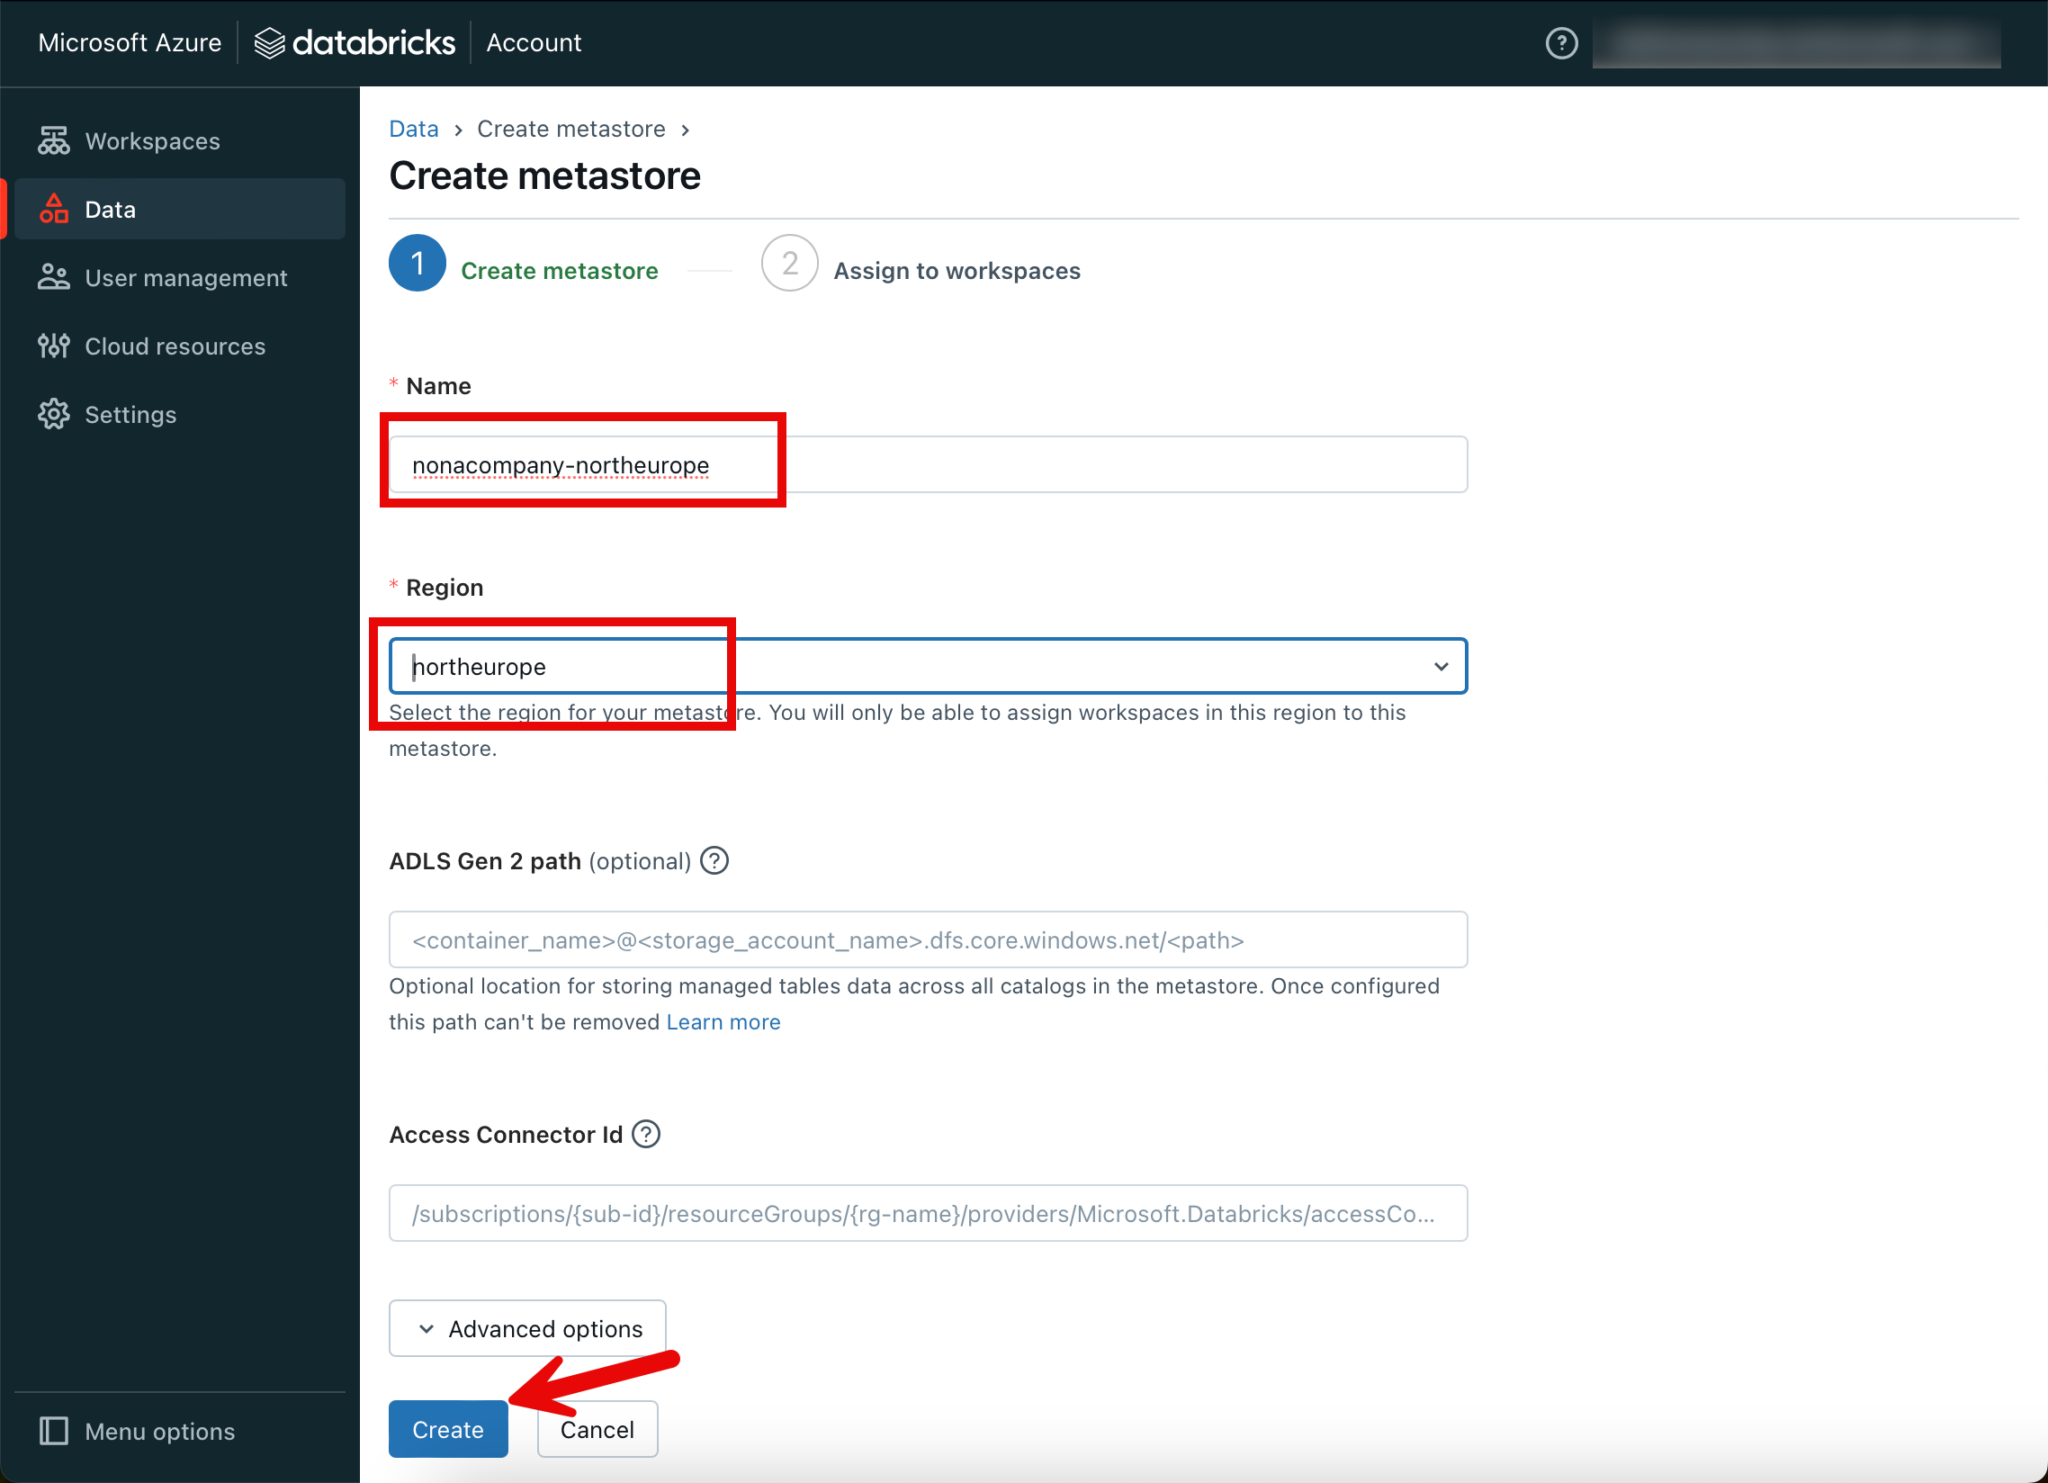
In the next step, I will assign the newly created metastore to the Databricks workspace, which I created as a priority.


Create Catalog objects
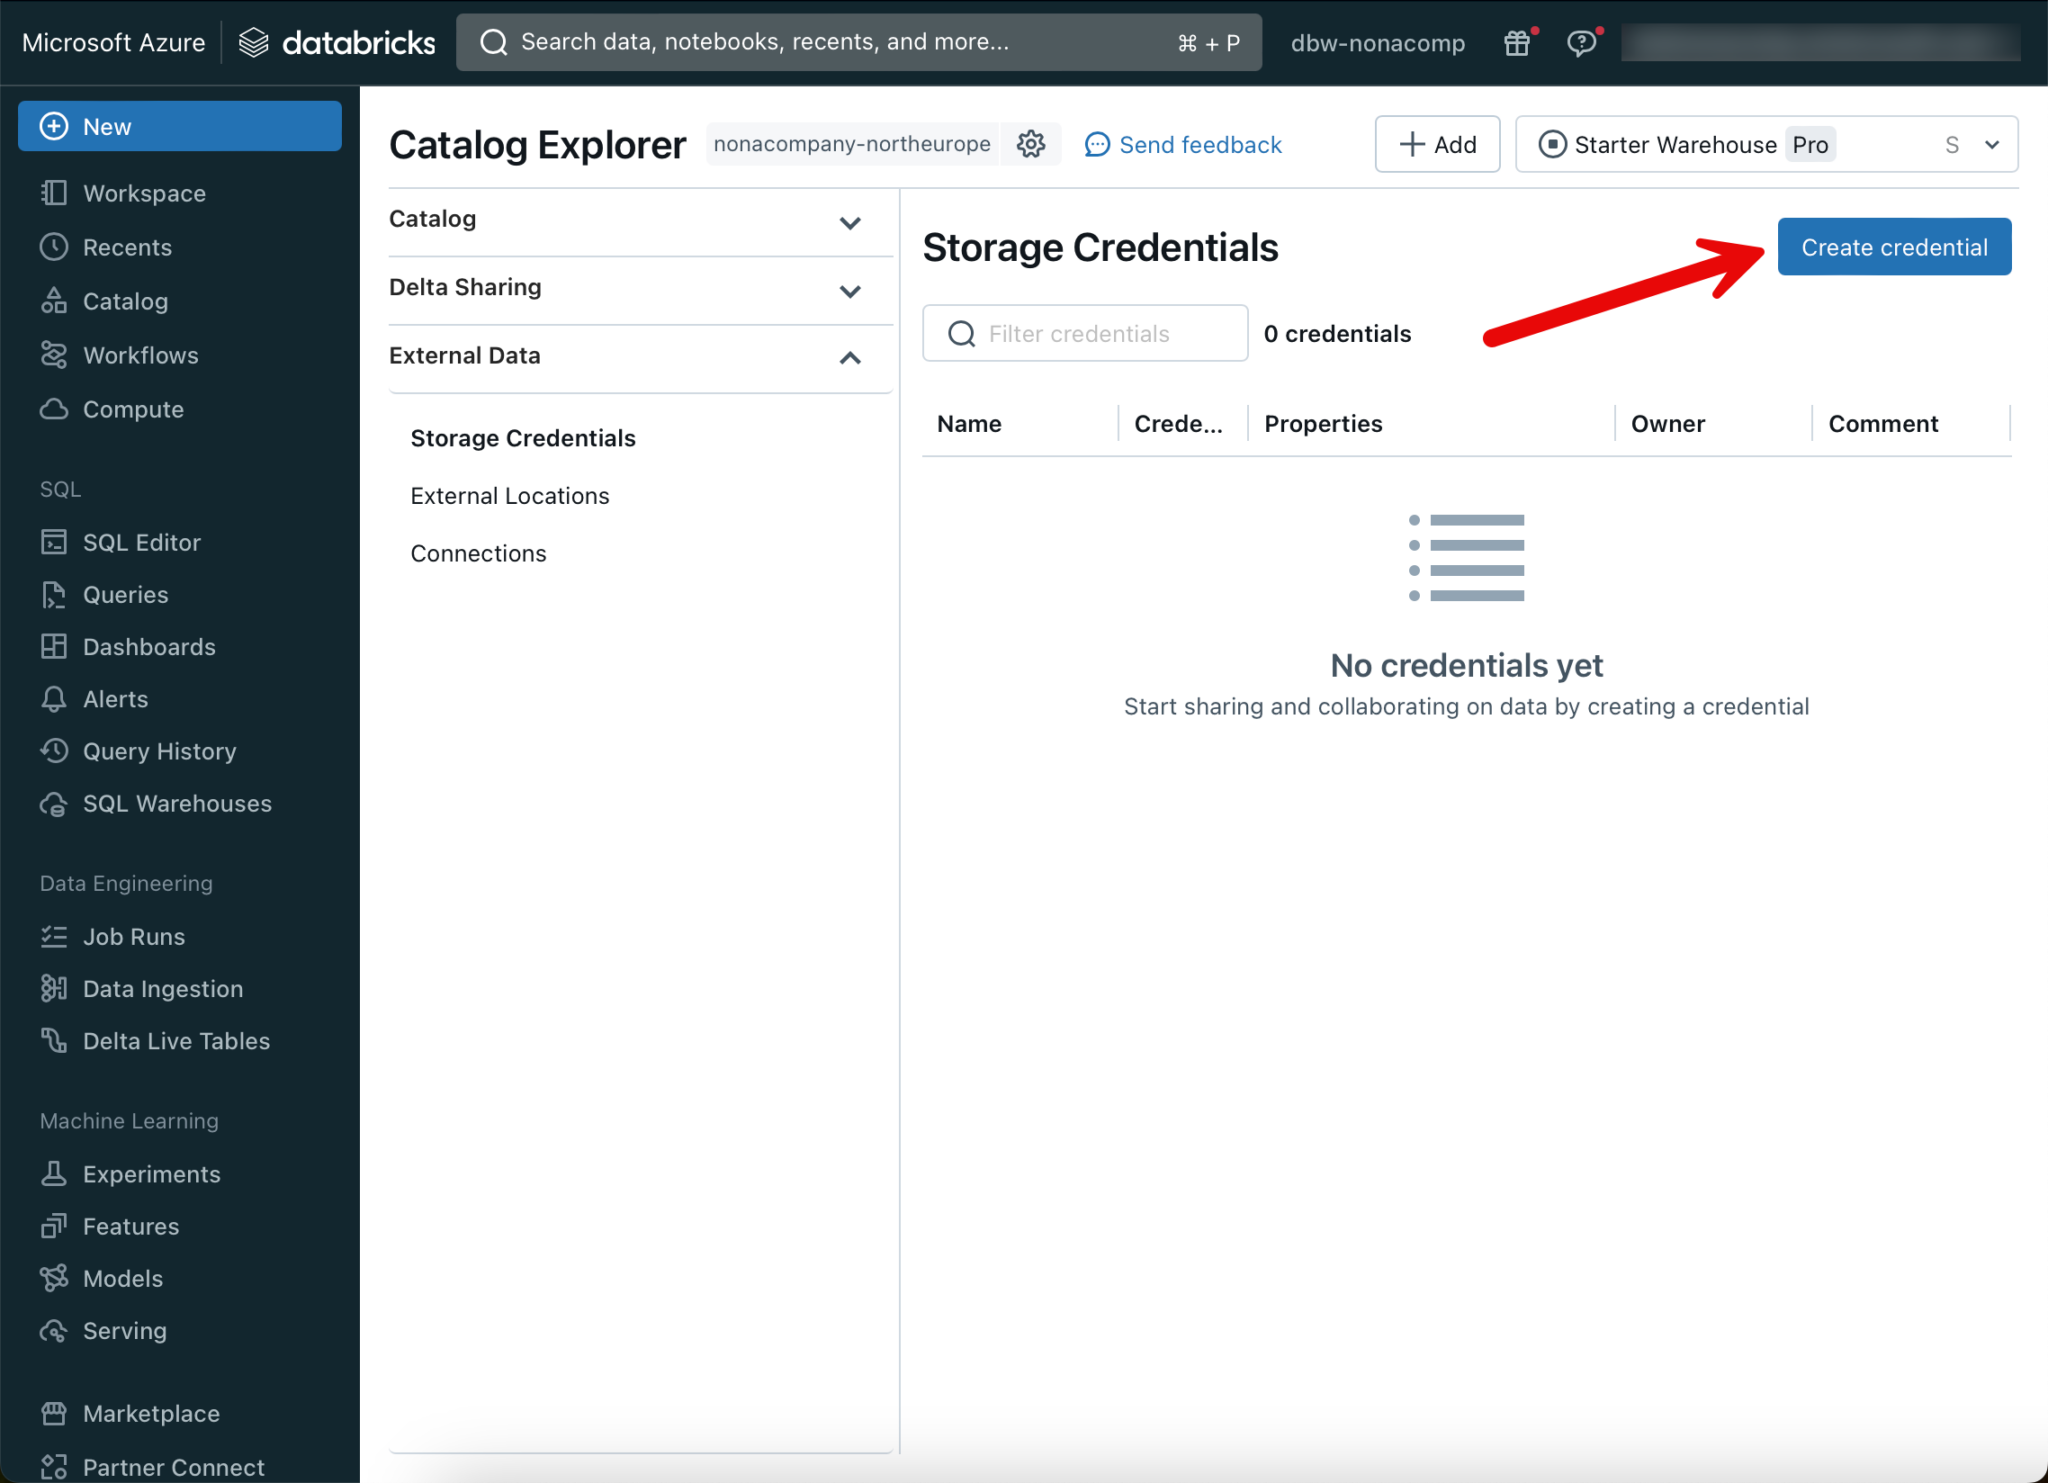
After the metastore has been created, I switch back to the Databricks workspace. To create the catalog objects, I switch to the corresponding menu item. Since I want to set where which objects are located, I will create the corresponding objects in “External Data”.
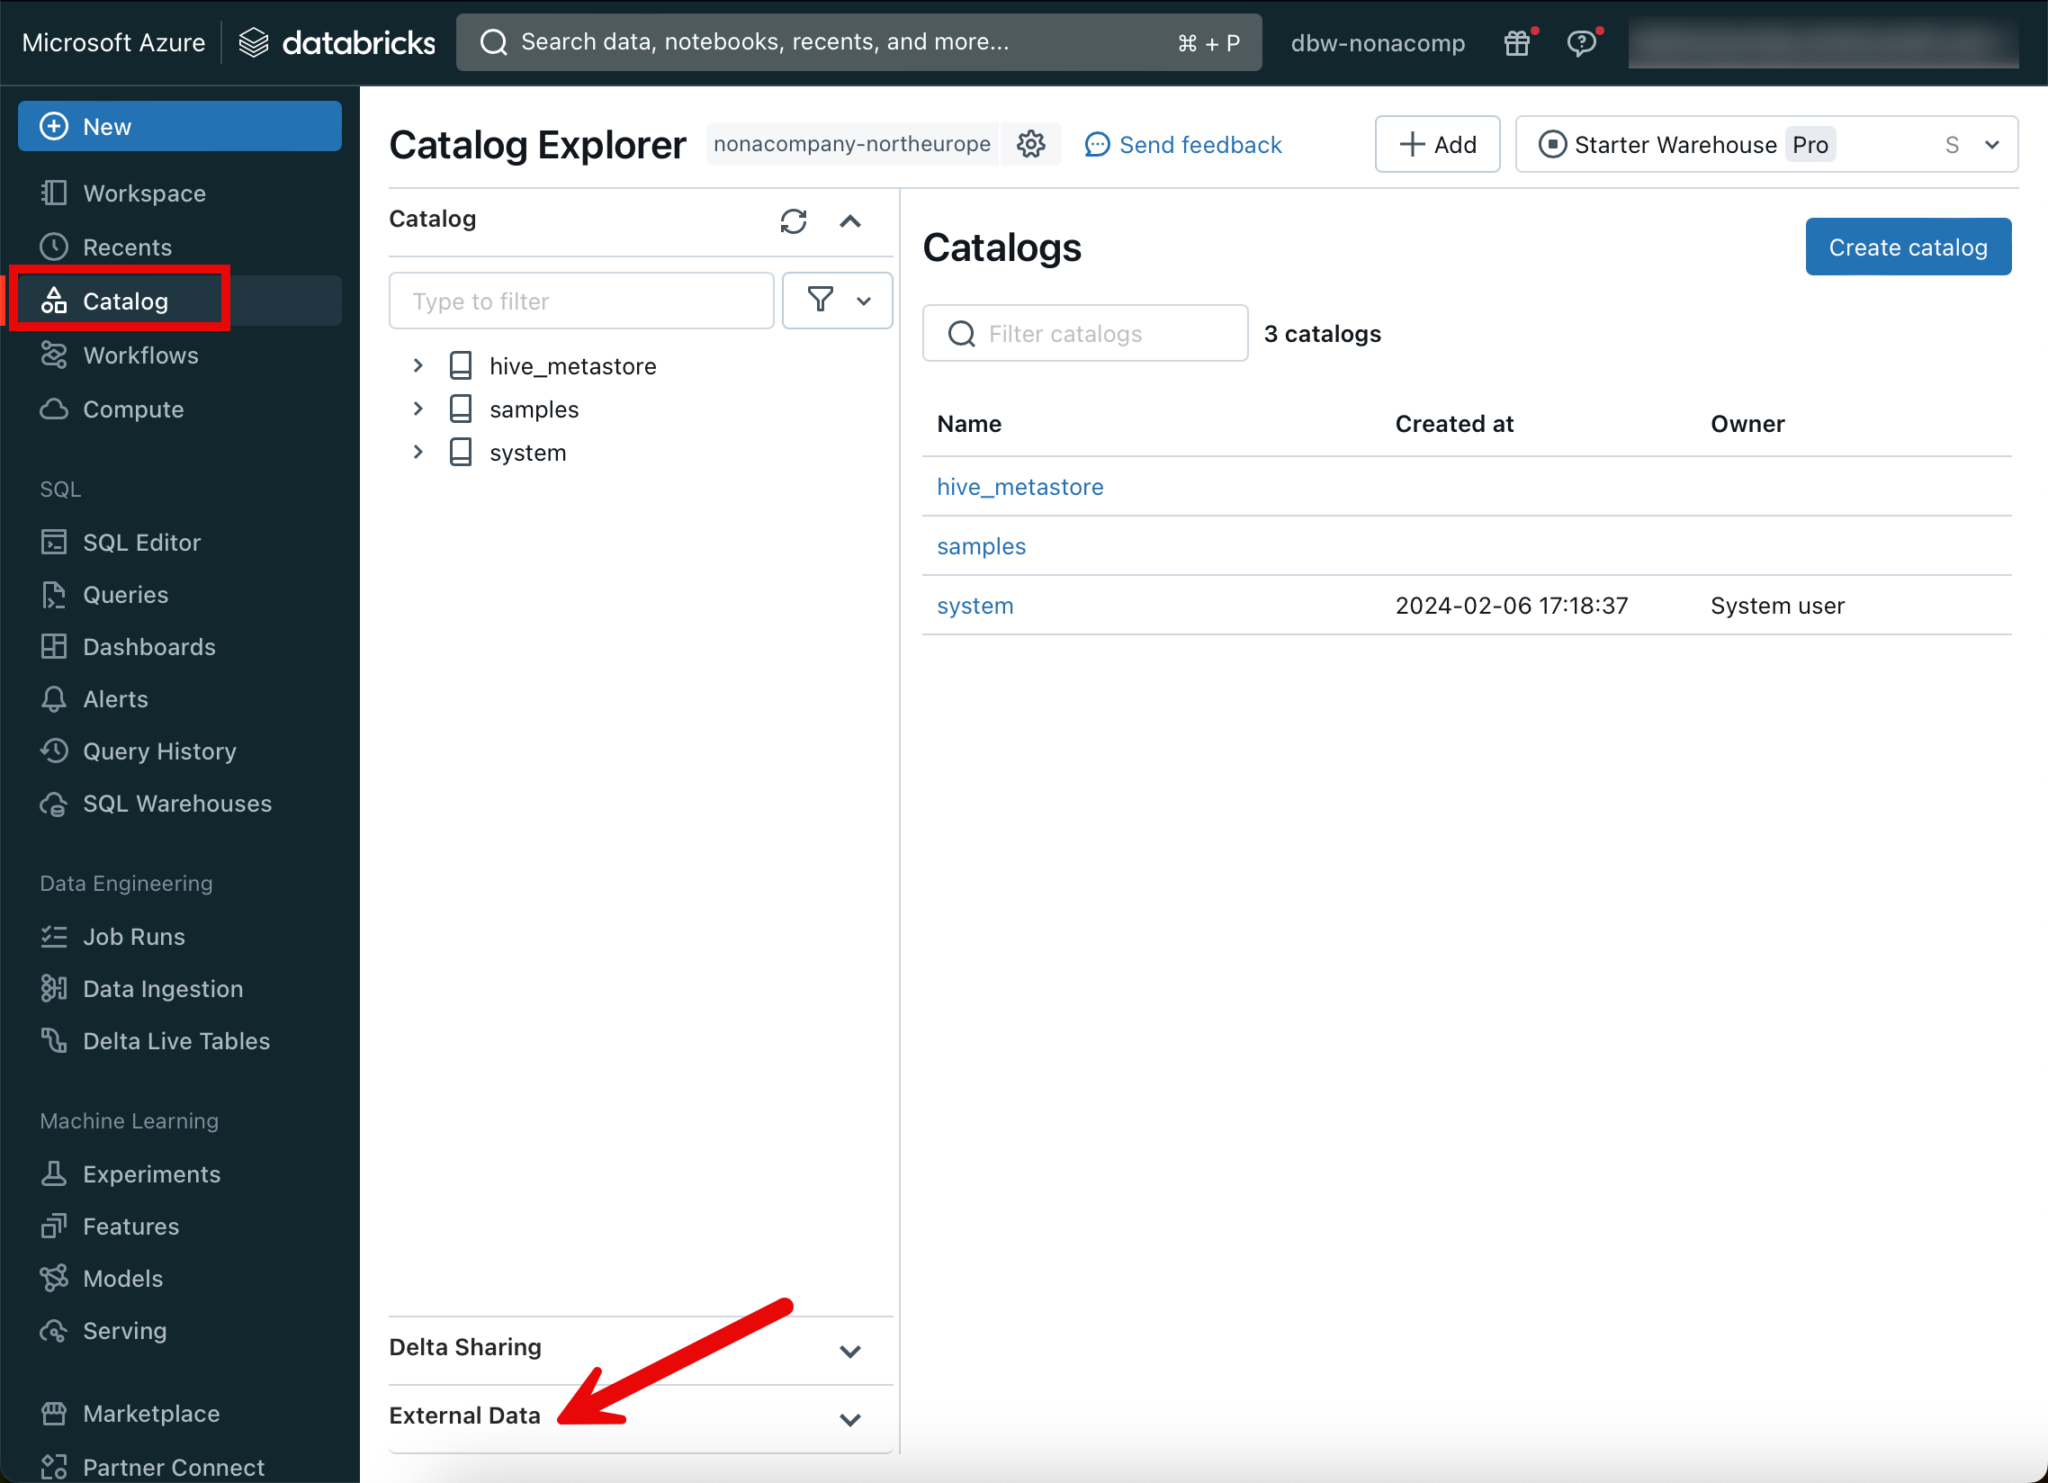
The first thing I need is a “Storage Credential”.
Here I enter the details of the resource “Access Connector for Azure Databricks”.
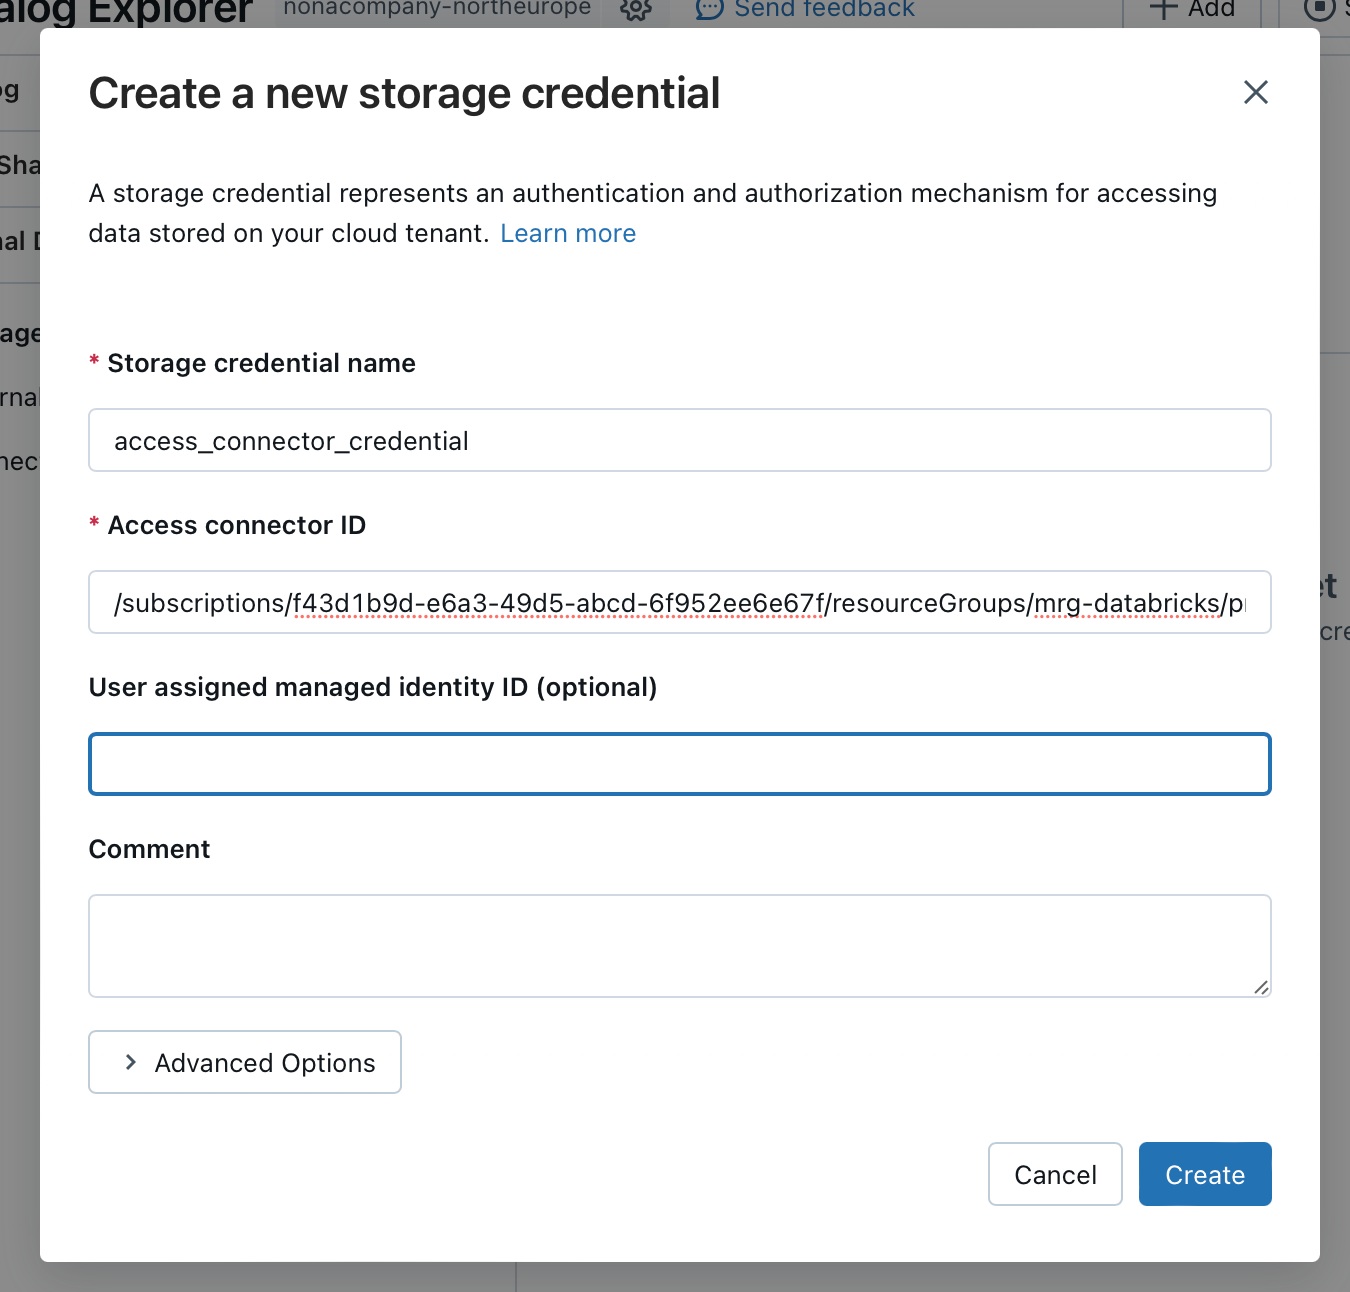
You can see the Access Connector ID if you look in the properties of the Access Connector resource in the Managed Resource Group:
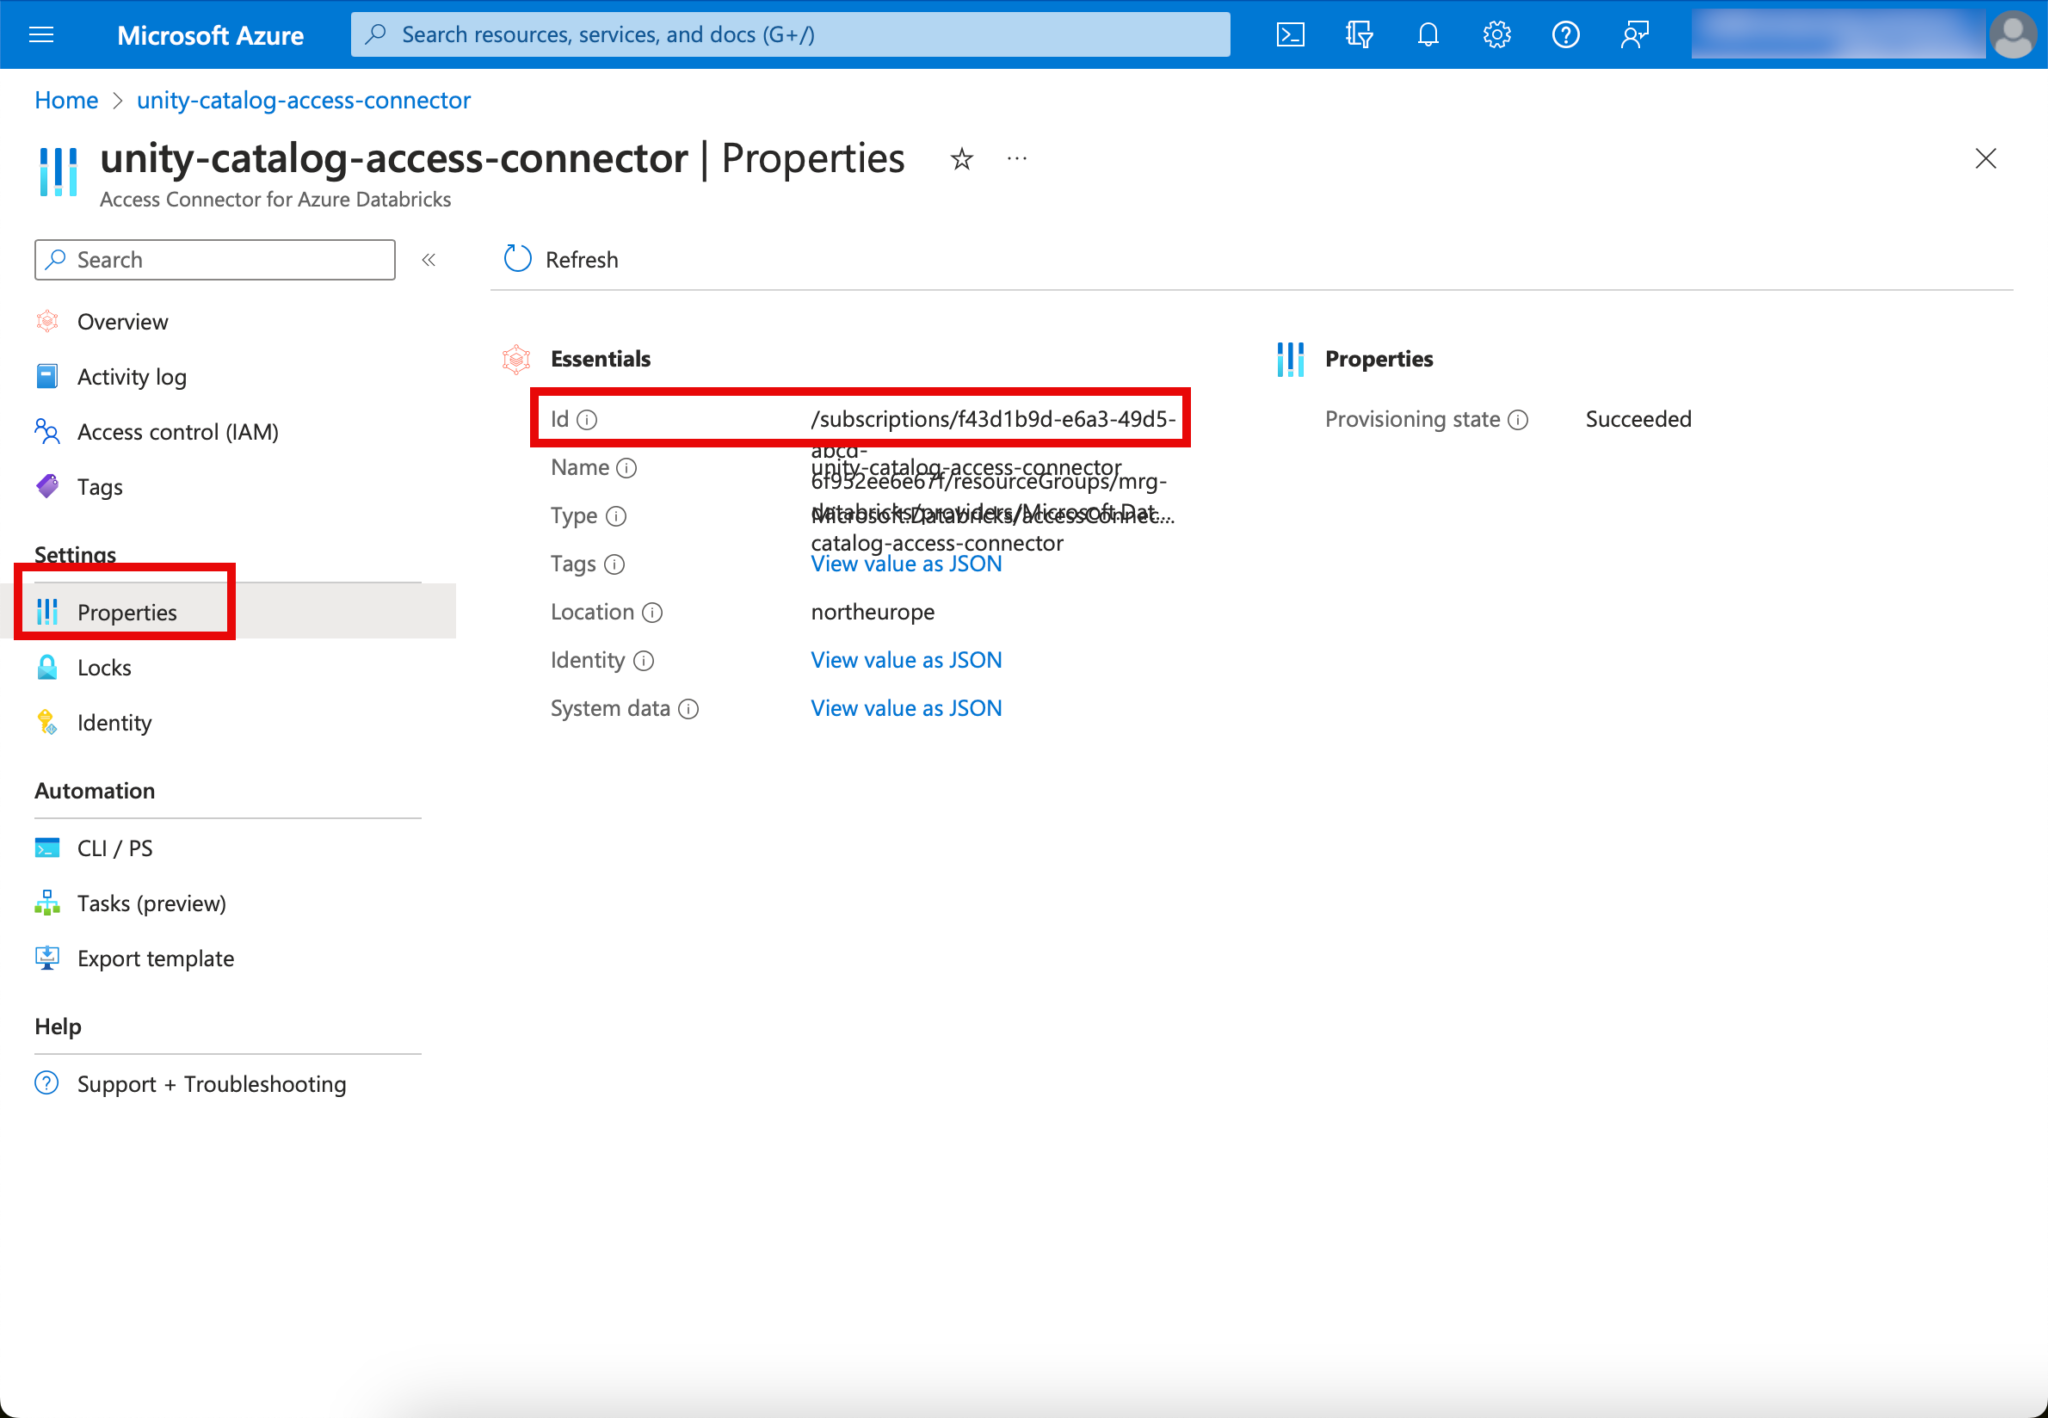
Then click on “Create” when the relevant information has been entered.
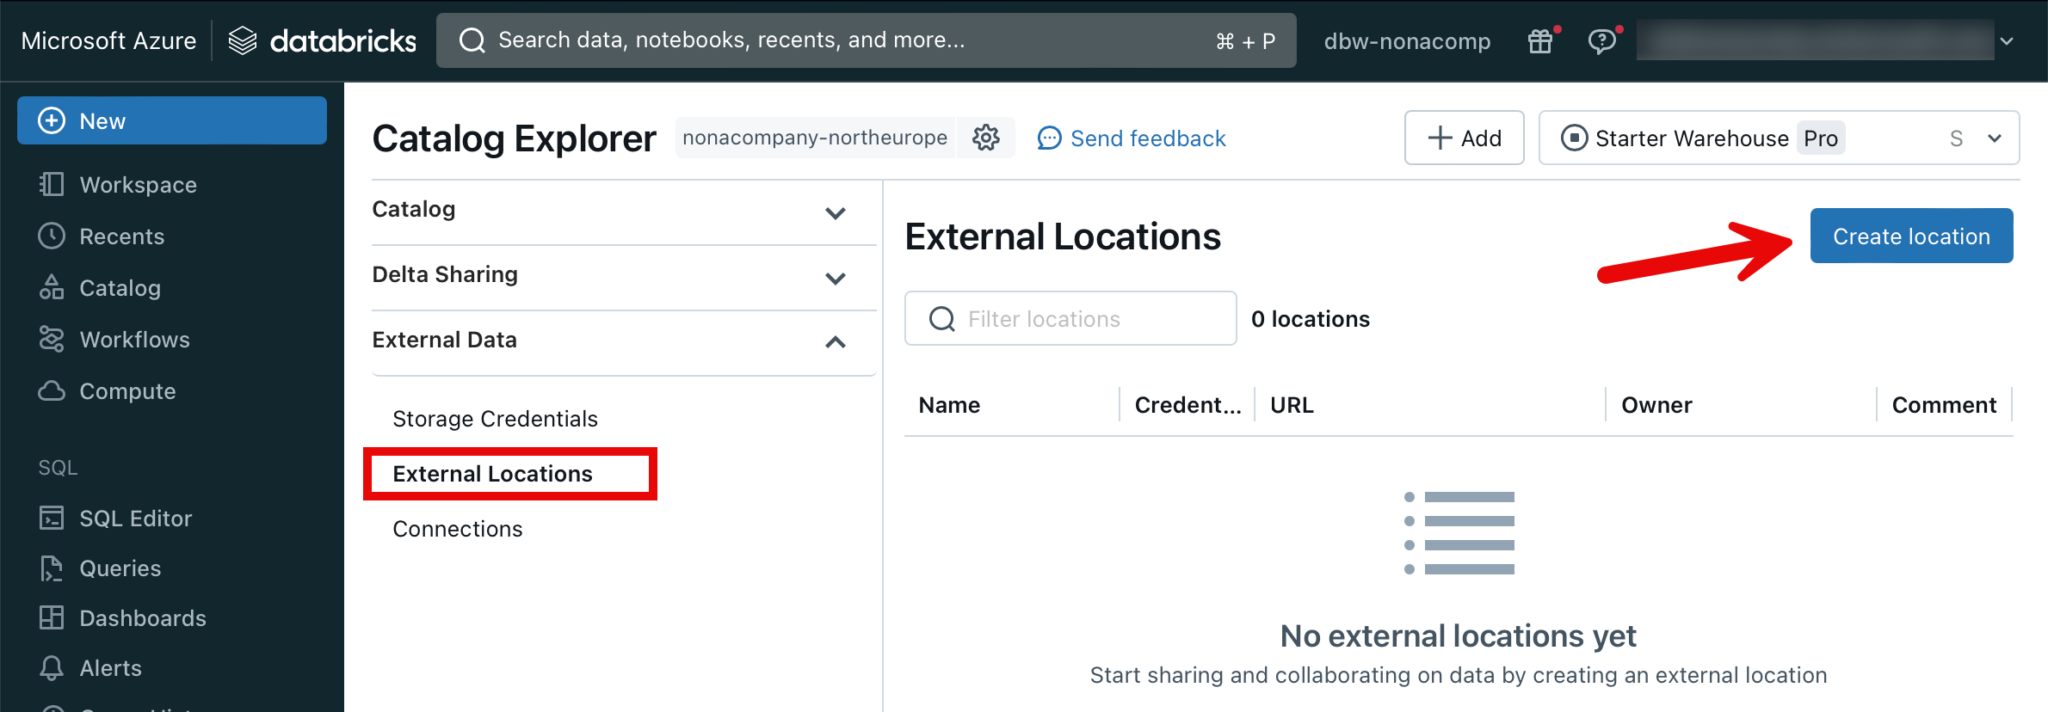
Create external locations
I create a separate, external location for all zones.
The URL for the external location is created according to the following pattern: abfss://[container_name]@[storage_account_name].dfs.core.windows.net/[path]
The values for [container_name], [storage_account_name] and [path] must be adapted to the respective storage account. In my example, it looks like this: abfss://[email protected]/
I leave out the value for [path] as I am setting up directly on the root directory of the respective container.

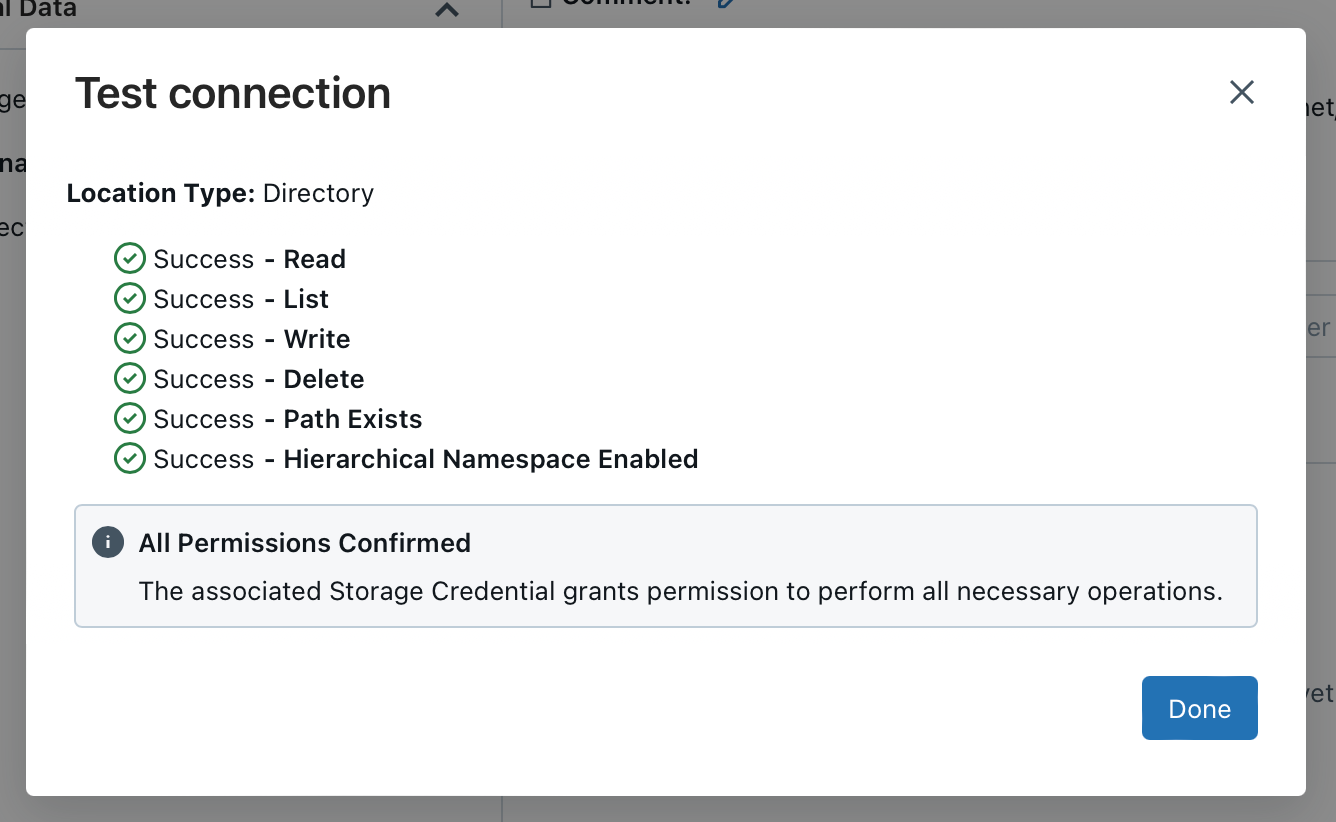
To test whether everything has been configured correctly, click on “Test connection”.
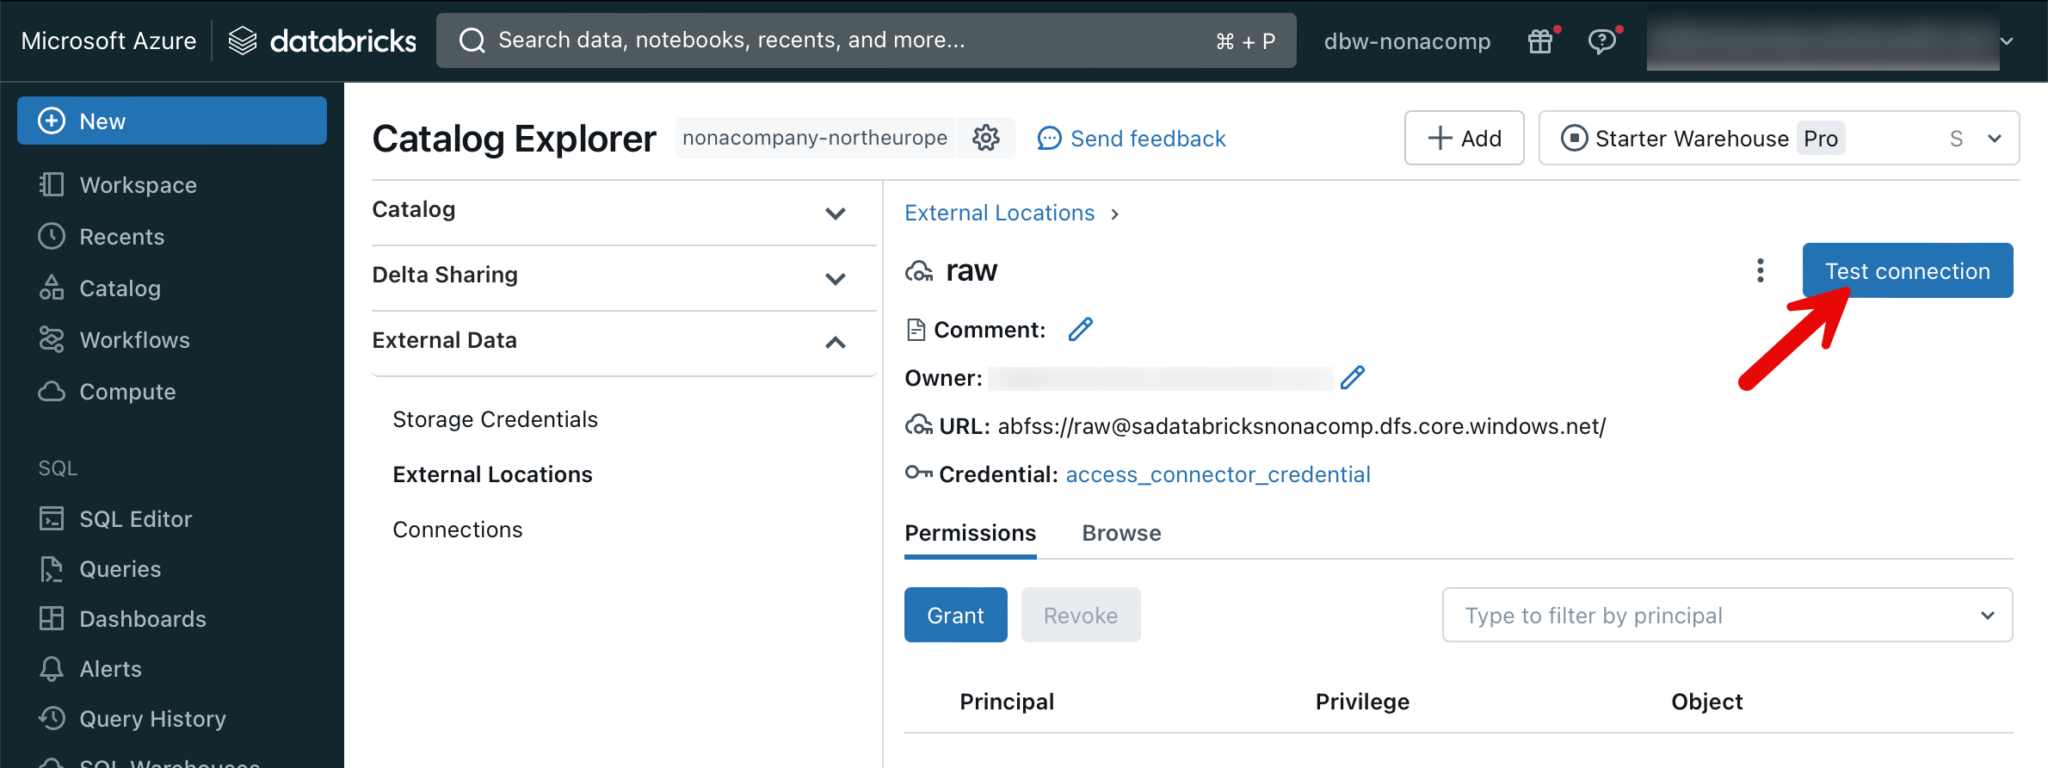
If everything has been set up correctly, a corresponding message is generated.
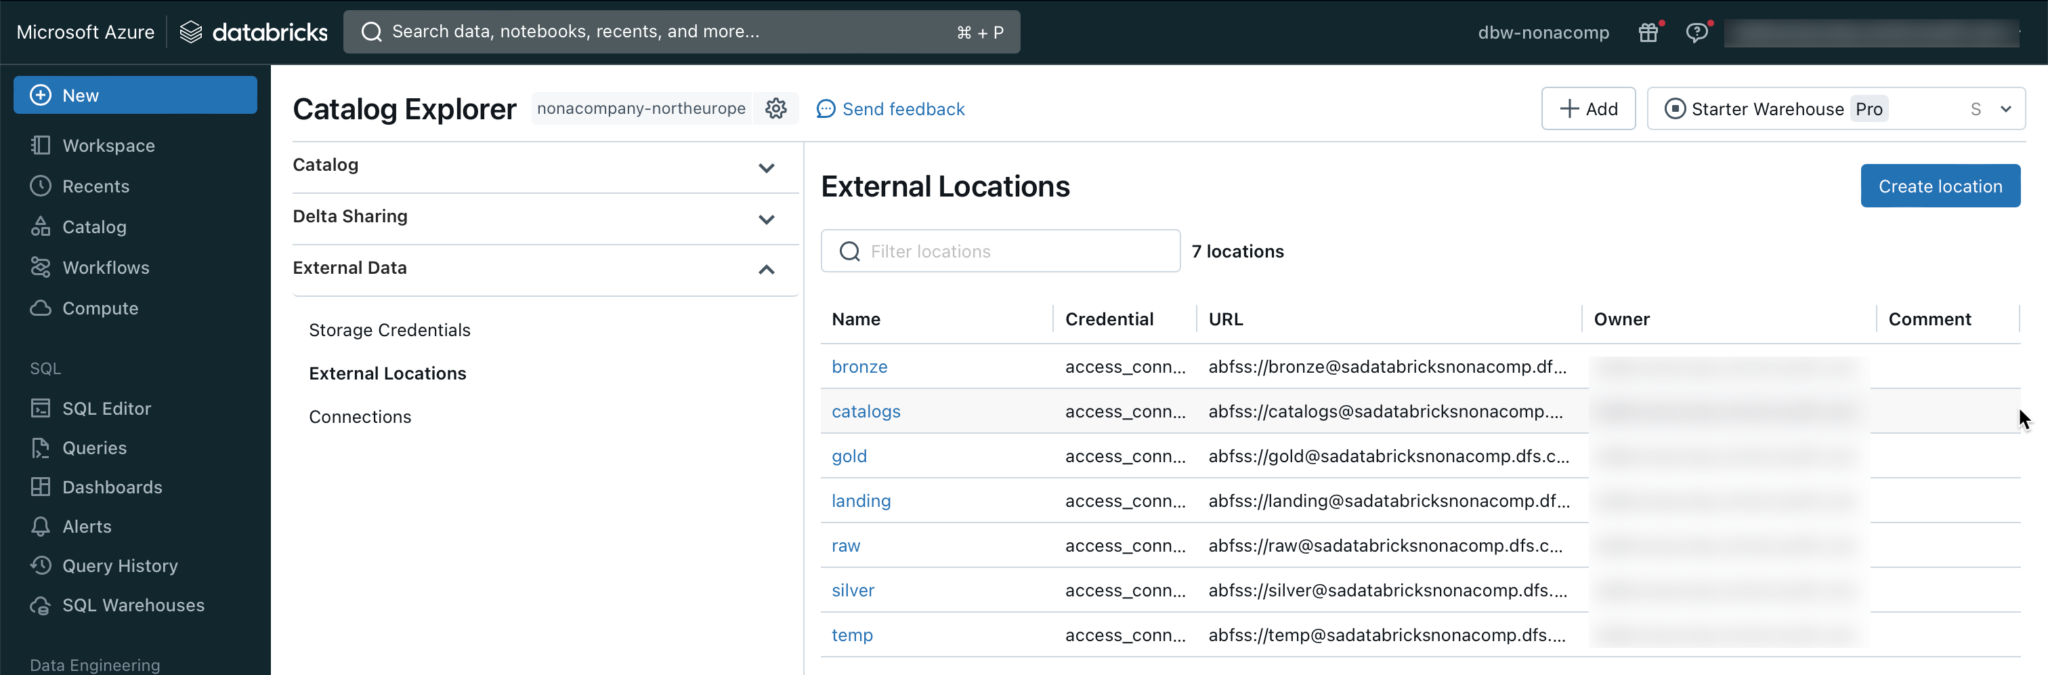
Now I repeat the step for all external locations. At the end, the following external locations should be present:
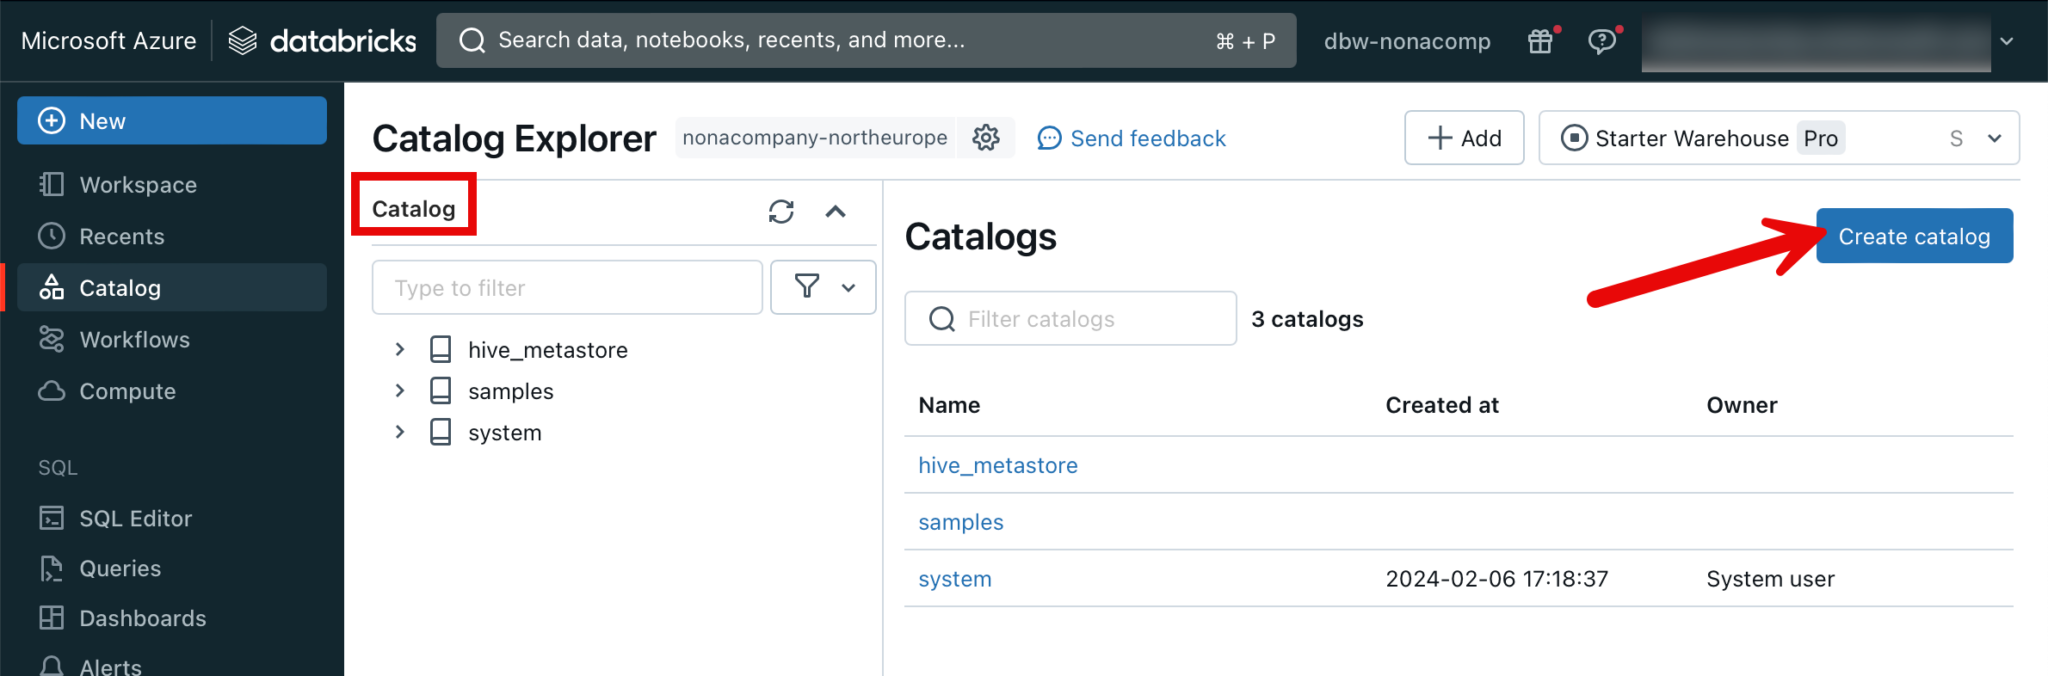
Create catalogs
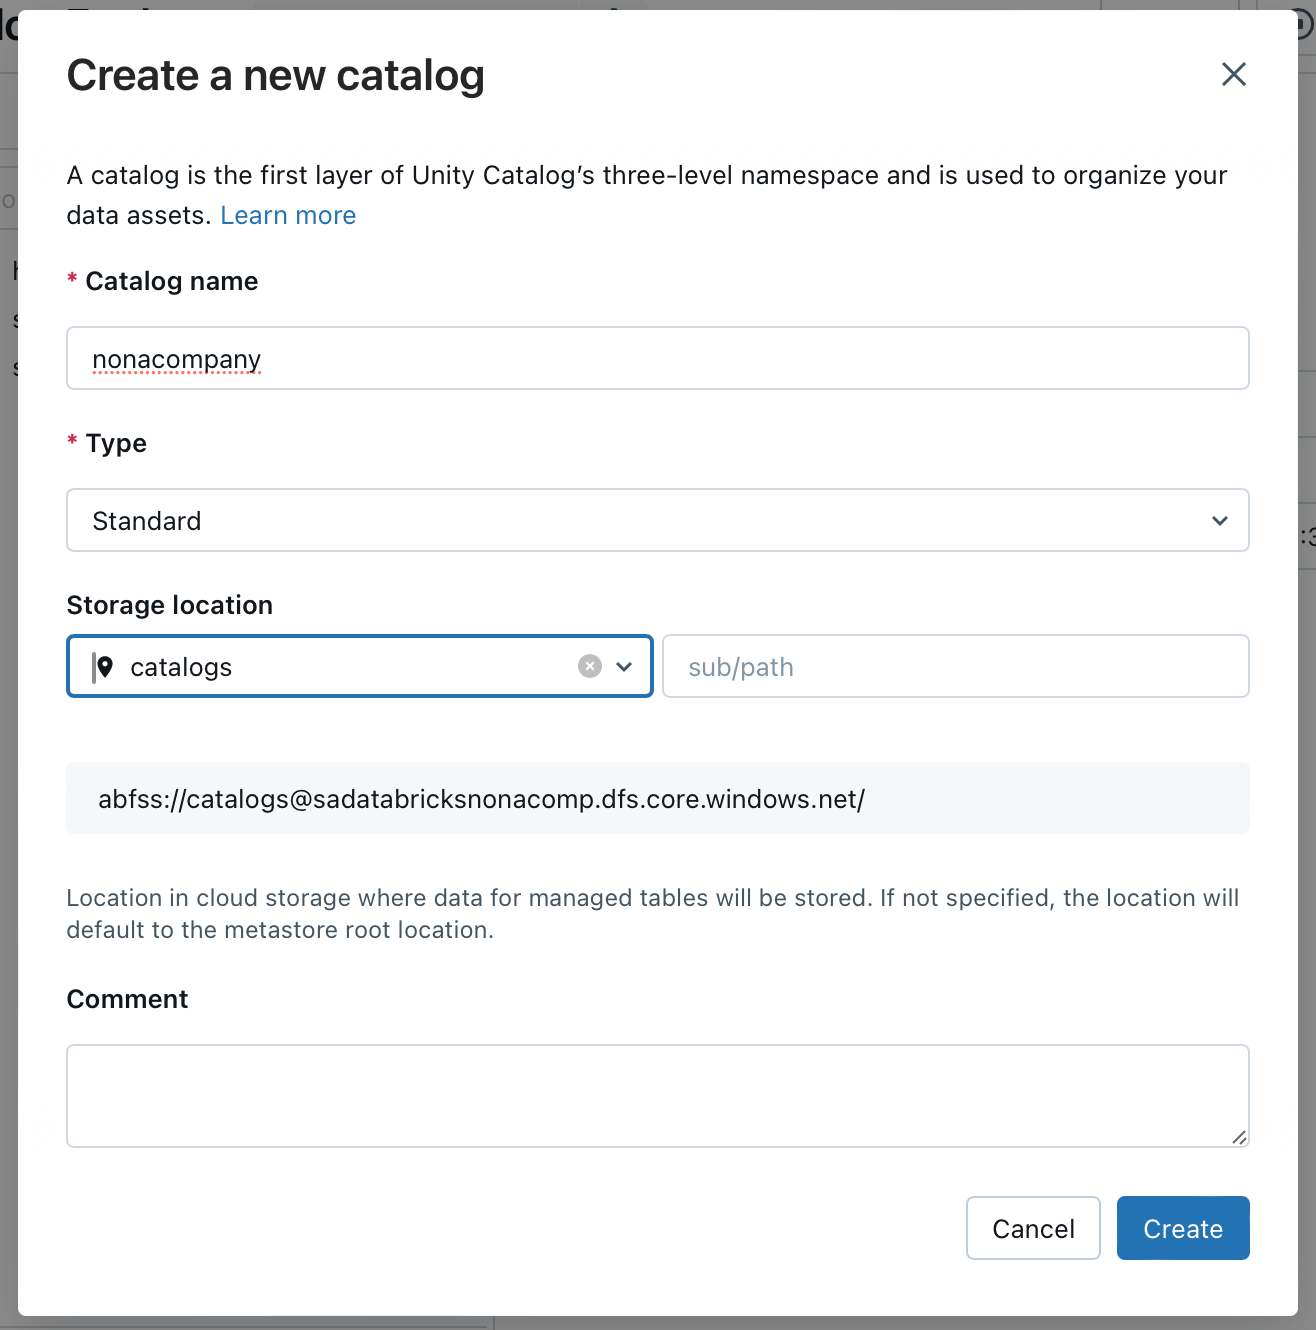
In my example, I will create a catalog. I will name it after my fictitious company NoNaCompany.
For the storage location, I select the “catalogs” storage location.
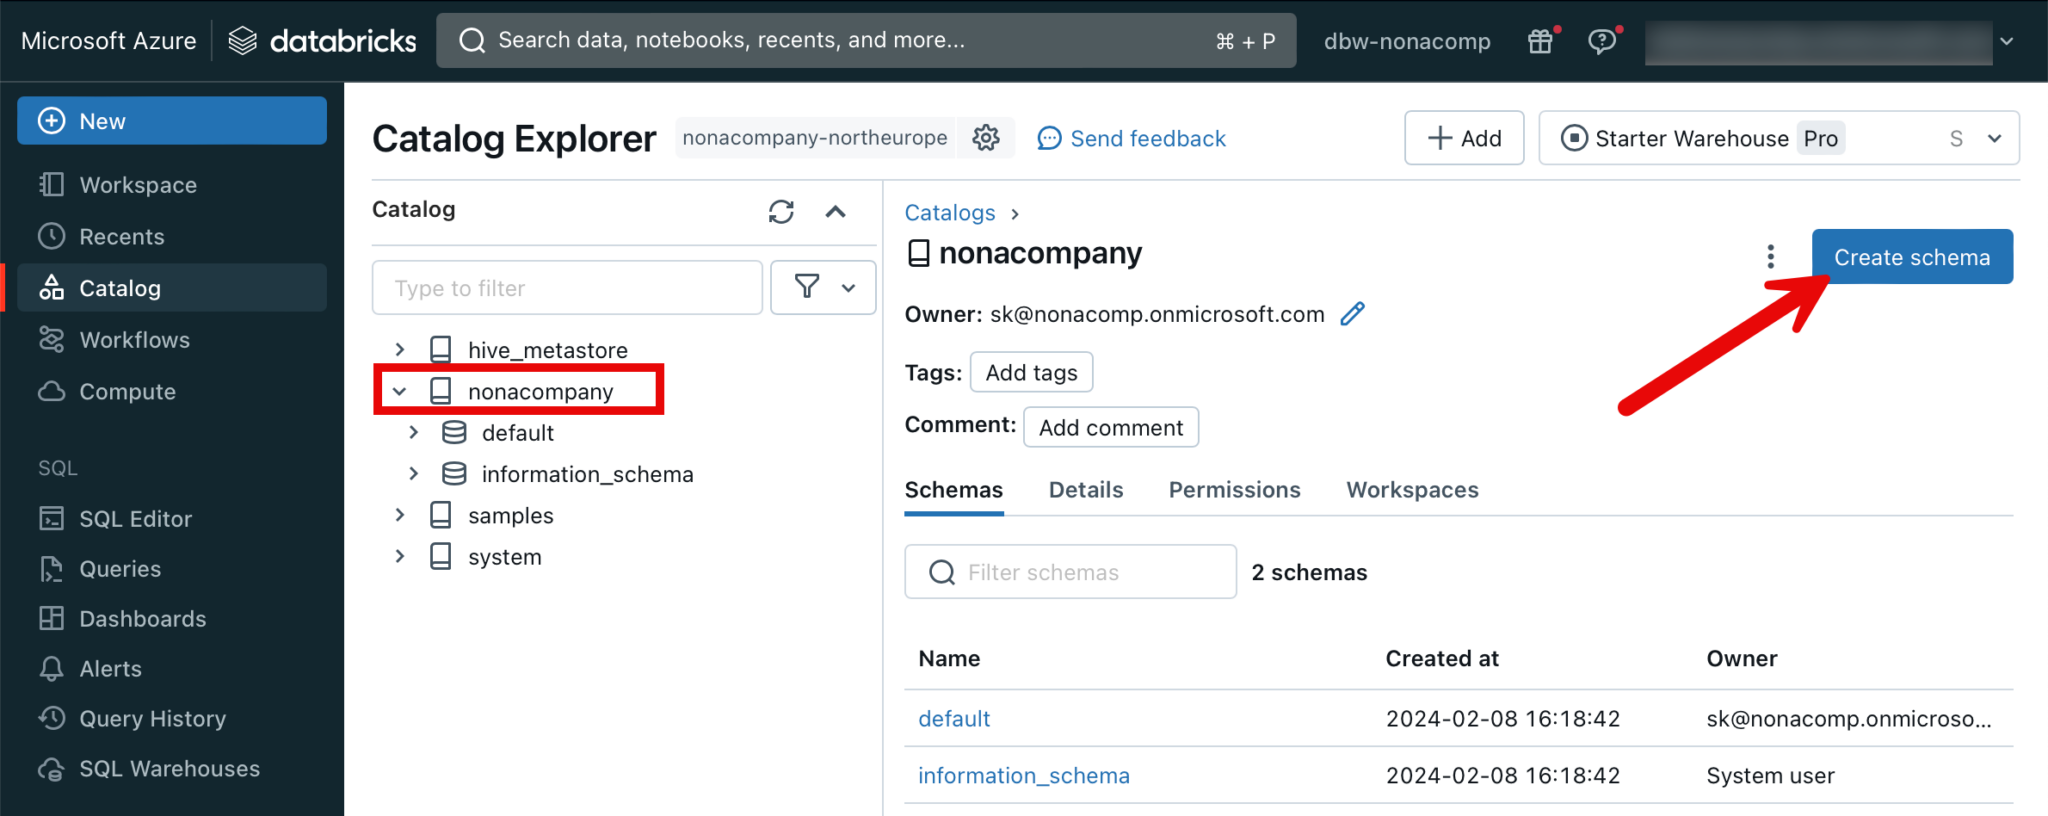
Create Schemas
Within the catalog, I now create my various schemas analogous to the zone model, or medallion architecture. I click on the corresponding catalog and then “Create schema”.
Similar to the Catalog, I select the corresponding storage location.

I repeat this step for all schemes until it looks like this:
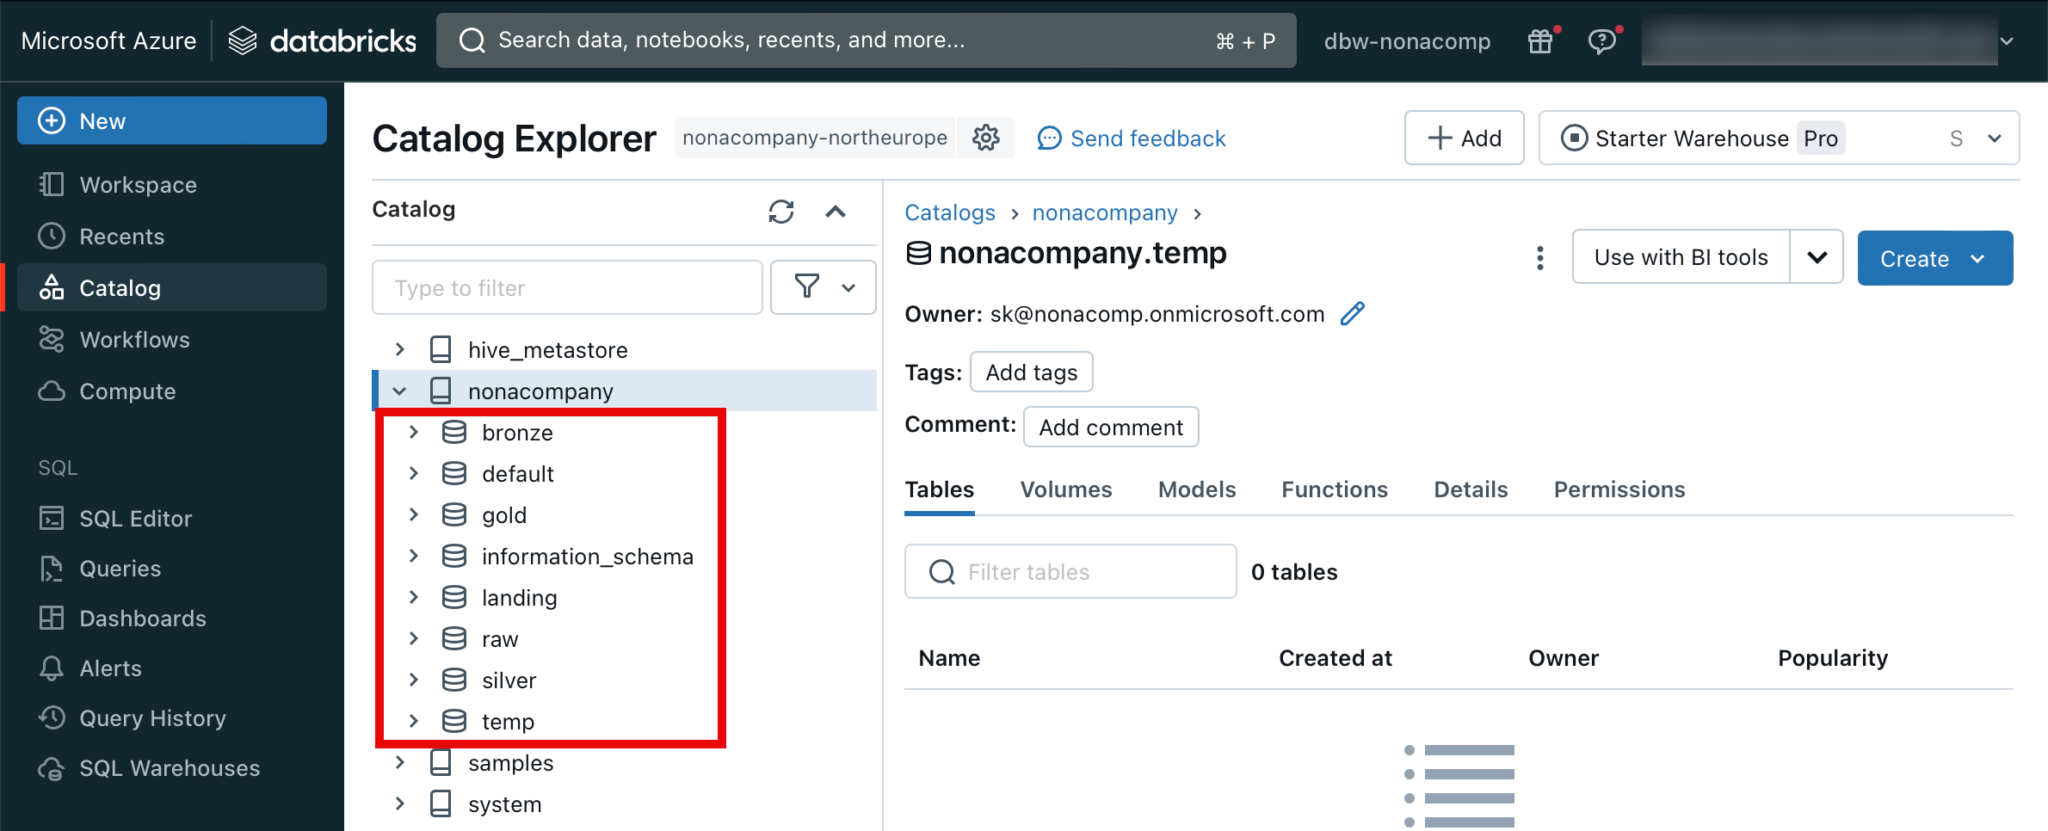
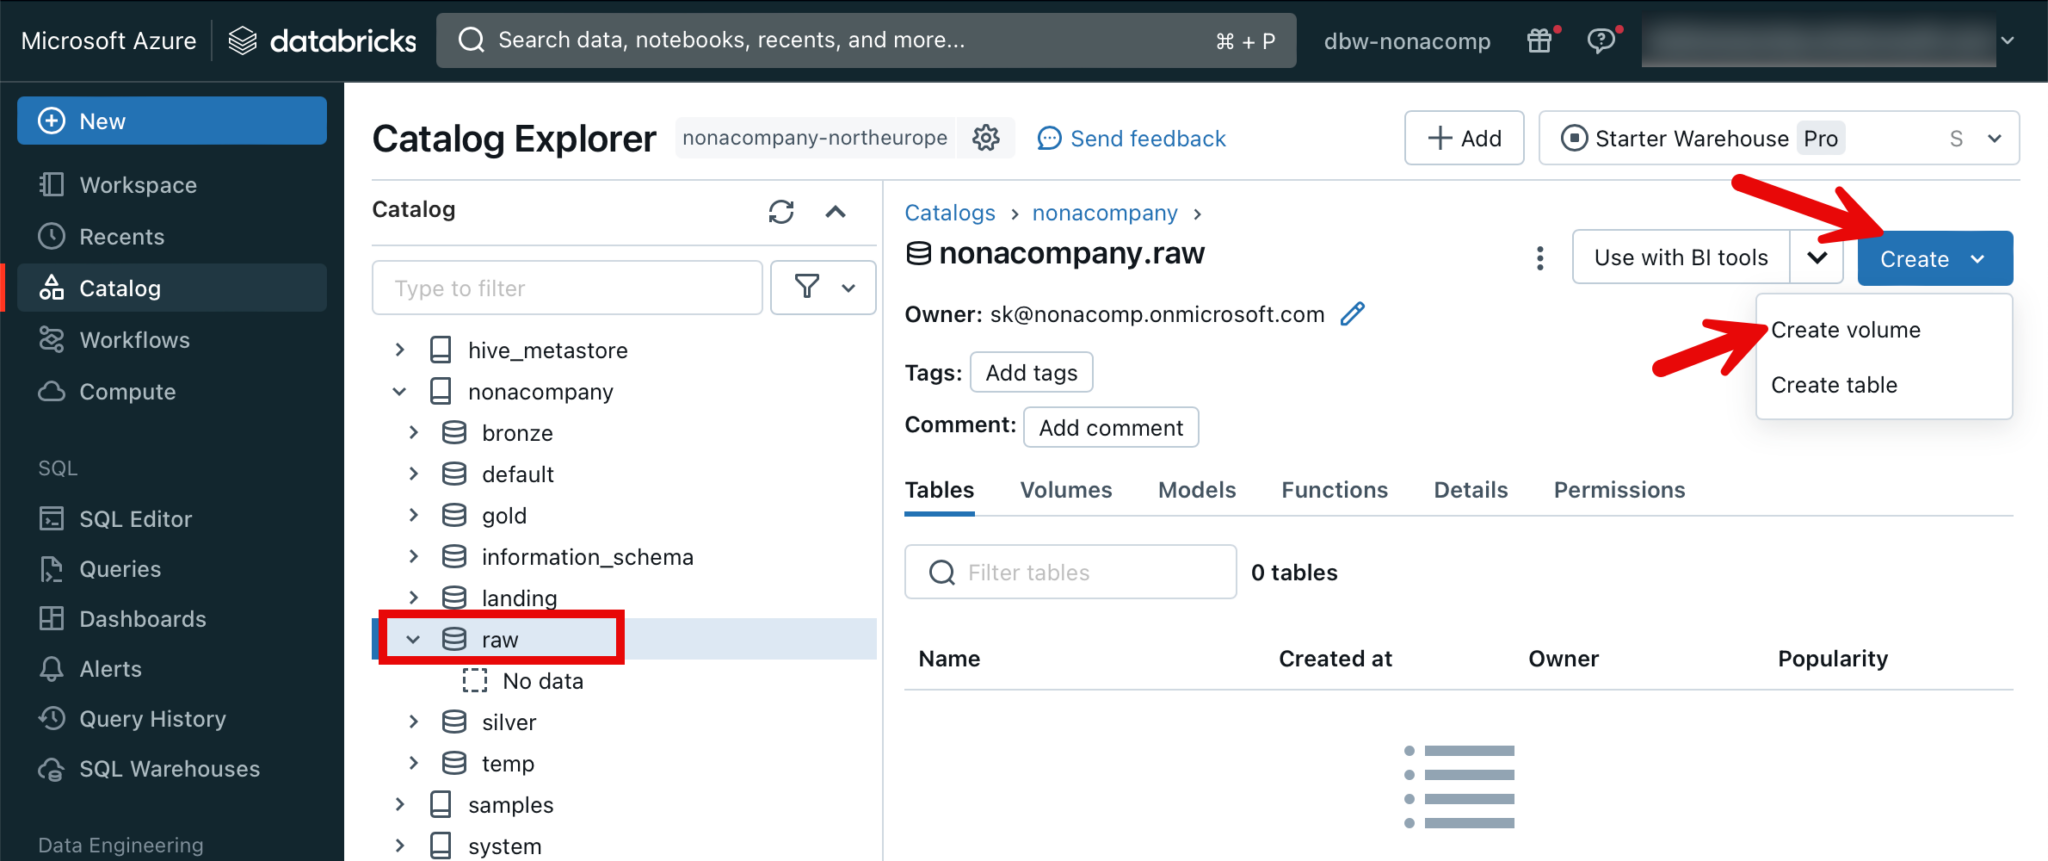
Create Volumes
For Raw and Landing, we want to work directly with files that are stored in the Datalake. So that we can access the files directly in Unity Catalog, we use so-called volumes. To do this, I switch to the raw schema. At the top right is the “Create” button, under which a volume can be created.
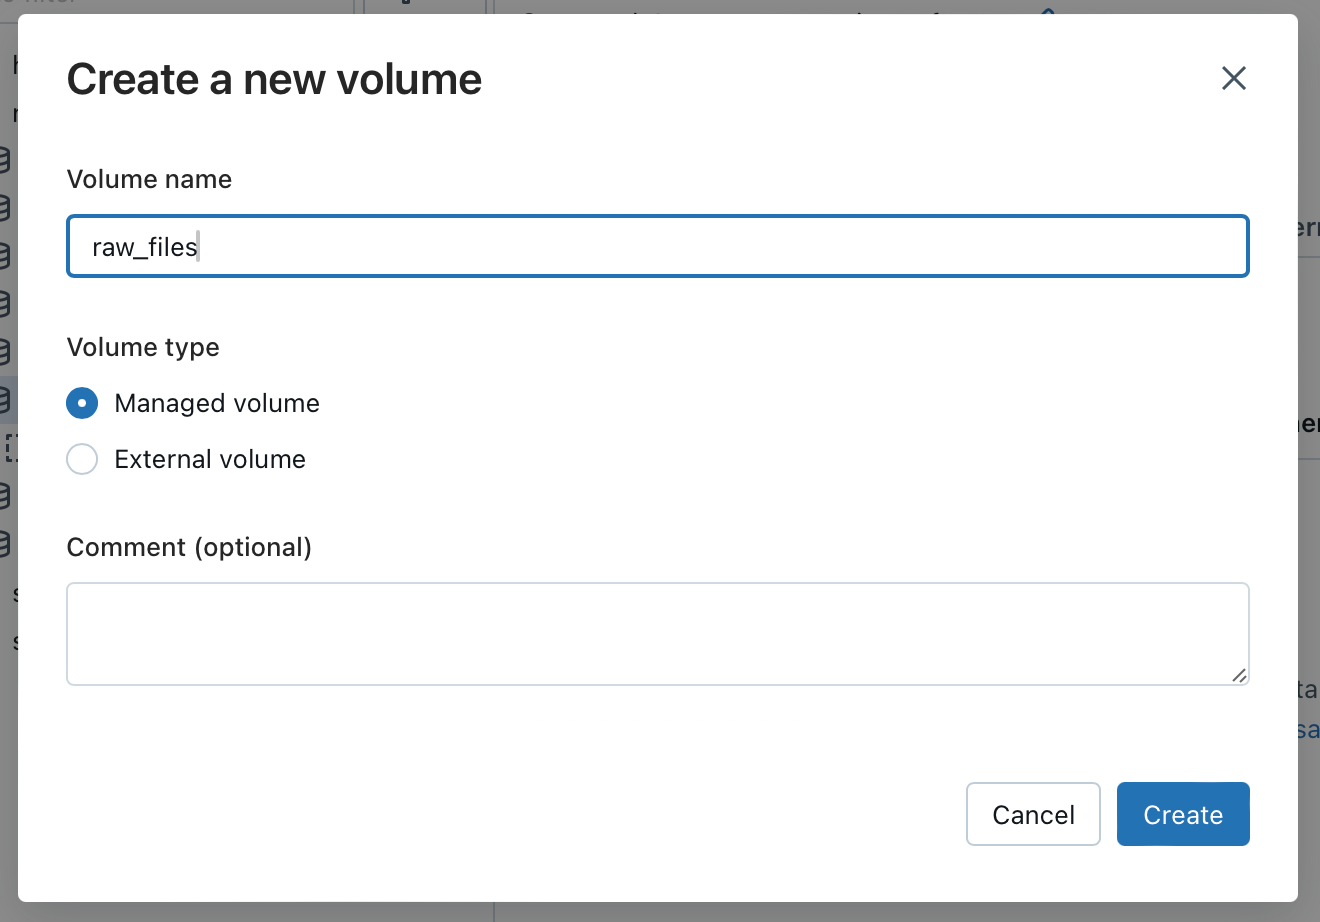
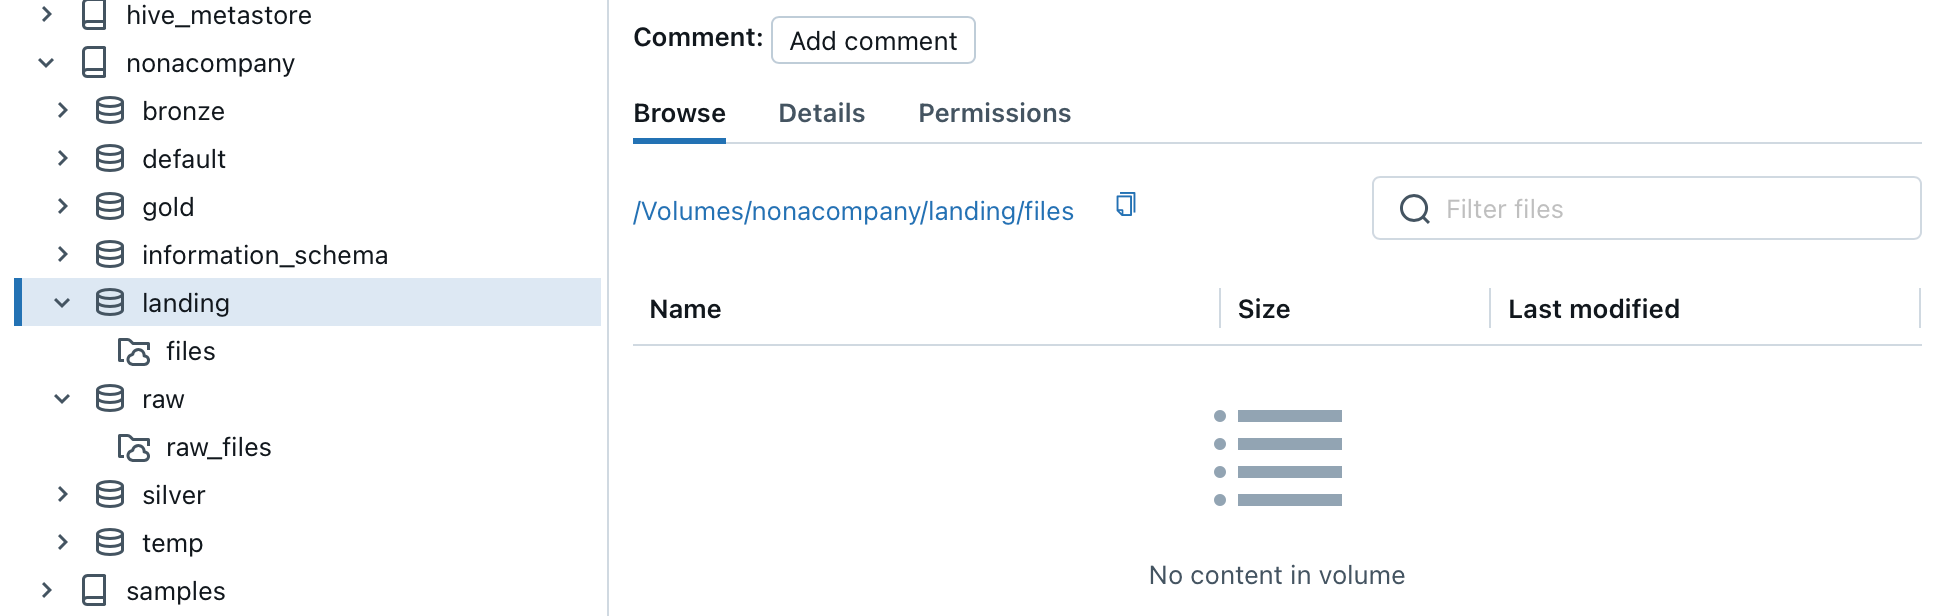
I repeat the same step for the volume for the landing container. Files located in the container can be addressed within Databricks with the corresponding path. In the Landing example, this would be:
/Volumes/nonacompany/landing/files/[path]/[filename]
The path is also displayed in the corresponding volume.
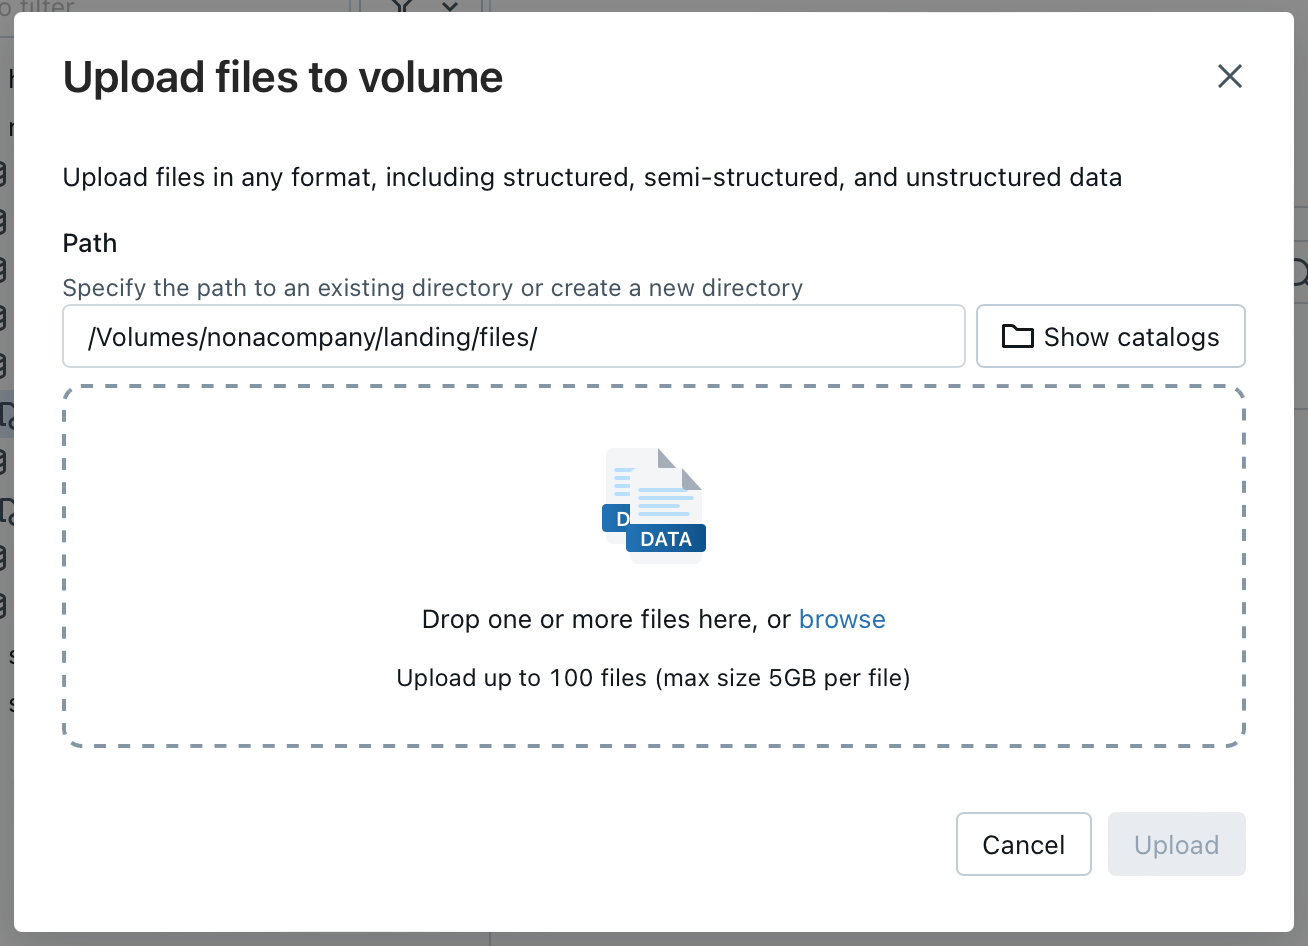
Upload files to a volume
There are several ways in which files can be uploaded to a volume. For example, a data factory can be used, which uploads files directly to the storage account container. Or there is also the option of uploading files directly in the Databricks Workspace. However, this is a manual process and therefore “cumbersome”.
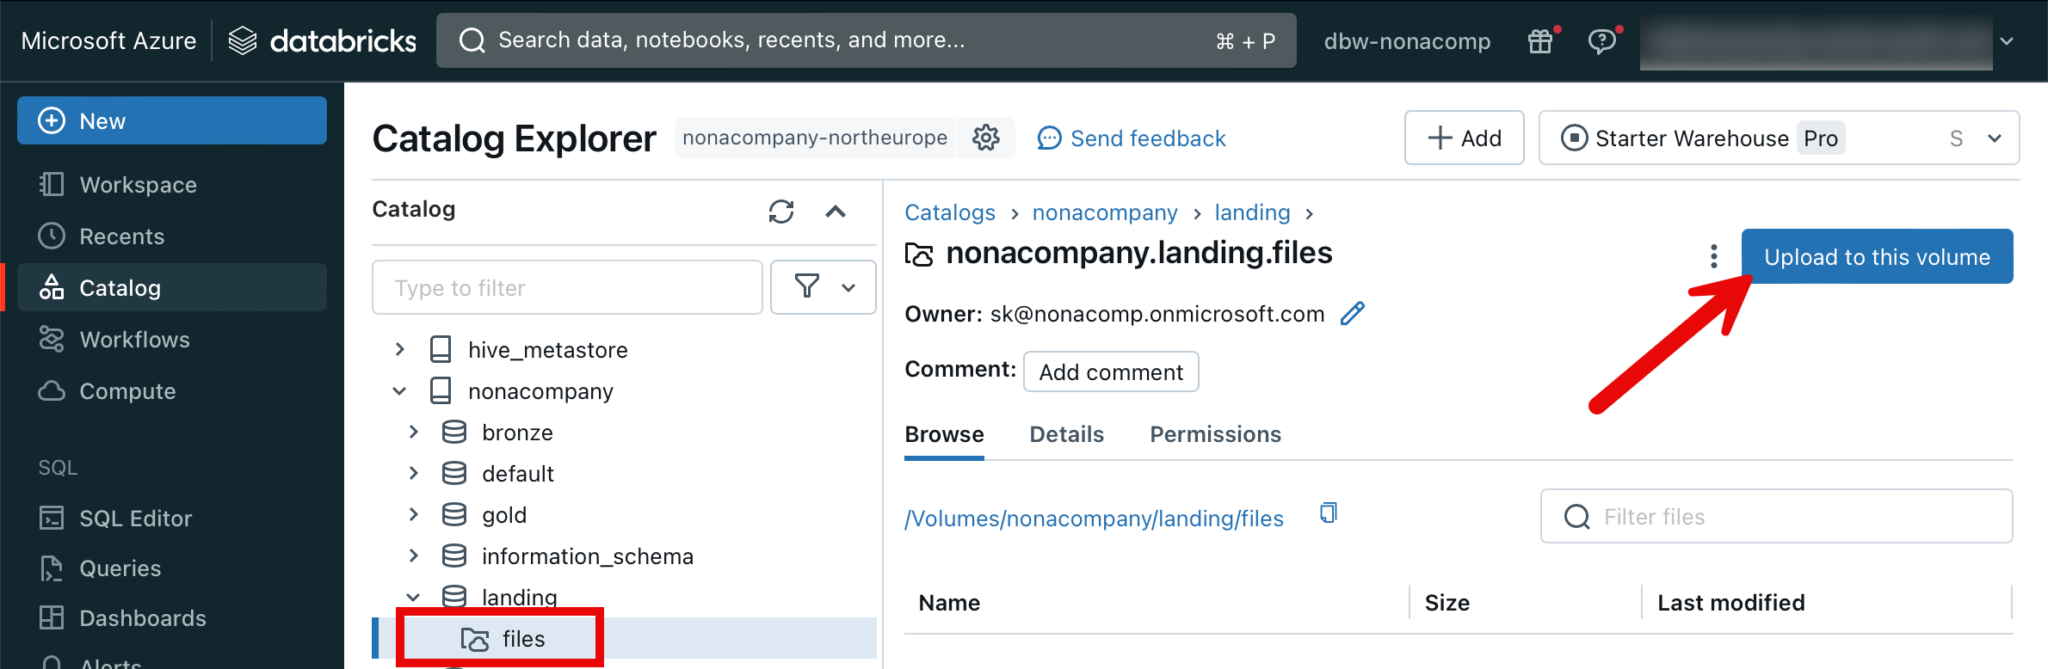
If I now want to determine the path for the uploaded file, I can do this via the GUI in the workspace.
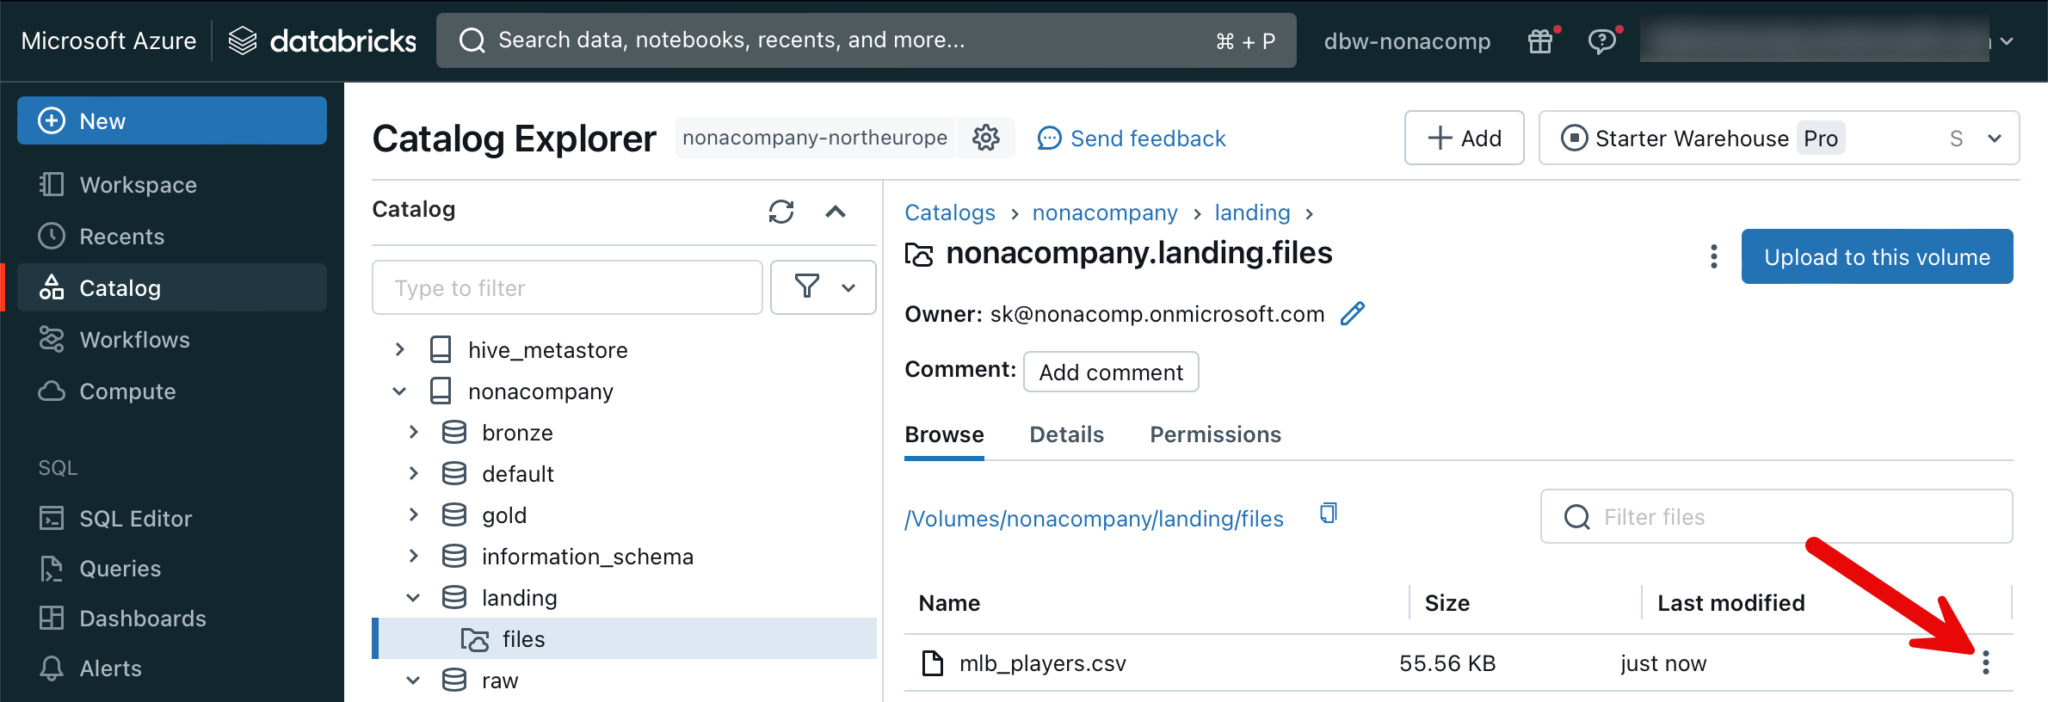
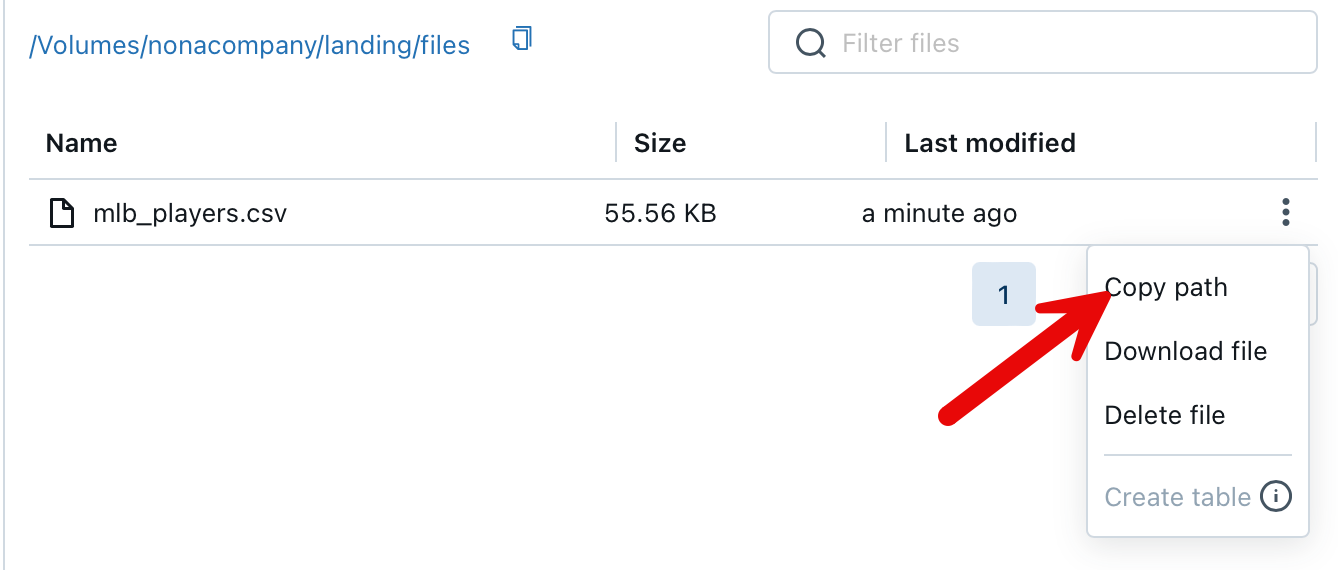
The file can now be accessed via this path: /Volumes/nonacompany/landing/files/mlb_players.csv
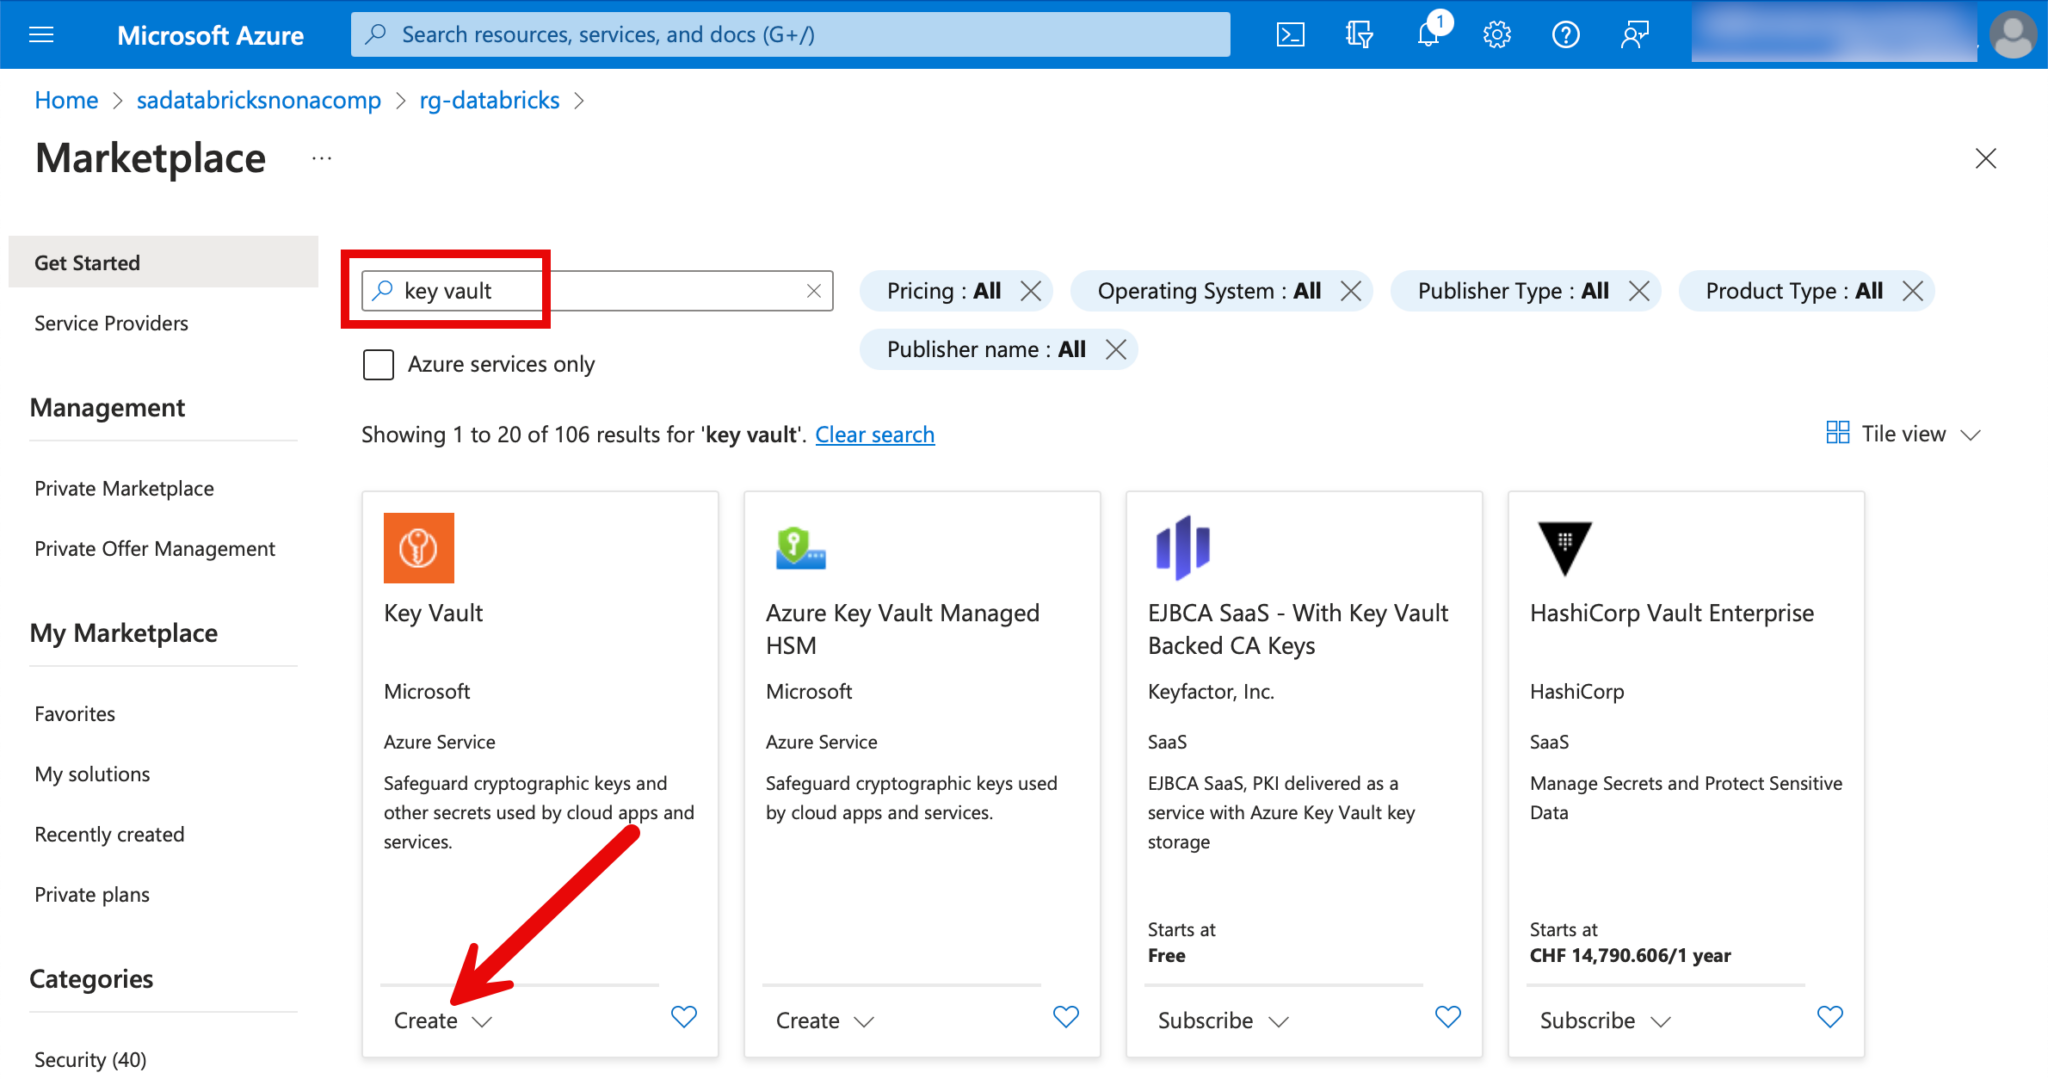
Create Azure KeyVault
When you create a data pipeline, there are always situations in which you use secrets. These are passwords, API keys and so on. These should never be stored in plain text within the code, such as in a notebook. For this purpose, you can use a secret scope in Databricks. In Azure Databricks, you can connect the secret scope to Azure KeyVault. This creates a link to the KeyVault. The secrets can be managed in the KeyVault and addressed in Databricks.
For this purpose, I create a new KeyVault in the resource group.
I choose Standard for the “Pricing Tier”.
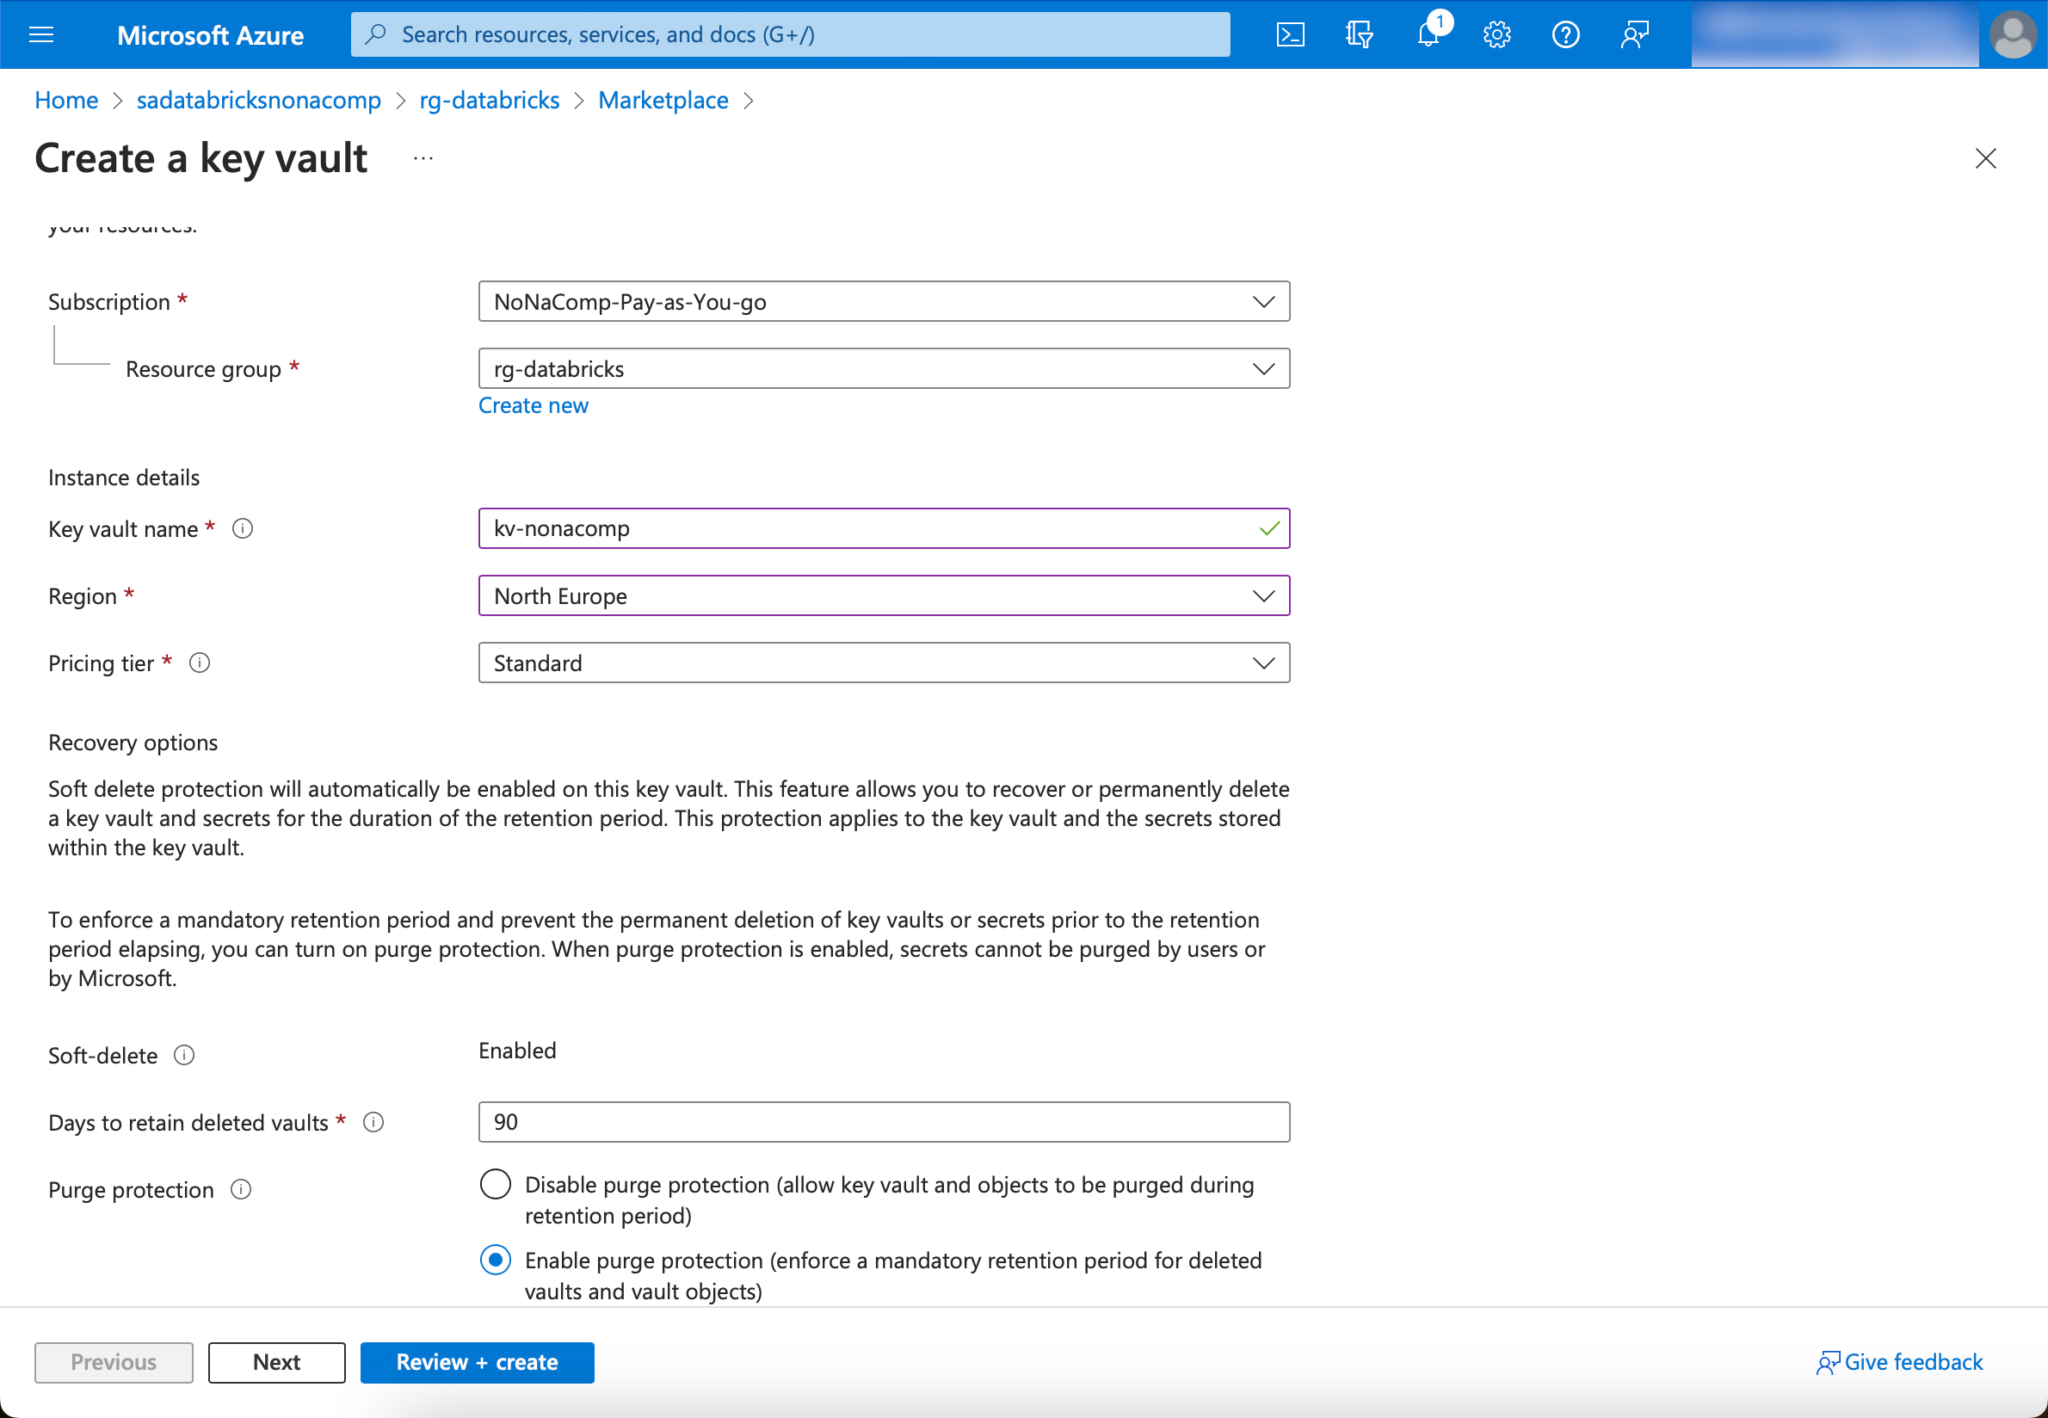
The rest can be left at the default settings.
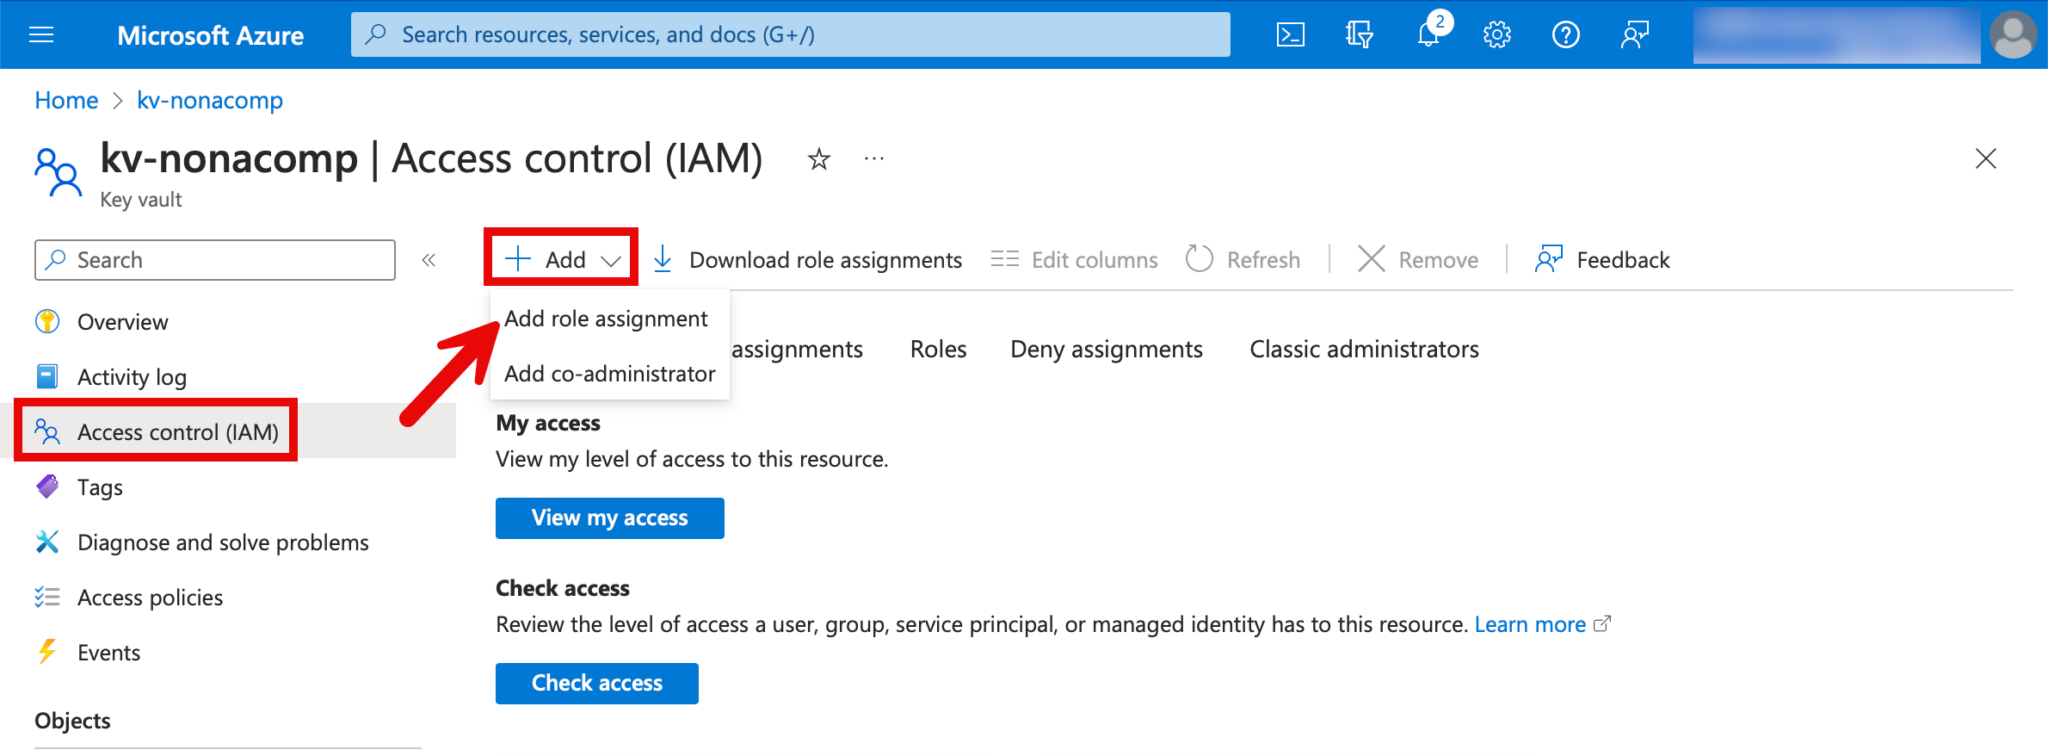
Next, the authorizations for the Key Vault must be assigned. The groups/persons who create secrets are assigned the role of “Key Vault Secrets Officer”. The authorizations for the KeyVault can be set under “Access Control (IAM)”.
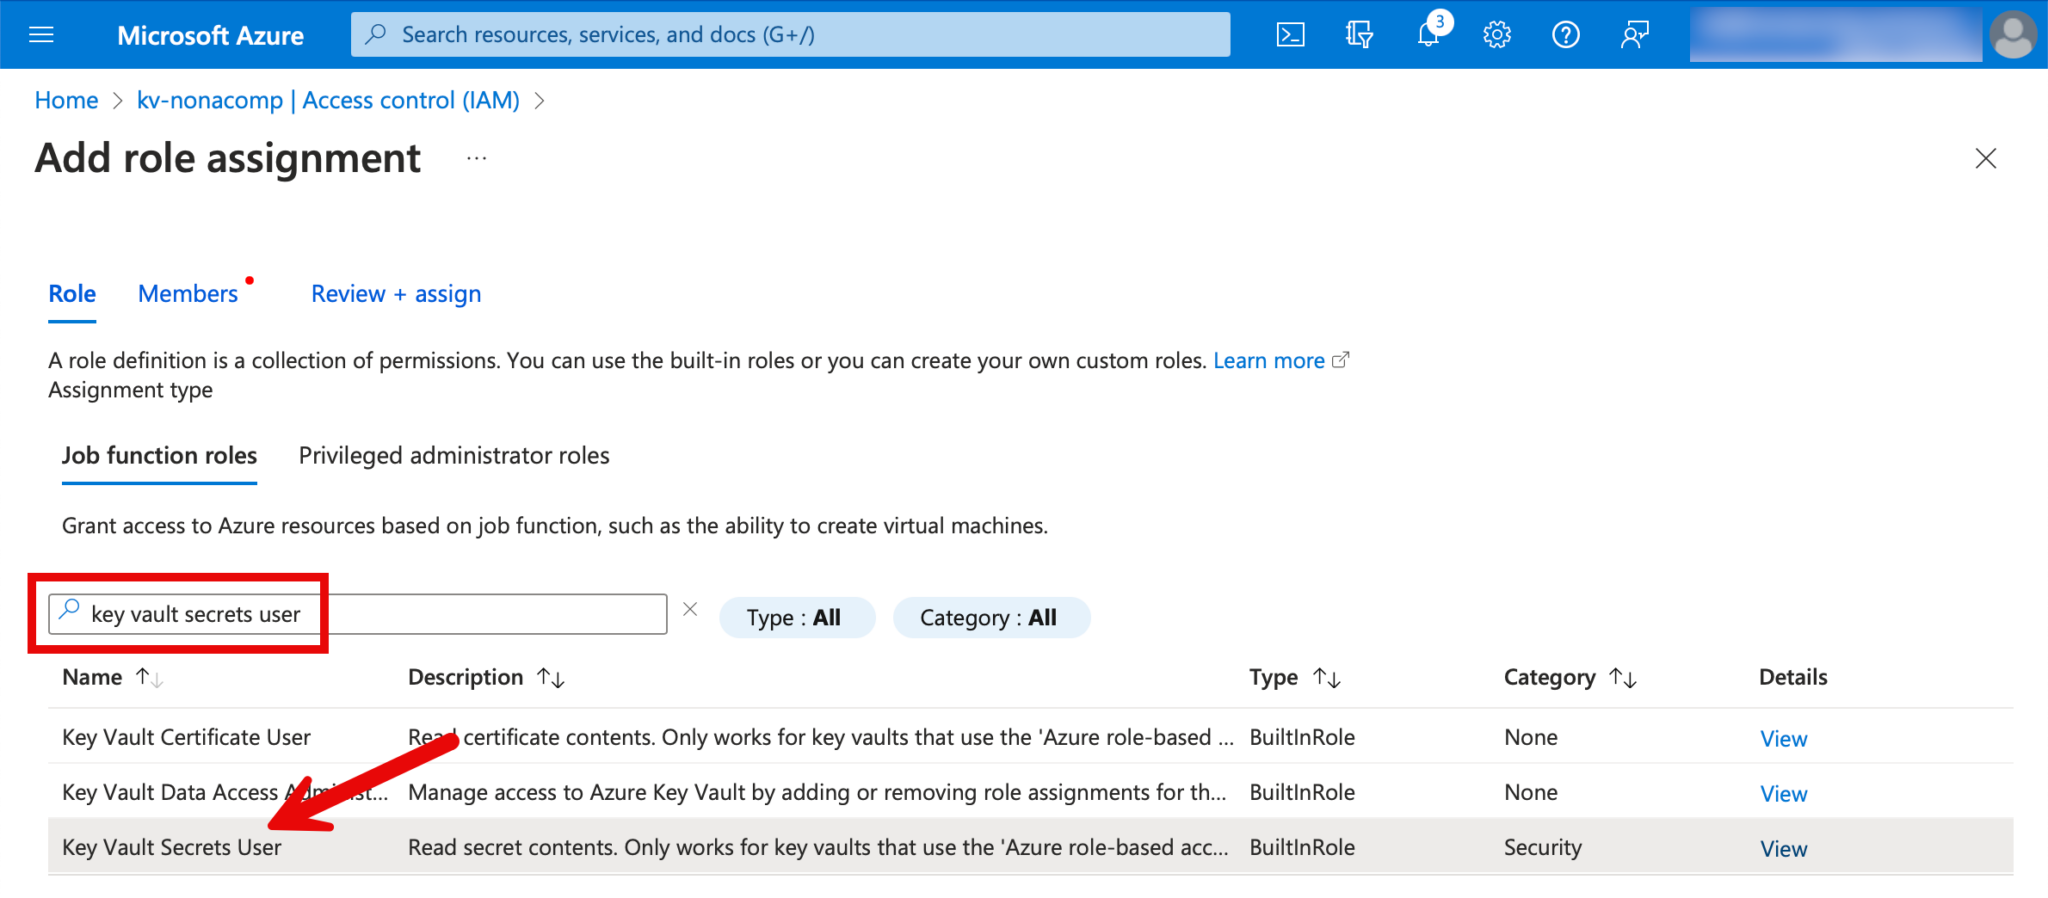
For the roles, I search for “Key Vault Secrets Officer”.
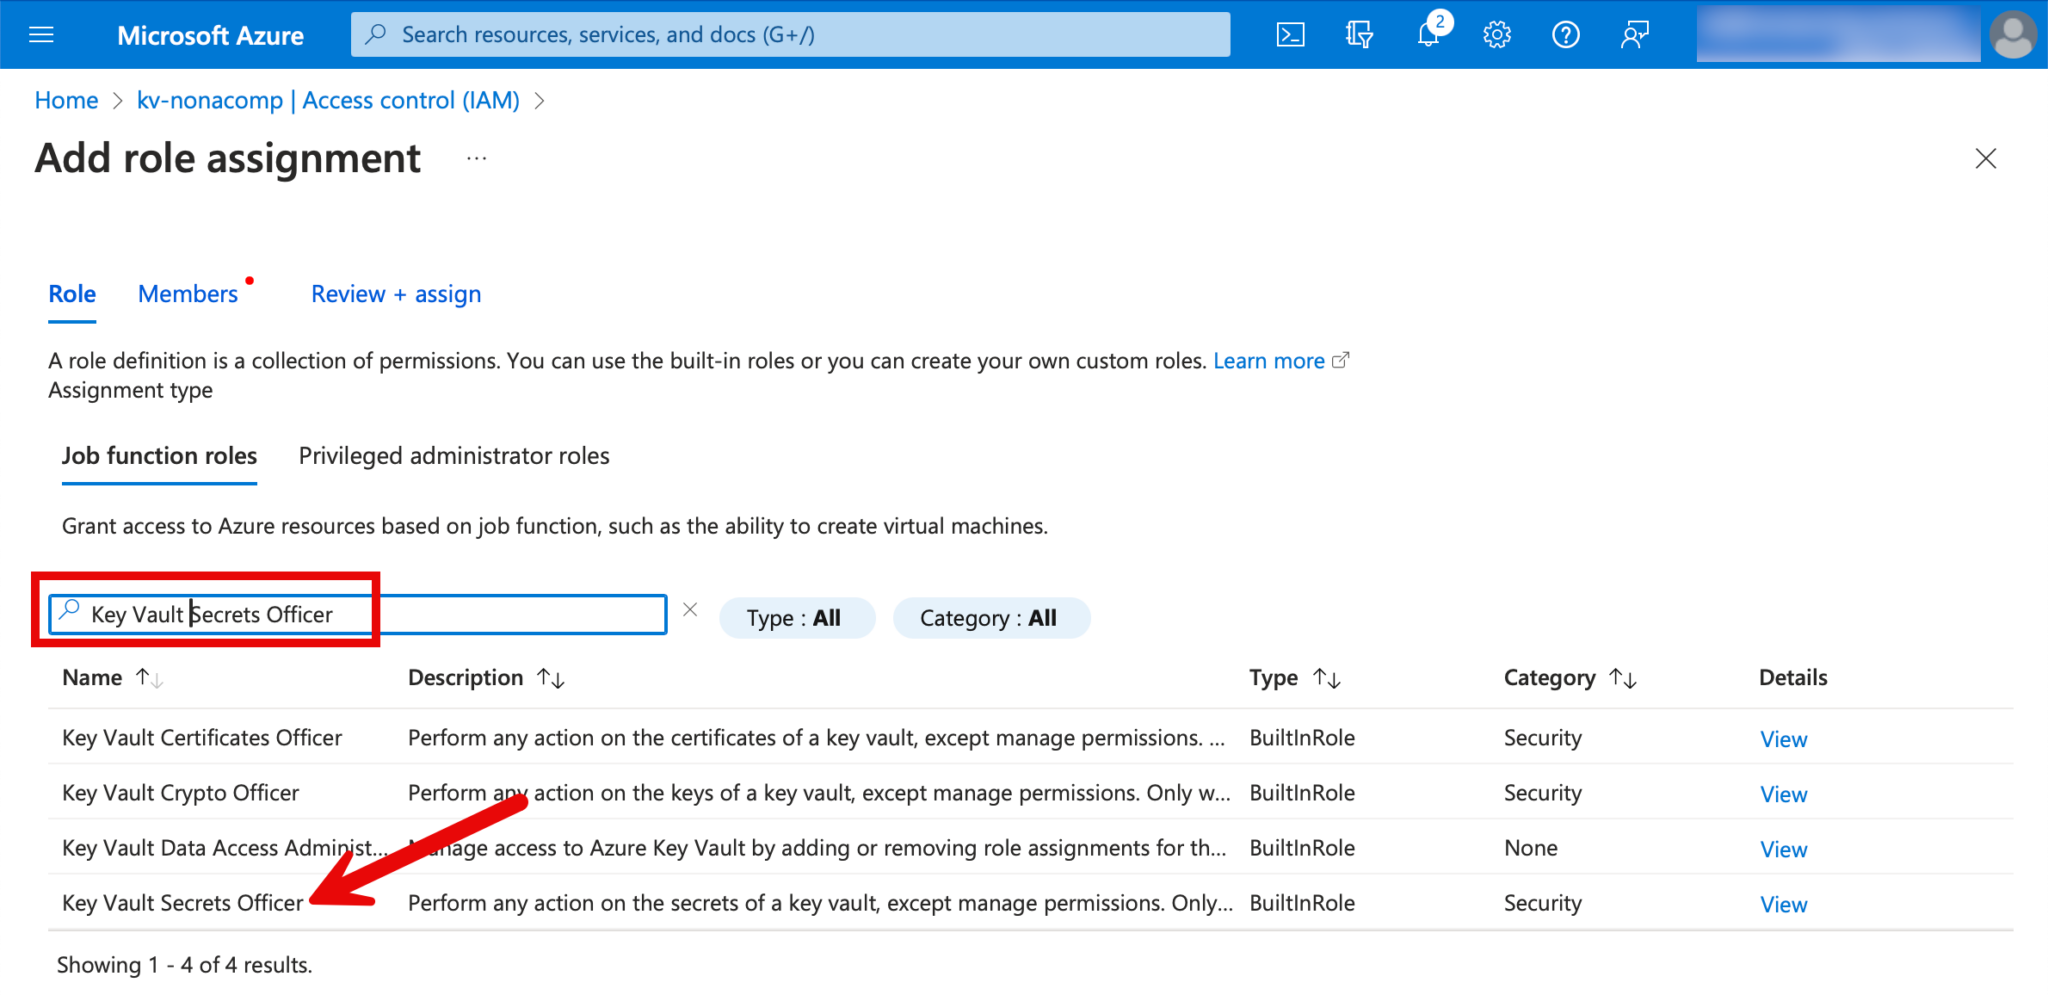
Then I search for the corresponding users/groups in Entra-ID and assign them to the role.
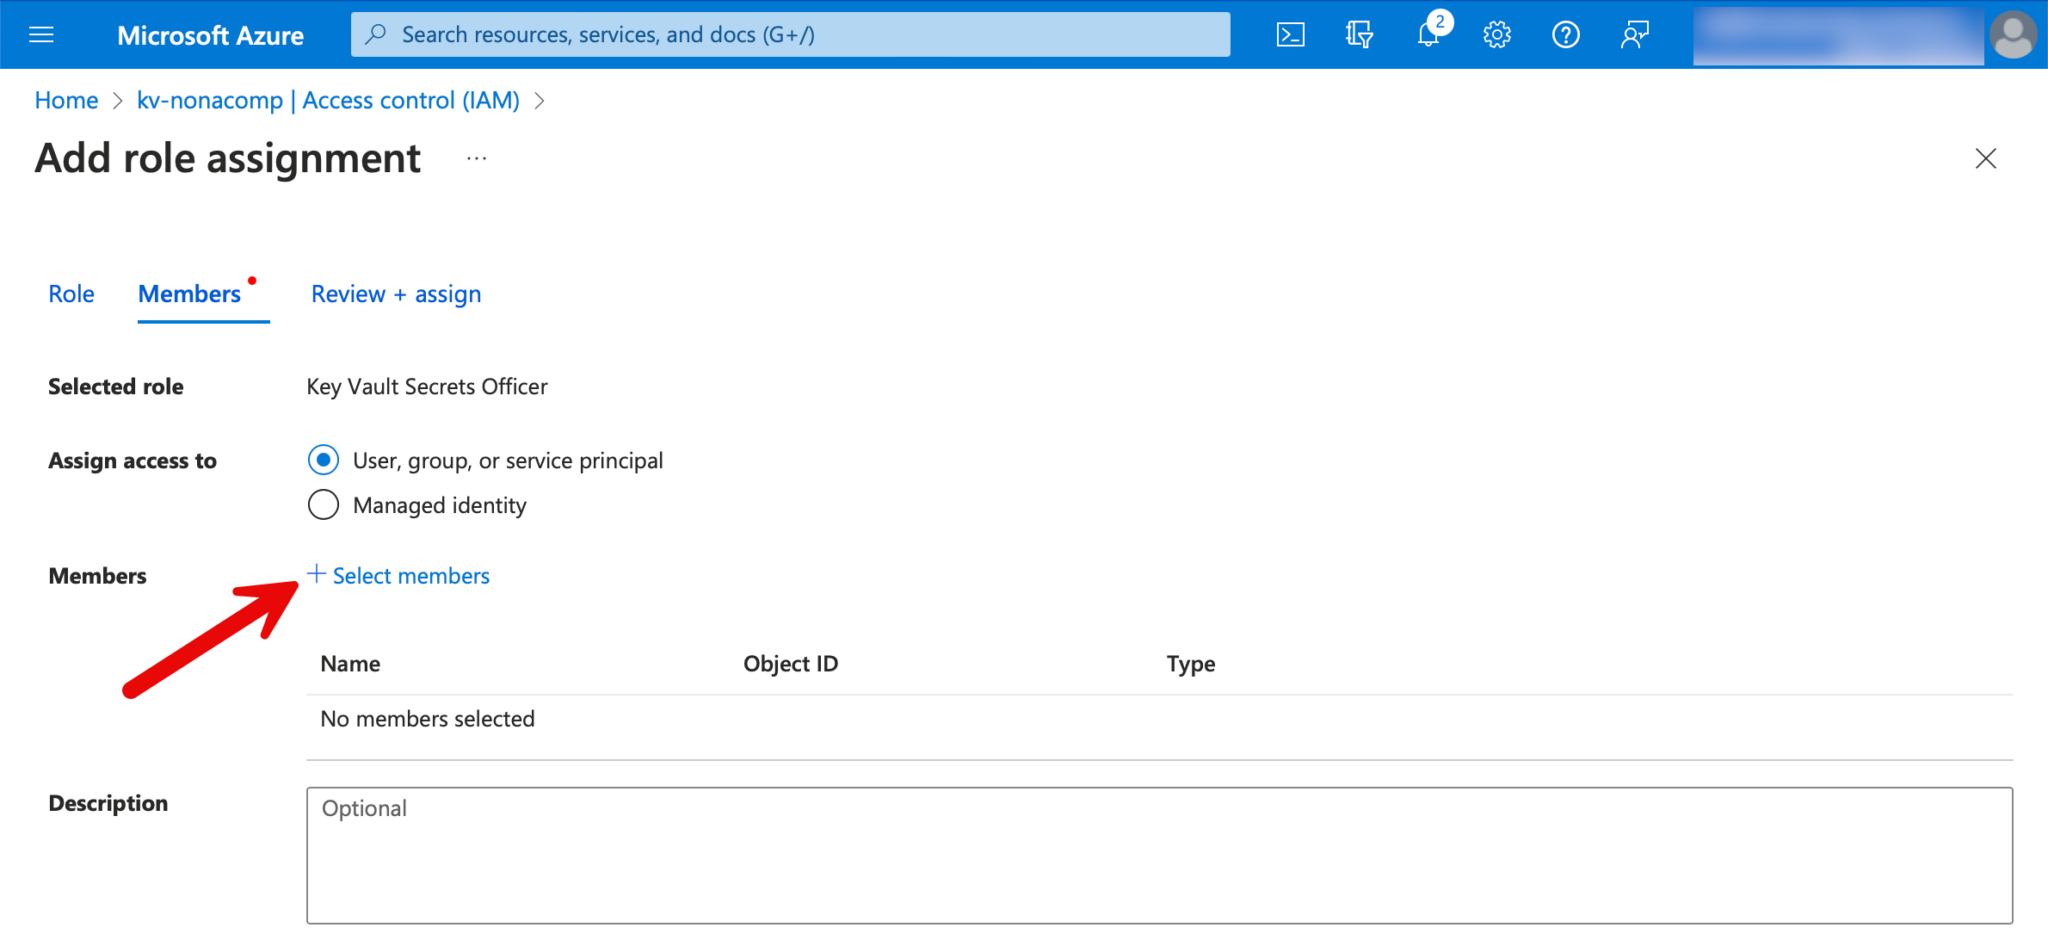
For groups/users who should only have read-only rights, we assign the role “Key Vault Secrets User”.
We also want to read the secrets via Databricks, so we also add the memeber “Azure Databricks” to the members.

Create secret scope in Databricks
How a secret scope can be created in Databricks is documented in detail:https://learn.microsoft.com/en-us/azure/databricks/security/secrets/secret-scopes
The corresponding URL must be entered so that a secret scope can be created manually. I copy the URL from my workspace and adapt the URL. For example: https://adb-6353763293941605.5.azuredatabricks.net/#secrets/createScope
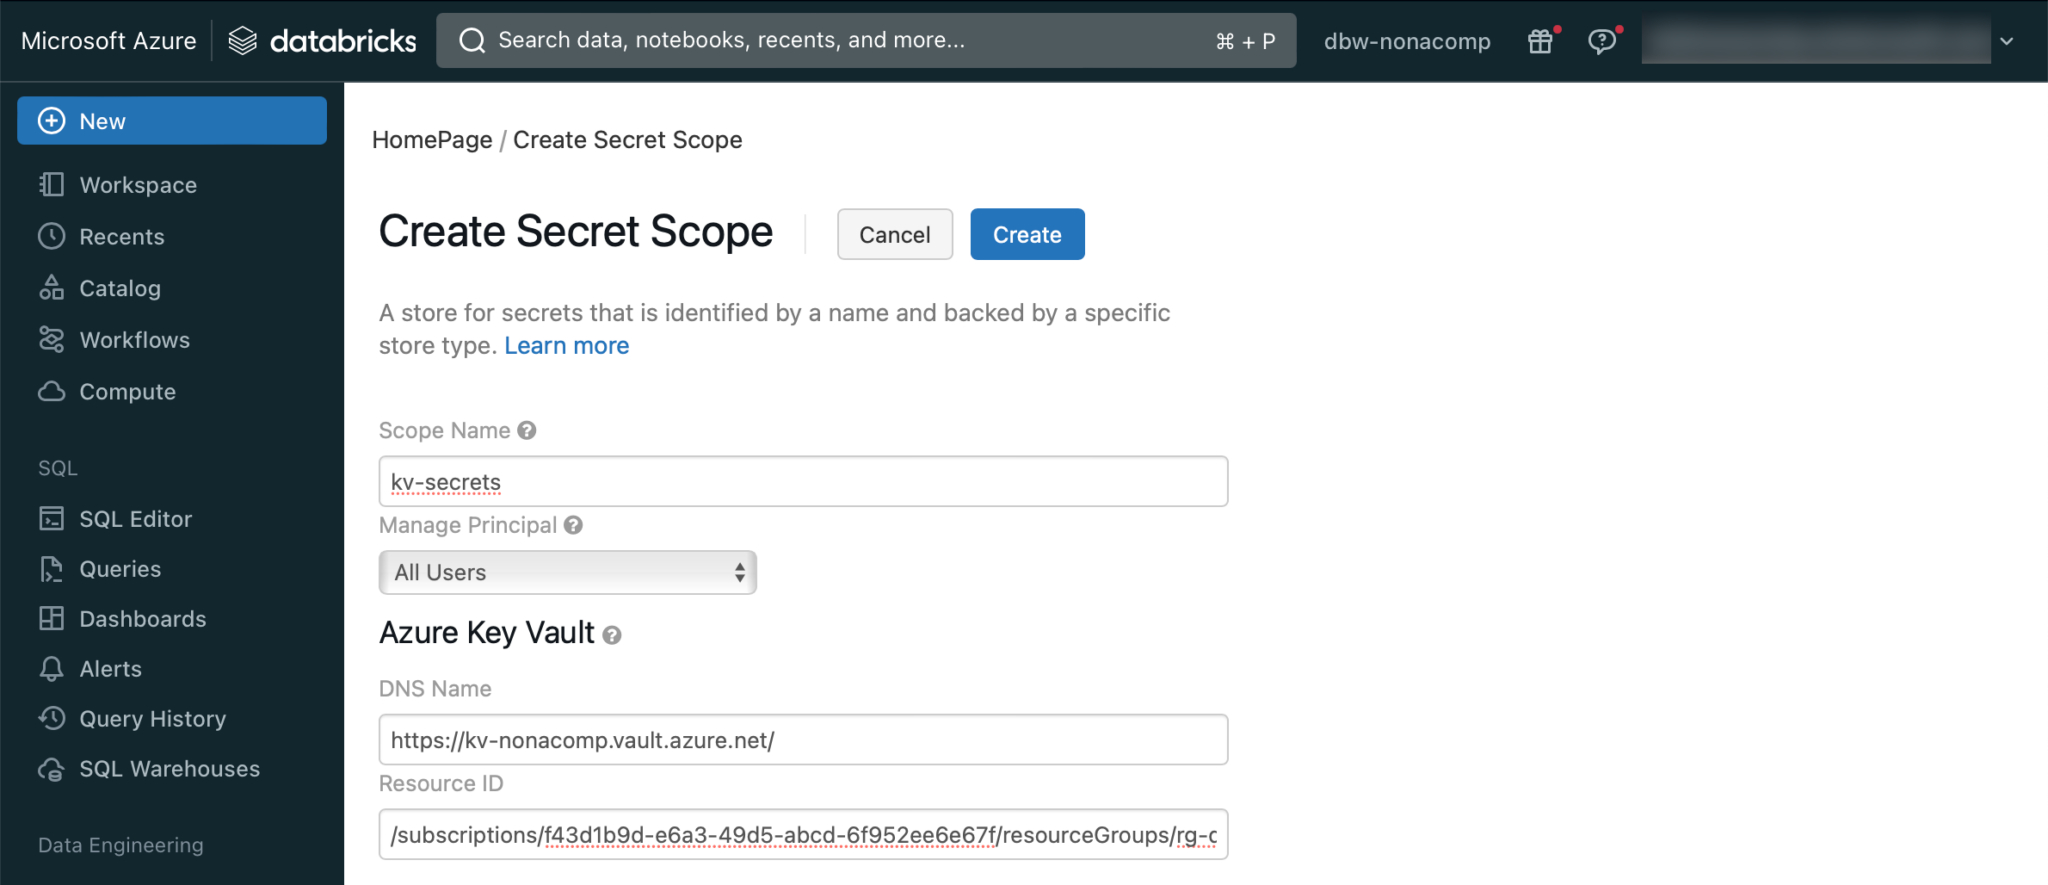
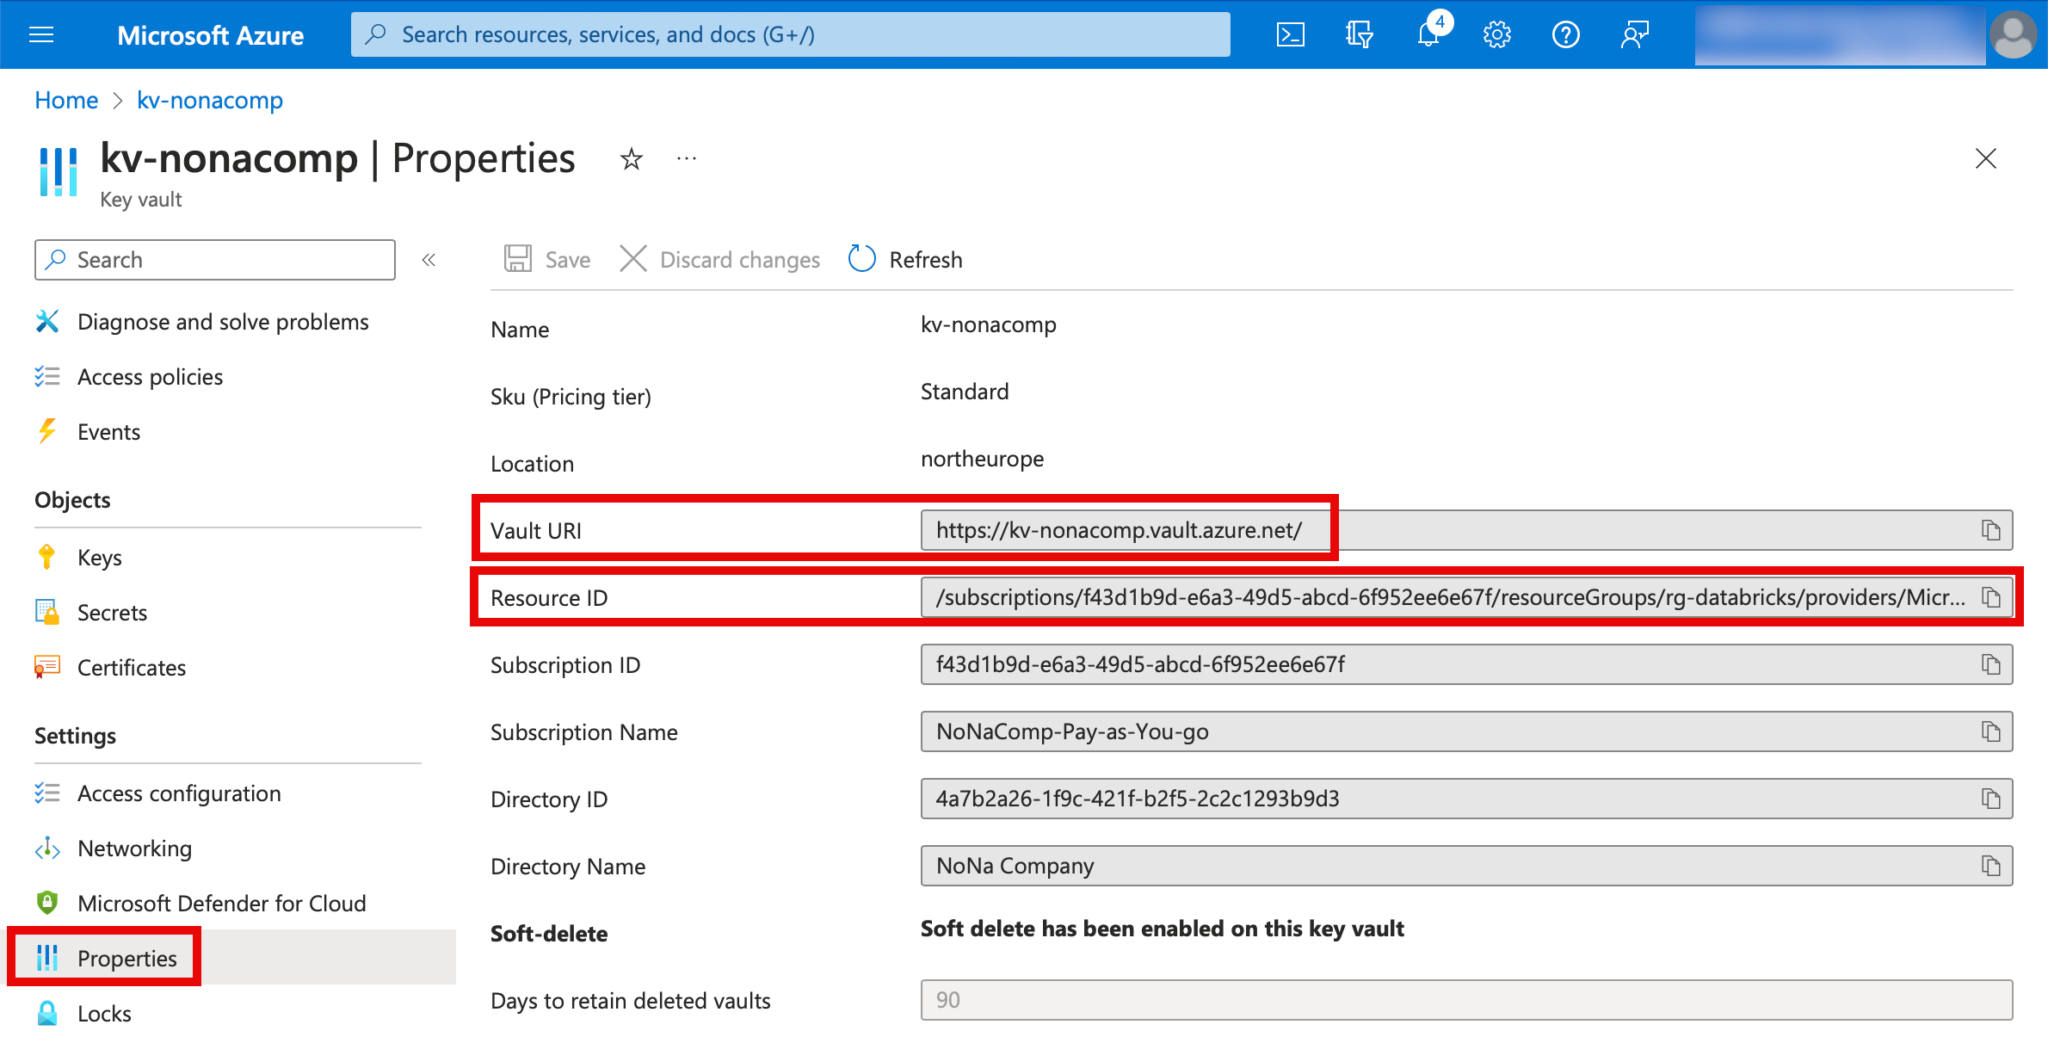
The details of KeyVault can be found in the Azure Portal:
Create a Cluster
Clusters are a central component of Databricks Lakehouse. I create a simple cluster by switching to the “Compute” menu item in Databricks.
A separate article could be written on the subject of clusters. In this article, I will limit myself to the creation of a simple “all-purpose compute” cluster.
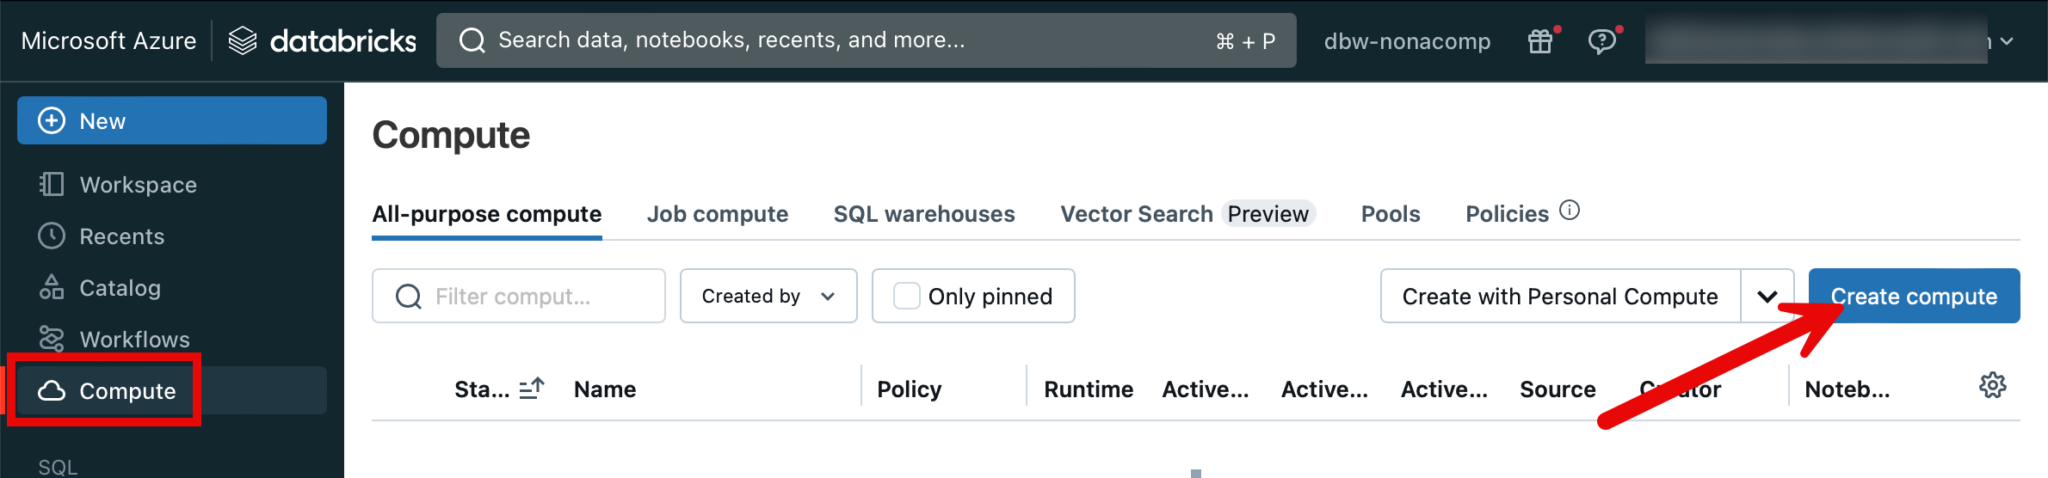
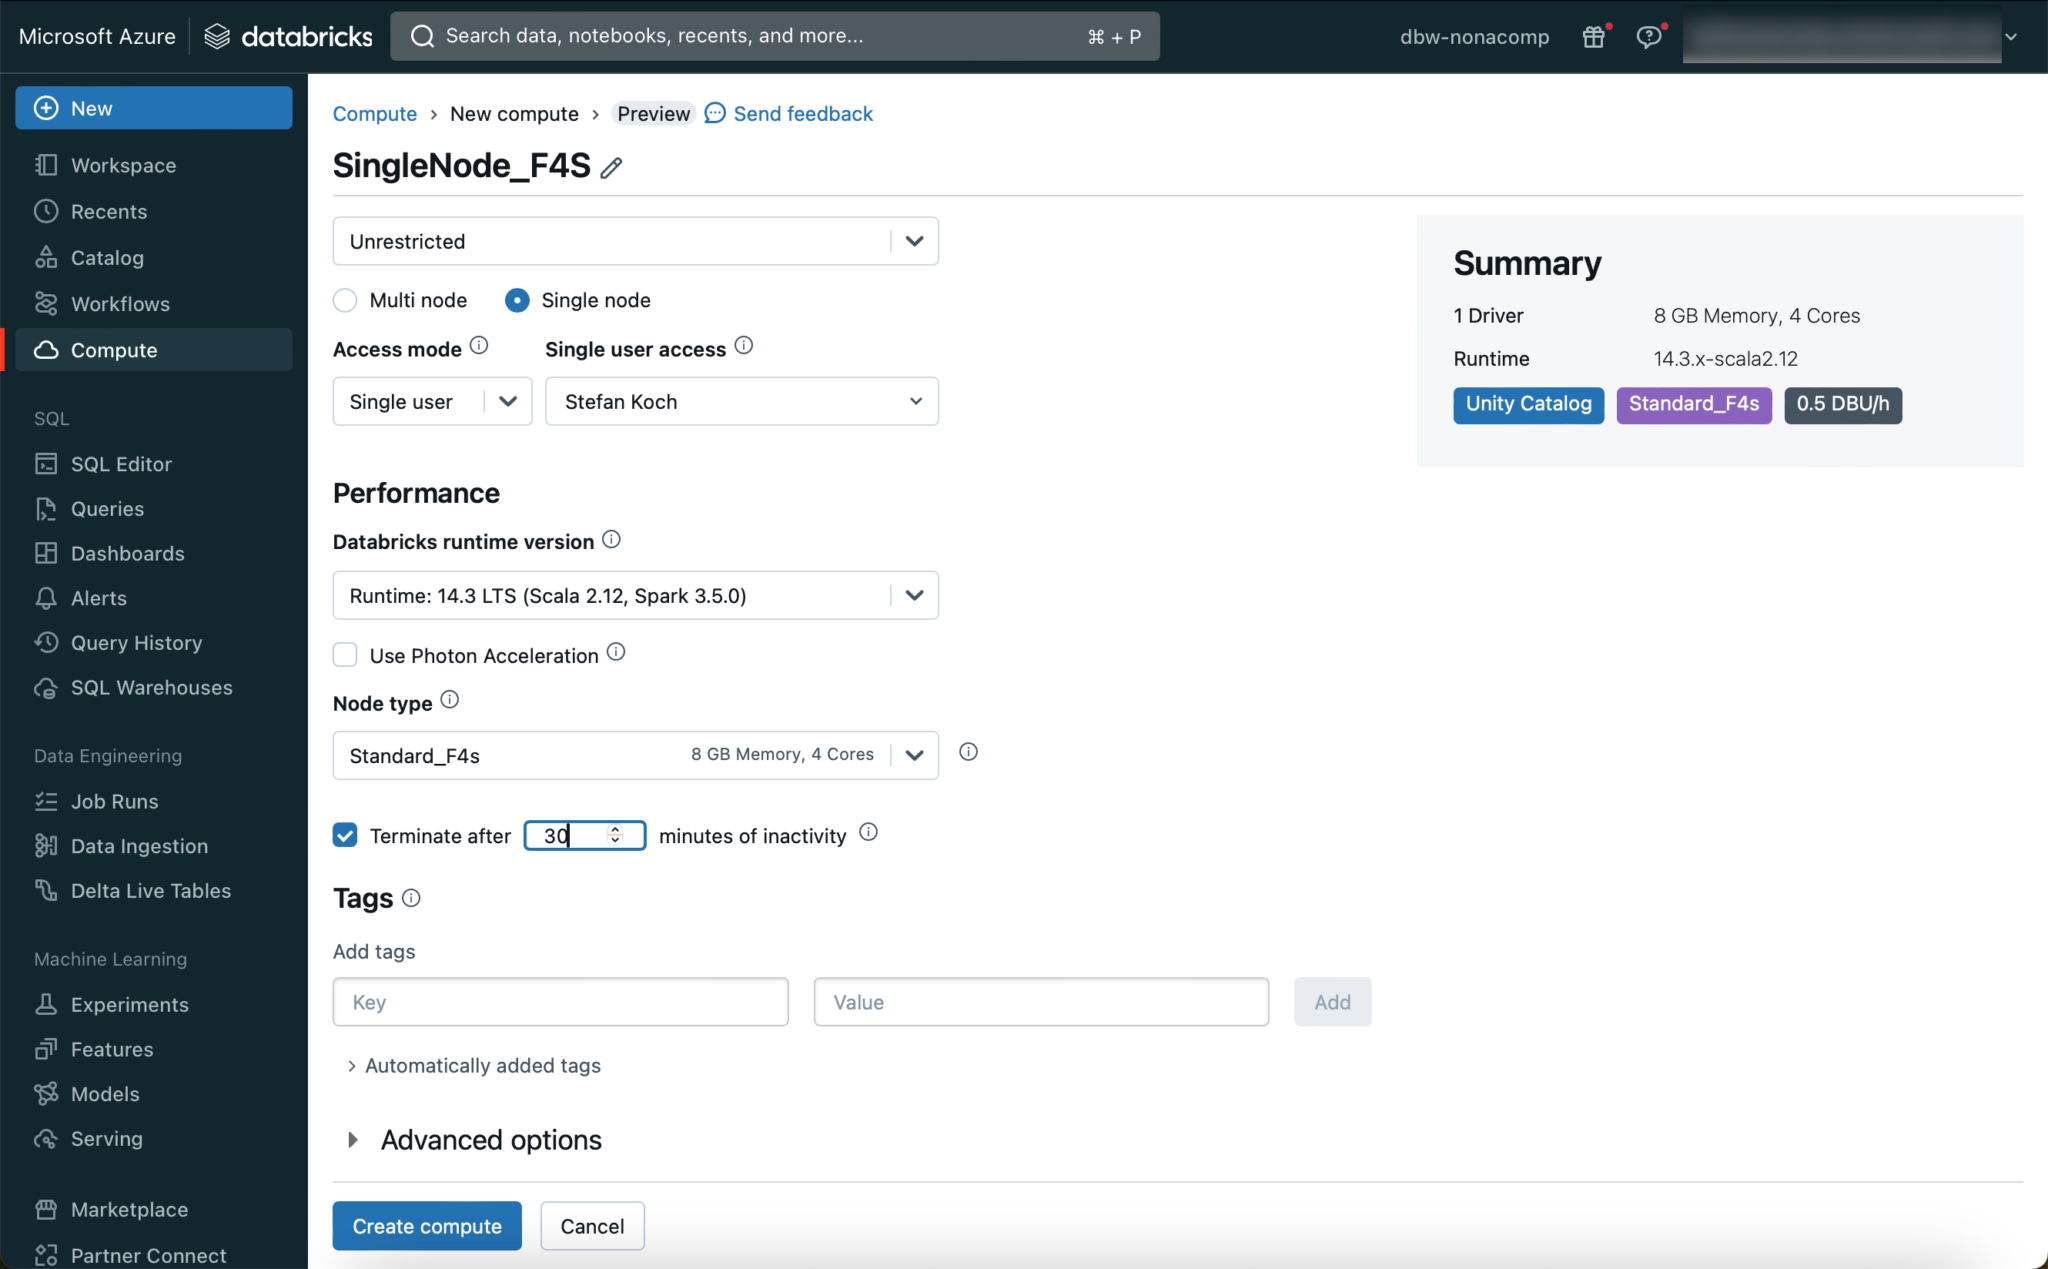
As a rule, you should choose an LTS version for the runtime. For smaller tests and data sets, it is sufficient to create a single-node cluster with a small node type. In Azure, this is the “Standard_F4s” image. If necessary, the cluster can be enlarged later, or an additional cluster can be added.
🚨🚨🚨Important: To avoid unnecessary costs, it is essential to set the cluster to terminate itself after a certain time! 🚨🚨🚨
I have set this to 30 minutes.
Read secrets from KeyVault
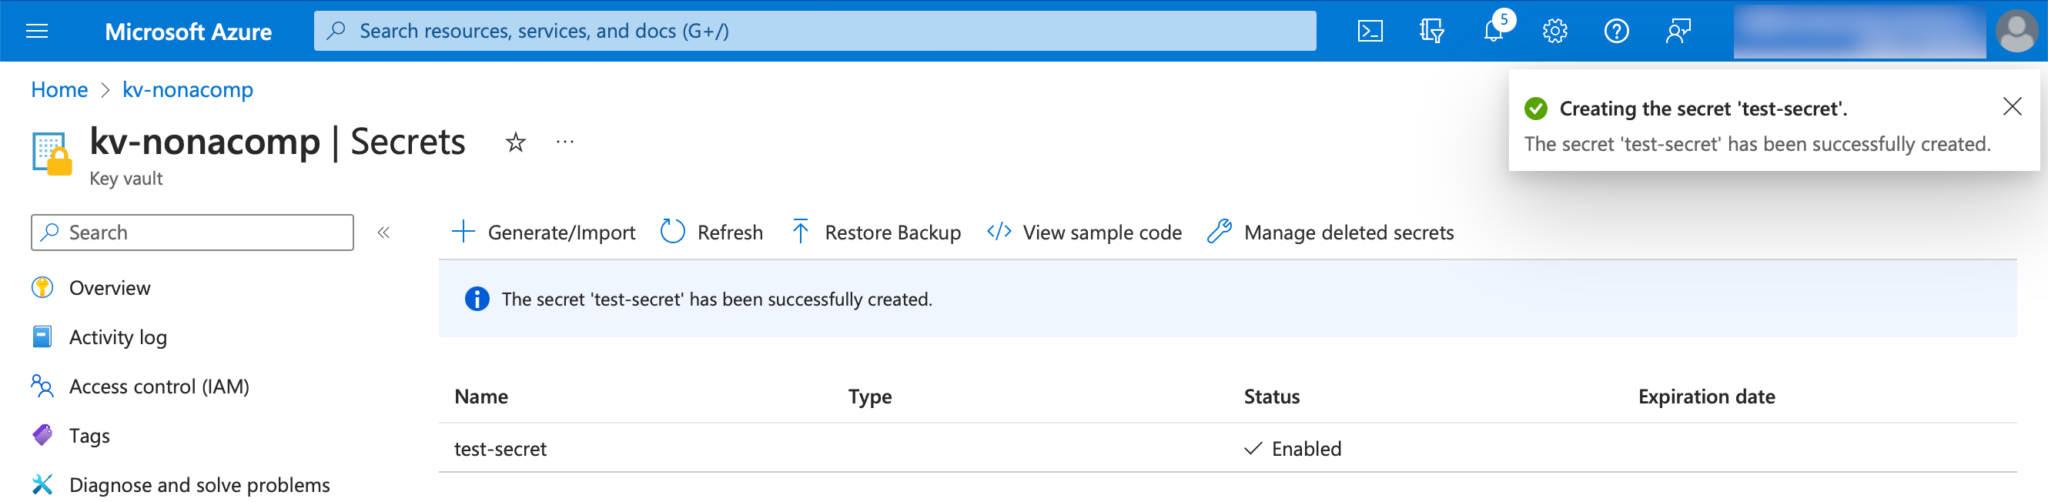
To test that the linking of the KeyVault with the Databricks Secret Scope works properly, I do a small test. I create a simple secret in the KeyVault itself.
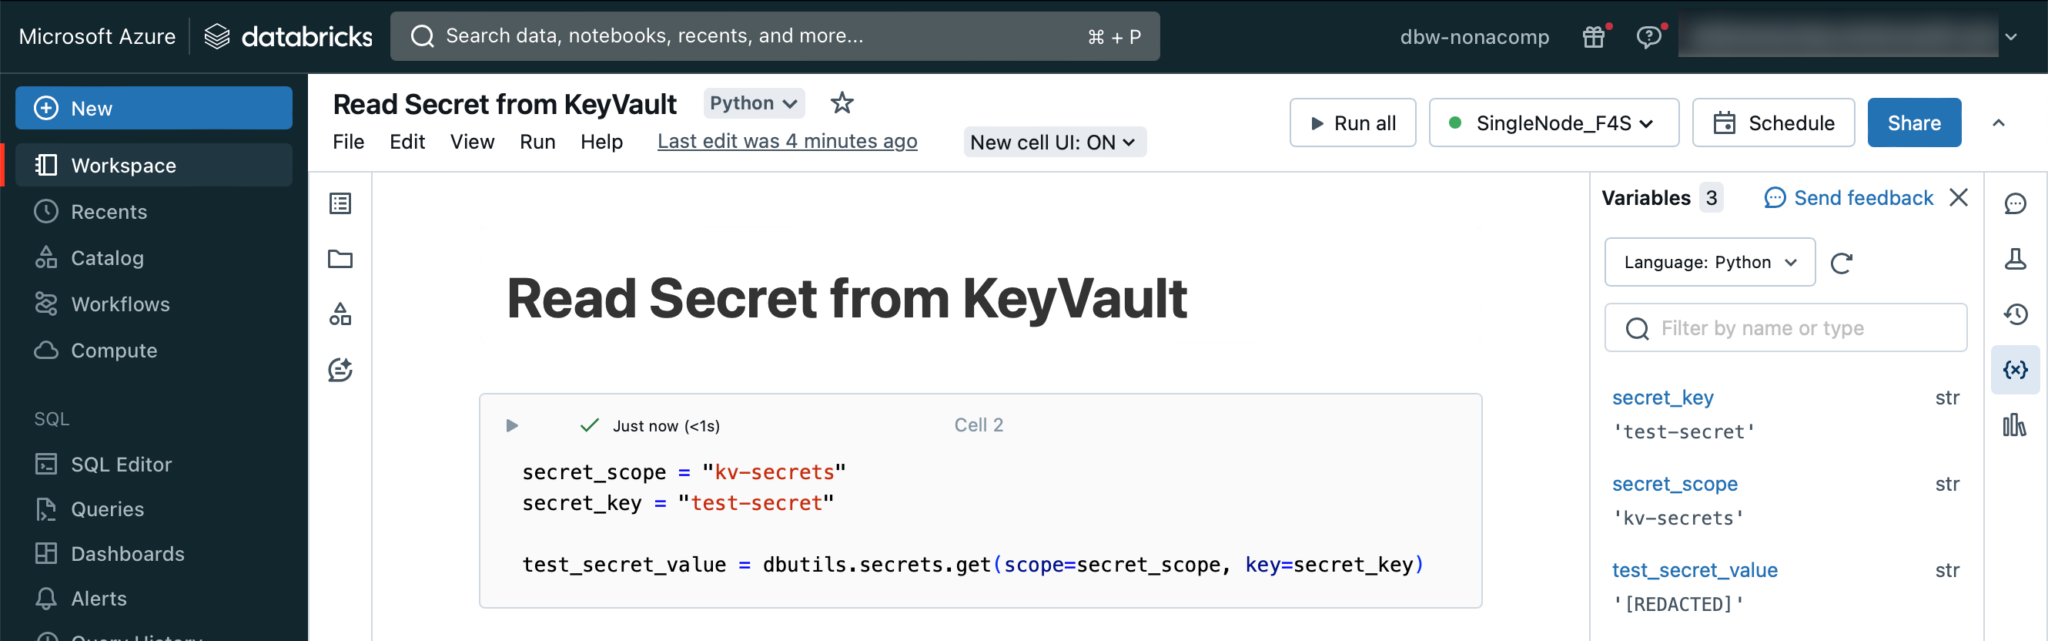
Within the Databricks workspace, I create a notebook in which I integrate the test secrets.
|
|
This cell in the notebook should be executed successfully. You can then check in the variable explorer whether the secret has been retrieved. For security reasons, the content of variables that are filled with secrets is not displayed in plain text, but a “REDACTED” message appears.
Conclusion
With this step-by-step guide, even less experienced users should be able to create a complete Databricks Lakehouse environment in Azure.
As already mentioned, this is a simple setup that is suitable for training, testing use cases or creating a simple proof of concept. If you want to go a step further and deploy a Lakehouse in a production environment, there are several other points to consider, including security, monitoring, user/group management, and so on.
I would also like to point out that many of the steps that I have shown here in a manual process should be automated. Among other things, the deployment of resources should be automated via “Infrastructure as Code”. The creation of objects in the Unity Catalog can also be done via code. I will provide corresponding examples in a future article.