How It Started
It all began with a question: “Hey, can I do this locally too?” A student asked me this during my Data Engineering class. Normally, I rely heavily on Azure cloud services there. There’s a practical reason for that: managing local machines for multiple students is a nightmare. We have Windows, Mac, Linux, and some even show up with tablets. Different hardware and configurations make it nearly impossible to set up exercises that work for everyone right away.
But the cloud has its downsides – especially for beginners. The flood of logins (GitHub, Azure, various services) meant that by the end of the semester, participants were juggling eight different accounts.
Even more serious: the costs. Cloud services generate expenses immediately, and they’re often hard to predict. My previous approach was to spin up environments with Terraform, scale them up during class, and scale them back down afterwards. But since I wanted to give students access to the infrastructure for practice too, instances stayed active longer – and the bill kept growing. That wasn’t satisfactory.
The Idea: Open Source Instead of Vendor Lock-in
I asked myself: why not build a setup that’s easier to manage? Instead of proprietary Azure products, I wanted to go all-in on open source. The goal: a Docker-based setup with an ETL orchestrator, Jupyter Notebooks, and a Kafka cluster. Kafka in particular was a major cost driver in the cloud – running an Event Hub for weeks adds up fast.
I quickly abandoned early attempts at local Docker setups – too complicated for many students. I needed an affordable Linux host in the cloud. Hetzner fit the bill: a virtual machine for an unbeatable 5€ per month, with no hidden costs for ingress, egress, or the other fees that hyperscalers love to tack on.
But a server on the internet means responsibility: open ports, SSH access, certificates – security risks. I found the solution in Cloudflare Zero Trust. It allowed me to design the deployment so that no ports need to be exposed externally. Everything runs through a protected Cloudflare Tunnel. Services are accessible via subdomains, safely behind an authentication layer.
I automated the entire process with OpenTofu and wrote it up in a Medium article. But that was just the beginning.
Evolution: Scaling Through Automation
With 50 to 70 students per semester, even 5€ per instance quickly adds up to 250–350€ per month. I needed a solution that spins up servers only when they’re actually needed and automatically tears them down again.
For this, I now use a Cloudflare R2 bucket to store the OpenTofu state file remotely. The free tier includes 10 GB of storage – given the tiny size of state files, that’s more than enough for hundreds of instances.
From this vision, a standalone project with a fitting name emerged: Nexus Stack. “Nexus” (Latin for connection/junction) perfectly describes how different technologies interlock in a “stack” to process data efficiently.
Enter Nexus Stack
I decided to release Nexus Stack under the MIT license so that not just my students, but the entire community can benefit. Nexus Stack isn’t just a script – it’s a framework for one-command deployment.
What makes Nexus Stack special:
- Zero-Open-Ports Policy: This is my personal highlight. During setup, port 22 (SSH) is only briefly opened via the Hetzner API to install the Cloudflare Tunnel. Once that’s done, the port is closed again. All access happens exclusively through the secure tunnel.
- The Control Plane: A web interface (control.your-domain.ch) lets you manage the infrastructure with a single click. You can dynamically enable services, spin up the instance, or schedule a teardown to save costs.
- Pre-built Stacks: Whether JupyterLab, Postgres, or Kafka – services are organized in Docker stacks and can be configured via a simple services.yaml. It’s also easy to extend with new stacks.
- GitHub Actions Integration: The entire lifecycle (spin up, teardown, destroy) is controlled through GitHub Actions. You don’t need to be an IaC expert to use Nexus Stack.
Why Nexus Stack?
In an era where data sovereignty matters more than ever, Nexus Stack offers an alternative to American hyperscalers.
- Sovereignty: Your data lives on your server.
- Cost efficiency: Fixed, low prices at Hetzner instead of unpredictable cloud bills.
- Simplicity: Once set up, automation takes care of the rest.
- For my students, this means: no more hours of installation. They get a link, log in, and can start with data engineering immediately.
What Does It Cost?
One of the most common questions: what does a setup like this cost? Here’s the breakdown:
- Hetzner CAX31: (ARM, 8 vCPU, 16 GB RAM) €0.02/hour (~€14/month at 24/7 operation, but that’s rarely needed)
- Cloudflare (Pages, Functions, D1, R2, Workers): €0 (free tier)
- GitHub Actions: €0 (2000 min/month free)
- Resend (email): €0 (100 emails/day free)
- Domain: ~€10-15/year
The CAX31 is an ARM-based VM that’s more than sufficient for most stacks. With 8 vCPUs and 16 GB RAM, multiple services run in parallel without issues. And the best part: you only pay when the instance is running. If you only need your stack during the day and shut it down in the evening via scheduled teardown, you pay even less.
Compared to the unpredictable costs of a hyperscaler, that’s a bargain.
The Control Plane: Self-Service Instead of Admin Dependency
A new problem quickly emerged: when deploying 70 individual stacks for my students, I don’t want to navigate the GitHub interface for each one. More importantly: students should be able to manage their infrastructure independently, without dealing with GitHub Actions, workflows, or infrastructure-as-code.
The solution was a Control Plane – a central web dashboard for controlling the entire infrastructure lifecycle. Cloudflare Pages with Cloudflare Functions fit perfectly – both available in the free tier.
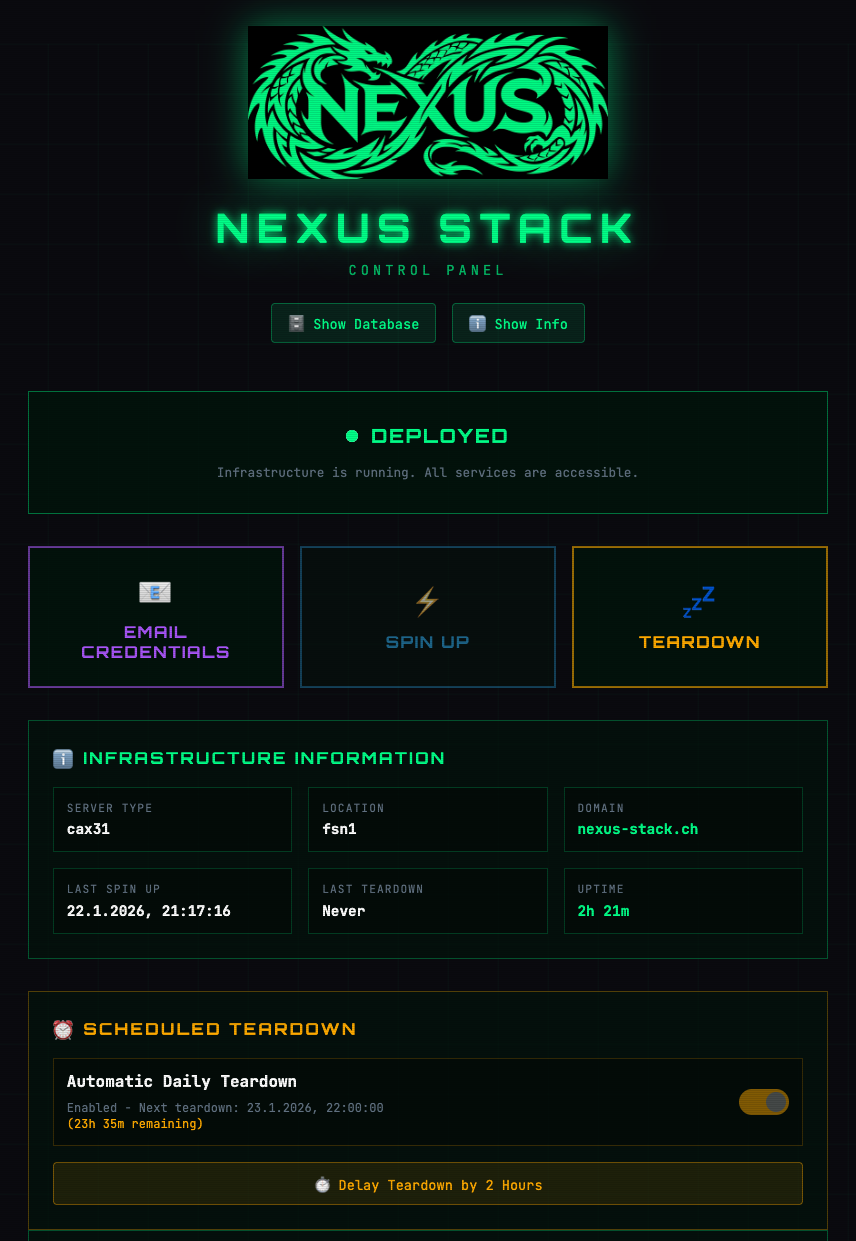
The Control Plane is automatically created as part of the initial setup and accessible at control.your-domain.ch. It consists of four components:
- Cloudflare Pages: A static frontend with a clean UI
- Cloudflare Functions: API endpoints that trigger GitHub Actions workflows
- Cloudflare D1: A SQLite database for runtime state (which services are enabled)
- Cloudflare R2: Where OpenTofu state files are stored. After a teardown, the entire stack can be automatically spun up again.
When a student clicks “Spin Up”, the frontend sends an API call to a Cloudflare Function, which triggers the corresponding workflow via the GitHub API. The same applies to “Teardown” (shutting down infrastructure) or enabling/disabling individual services.
The Benefits No GitHub knowledge required: Students don’t need a GitHub account, no knowledge of Actions or YAML files. A single button click is enough.
Scheduled Teardown: Particularly useful is the ability to schedule an automatic shutdown. A student can start their stack at 2 PM, work, and the stack automatically shuts down at 10 PM. This saves costs and I don’t have to manually check for forgotten instances.
Service Toggle: Not everyone needs every service. Through the Control Plane, students can enable only the services they actually need. This saves resources and makes the system faster.
 Cloudflare Worker for Automation: A scheduled worker regularly checks if planned teardowns are due and executes them automatically. Completely serverless, completely free.
The Password Problem: From Idea to Solution
A new problem emerged: how do I securely distribute passwords?
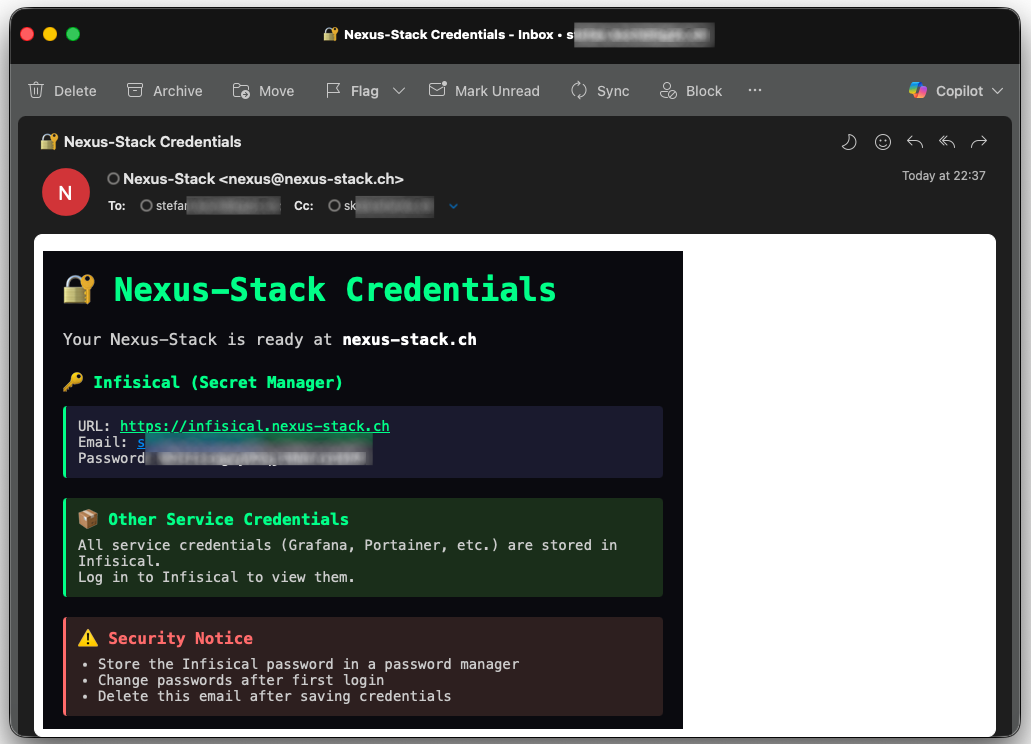
Each stack automatically generates admin passwords for all services (Grafana, JupyterLab, Portainer, etc.). Sending these via email is insecure. Sharing them in a Google Doc would be a security nightmare. I needed a secret manager. The solution was obvious: Infisical – an open-source secret manager that can be deployed as a Docker container. Perfect! I added Infisical as another stack to Nexus. During deployment, all generated passwords are automatically uploaded to Infisical via its API and tagged by service. Students can log in and find their credentials there – neatly organized, securely stored.
But then came the next challenge: how do students get access to Infisical itself? If I send the Infisical admin password via email, I haven’t solved the original problem – just moved it. I’d still have to do something manually. I needed a more elegant solution.
Email Integration: The Missing Piece
The answer was an email service. With Resend, I found a service that allows 100 emails per day in the free tier – more than enough for my purposes. And the best part: Resend has a simple API that’s perfect for automation.
Here’s how the flow works now:
-
Initial Setup: When I set up a stack for a student, I store their email address in the configuration.
-
Deployment Notification: As soon as the stack is successfully spun up, the deployment script automatically sends an email via Resend
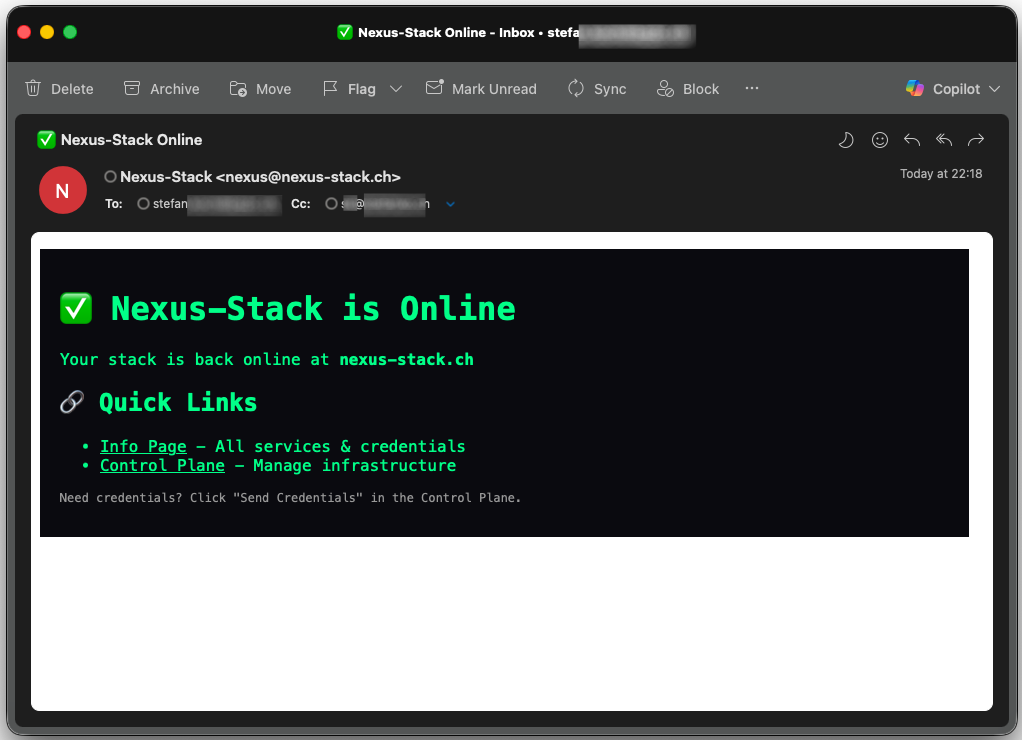
-
Self-Service Password Reset: On the Info Page, there’s a “Send Infisical Password” button. One click sends the Infisical admin password via email. The student logs in, changes the password (hopefully!), and can now access all other service credentials.

-
Auto-Shutdown Warning: 15 minutes before a scheduled teardown, a reminder email is sent: “Your stack will shut down in 15 minutes!” This gives you the chance to log into the Control Plane and either delay the teardown by 2 hours or cancel it for the day.
This setup solves multiple problems at once:
- Security: Passwords are never permanently shared via email
- Self-Service: Students can help themselves
- Transparency: Everyone knows exactly when their stack is running and when it’s not
- Cost efficiency: Forgotten instances are a thing of the past
Secrets Management: Automation is King
An important aspect of Nexus Stack is the fully automatic generation and management of secrets.
OpenTofu generates everything – in the OpenTofu code, I use random_password resources for each service:
|
|
These passwords are stored in the Terraform state file – and here’s where it gets interesting: the state file isn’t stored locally, but in a Cloudflare R2 bucket, also securely protected by Cloudflare.
I use GitHub Secrets for CI/CD. Certain secrets (e.g., Cloudflare API tokens, Hetzner API tokens) need to be accessible from GitHub Actions. These are stored as GitHub Secrets and are only visible to workflows.
During deployment, the following workflow occurs:
- OpenTofu generates service passwords
- The deployment script reads them from the state file
- The passwords are transferred to Infisical via API
- They are never output in logs (all scripts mask secrets)
The beauty of this: I don’t know the passwords myself. They’re generated, stored, and distributed without me ever seeing them. That’s not just convenient – it’s also more secure.
GitHub Actions: The Orchestration Hub
The heart of Nexus Stack is full automation via GitHub Actions. I deliberately decided against local deployments – everything runs in the cloud. This is also because the Control Plane can only run in the cloud, specifically on Cloudflare – I can’t simulate that locally. But the good news is that pipeline execution takes just a few minutes, so you can test new functionality quickly.
 I chose GitHub Actions for the following reasons:
- Consistent environment: Whether I’m working from my Mac, a student from Windows, or a contributor from Linux – the workflow runs the same way every time.
- No local dependencies: No “works on my machine” problem. No installing OpenTofu, Cloudflare CLI, or other tools.
- Audit trail: Every deployment step is traceable. Logs remain available for 90 days.
- Integration with Control Plane: The Control Plane triggers workflows via GitHub API – seamless and secure.
Nexus Stack has several specialized workflows:
- initial-setup.yaml: First-time setup (Control Plane + infrastructure)
- spin-up.yml: Spin up stack (uses existing state file)
- teardown.yml: Tear down stack (keeps state, deletes server)
- destroy-all.yml: Complete cleanup (also deletes state and Control Plane)
Every workflow is idempotent – you can run it multiple times without breaking anything.
A typical “Spin Up” looks like this:
- Student clicks “Spin Up” in the Control Plane
- Cloudflare Function triggers GitHub Actions workflow
- Workflow checks out OpenTofu state from R2 bucket
- Hetzner server is created
- SSH port 22 is briefly opened (for setup)
- Cloudflare Tunnel is installed
- SSH port is closed again (Zero-Open-Ports!)
- Docker services are started
- Secrets are transferred to Infisical
- Deployment success email is sent via Resend
- Student opens Control Plane and enters their email at Cloudflare Zero Trust
- Cloudflare sends a one-time code
- Student can request the master password for Infisical via Control Plane
Everything runs automatically. Average deployment time: 4-6 minutes. That depends, of course, on which stack is selected and how many.
Wetty: SSH in the Browser
One last problem remained: how do I access the server when I need to debug? Some stacks require development work, which means I need to check Docker logs when something breaks to understand why. But since I set up the entire automation outside my own machine, I don’t have the SSH key locally. For my students, that was never an option anyway. I needed something simpler. That’s why I set up a stack with Wetty.
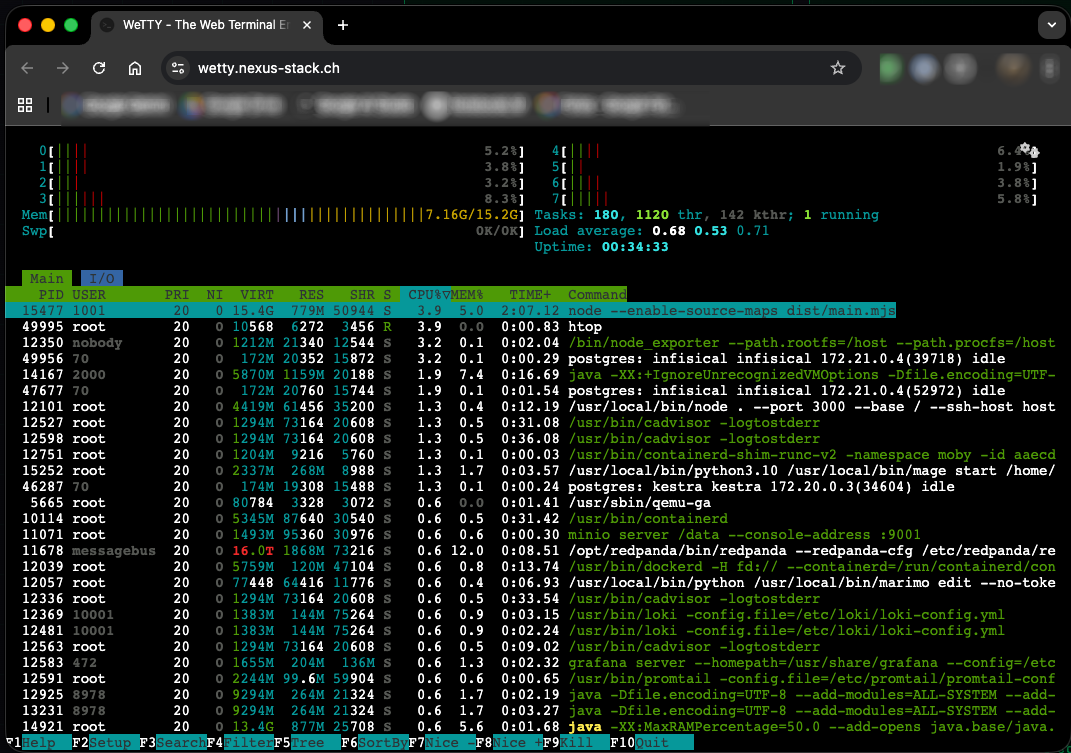
Wetty is a terminal-in-the-browser. It runs as a Docker container and provides a full SSH terminal – accessible via a web URL. Technically, it works like this: the Wetty container runs on the Hetzner server and listens on port 3000. The Cloudflare Tunnel routes ssh.your-domain.ch to localhost:3000, while Cloudflare Access protects the connection with email OTP. Wetty connects internally via localhost:22 to the host. The private SSH key is injected directly into the Wetty container during deployment. Students simply open ssh.your-domain.ch in their browser, authenticate via Cloudflare Access, and land directly in a shell on the server. No local SSH configuration needed. No keys to download. Just a browser.
Here too: the SSH port is not publicly accessible. Wetty accesses it internally, but from the outside, the server remains “portless”. All access goes through the secured Cloudflare Tunnel and is protected by multi-factor authentication (email OTP). What’s more, the service doesn’t start automatically – only on demand. You can enable it in the Control Plane and it’s available a few minutes later.
Available Stacks
Nexus Stack comes with a growing collection of pre-configured services. Instead of listing each one individually, here’s an overview by category:
For Data Engineering and ETL, Kestra and Mage are ready to go – both modern orchestrators that outperform Airflow in many areas. If you prefer visual workflows, n8n offers a no-code alternative for workflow automation.
In the Databases and Storage area, CloudBeaver provides a SQL client directly in the browser. MinIO delivers S3-compatible object storage for data lakes. For event streaming, there’s Redpanda – a Kafka-compatible alternative that runs much more efficiently, perfect for smaller instances.
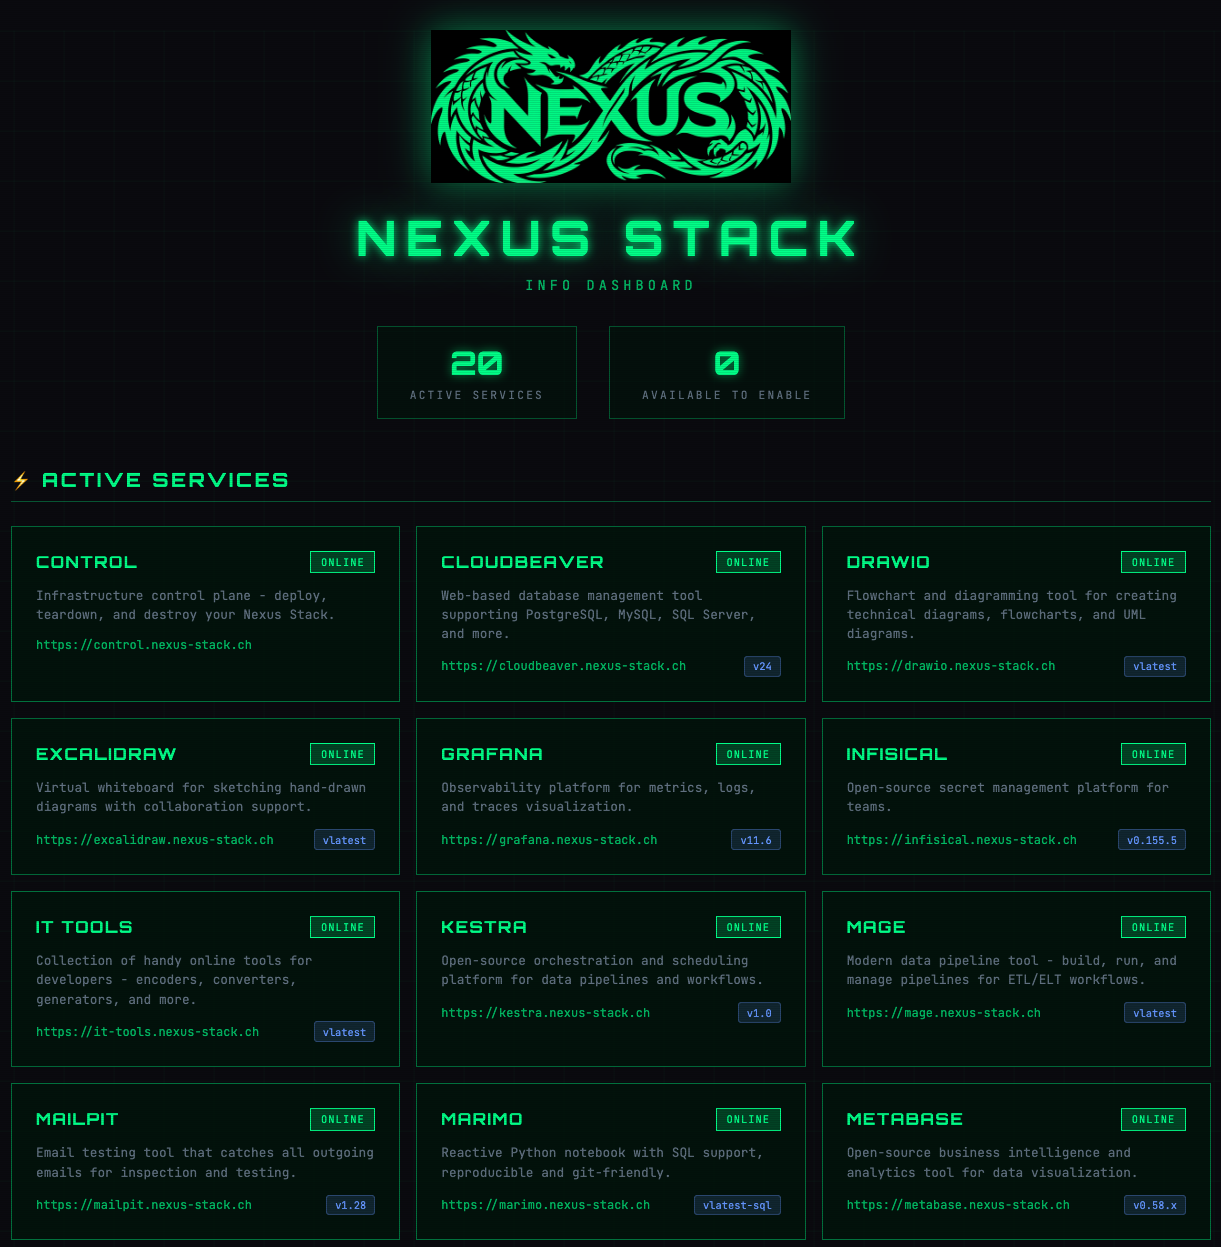
Monitoring and Observability is covered by Grafana (dashboards and alerting), Uptime Kuma (service monitoring), and an Info Dashboard that clearly lists all active services.
For Visualization and Diagrams, Excalidraw (whiteboard sketches) and Draw.io (technical diagrams) are included. Analytics and BI is handled by Metabase – a tool that even non-technical users without SQL knowledge can use.
For Notebooks and Interactive Coding, there’s Marimo as a modern Jupyter alternative. And IT-Tools provides a collection of useful developer utilities (Base64 encoder, JSON formatter, etc.).
Of course, Portainer is included – the graphical Docker management interface, in case you want to manually inspect containers.
All services are visible on the Info Dashboard.
The project is under active development. More stacks will be added in the coming weeks.
Contributions Welcome
Nexus Stack is open source under the MIT license. If you’re missing a stack, have an idea, or find a bug: GitHub Issues are open. Pull requests are welcome – whether it’s new stacks, documentation, or bugfixes.
The project thrives on others using and improving it. So: fork it, break it, fix it, share it.
What I Learned
This project was a steep learning curve for me. I went deep into Docker, Cloudflare Zero Trust, OpenTofu, and GitHub Actions. A lot of things I only knew superficially before, I suddenly had to really understand – because otherwise it wouldn’t have worked.
The combination of Infrastructure-as-Code and Cloudflare’s serverless stack (Pages, Functions, D1, R2, Workers) in particular showed me how much you can build today without your own server infrastructure. The Control Plane runs completely free on Cloudflare – and theoretically scales infinitely.
What Didn’t Work
Not everything went smoothly – far from it. Debugging in a setup distributed across multiple cloud services can be extremely tedious. When a deployment fails, you have to dig through GitHub Actions logs, Cloudflare logs, and Docker logs. Sometimes the error was somewhere completely different than expected.
Multiple times I got lost in my own code. I had implemented a solution that worked – only to realize I was missing an important feature. So: refactor everything. And then suddenly something else stopped working that had worked before. Classic.
The decision to orchestrate everything through GitHub Actions also had its pitfalls. Debugging workflows that run remotely is significantly more cumbersome than local testing. But in the end, the advantages (no local dependencies, consistent environment) outweigh the downsides.
Prerequisites
If you want to set up Nexus Stack yourself, you’ll need:
- Your own domain – The foundation for all subdomains (control.domain.ch, info.domain.ch, etc.)
- Cloudflare Account (free) – For Zero Trust, Tunnel, Pages, Functions, D1, R2
- Hetzner Account – For the VMs
- GitHub Account – For repository and Actions
- Resend Account (free) – For email notifications
- Docker Hub Account (optional) – If you want to push custom images
The initial setup takes about 30 minutes if you already have the accounts. The documentation on GitHub walks you through the process step by step.
Outlook
The next big step: an automation solution that applies Nexus Stack to a list of people. Instead of deploying each stack individually, I want to read a single config file with names and email addresses and automatically spin up a personalized stack for each one. That would reduce the onboarding process for new semesters from hours to minutes.
Links and Documentation
- Project Website: nexus-stack.ch
- GitHub Repository: github.com/stefanko-ch/Nexus-Stack
In the GitHub repository, you’ll find detailed documentation on setup, configuration, and adding your own stacks.
Questions? Feedback? Drop me a message or open an issue. I’d love to hear from anyone who gives Nexus Stack a try.
Useful Links
Infrastructure & Hosting
- Hetzner Cloud – Affordable cloud VMs
- Cloudflare Zero Trust – Secure access without open ports
- Cloudflare Tunnel – Expose services securely
- Cloudflare Pages – Static site hosting
- Cloudflare D1 – Serverless SQLite database
- Cloudflare R2 – S3-compatible object storage
Infrastructure as Code
- OpenTofu – Open-source Terraform alternative
- GitHub Actions – CI/CD automation
Data Engineering Stacks
- Kestra – Data orchestration platform
- Mage – Modern data pipeline tool
- Redpanda – Kafka-compatible streaming
- MinIO – S3-compatible object storage
- Metabase – Business intelligence
Development Tools
- Portainer – Docker management UI
- Grafana – Monitoring and dashboards
- CloudBeaver – Web-based SQL client
- Marimo – Modern Python notebooks
- Wetty – Web-based terminal
Utilities
- Infisical – Open-source secret management
- Resend – Developer-first email API
- Uptime Kuma – Self-hosted monitoring
- Excalidraw – Virtual whiteboard
- Draw.io – Diagram editor
- IT-Tools – Developer utilities