dbt core: Set up in VS Code and run seamlessly on Databricks – step by step
In this step-by-step guide, I will show you how to install dbt core locally in Visual Studio Code, set up the corresponding Visual Studio Code Extension and run dbt on Databricks.
Contents
What is dbt?
dbt stands for “data build tool” and is an open source software tool that is mainly used for data modeling and data integration. With dbt, data analysts and data engineers can create data pipelines that transform, cleanse and convert data into a form suitable for analysis. Further information on dbt can be found here: https://www.getdbt.com/
dbt can be operated either in a paid cloud version or as an open source version. In this guide, I am using the free core version.
Preparations and requirements
I assume that you have already set up a Databricks environment. If not, I have written a step-by-step guide here on how to create such an environment in Azure.
You should also install the following software on your computer:
Github Desktop: https://desktop.github.com/
Visual Studio Code: https://code.visualstudio.com/
Python: https://www.python.org/downloads/
Git: https://git-scm.com/downloads
Create a Git repo
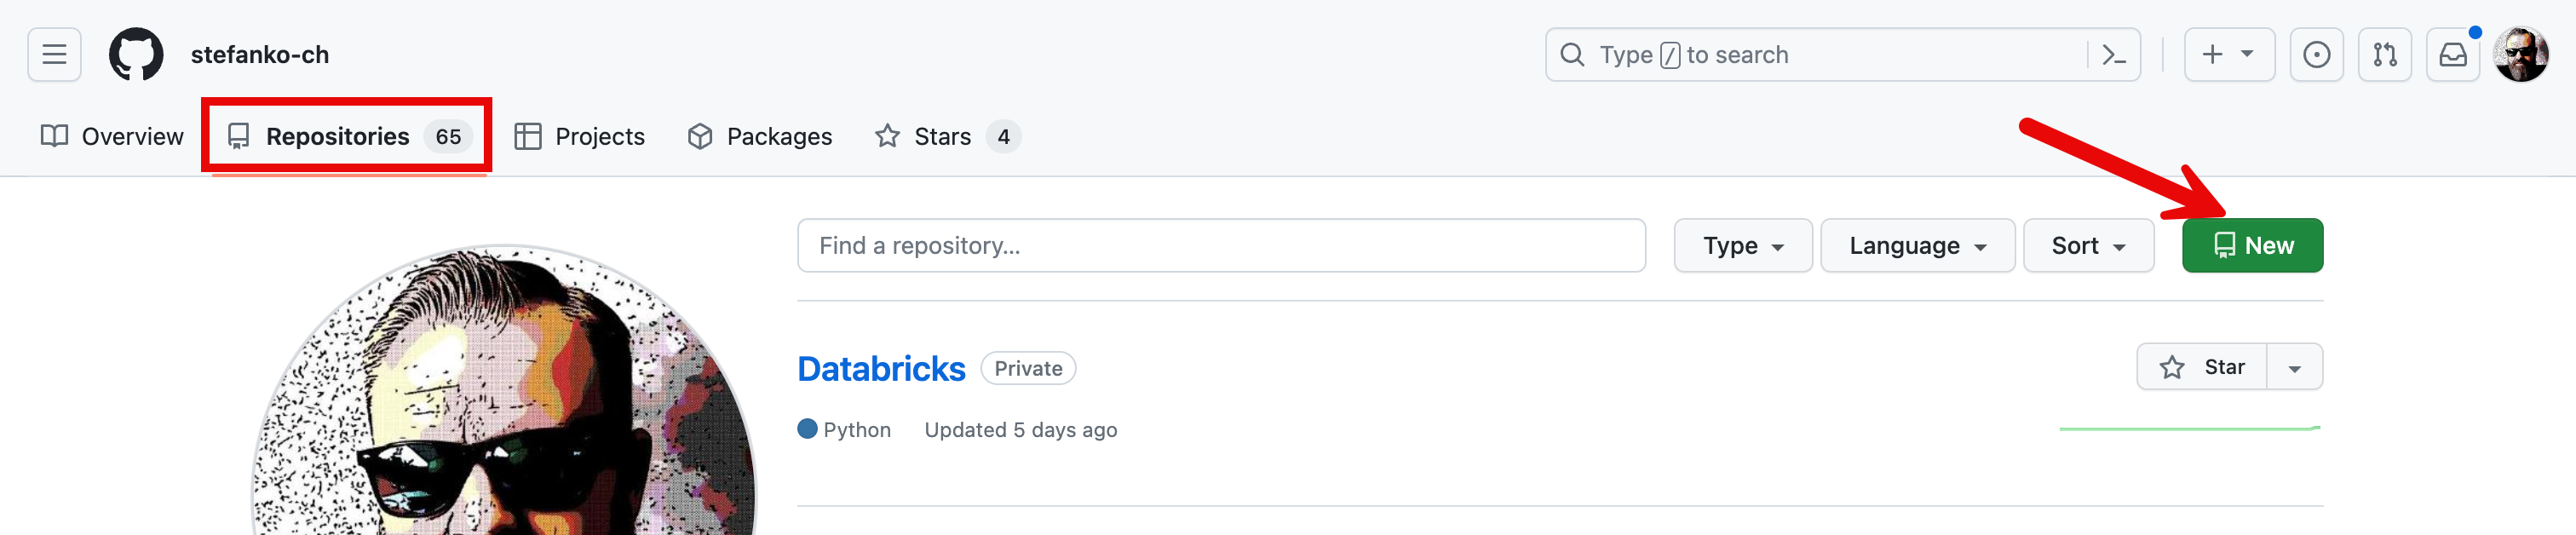
Before I start with the actual installation, I will create a Github repository. On Github, I go to the repositories. There I click on “New”.
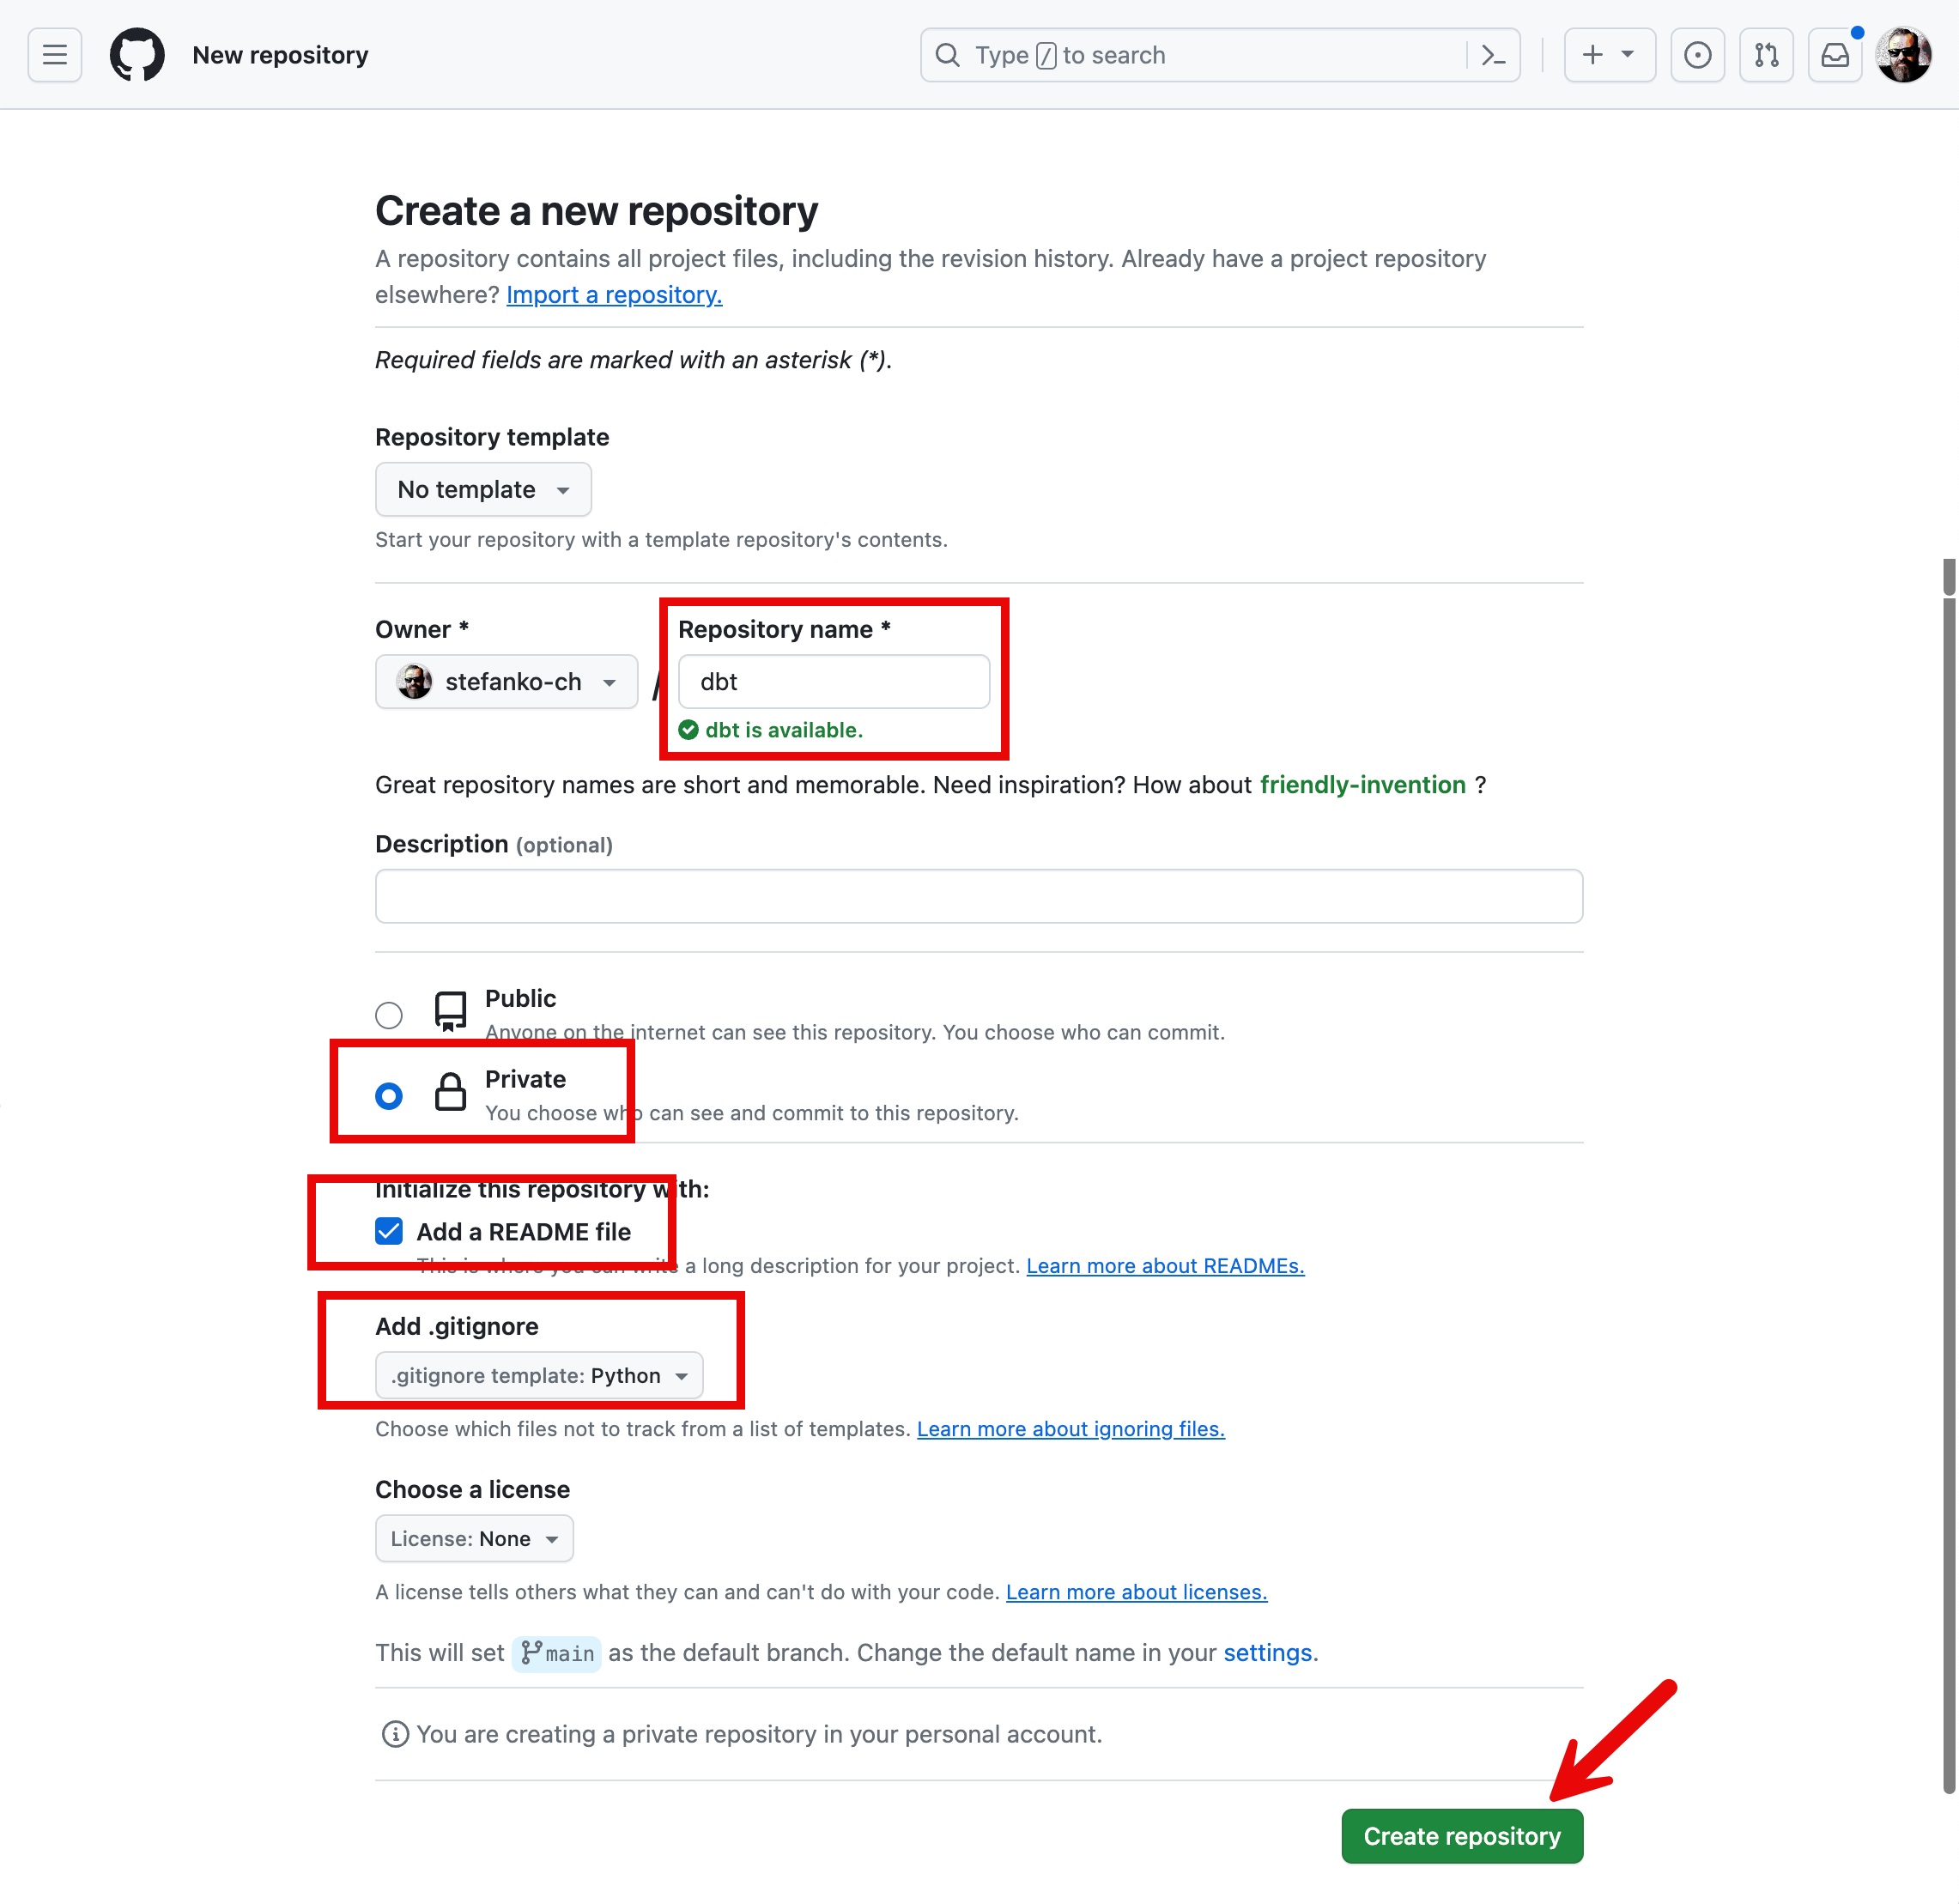
I give my new project a descriptive name and make a few additional settings:
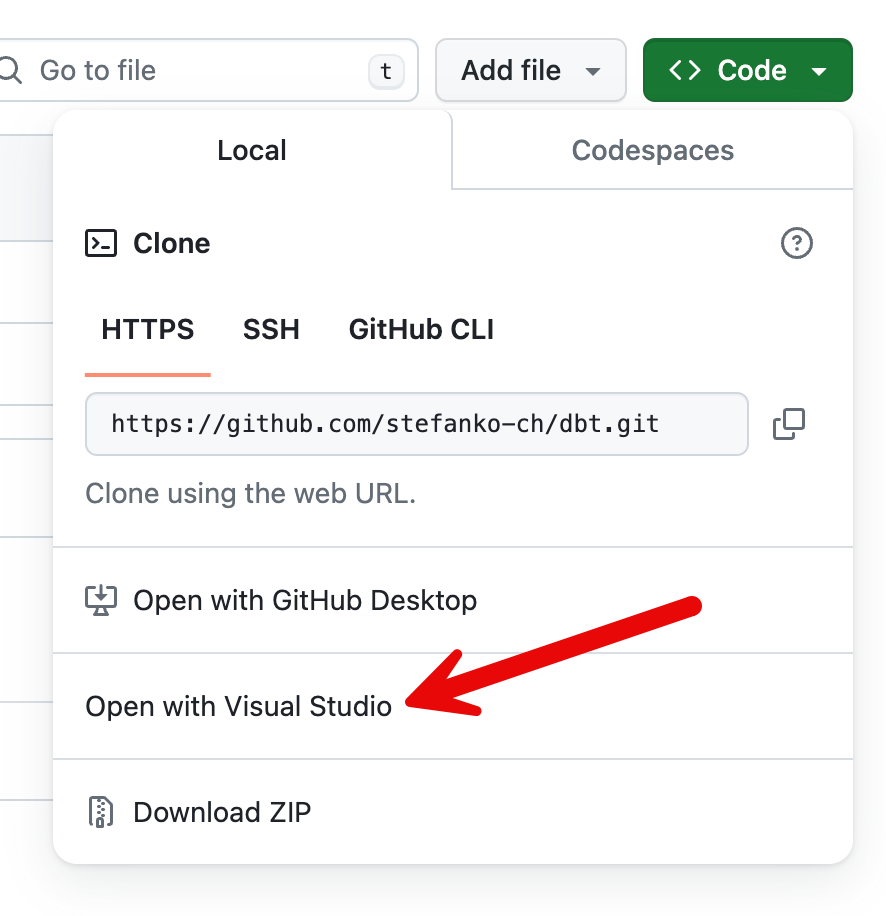
I can then clone the empty repository to my local computer via browser and VS Code.

A pop-up will open
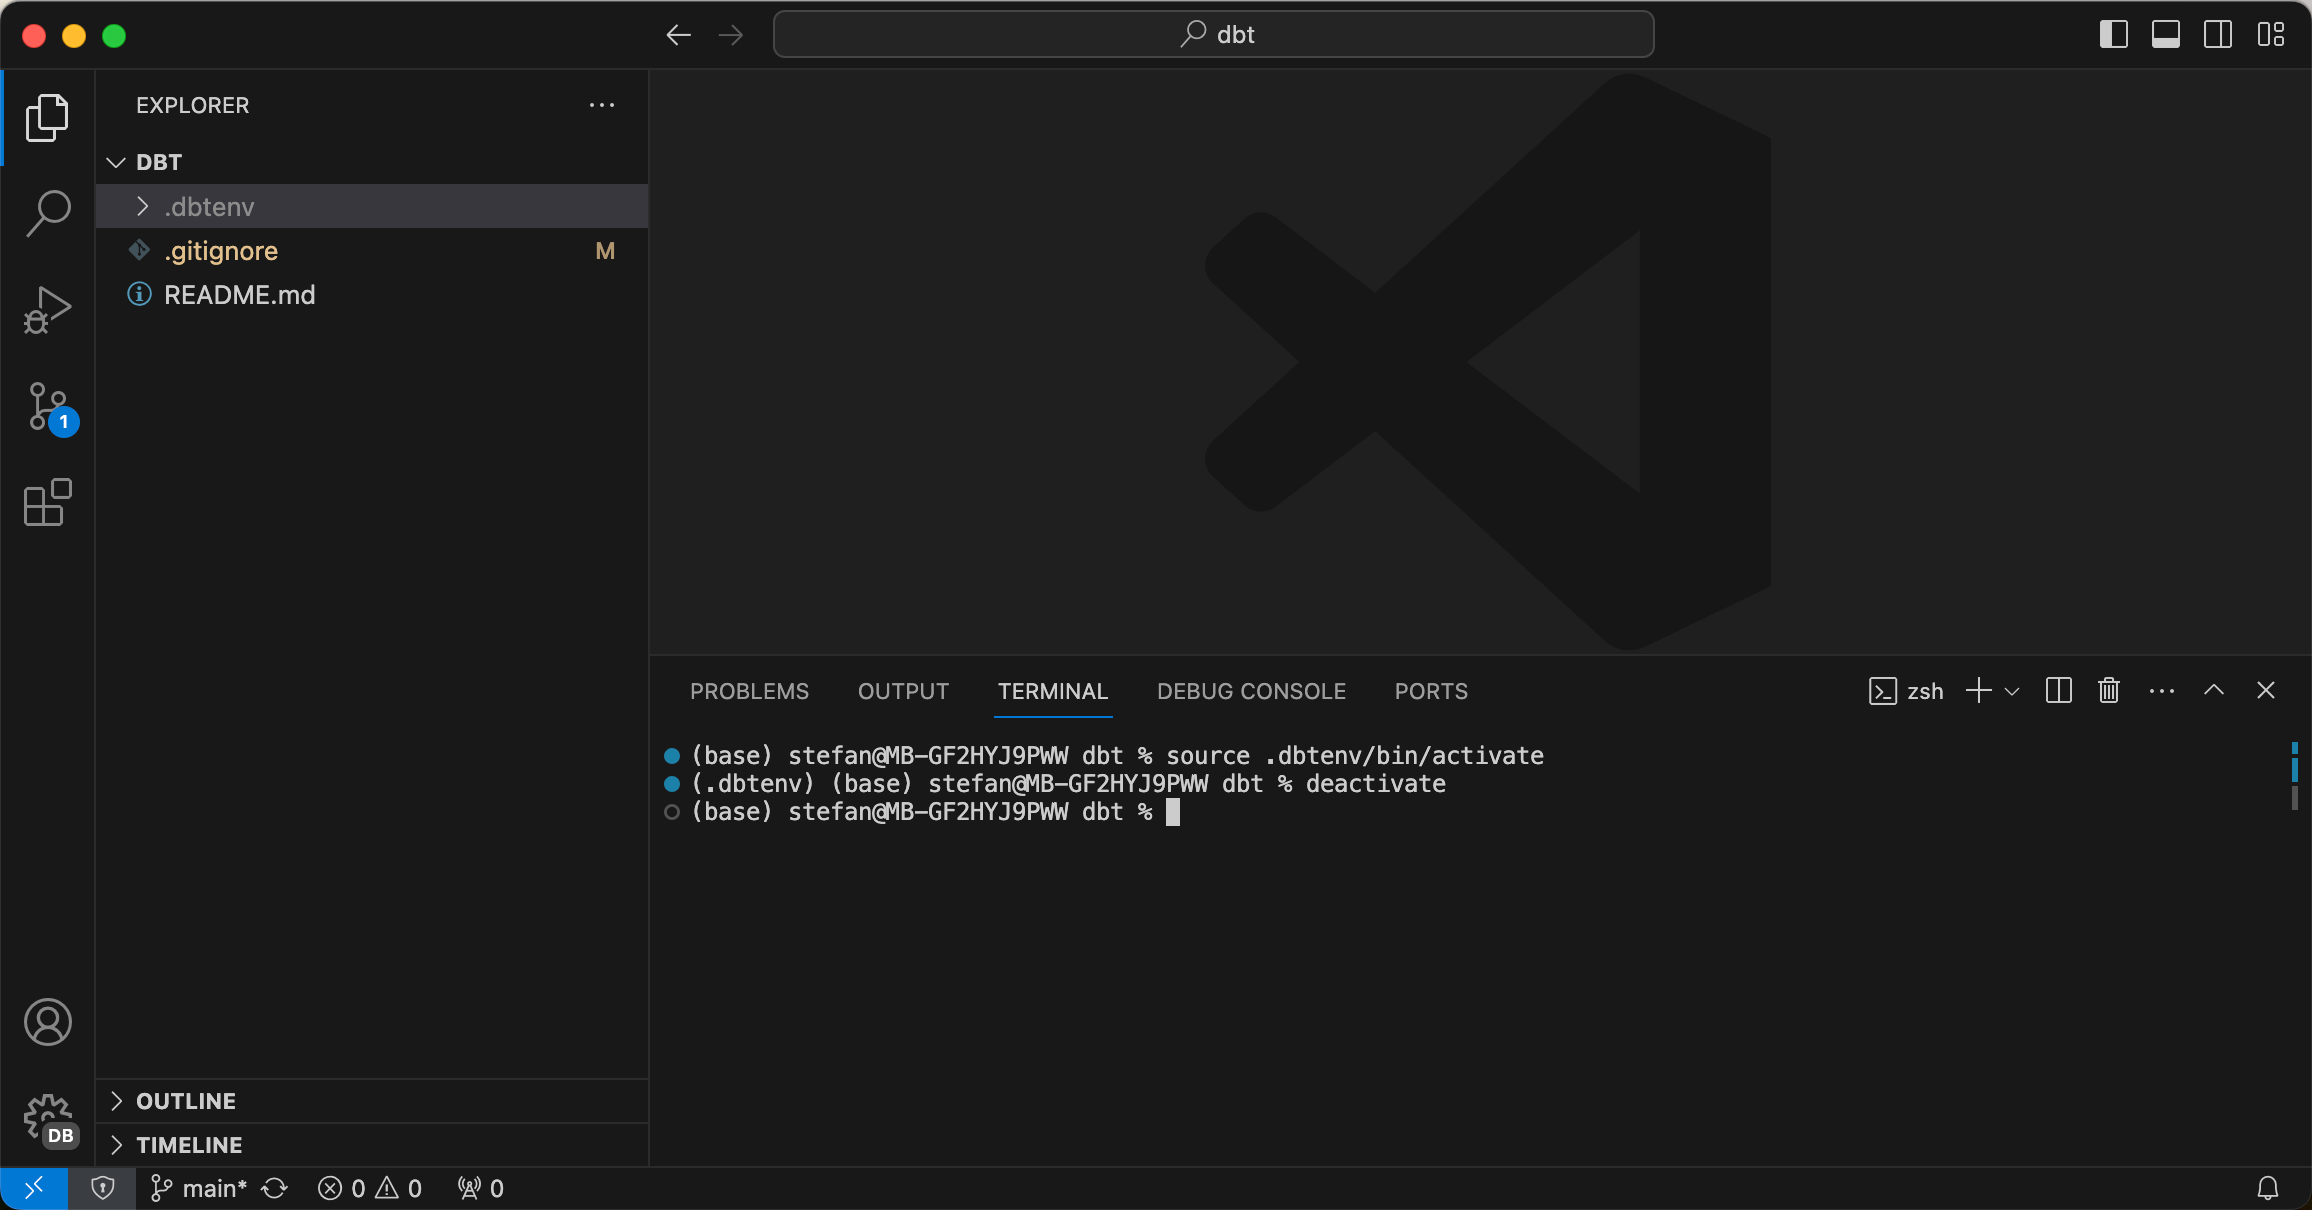
Visual Studio Code opens and you can see the content of the project, which now contains the README and the .gitignore file.
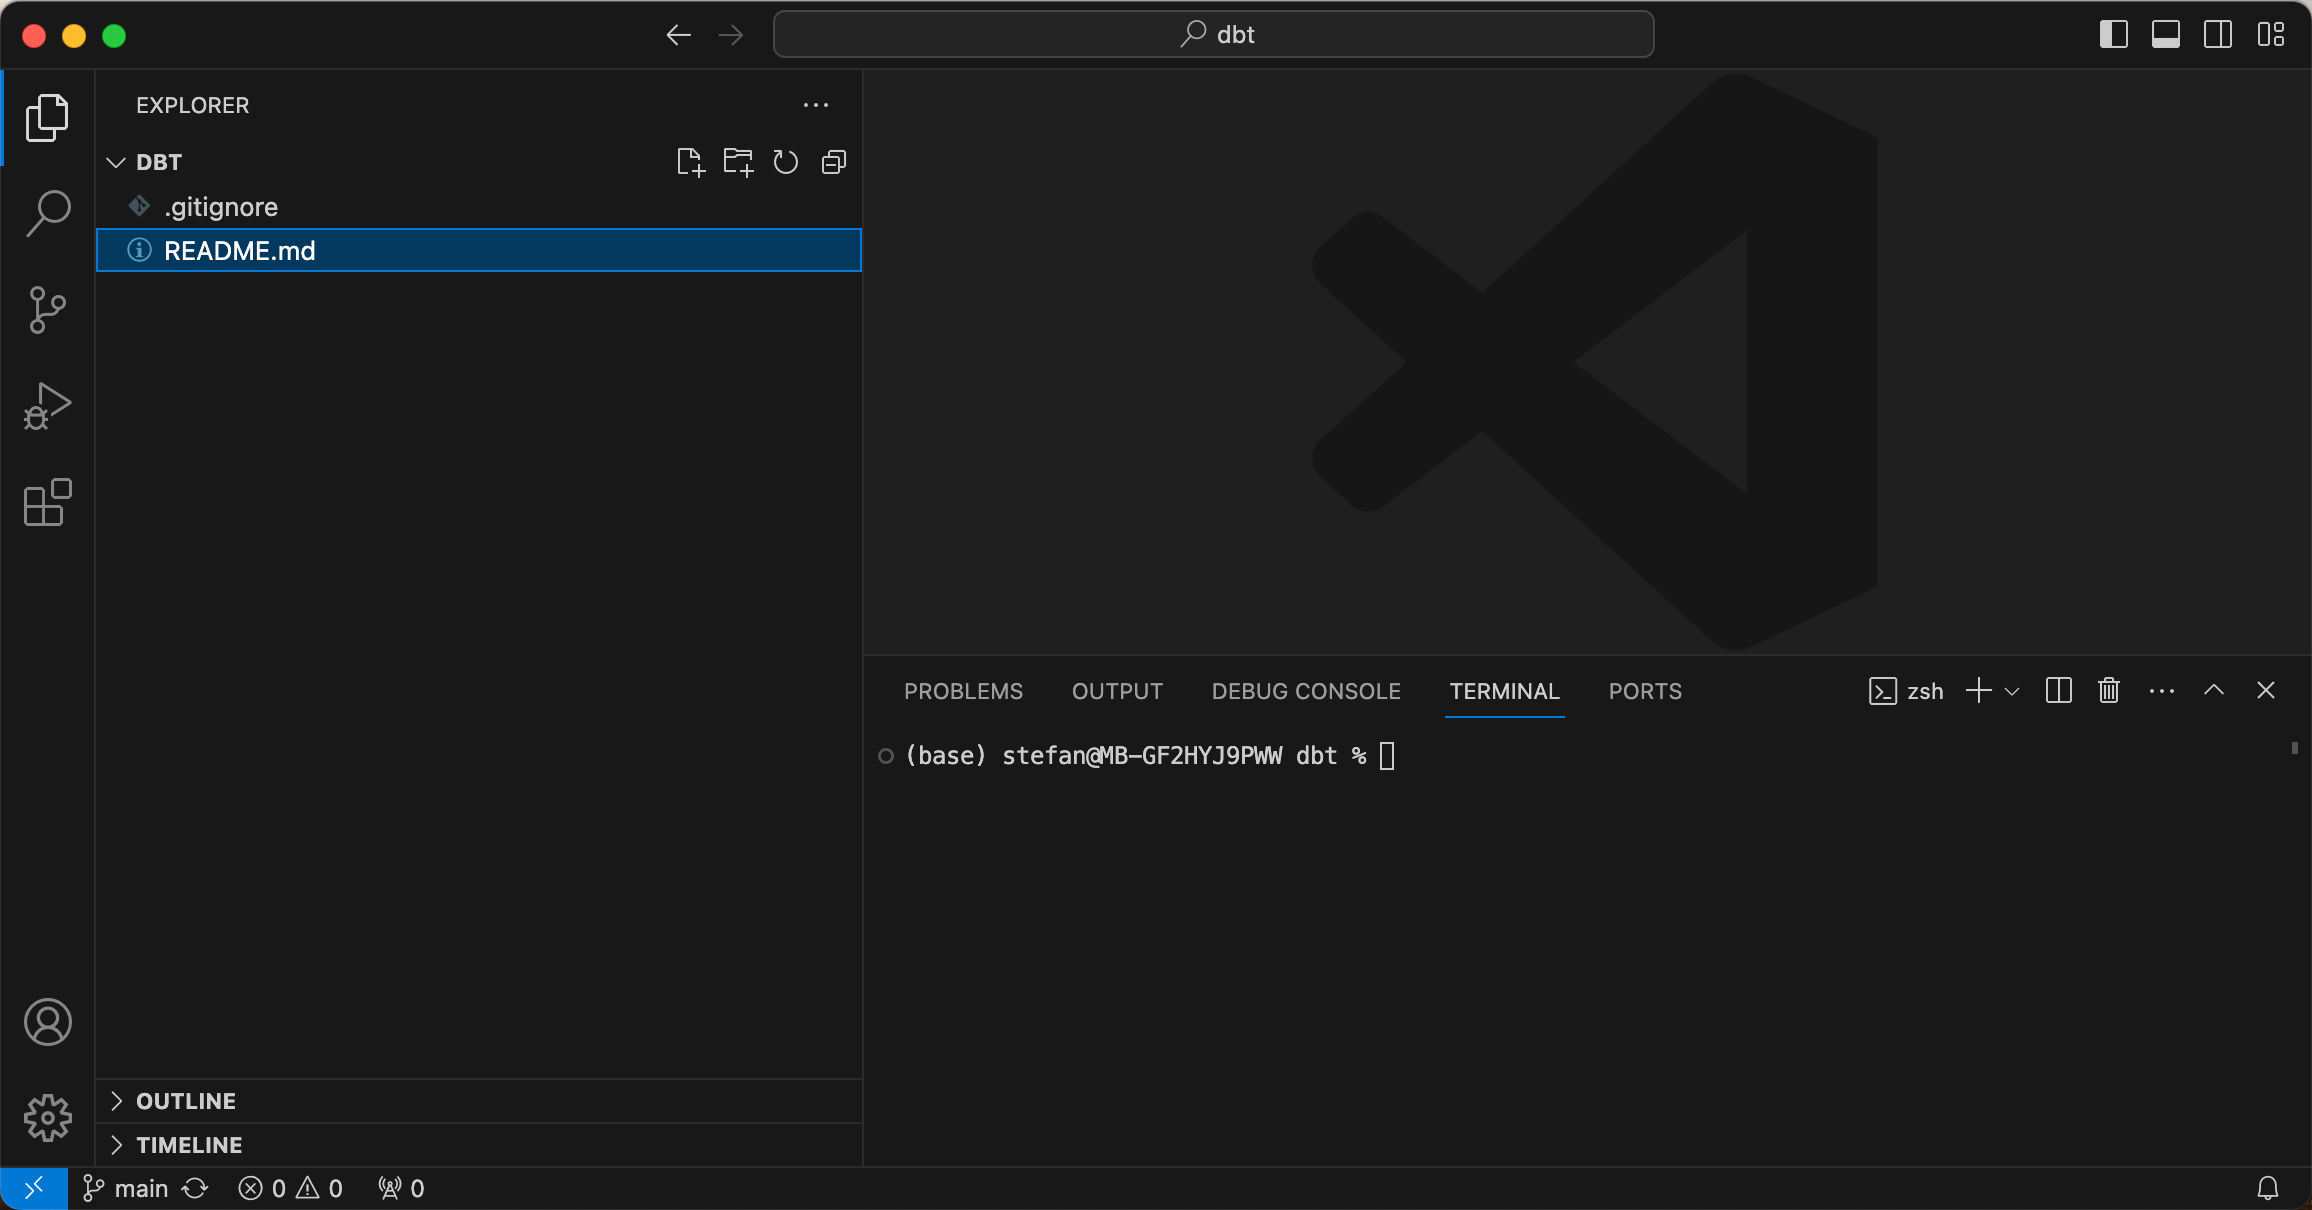
You can either open a terminal or use the terminal integrated in VS Code. This means I don’t have to switch back and forth between an external terminal and VS Code.
Python preparations
Python is required for dbt. For VS Code there is an extension for Python, which I install.

I check the installation and version of Python.
python --versionThe corresponding version should then be returned in the terminal.

To avoid conflicts with other Python projects and installations, I install dbt in a virtualenv. You can find more information about what a virtualenv is here: https://docs.python.org/3/library/venv.html
I will create the virtualenv in the directory of the cloned Github project. If you are not yet in this directory, you have to navigate there. The VirtualEnv can then be created with the following command:
python -m venv .dbtenvThe name of the VirtualEnv is .dbtenv. When the command is executed, you will see a folder with the same name that is created. This contains the binaries for the environment.

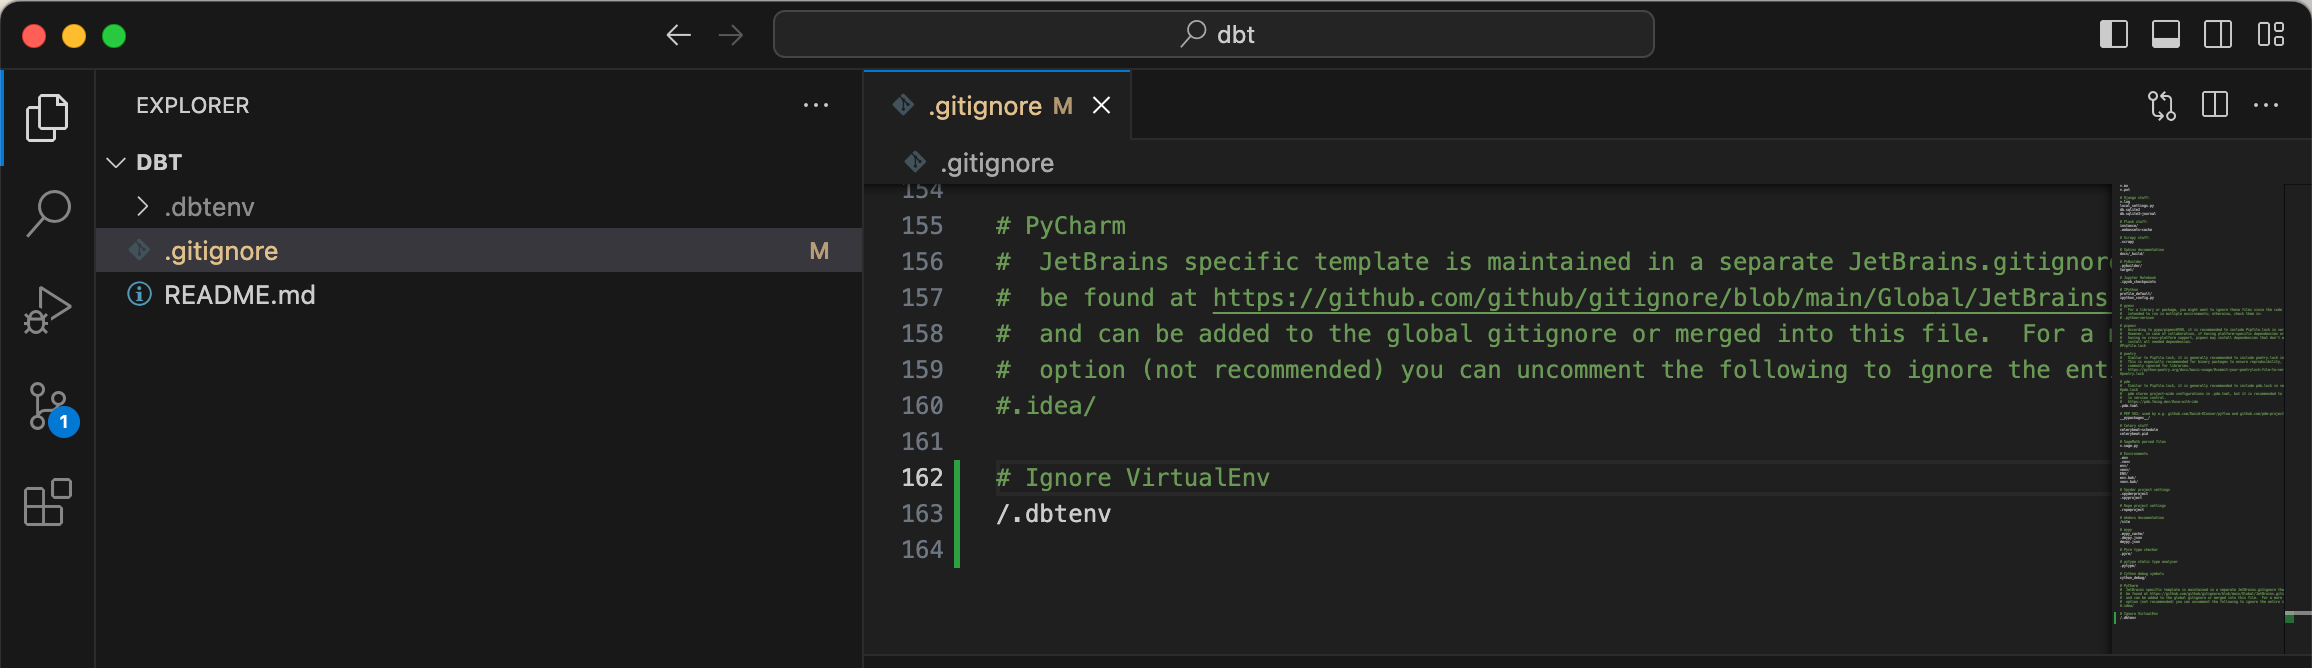
The .dbtenv folder is located in the Git directory and would also be pushed to the Git repository during a commit. However, I want to prevent this and add the folder to the .gitignore. To do this, you can add a new line to the .gitignore file:
/.dbtenv
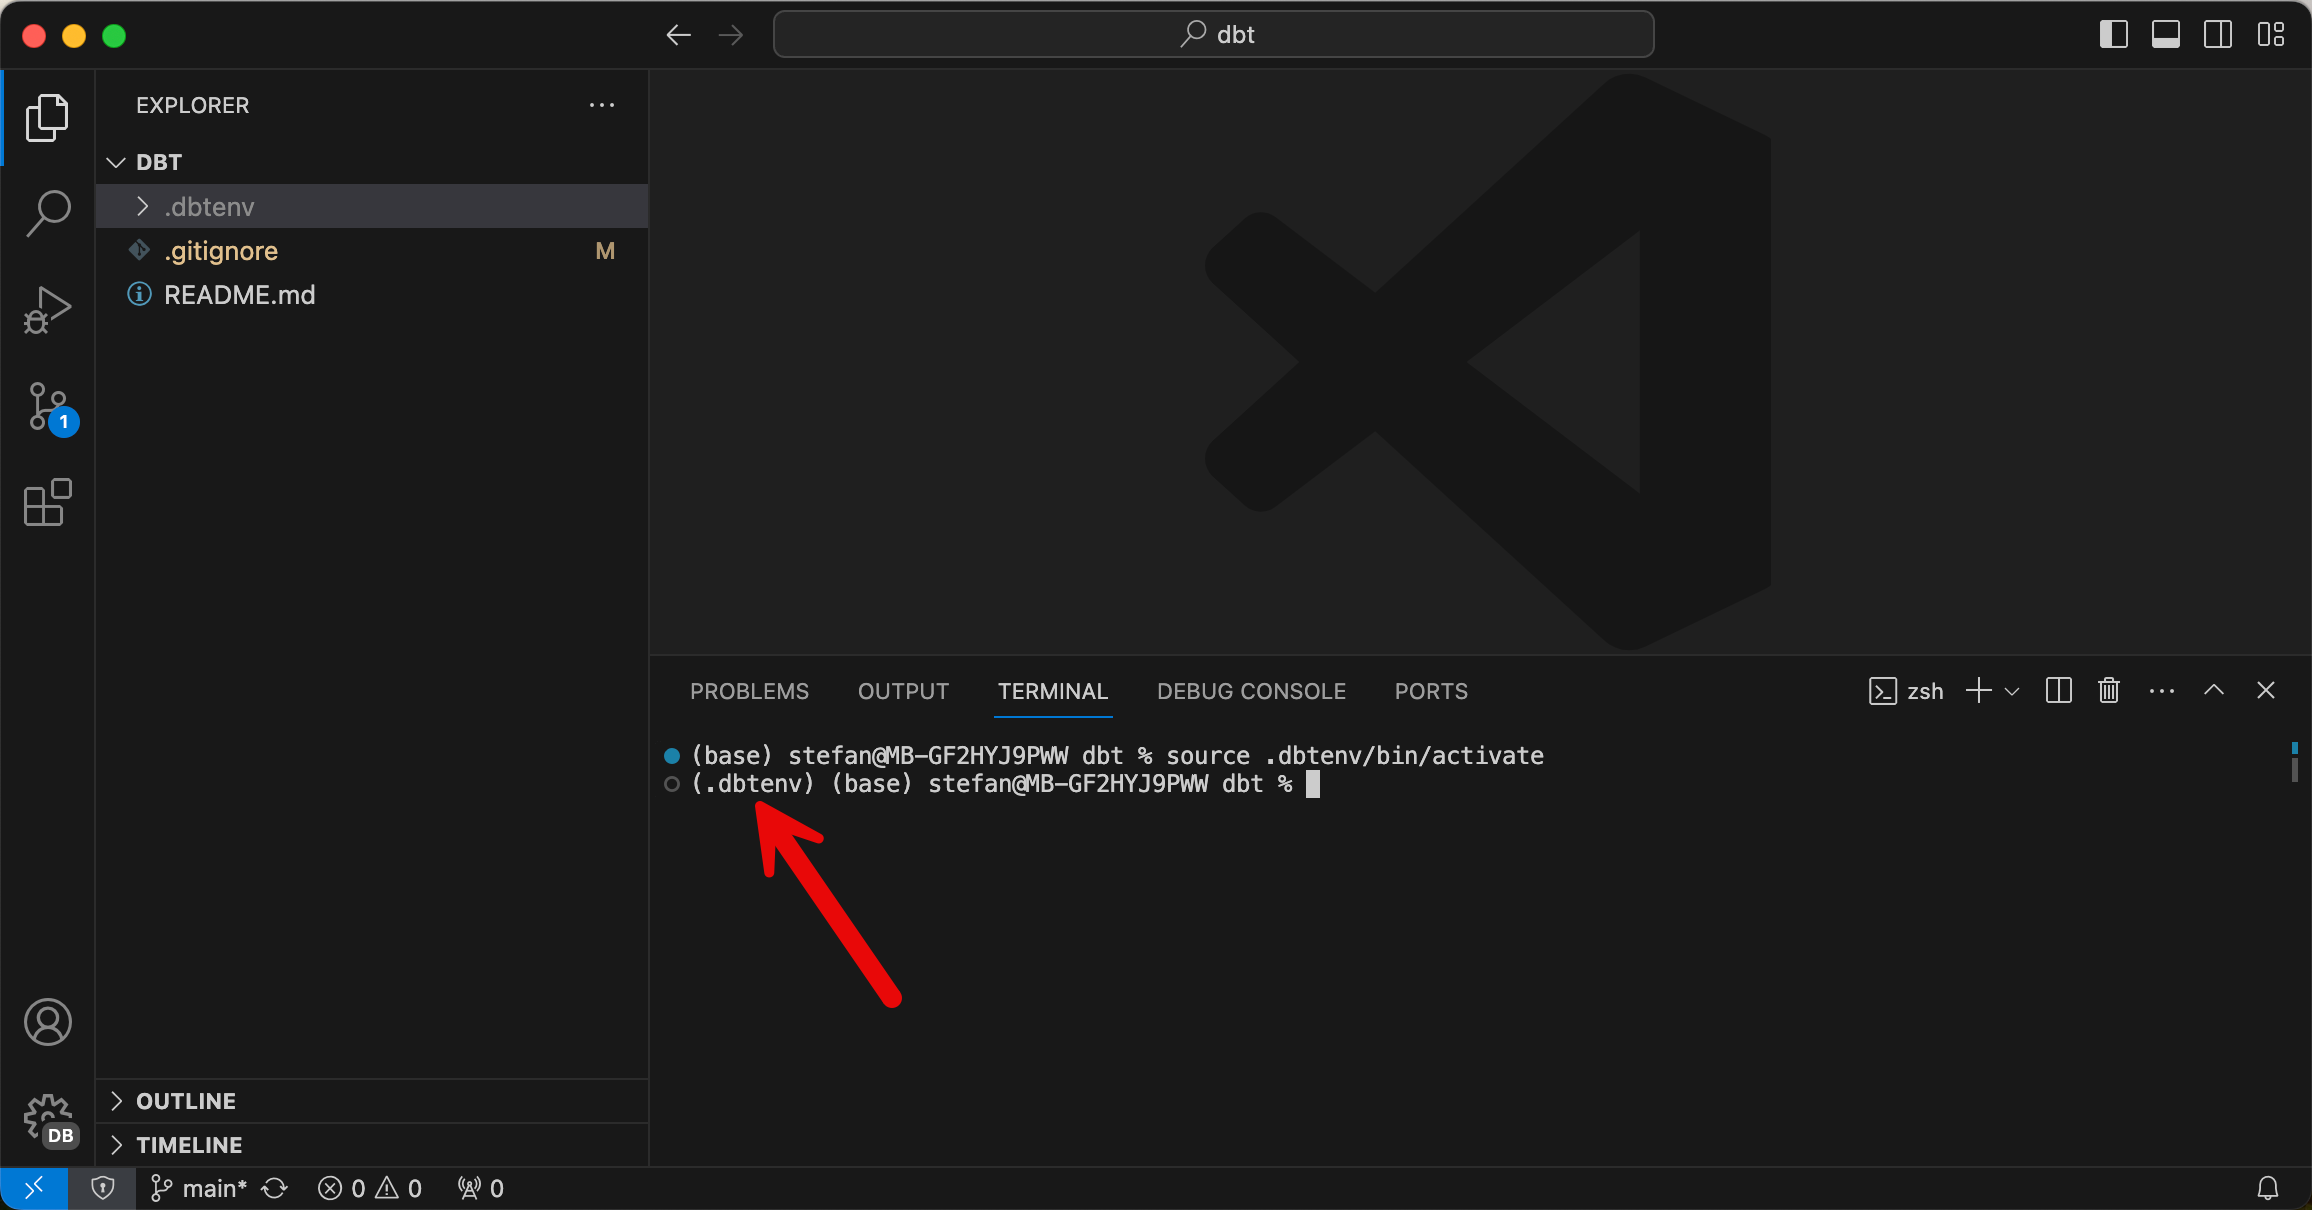
Now the VirtualEnv still needs to be activated, which you can do in the terminal with a command line. I work on a Mac, where the command line is source .dbtenv/bin/activate, on a Windows computer the command is different, for example .dbtenv\Scripts\Activate.ps1 .Depending on your own environment, the corresponding code must be adapted.
source .dbtenv/bin/activateThe fact that the environment is now activated can be seen in the terminal, preceded by the name of the VirtualEnv:
To leave the VirtualEnv context, you can use the “deactivate” command.
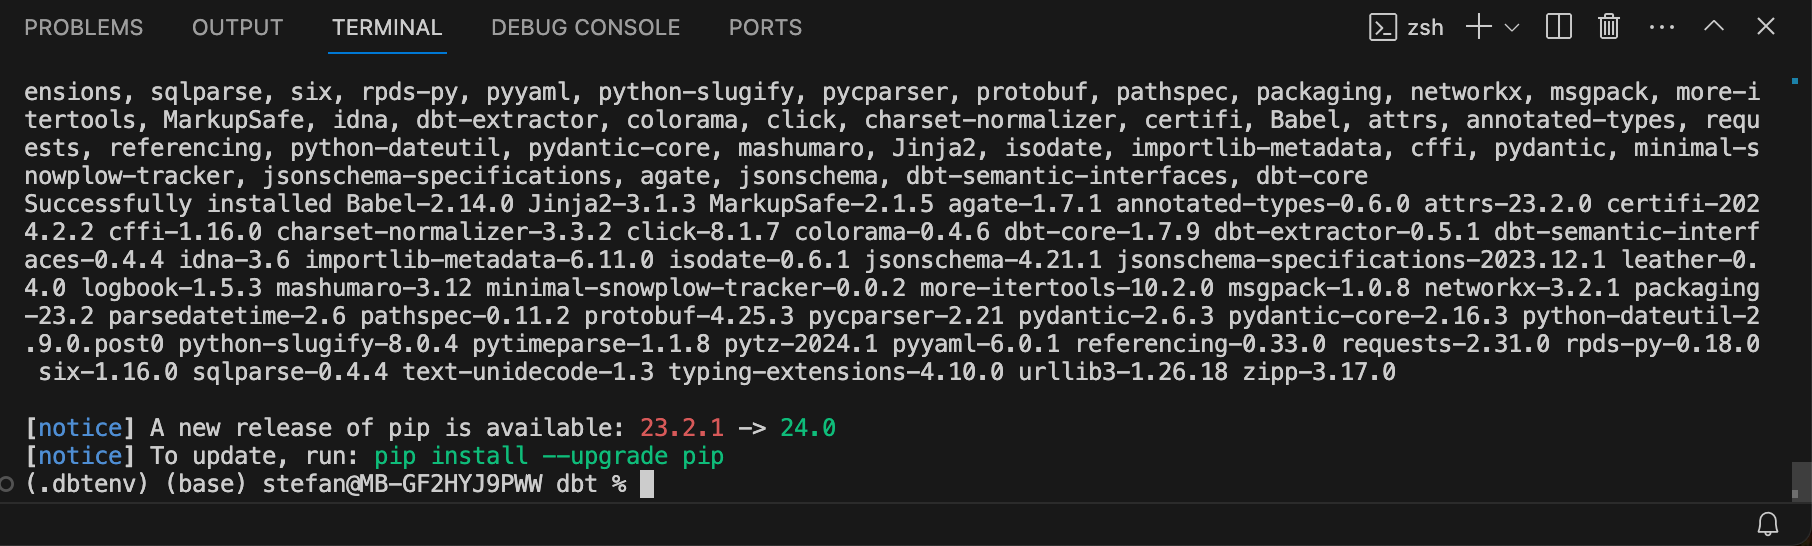
But now I want to stay in VirtualEnv and start with the installation of dbt-core:
pip install dbt-coreAll required packages are now installed.
In addition to dbt-core, I also need the module for Databricks. I install this as well.
pip install dbt-databricksYou can check the installation and versions of both modules.
dbt --versionAn output appears with the corresponding versions:

Create a dbt project
Now the dbt project is initialized. In my example, I give the project the name “dbt_playground”.
dbt init dbt_playgroundSeveral input parameters are then requested in the terminal, which can be entered one after the other.
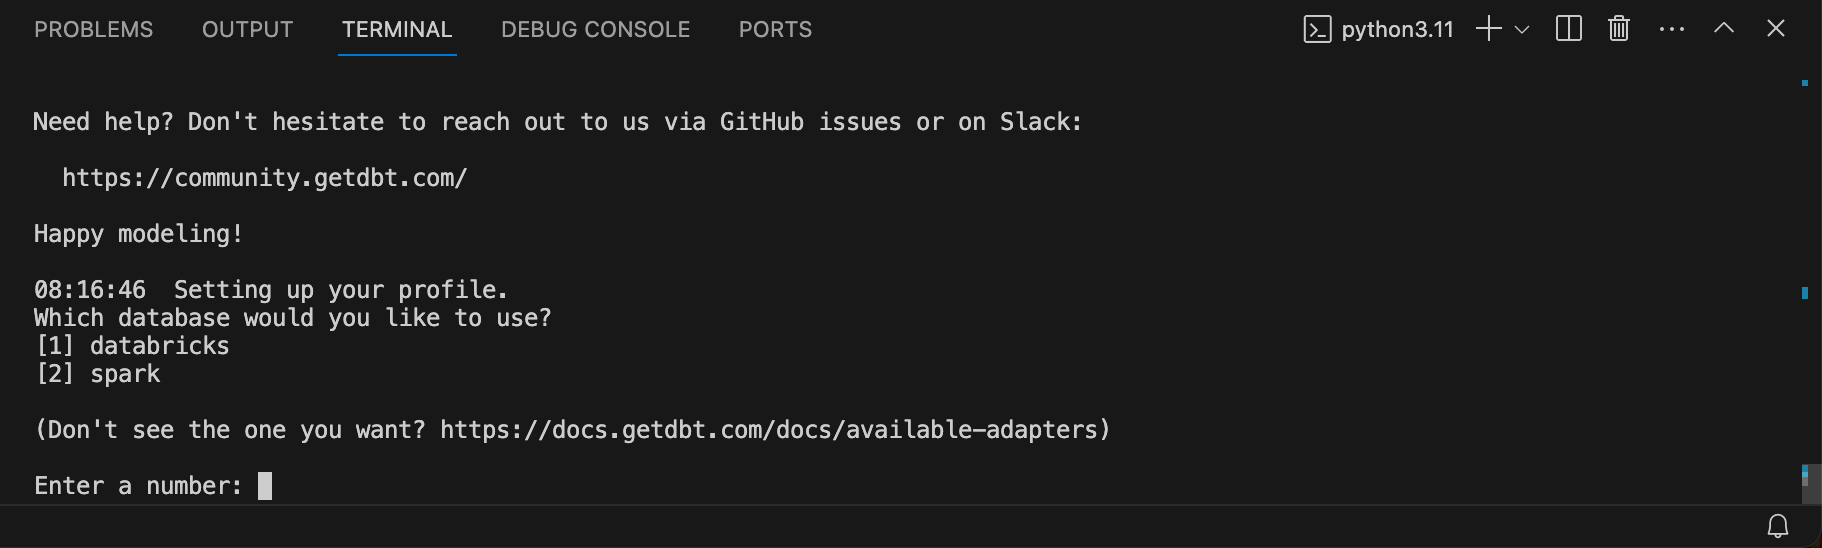
For the database, I select [1] for Databricks.
I am then asked for the host. To find this out, I log into the Databricks workspace and switch to the SQL warehouses.

It is best to create a serverless cluster. These have a start time of around 8 seconds and are therefore ideal for development. For the size, you can choose the smallest T-shirt size of 2X-Small, which is perfectly sufficient for most workloads. Once the warehouse cluster has been created, click on the name of the warehouse and go to “Connection Details”.
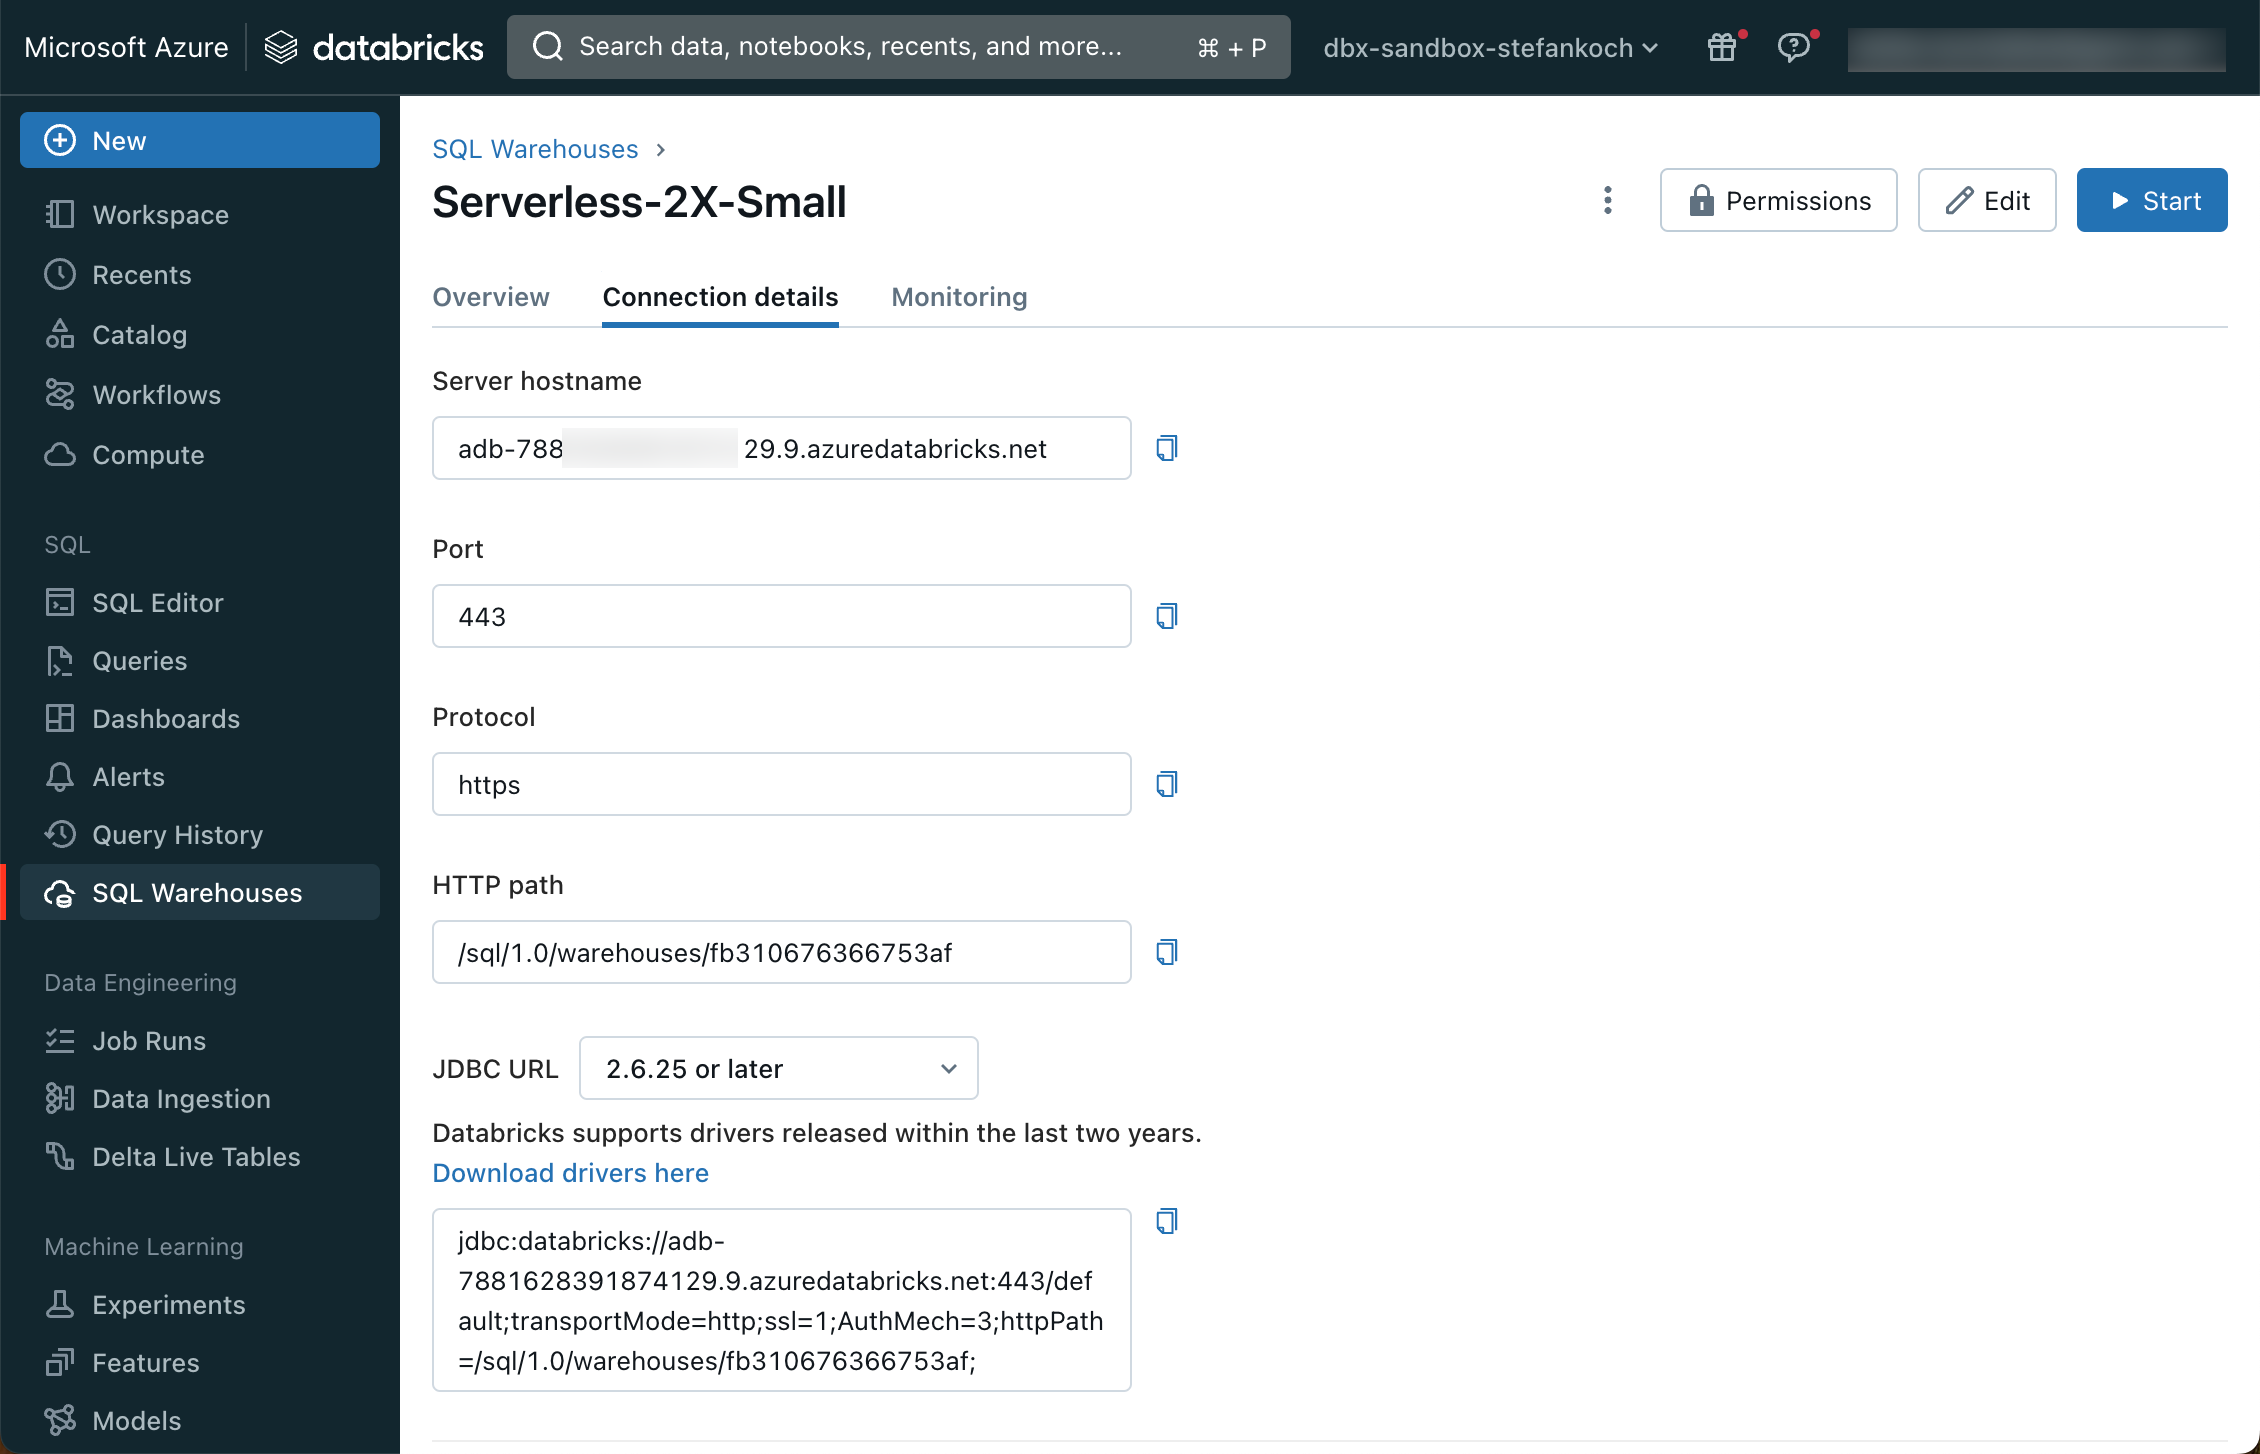
Here you can see the server host name, which can be inserted in the dialog window of the dbt initialization. Also the HTTP path, which is requested in the next step. The next step is to insert a personal access token, which can be created in the Databricks workspace.
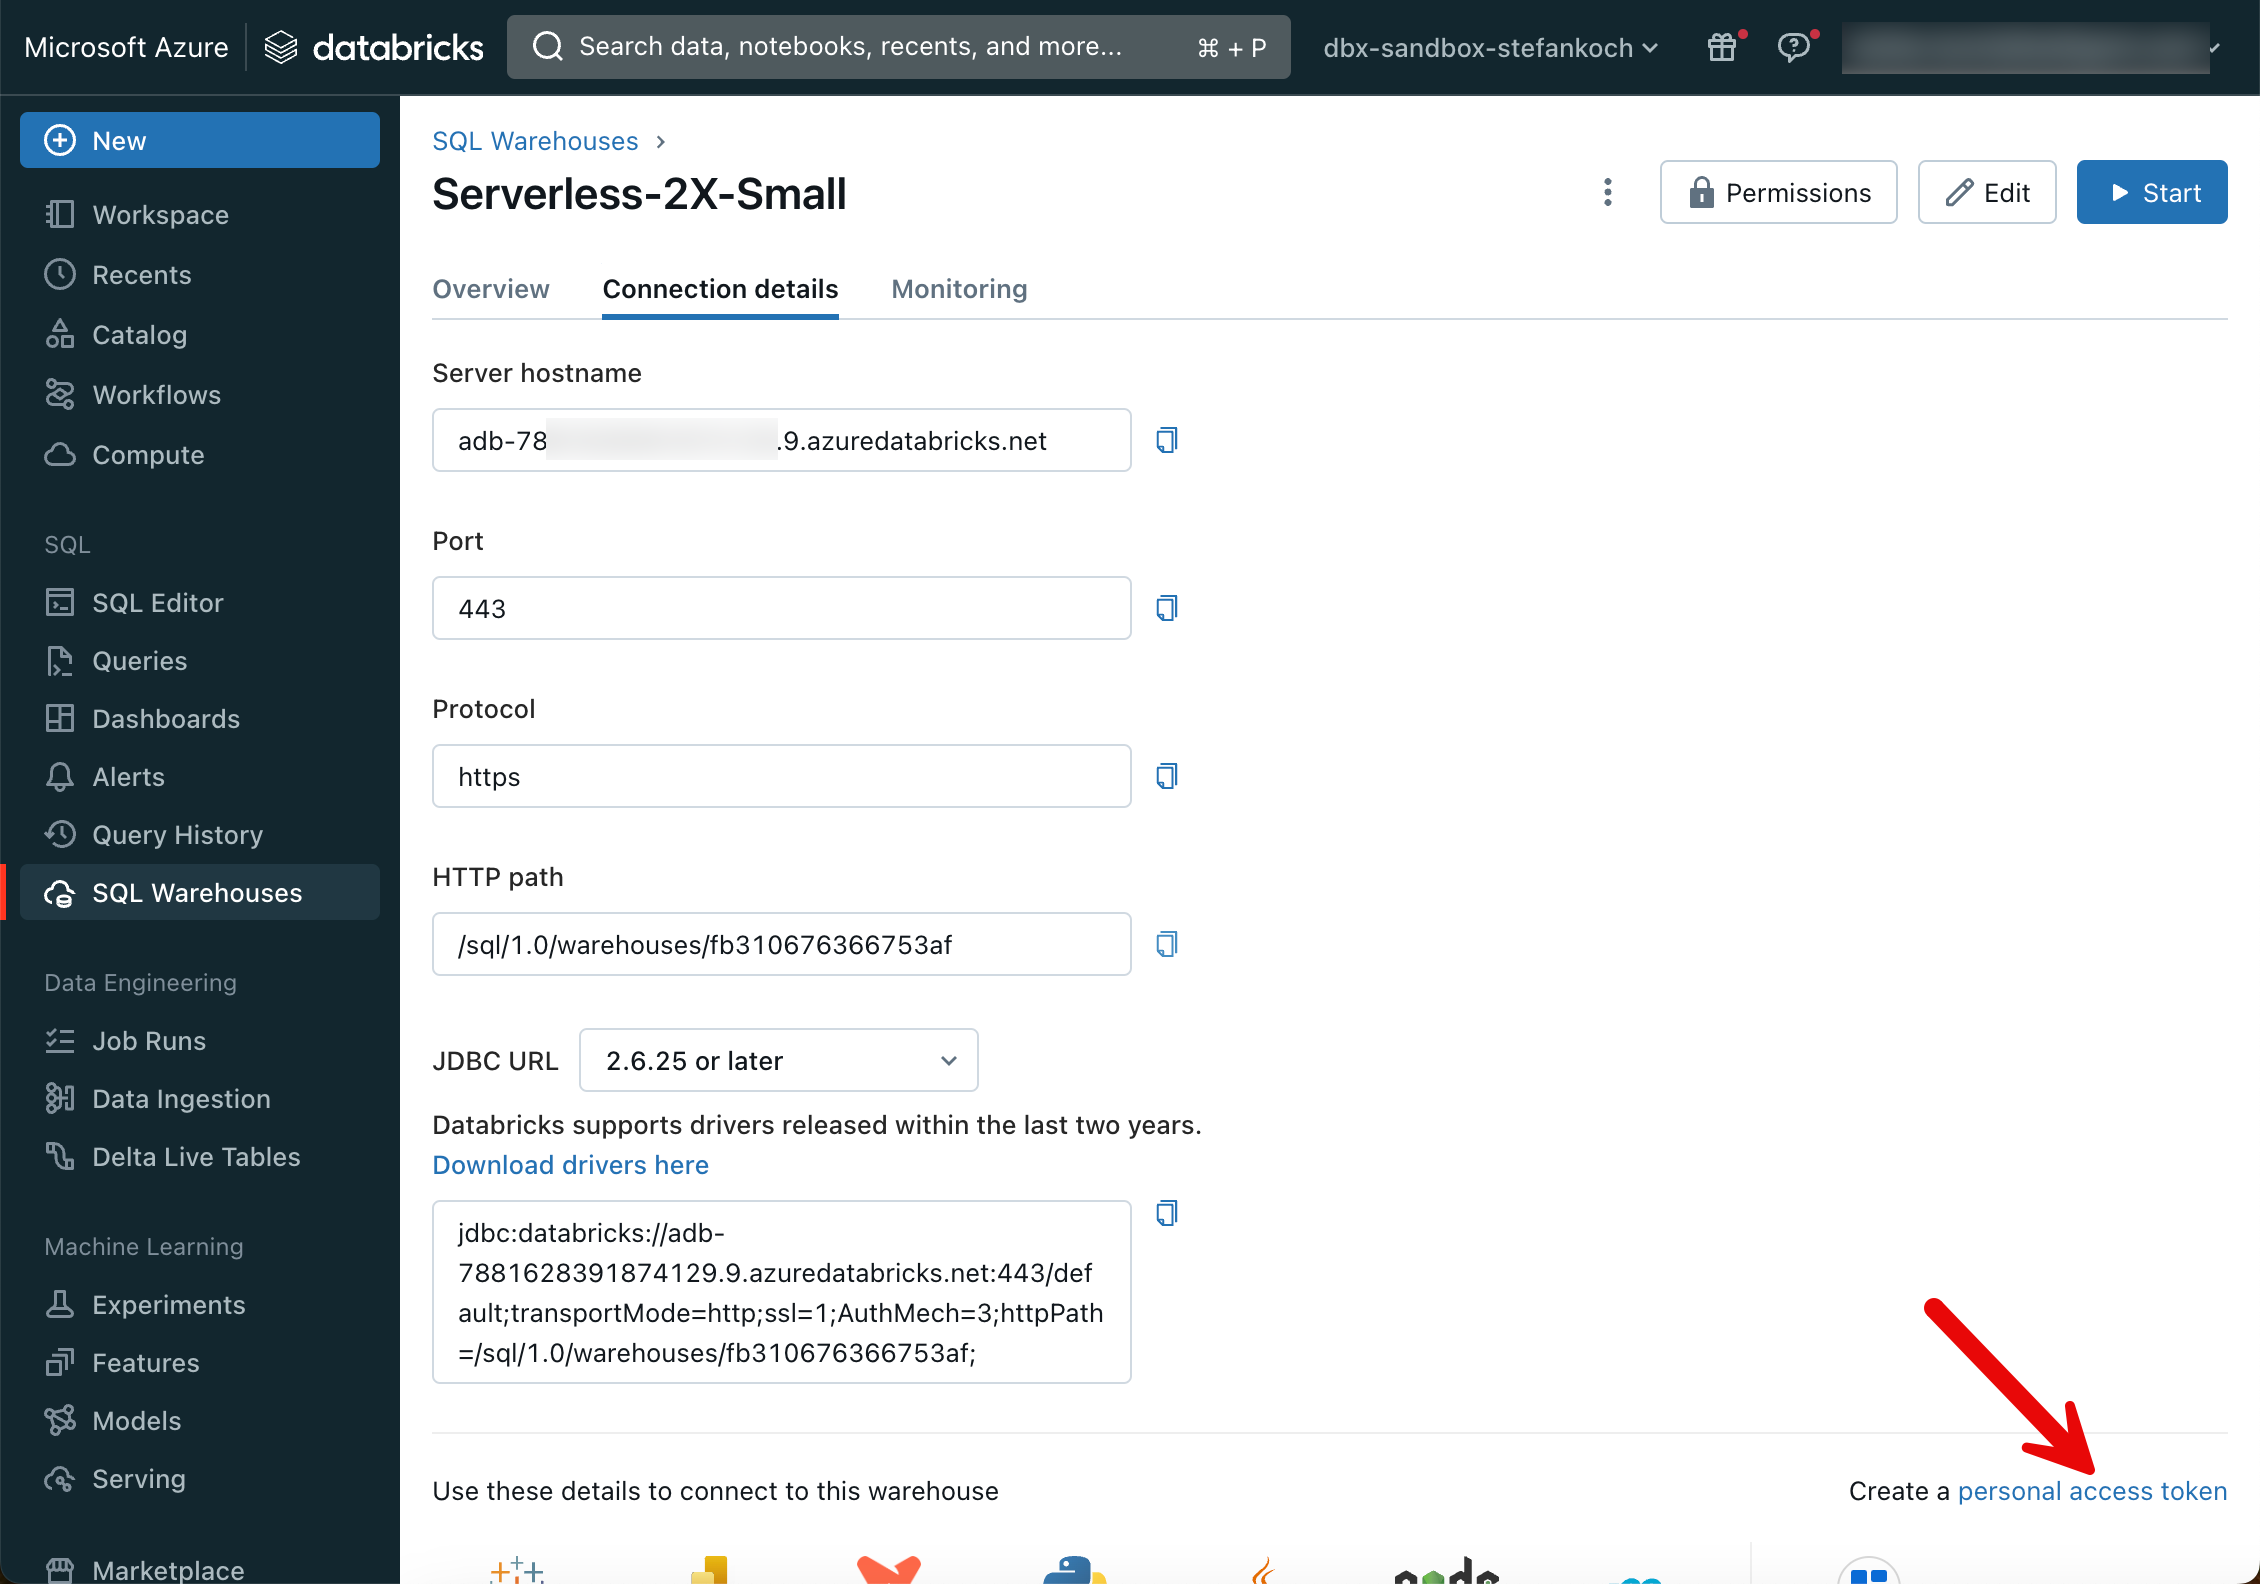
I create a new token.


You can copy the PAT and then paste it into the terminal under the corresponding option.
In the next option, I select Unity Catalog. You can then enter a name for the catalog and a schema.

To test the setup, I change to the newly created directory that was created during initialization and run dbt debug.
cd dbt_playground
dbt debug
As you can see, my project has been successfully created. Furthermore, 2 example models have already been created:

If you need to make adjustments to the connection settings at a later date, you can edit the profile for this purpose.
nano /Users/[username]/.dbt/profiles.yml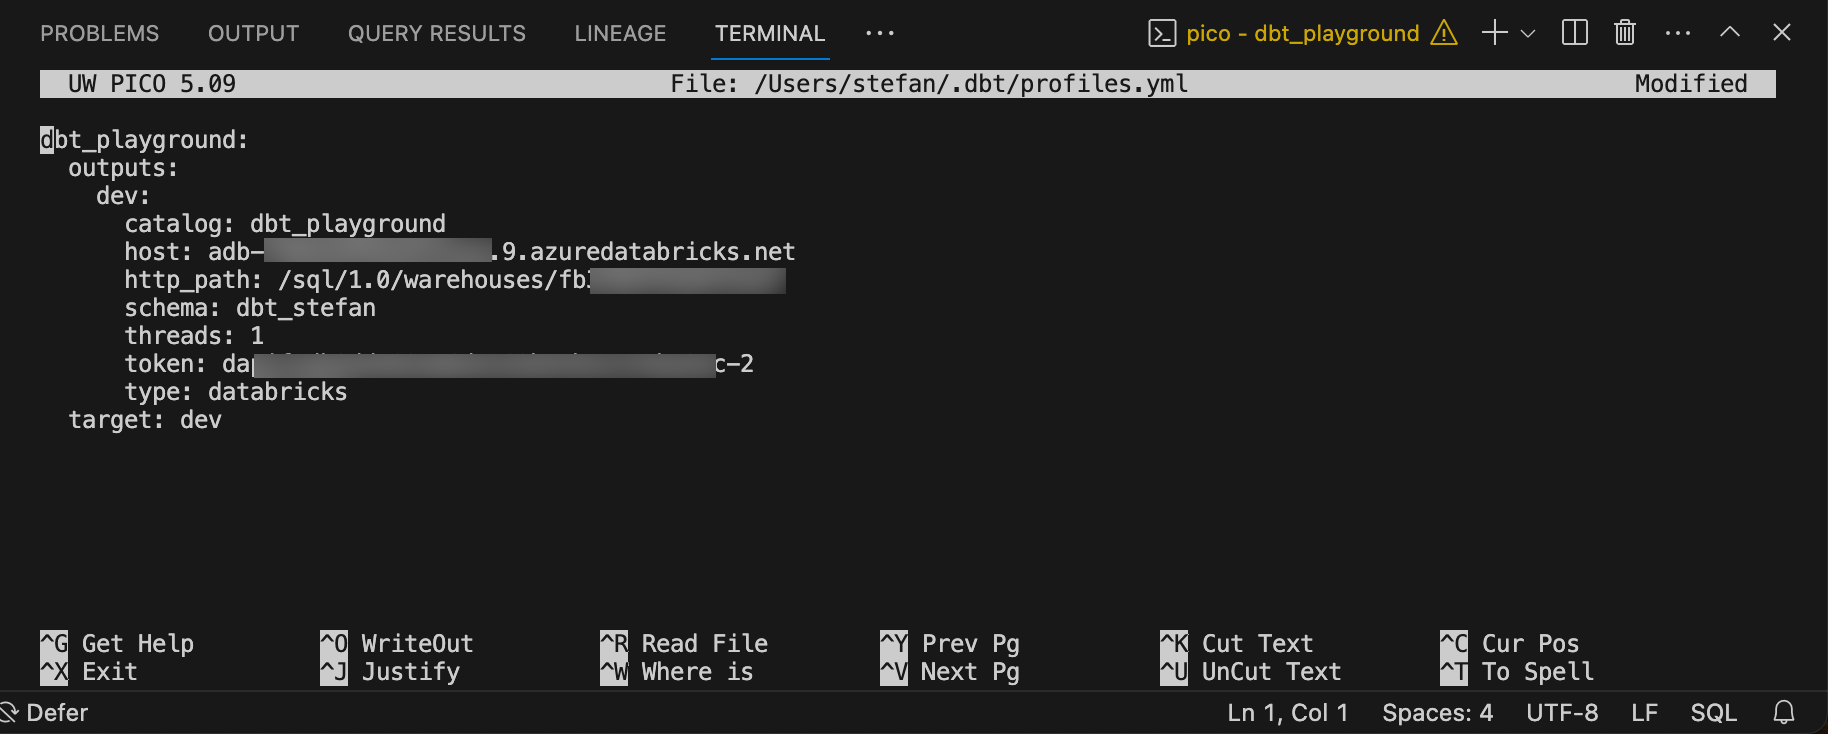
Create a catalog for dbt
I use Unity Catalog and would like to deploy my dbt models in the catalog “dbt_playground”. To do this, the corresponding catalog must first be created in Databricks.

Install VS Code dbt extension
There is an extension for Visual Studio Code that simplifies working with dbt core. This can be installed in the VS Code Marketplace.

dbt run
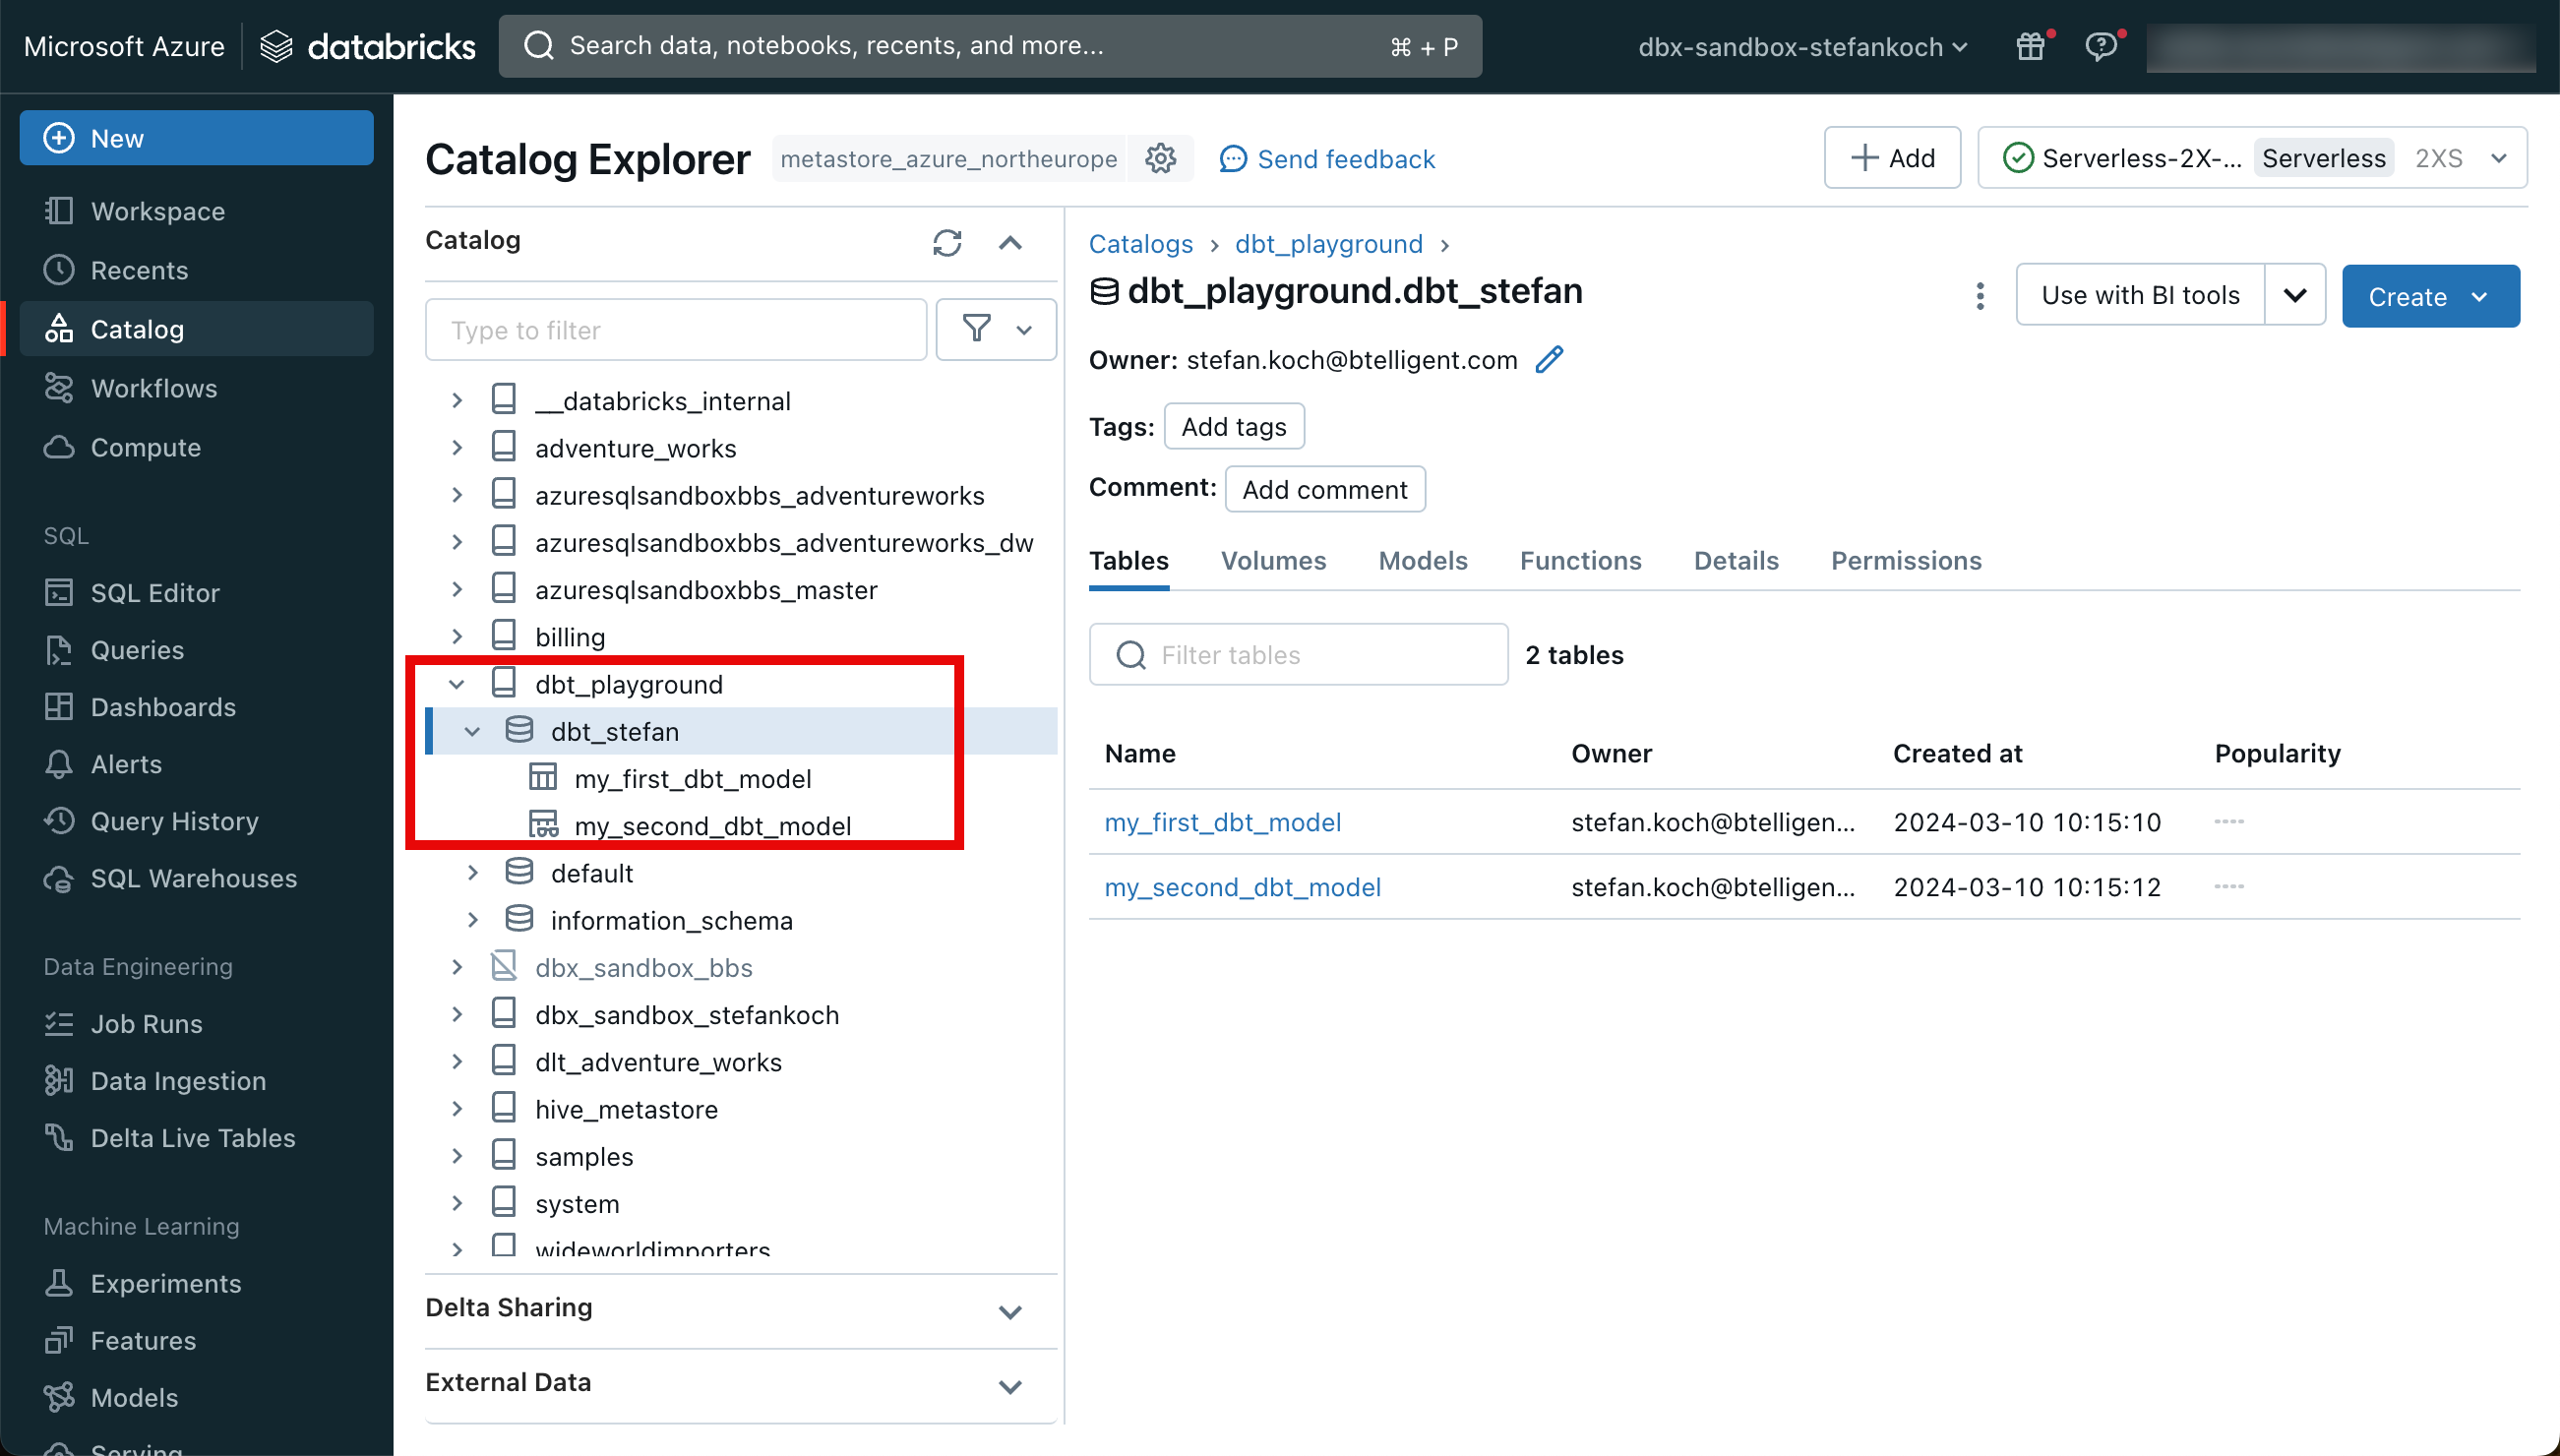
Now I will deploy the two example models by executing dbt run.
dbt runThis command starts the warehouse cluster in the background and deploys the models.

If you switch to the corresponding catalog in the Databricks workspace, you can see the newly created objects.
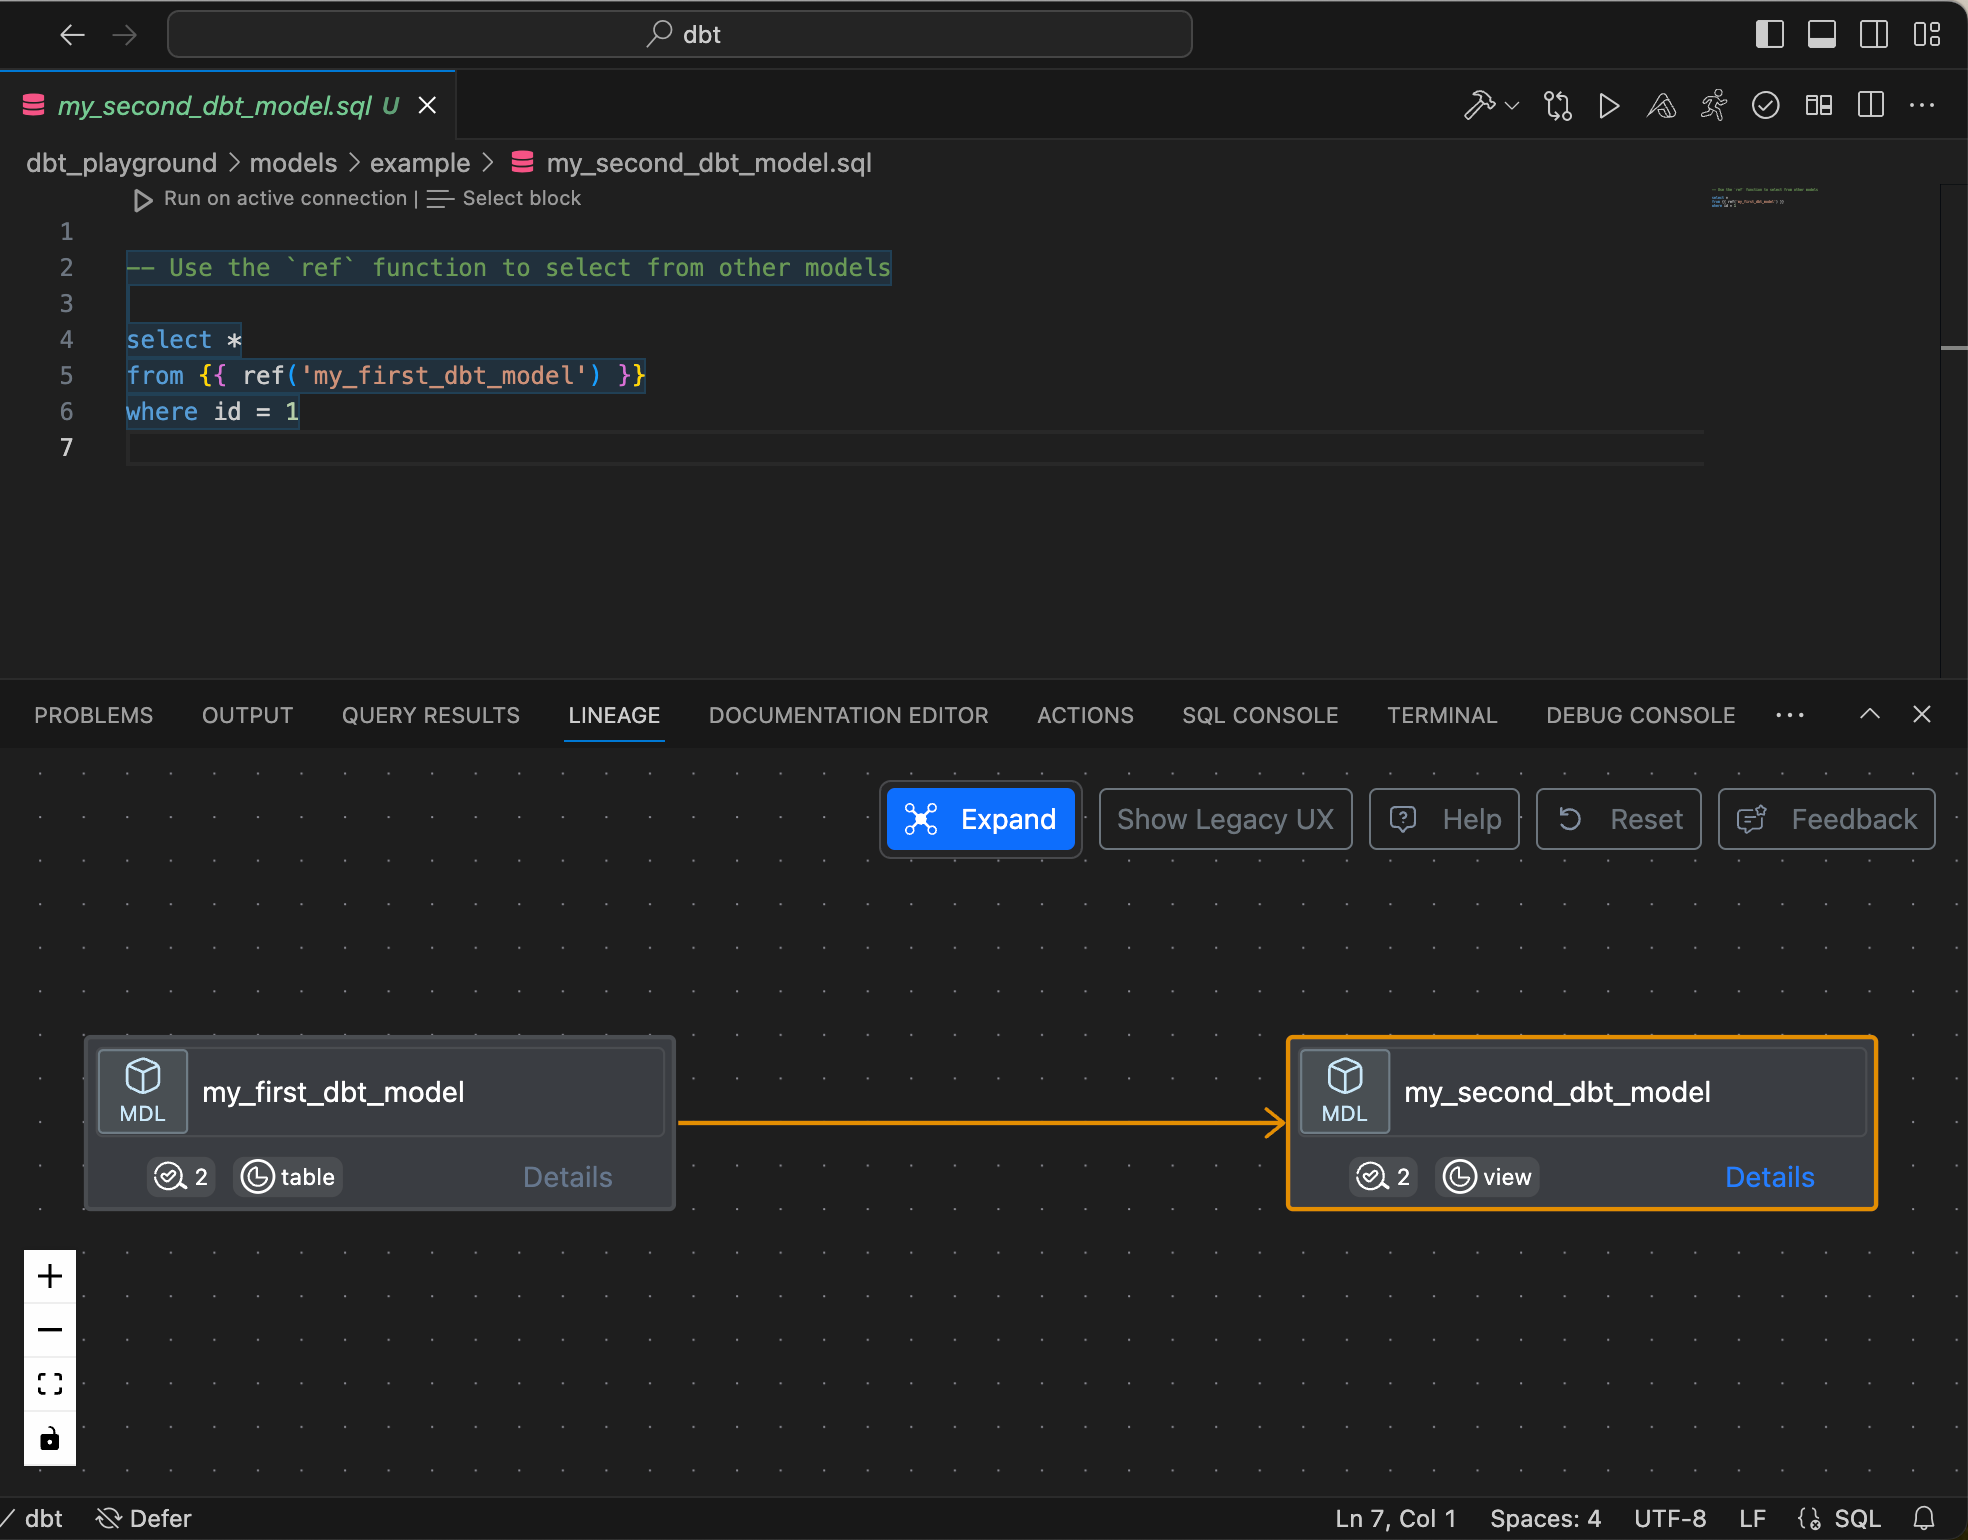
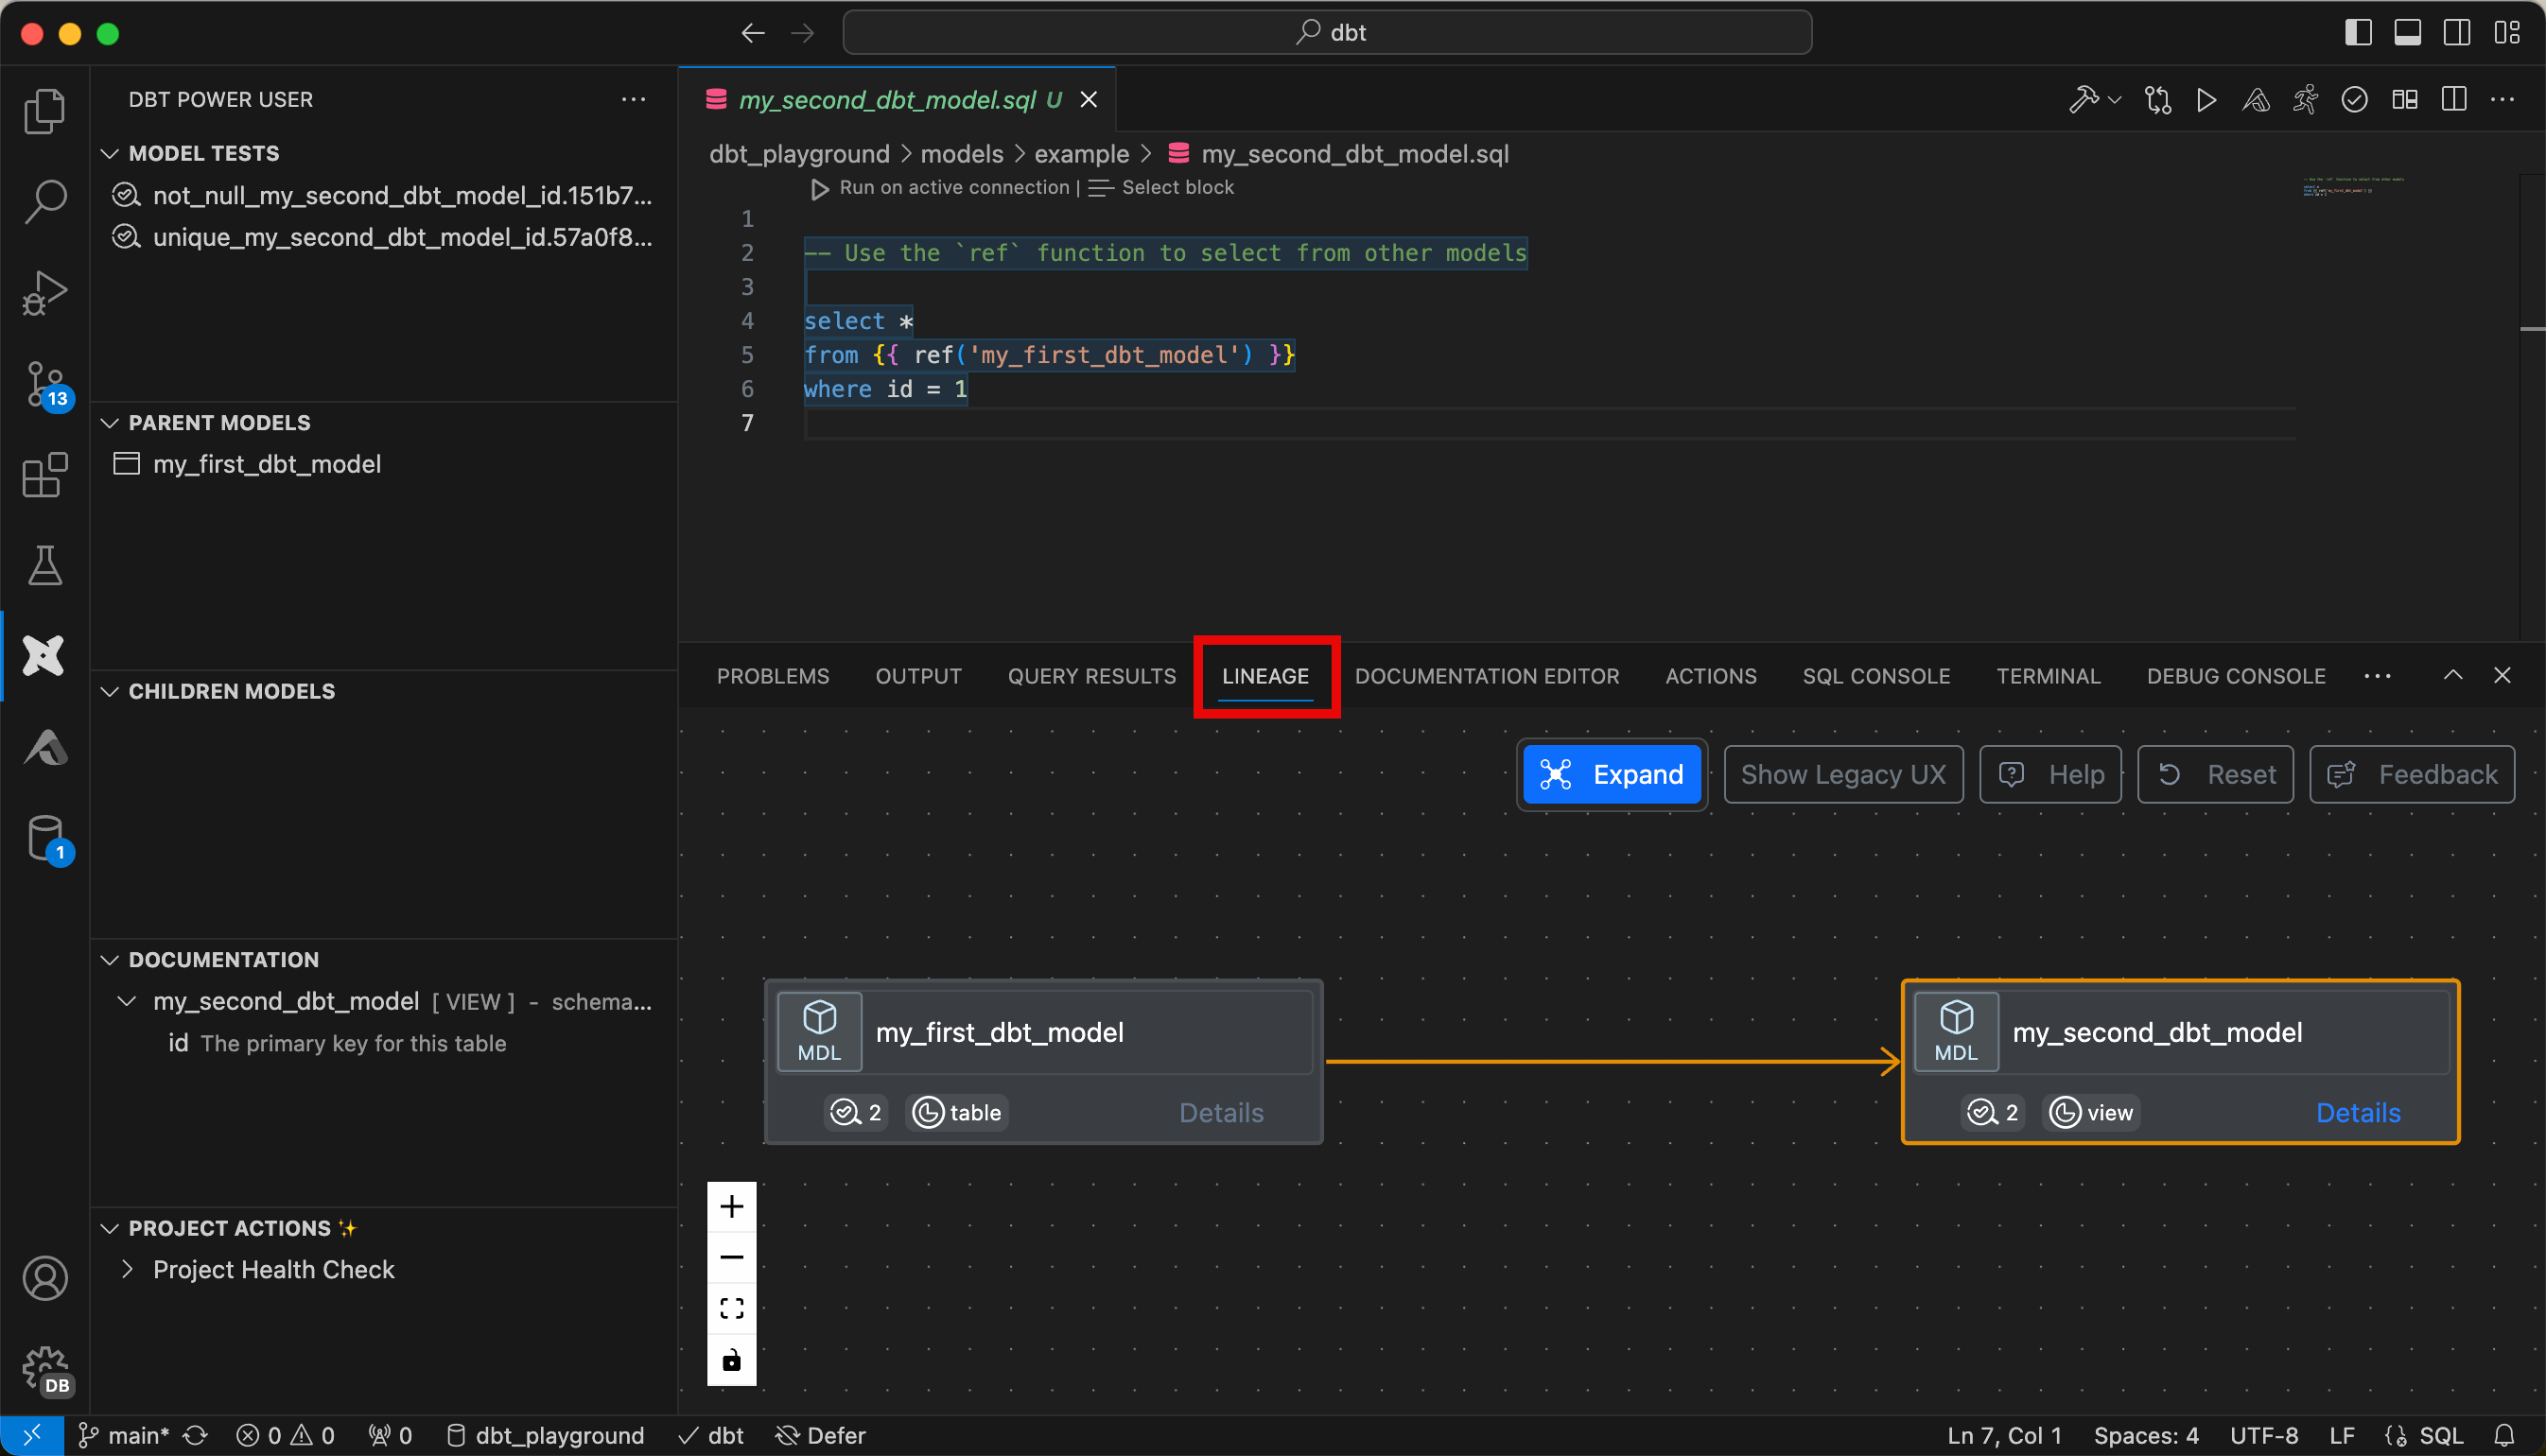
The extension offers many conveniences when working with dbt core. There is a command palette with which, for example, you can get the result of a query of a model.
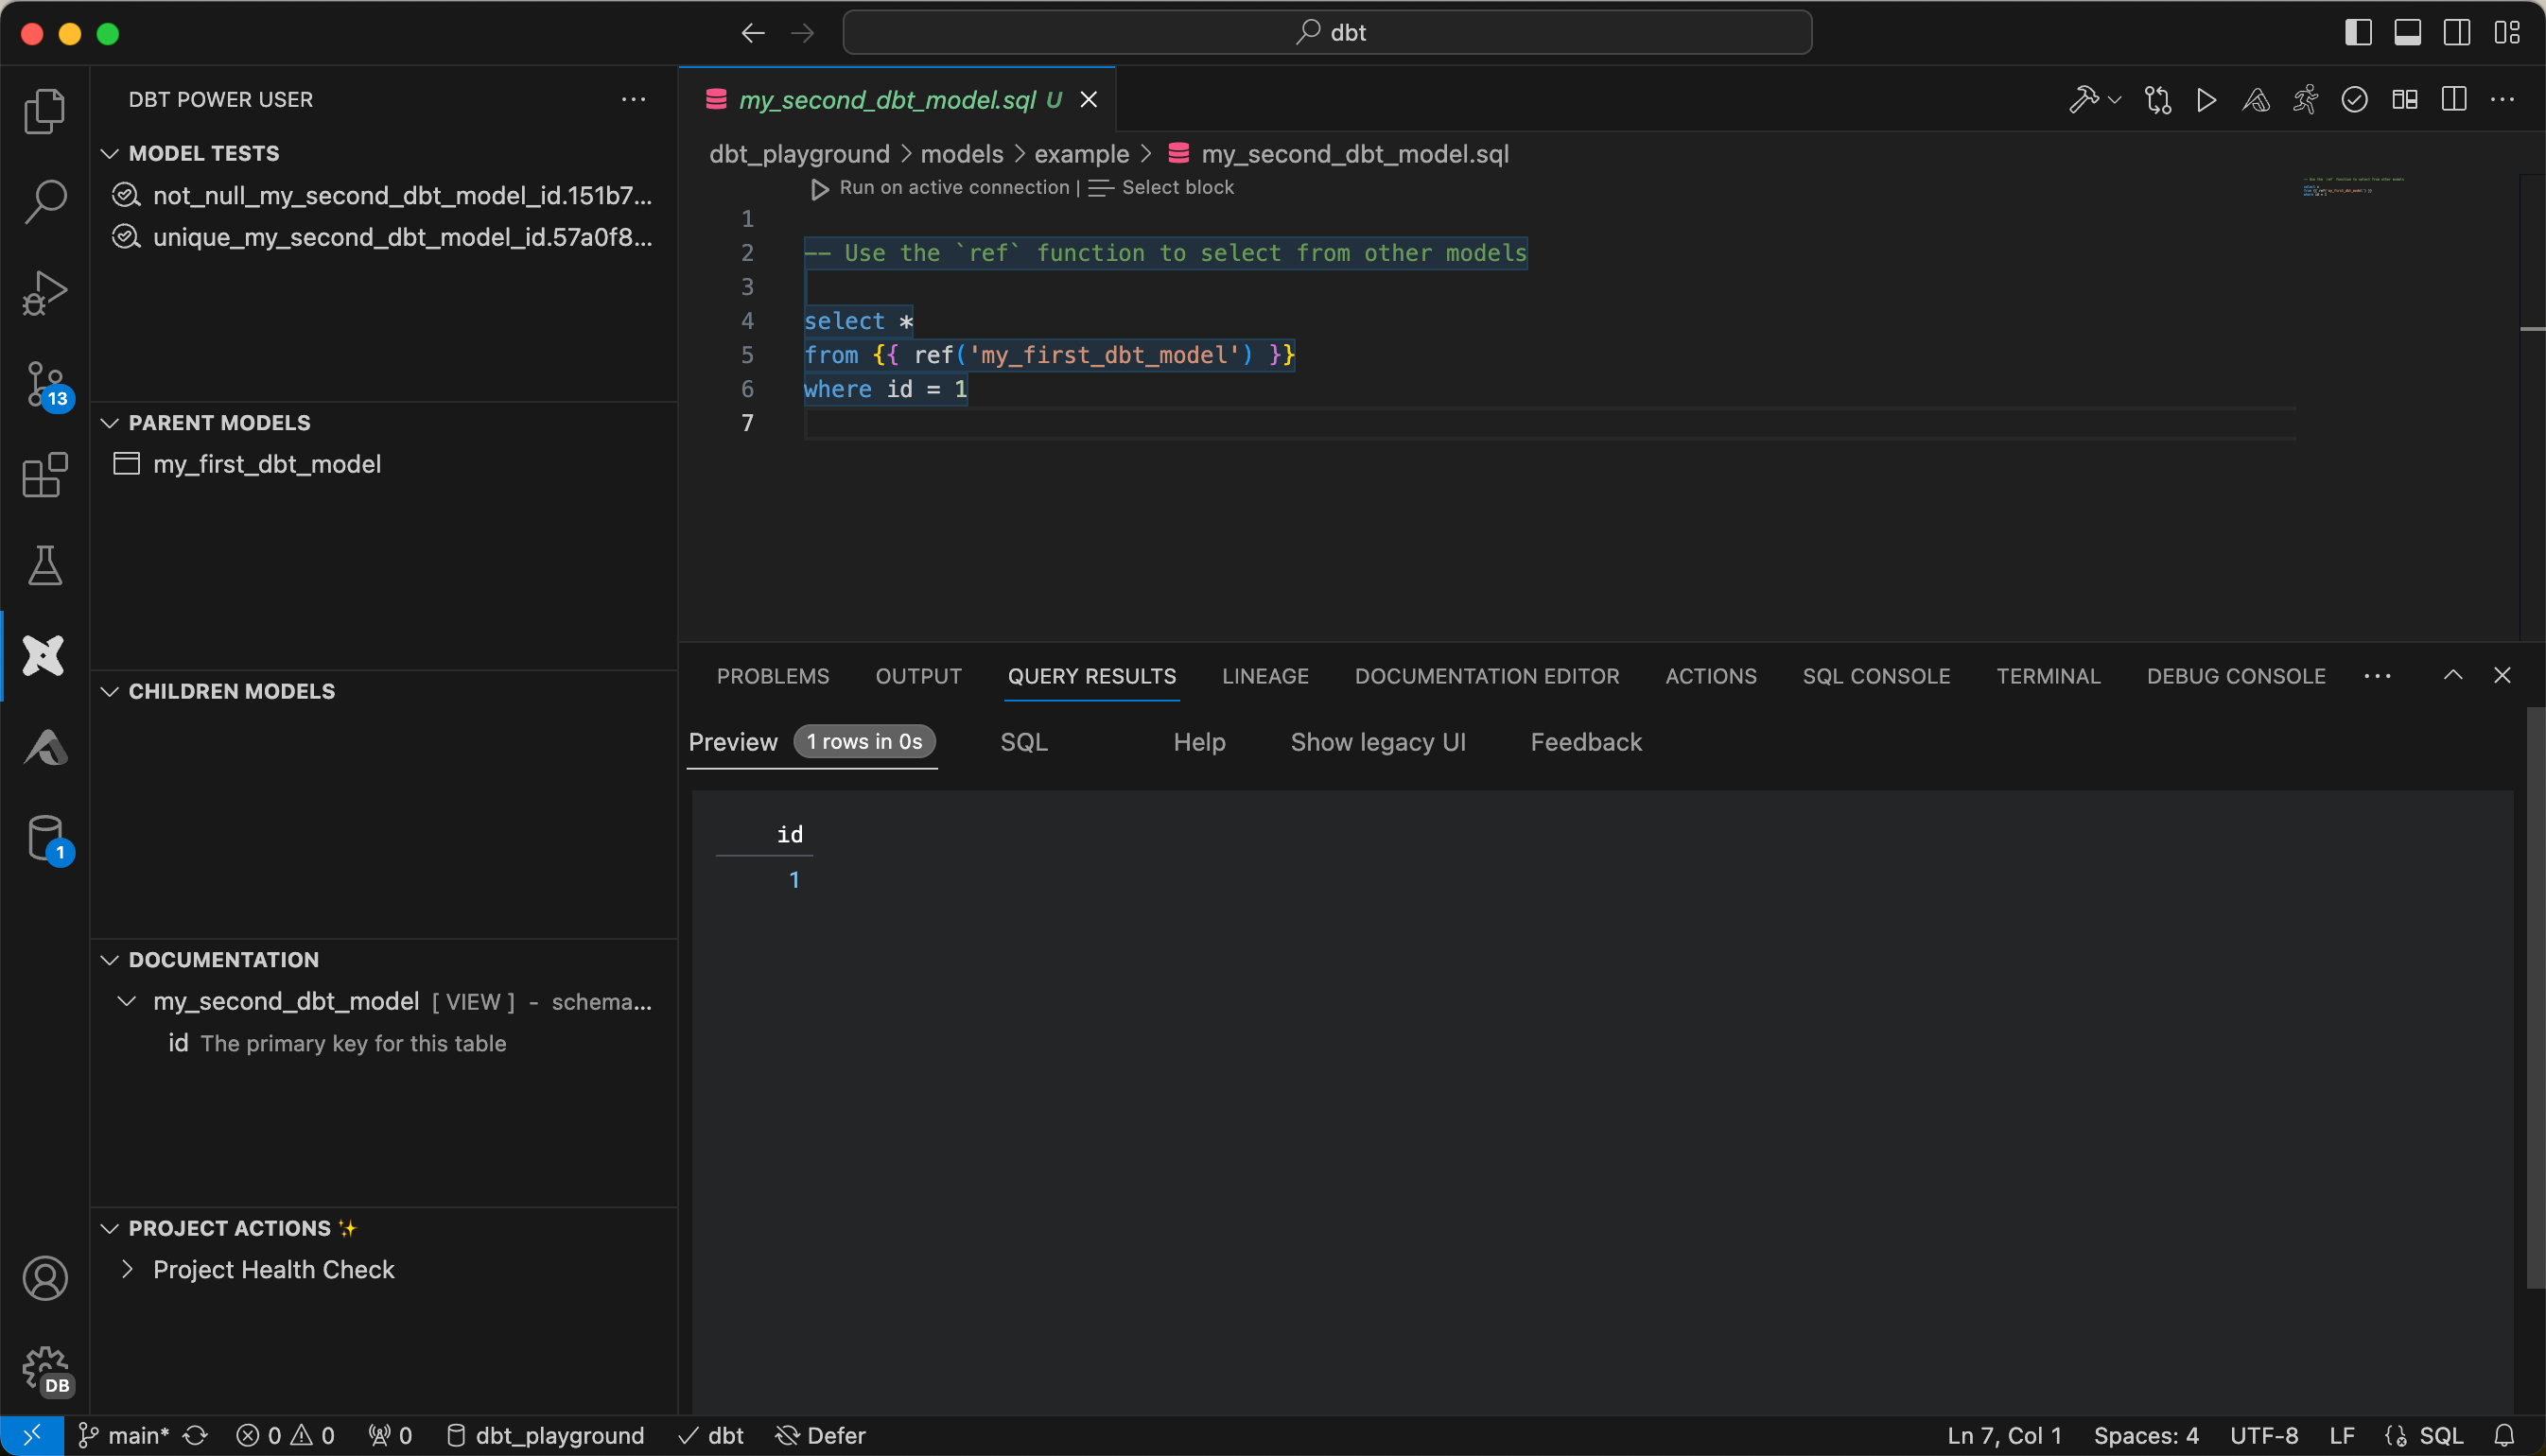
Or you can display the lineage.
A documentation editor is also available.

For further features of this extension, I recommend consulting the documentation:https://docs.myaltimate.com
Install Databricks SQL Extension in VS Code
So that I don’t always have to switch back and forth between VS Code and the Databricks workspace during development, I can install an extension in VS Code to be able to query the data directly in the IDE. To do this, I install the “Databricks Driver for SQLTools” extension.

After installation, a new icon for the extension appears on the left-hand side. When I switch to the extension, I can create a new connection.

Various details are queried during configuration, including the connection details to the SQL warehouse. These are analogous to the setup of dbt and can be adopted accordingly.
Once the connection has been set up, you can send SQL queries to the warehouse directly from VS Code.

Commit project and push to Git
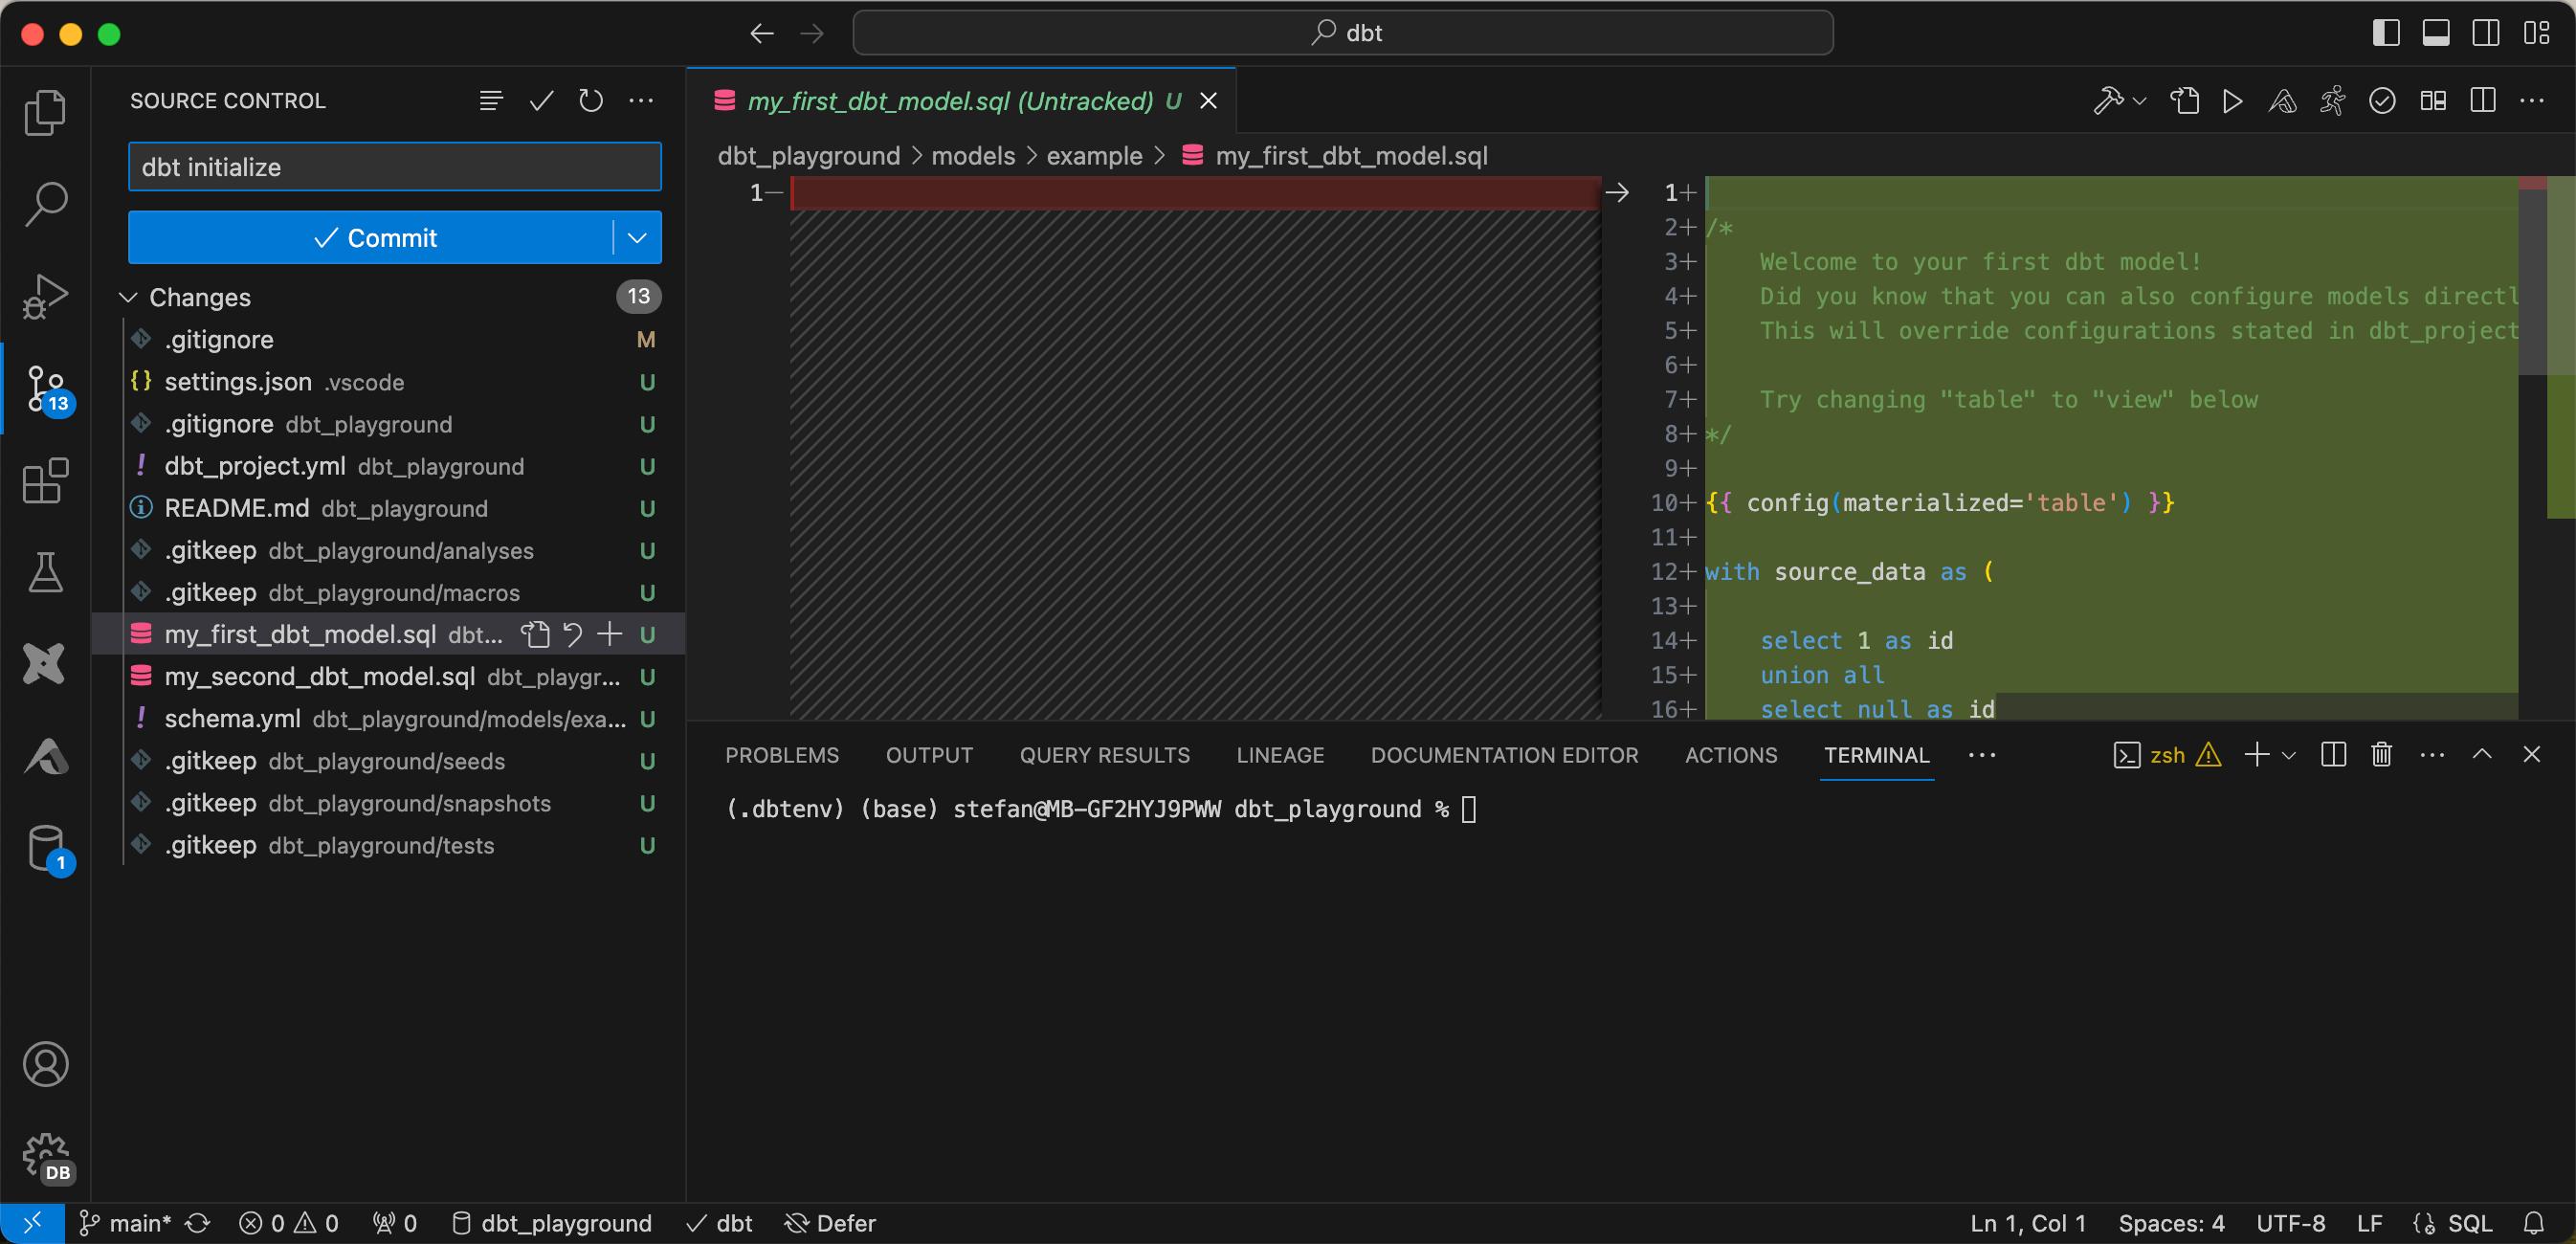
Now that I’ve finished setting up the project, I want to commit the newly created artifacts and push them to the Github repo. However, I still have to make sure that certain files are not pushed up. When I switch to “Source Control” in VS Code, I can see all the changes.
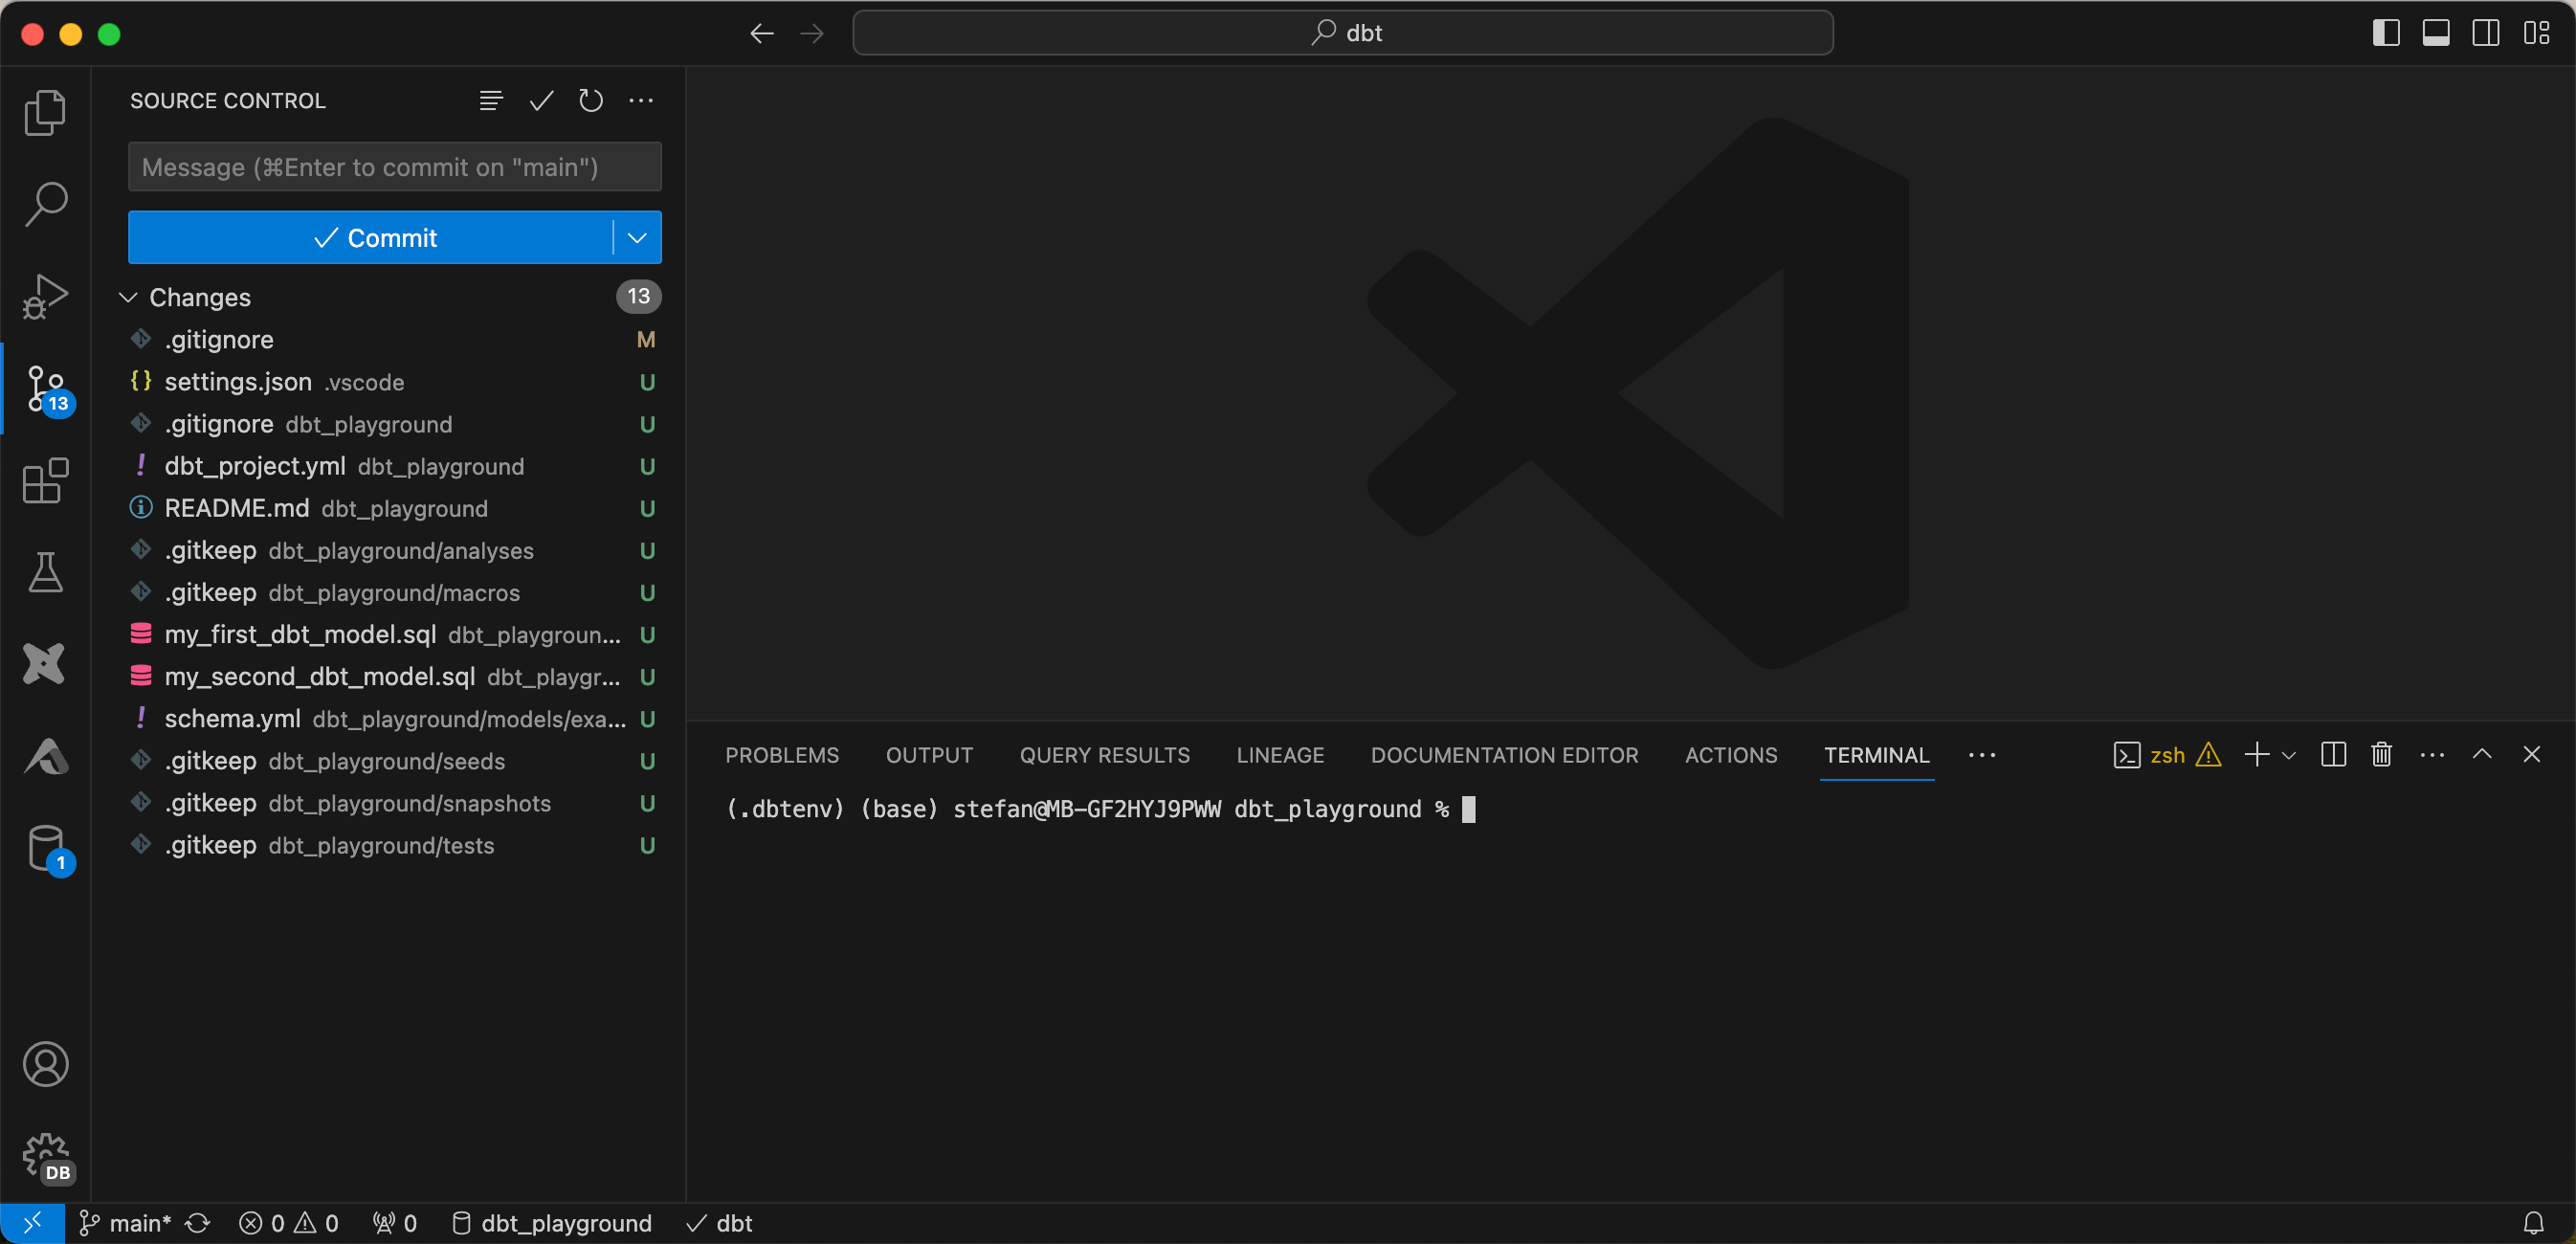
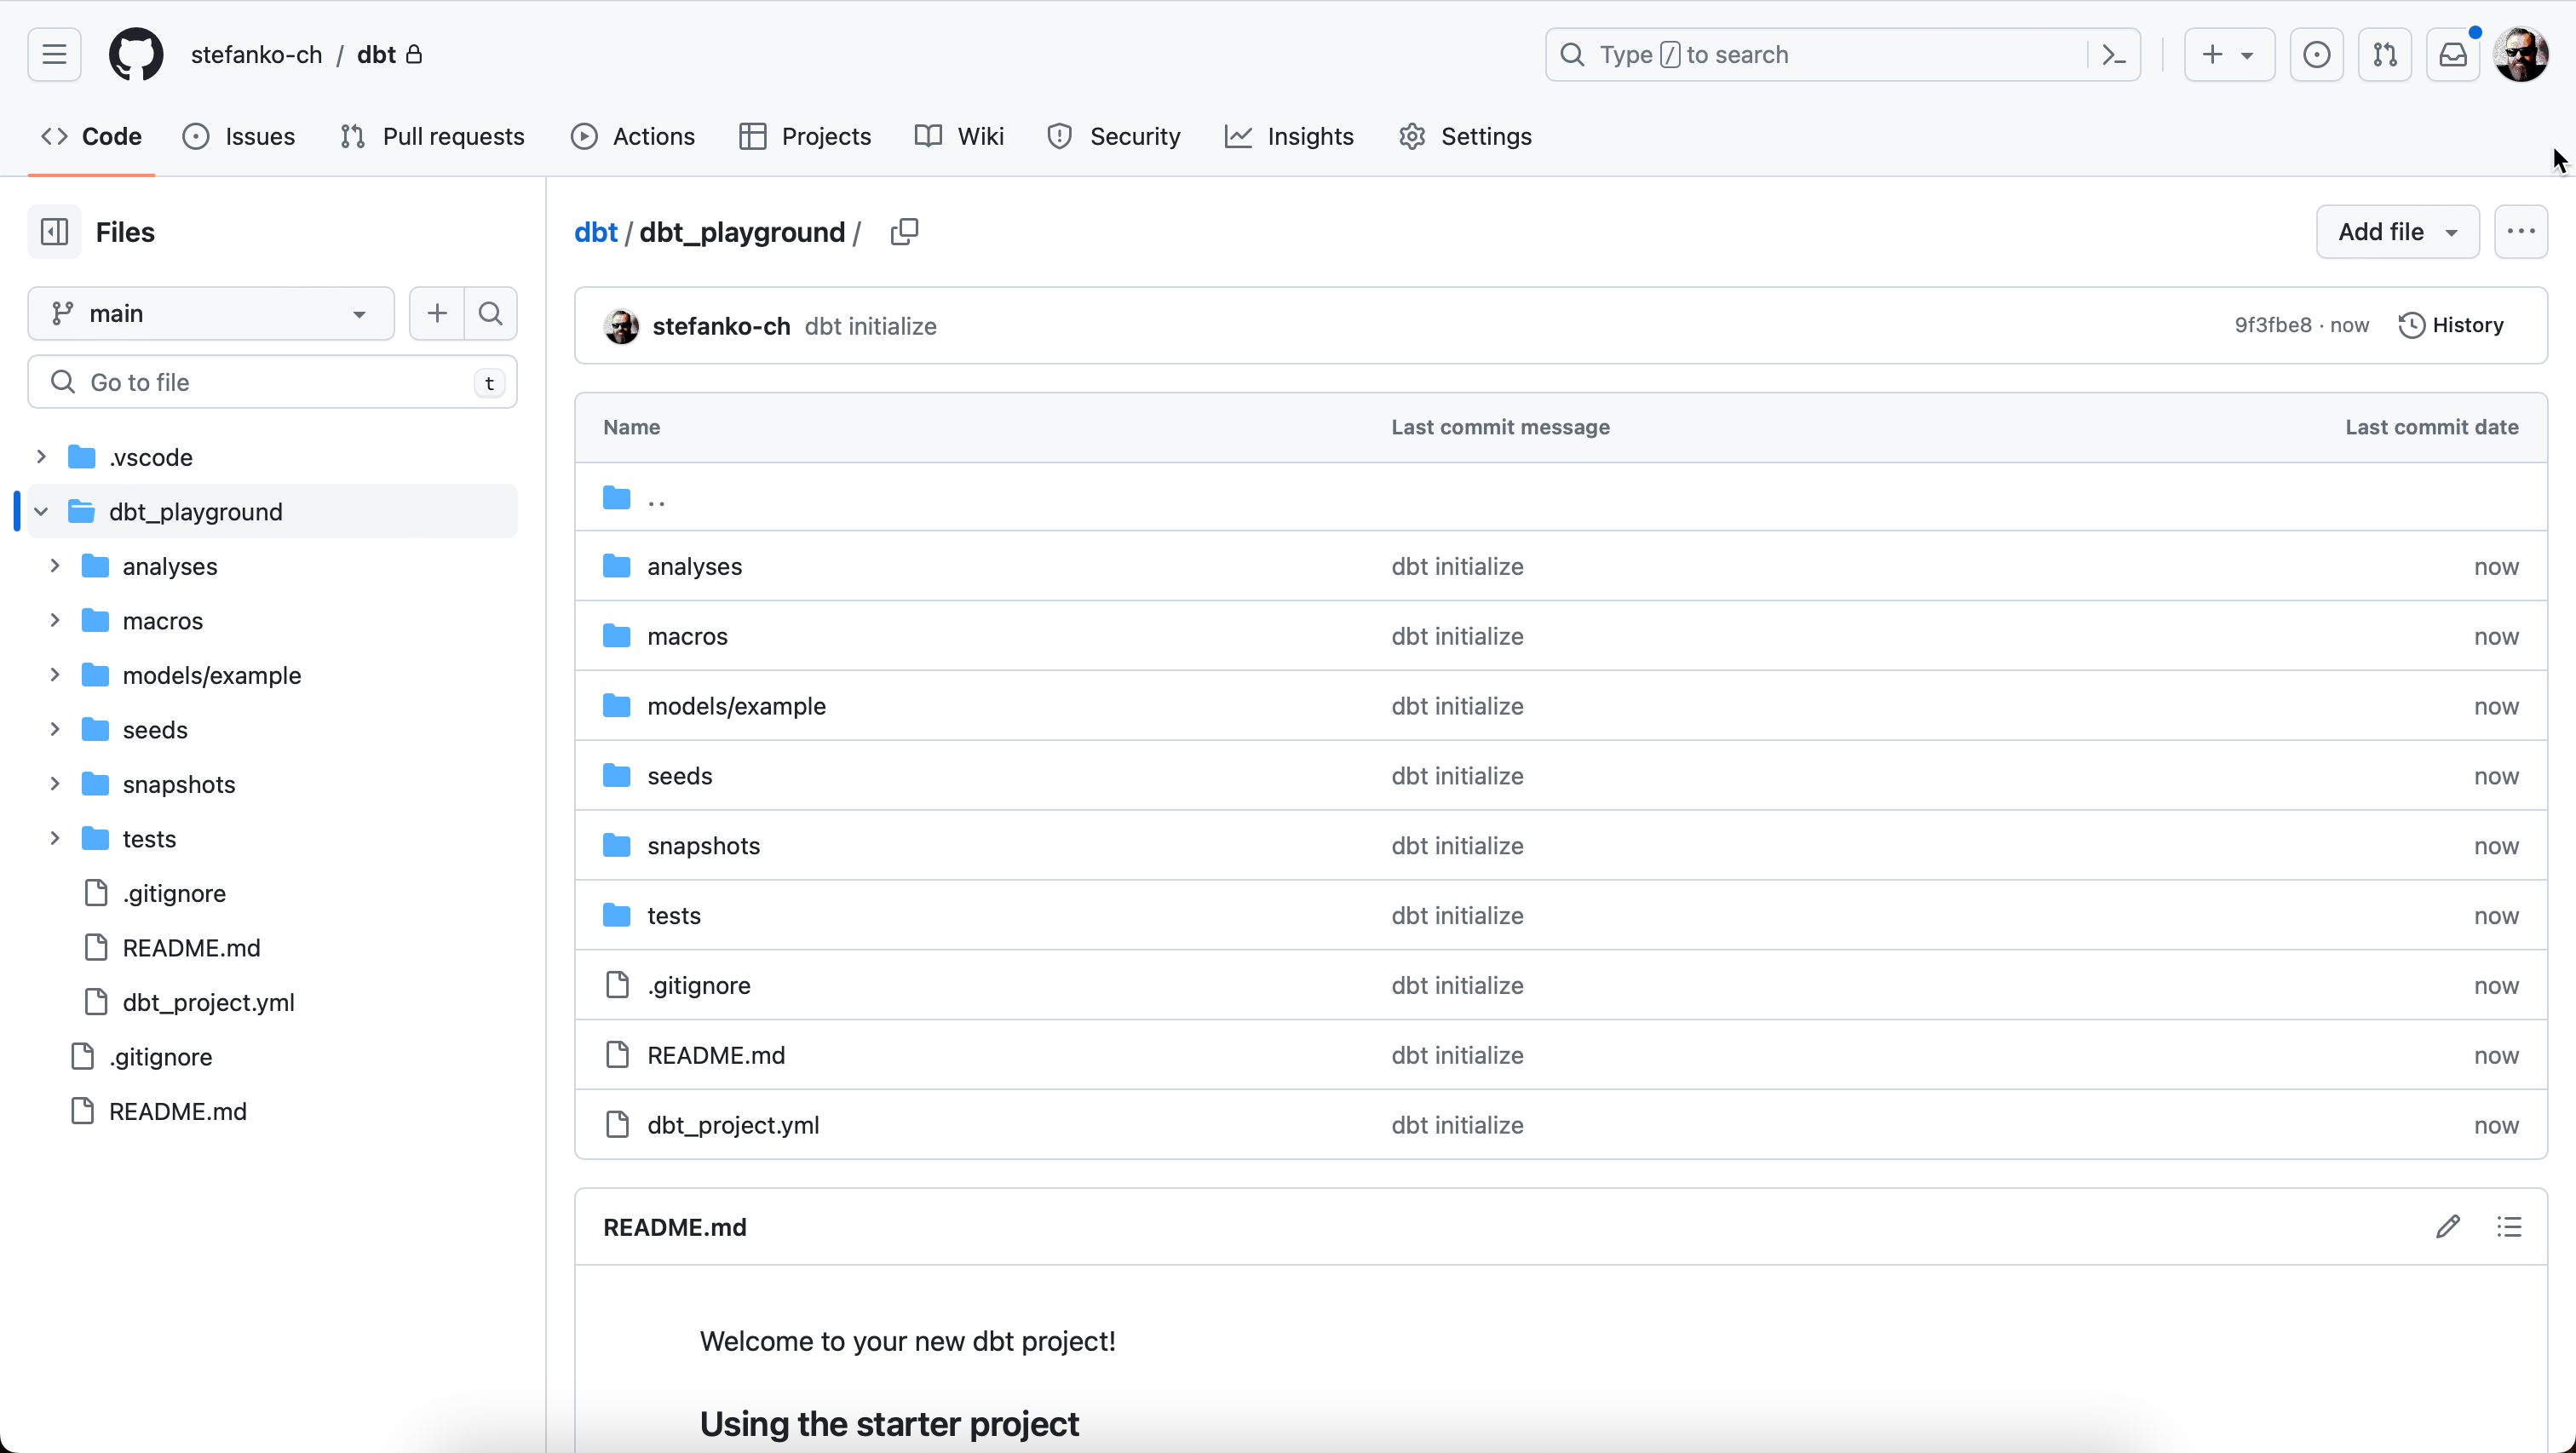
You can click on the individual files and see the changes. If everything is as desired, you can commit and push.
The changes are then visible in the Github repo.