
First steps with the Azure Cloud
Azure is Microsoft’s cloud computing platform. It offers a comprehensive suite of cloud services that enable companies to develop, deploy and manage applications without having to have physical hardware on site. Azure enables users to use resources such as virtual machines, storage, databases, networks and much more in Microsoft’s globally distributed data centers. The Azure Cloud is one of the leading hyper-scalers on the market. In the following article, I would like to give beginners a few useful tips to make it easier to get started with the Azure portal.
Read more: First steps with the Azure CloudContents
First things first: who pays?
The cloud is not free, and Microsoft is no exception with its Azure platform. However, it is possible to create a trial account: https://azure.microsoft.com/en-us/free.
With this trial account, you receive a starting credit of 200 US dollars, which is valid for one month. This means that the amount expires after 30 days if it is not used up. In addition, various selected services can be used free of charge for 12 months.

When you create the free account, make sure that you use a “Private session” in the browser. This will prevent you from accidentally registering a false Windows or Microsoft account. I will describe how this works later in this article.
When registering for this trial account, you can only use an e-mail address that is not yet registered with Microsoft. A credit card must be entered when registering. This is just to verify that you are a human being and not a robot. No charges are made. This means that when the free credit is used up, the resources are simply stopped.
If you have already used the trial account or the credit has been used up, you have the option of creating an Azure subscription with your credit card. The costs of the resources are charged to the credit card once a month.
The Portal
The easiest way to administer the Azure Cloud is via the Portal. When you call up this page, a Microsoft login window appears.

And this is where the first pitfalls lurk. You have to be careful that you are using the right Microsoft account. Many people have a business e-mail address that is linked to an Entra-ID and a private mail account from Microsoft. People often have even more accounts, for example my students, who are provided with an account by the university in addition to their business and private accounts. Or consultants like me, who use a separate Microsoft account for each customer project. The problem is that cookies are stored in the browser, among other things. This means that you are sometimes automatically logged into the portal with an existing Microsoft account, and this is usually the one you want to use. A short-term solution would be to use the browser in “incognito mode”. However, this is tedious in the long term if I want to log in again and again with the same account. It is much more convenient to use browser profiles.
Browser Profile
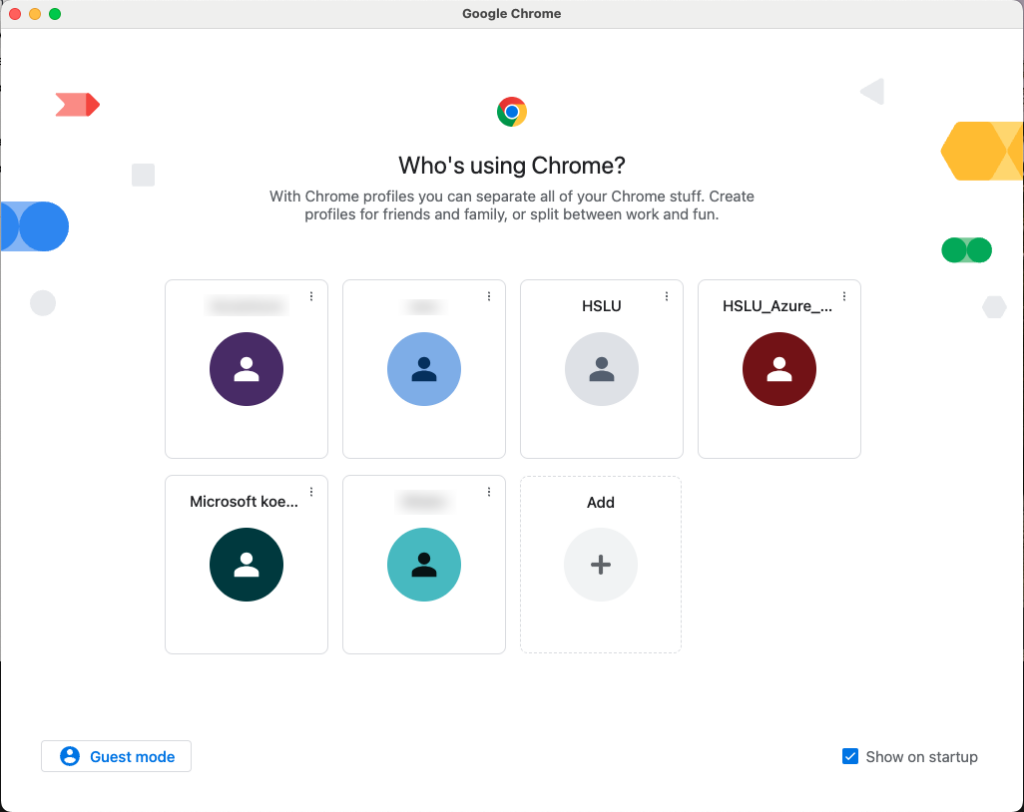
All common browsers now support the use of browser profiles. This allows different accounts to be separated from each other. For example, I have created a separate profile for each Microsoft account, here using the Chrome browser as an example:
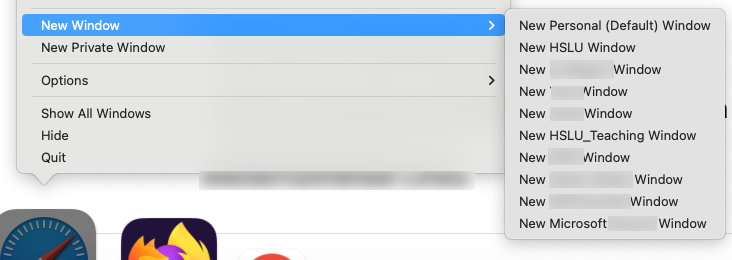
Or with the Safari browser:
I use a unique name for each profile so that I always know in which context or with which account I am currently working. Another advantage of browser profiles is that the browser remembers the credentials, in contrast to incognito mode, where the login details have to be entered again each time.
Another helpful tip: use different browsers. As a Mac user, I mainly use the Safari browser. However, there are occasionally situations where Safari is not the best choice. One example is certain applications that run in the browser. Or every now and then, Microsoft Teams makes mistakes in the Safari browser. Then I switch to another browser, such as Chrome.
Below are a few links on how to create a profile in the most common browsers:
- Safari: https://support.apple.com/en-us/105100
- Chrome: https://support.google.com/chrome/answer/2364824
- Firefox: https://support.mozilla.org/en-US/kb/profile-manager-create-remove-switch-firefox-profiles
- Edge: https://support.microsoft.com/en-au/topic/sign-in-and-create-multiple-profiles-in-microsoft-edge-df94e622-2061-49ae-ad1d-6f0e43ce6435
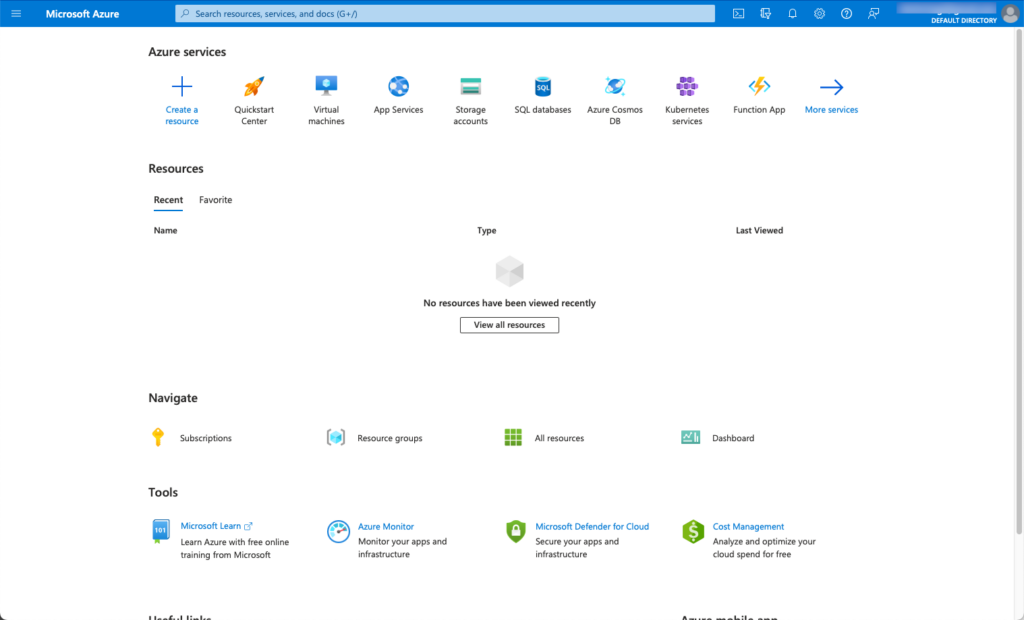
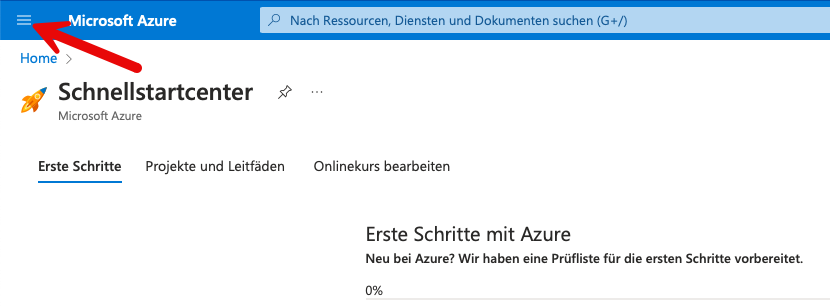
The first time you log in via the Azure portal, you land on the start page.
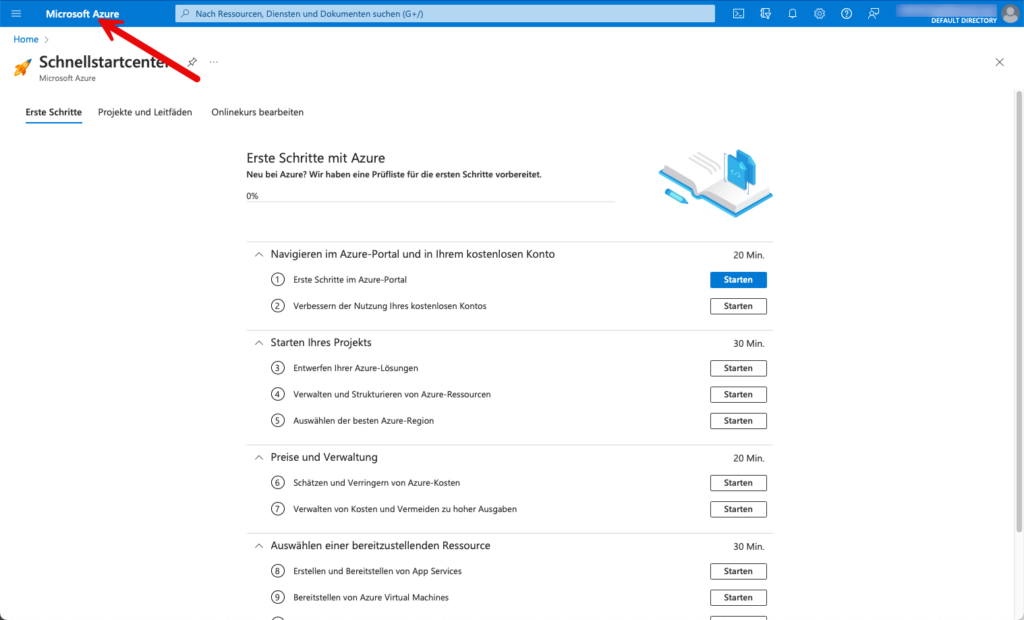
For users who are new to the Azure portal, it can be a little confusing at first when navigating somewhere. To get back to the home screen, you can simply click on the heading “Microsoft Azure” to get back to the home view. This works wherever you are in the portal.
Another way to return to the Home screen is via the integrated menu on the left-hand side.
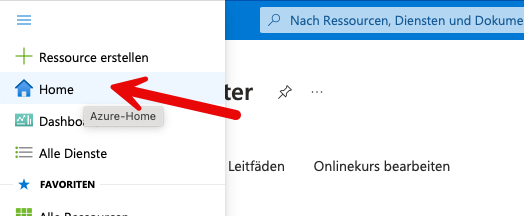
But it takes a few clicks, so the first method is more convenient from my point of view.
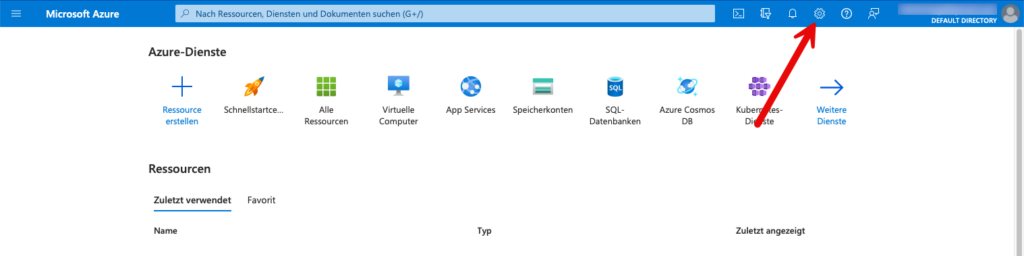
Settings
When I create a new Azure environment, I always change the settings first. My native language is German and this was automatically recognized. However, it is advisable to change the language to English. This makes it easier later when researching certain things. The forums and help pages are usually in English and you can access the relevant resources and settings more quickly. Some of the translations from English are not entirely clear. Or you can’t find help on non-English pages. The Azure Portal settings can be changed here:
I only change the language to English, but leave the regional format according to my location.

Further settings can be made, but these are not mandatory and are merely a matter of personal taste.
Mobile Apps
You do not necessarily have to log into the Azure Portal via a browser. There are mobile apps for the Azure Portal in which you can carry out the most basic administration.
https://azure.microsoft.com/de-de/get-started/azure-portal/mobile-app

The apps are limited to the minimum functions. However, in the past I have repeatedly had situations in which I was happy to access Azure resources on the move. For example, when I scaled up certain resources during a training course and forgot to scale them down. I was then able to quickly scale the resources down again on the train.
Resources & resource groups
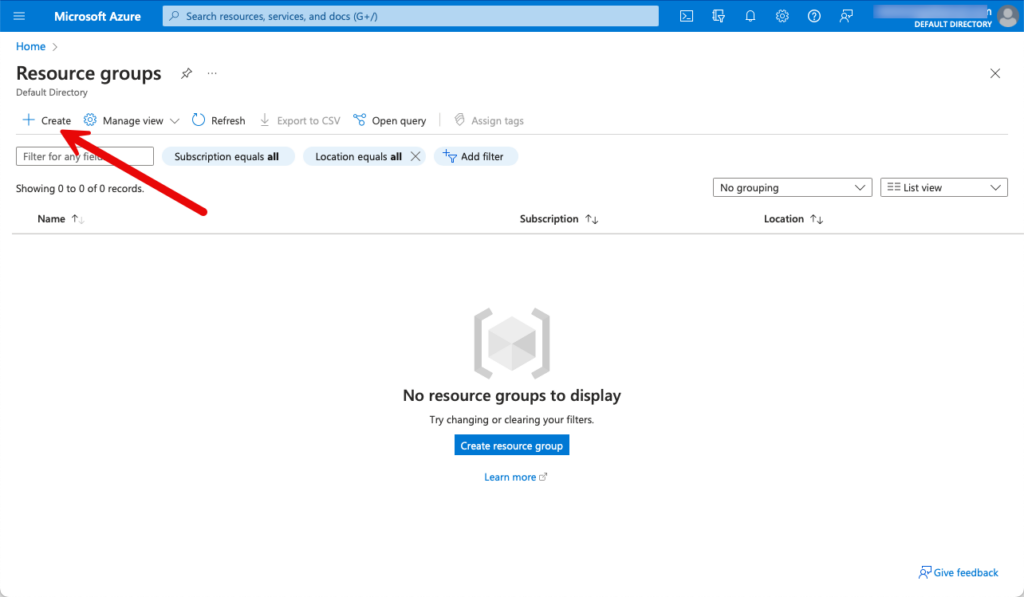
Over time, more and more resources accumulate in the portal, so it is worth keeping them in order. This can be achieved by creating resource groups and deploying the corresponding resources to these groups. The quickest way to create new resource groups is in the Home.

Oben links auf “Create” klicken.
And then make the appropriate settings.

Each resource group has a subscription. As I only have one in this account, the selection is easy. A descriptive name should also be set. The choice of region is based on various criteria: Location and price. On the one hand, I choose a region that is as close as possible to my location in order to achieve low latency. On the other hand, I want to deploy the cheapest possible resources. Depending on the region, there are different prices for the same resources. Although I live in Switzerland, I usually choose Europe North or Europe West because the prices there are a little lower than in the Swiss Azure locations. Further details can be found here:
https://azure.microsoft.com/en-us/explore/global-infrastructure/geographies/.
Creating the resource group takes a few seconds. I then navigate to the resource group by clicking on the object:

I can then create the resources within the resource group by clicking on the “Create” button.

You are then taken to the Marketplace, where you can choose from a variety of resources. In my example, I create a storage account.
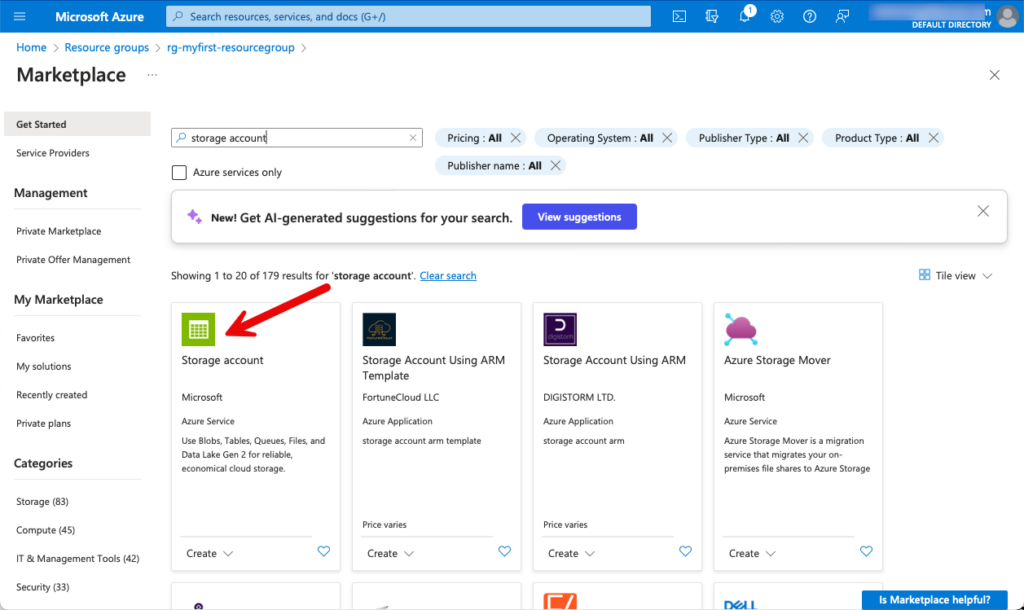
I will not provide detailed instructions here. If you are interested, you can find instructions on how to create a storage account here: https://learn.microsoft.com/en-us/azure/storage/common/storage-account-create?tabs=azure-portal
After a short moment, you will see the resource that has been created.
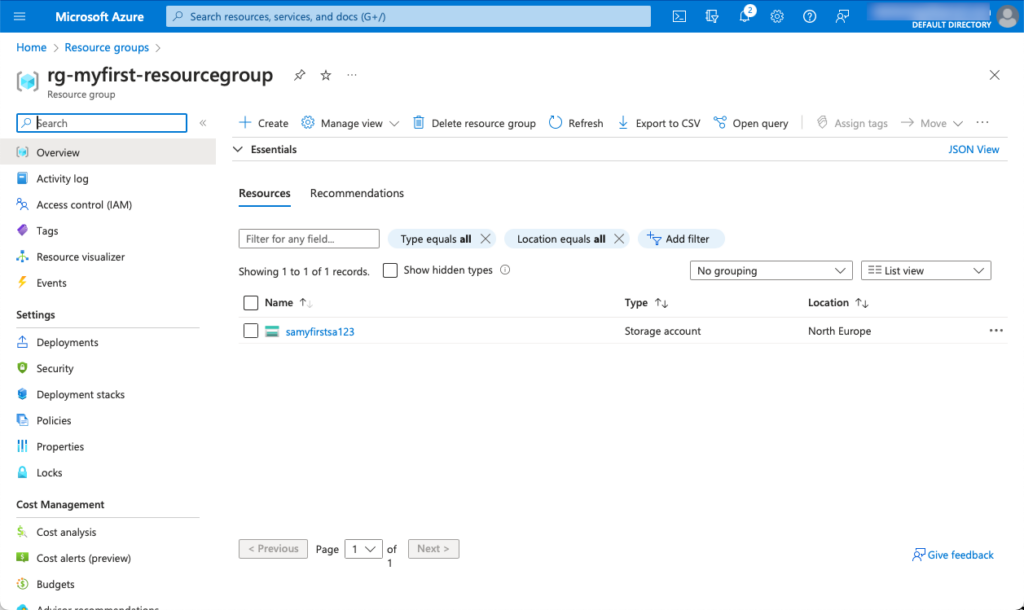
It is advisable to adhere to a naming convention for the names of the respective resources. Help can be found here: https://learn.microsoft.com/en-us/azure/cloud-adoption-framework/ready/azure-best-practices/resource-naming
The abbreviations for the respective Azure resources should also be chosen with a specific system in mind. The official Azure abbreviations have proven themselves: https://learn.microsoft.com/en-us/azure/cloud-adoption-framework/ready/azure-best-practices/resource-abbreviations
Cost control and notifications
To ensure that costs do not get out of hand, you should always look at the current costs so that you know which resources are causing how many costs. Based on this, you can consider optimizing certain resources. The list of the corresponding costs can be viewed on the subscription itself.


The running costs are displayed directly in the overview. However, the costs are not displayed in real time, but with a delay of a few hours. However, as the subscription is relatively new, it is not surprising that no costs have been displayed yet. For this reason, here are a few screenshots of another subscription that I work with.

You can already see various cost statements in the overview.

The detailed costs can be displayed under the “Cost Analysis” tab.

Detailed evaluations can be made here, for example according to resources, resource groups, consumption in certain periods and so on. There is also a forecast of how costs will develop based on current usage.
To prevent unexpected costs from being generated, you can create a budget that must not be exceeded. This means that if the budget is reached, all resources are stopped and no further costs are incurred.
On the subscription, click on “Budgets” in the menu and add a new one.
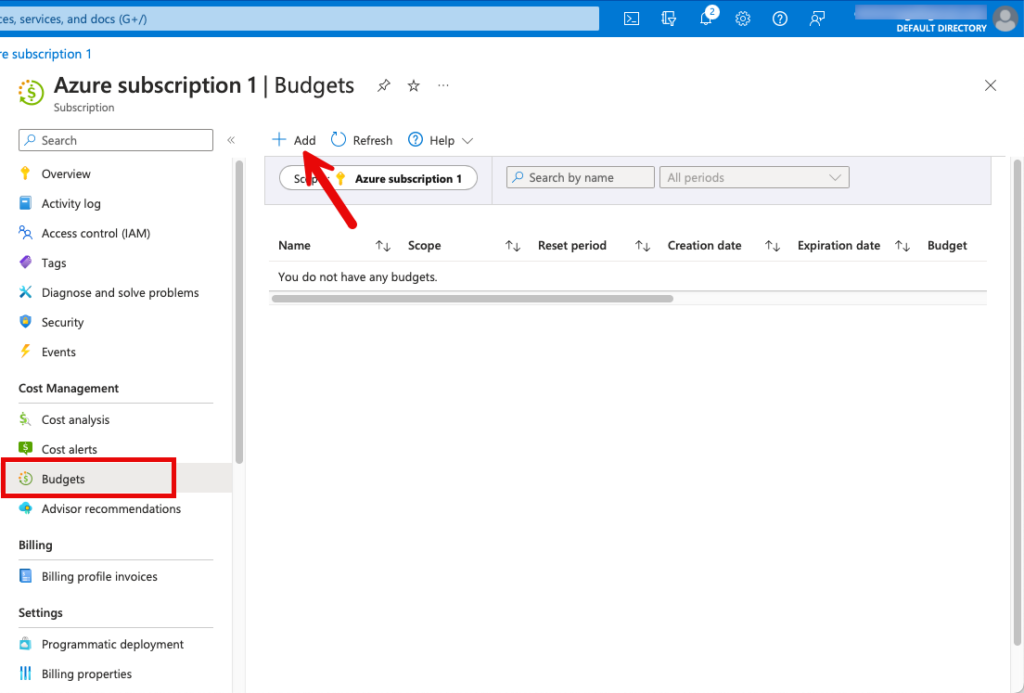
In my example, I don’t want to spend more than 100 Swiss francs. I assign a descriptive name and set the limit to 100.
Of course you want to receive a message before the budget is reached, you can set this under alarm conditions. I set a threshold value of 80%, which means that when my spending reaches CHF 80, I receive a message by e-mail.
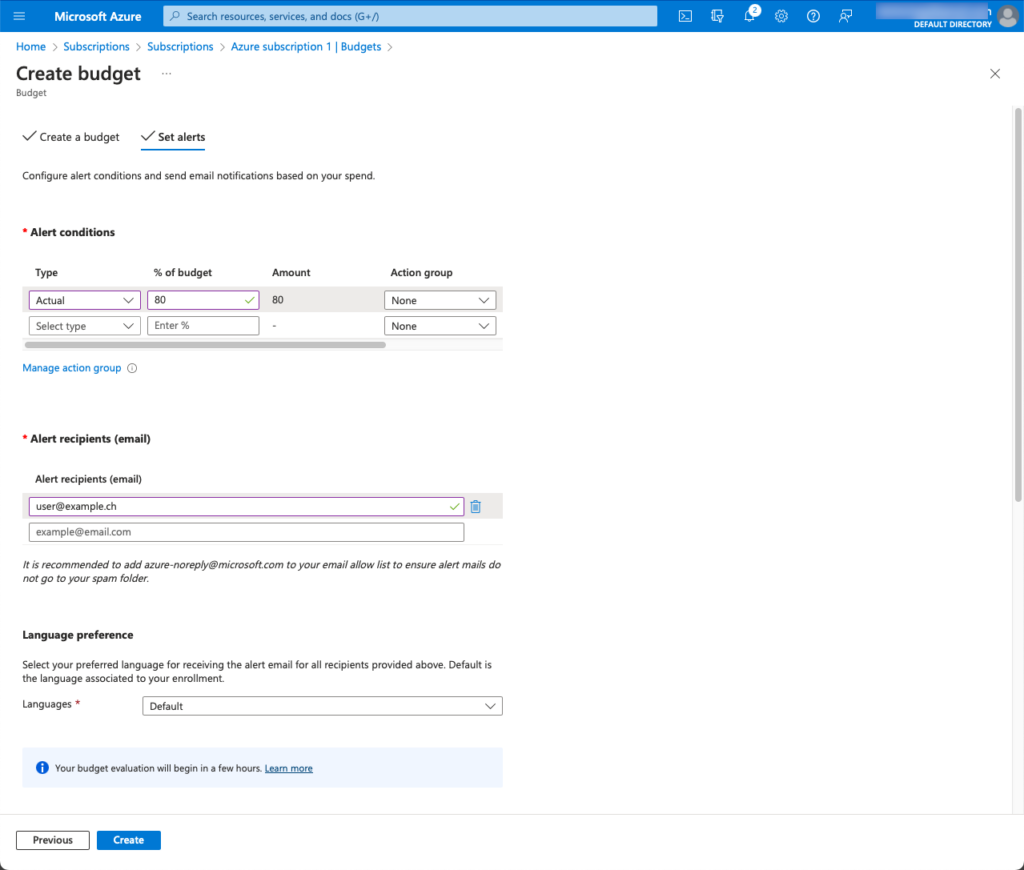
In addition to notification by e-mail, there are other options for notifications that could be realized with an action group. https://learn.microsoft.com/en-us/azure/azure-monitor/alerts/action-groups

Further links
In my article, I covered the essential points when starting with Azure. The topic is much broader than that. Becoming an expert in Azure takes a lot of time, practice and you have to deal with it regularly. There is very good documentation and tutorials from Microsoft that you can consult for further information.
A good starting point is certainly Microsoft Azure Fundamentals: https://learn.microsoft.com/en-us/training/paths/microsoft-azure-fundamentals-describe-cloud-concepts/
Or you can aim for certification and have your newly acquired skills officially confirmed with a certificate: https://learn.microsoft.com/en-us/credentials/certifications/exams/az-900/